
Another Custom Center Console / Sub Box
 06-04-2012, 08:54 PM
#1

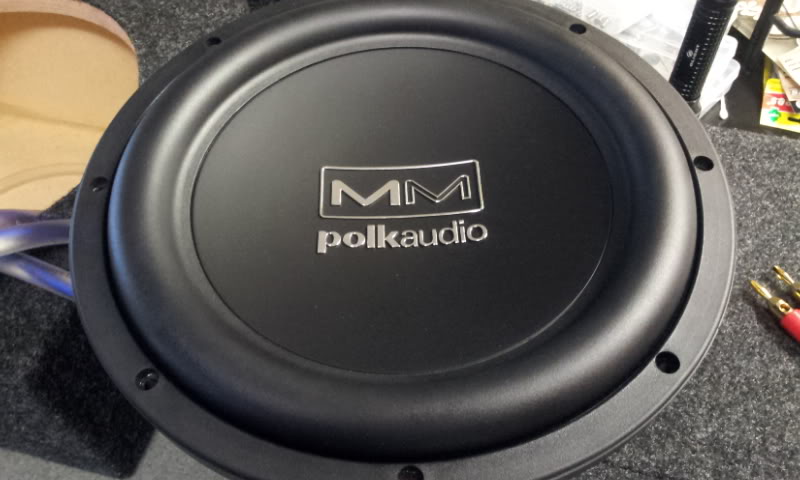
I recently decided to update my system from (2) 10" Polk Audio subs to (4) 10" Polk Audio Subs. My mids / highs are Polk Audio as well and I am very happy with them. Just like horsepower in a race car, I found myself wanting MORE tight clean bass. Don't get me wrong.. I am VERY pleased with my (2) Polk subs. But, coming from a former install of (6) 12's in my GMC SUV, I found myself wanting "more"! So, I've decided to remove my center seat in the front and build a custom console which will hold (2) additional 10" subs. Each chamber is .70 cuft (sealed). My Polk MM1040's recommended VAS is .65 cuft. I will keep everyone posted of this build..
(pictures soon to come)!
(pictures soon to come)!
Last edited by officermartinez; 06-04-2012 at 09:05 PM.


 06-04-2012, 09:37 PM
#4
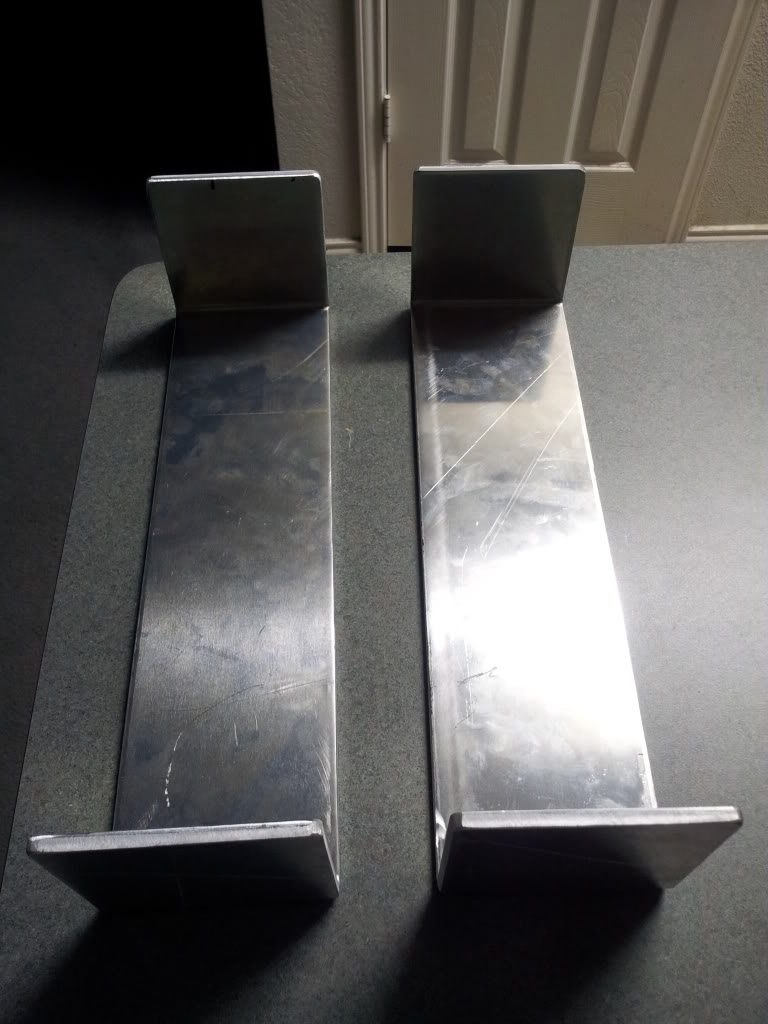
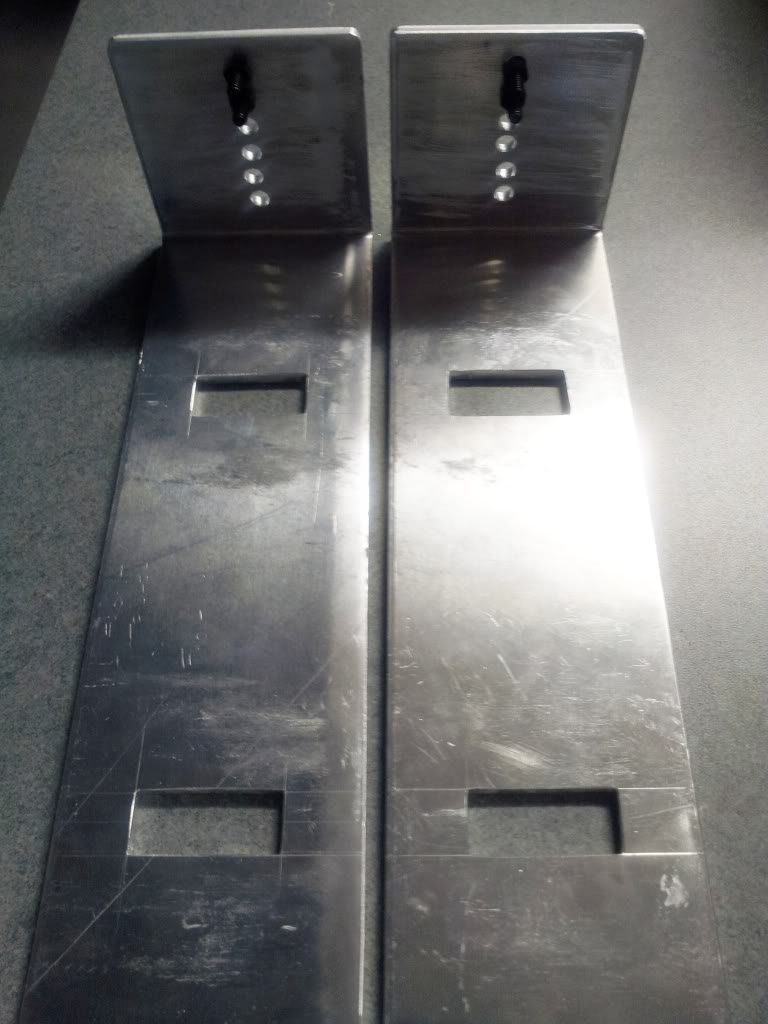
I went to a local company and had some 1/4" aluminum brackets fabricated. The brackets are really nice and thick! They are 14 1/4" (interior distance from one side to the other). They are going to use the existing floor mount holes for the center seat with the factory bolts which are going to hold the center console once it's mounted in place.. I will be taking them to a local powder coating company to have them powder coated "wrinkle black".
06-04-2012, 09:49 PM
#5
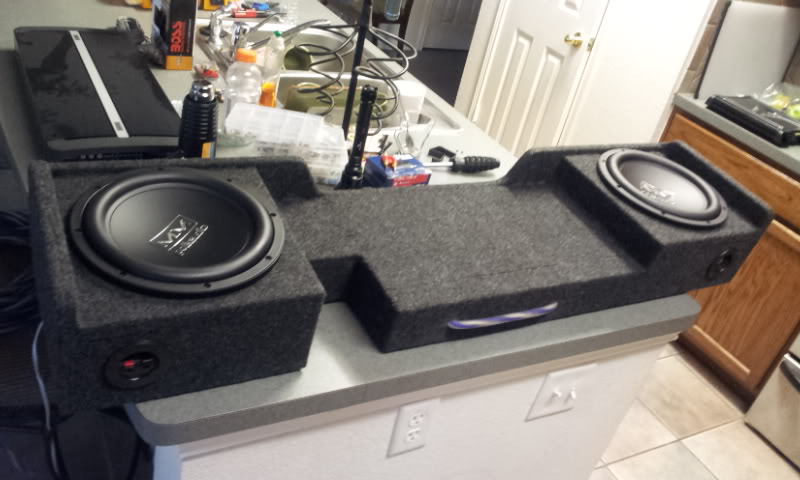
Here's my "other" box with my (2) 10" inch subs in it. The box was built by a company called Subthump. I'm happy with this box but later on down the road, I plan on adding some custom diamond plated aluminum dressing around it.. powder coated to match of course.. (the BOSS box is an amp wire kit for my sons car.. NOT my F150. I went with Monster Cable wires / interconnects and 10 gauge Stinger Speaker cables).
Last edited by officermartinez; 06-04-2012 at 09:51 PM.
06-04-2012, 10:01 PM
#6
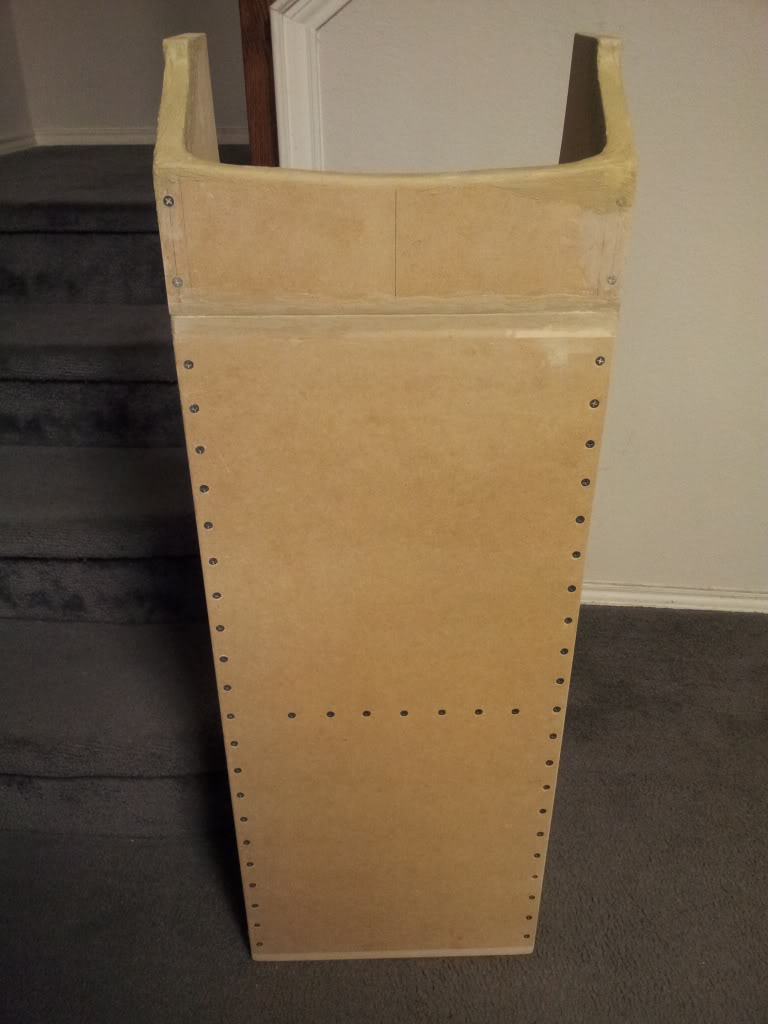
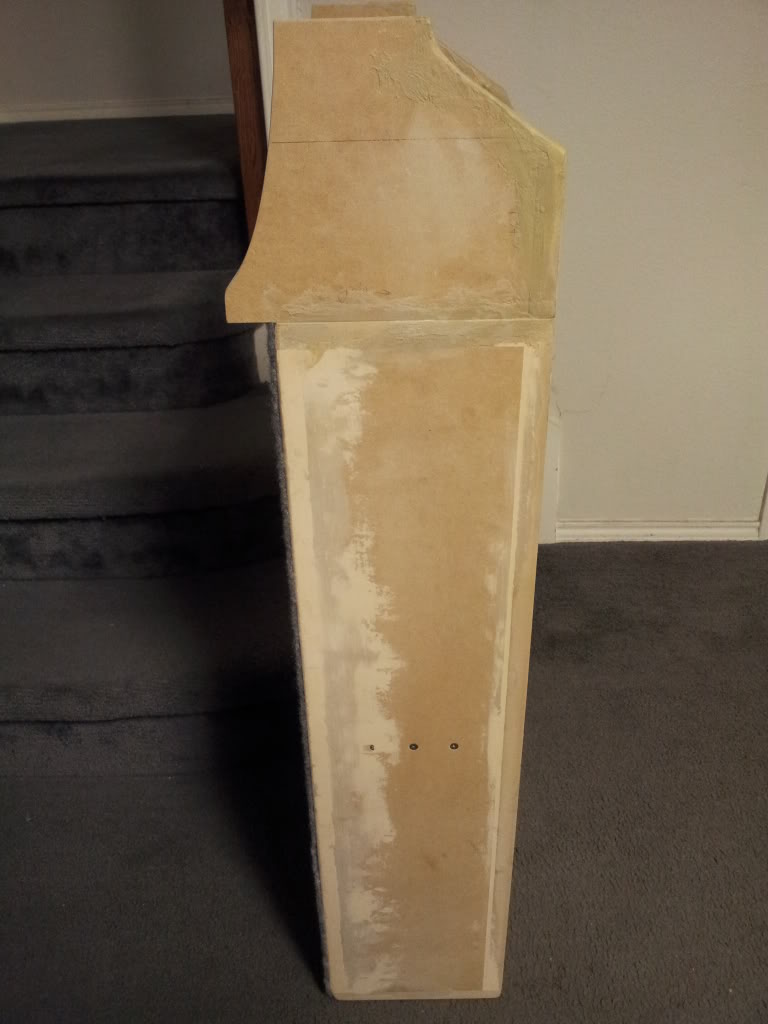
Got the speaker box / center console built.. I am a firm believer of plenty reinforcements (screws, liquid nails, wood filler). Here is the "rough" design of the box. I will sand the liquid nail filler down a bit before taking the center console to my local upholstery shop. The box portion of the console used liquid nails and 2 1/4" sheet rock screws. The attached bezel that helps form the front part of the console used sheet rock screws, liquid nails and right angle channel aluminum to hold everything solidly in place. It's a tank! EXTREMELY SOLID!


Trending Topics
06-05-2012, 08:02 PM
#10
Been working on the console mounting brackets today.. Ugh, 1/4" aluminum is a bit of chore to cut with my sub par tools.. LOL. But, I finally made some progress and got everything cut and drilled..

I only had a little bit of sand time on my console today..
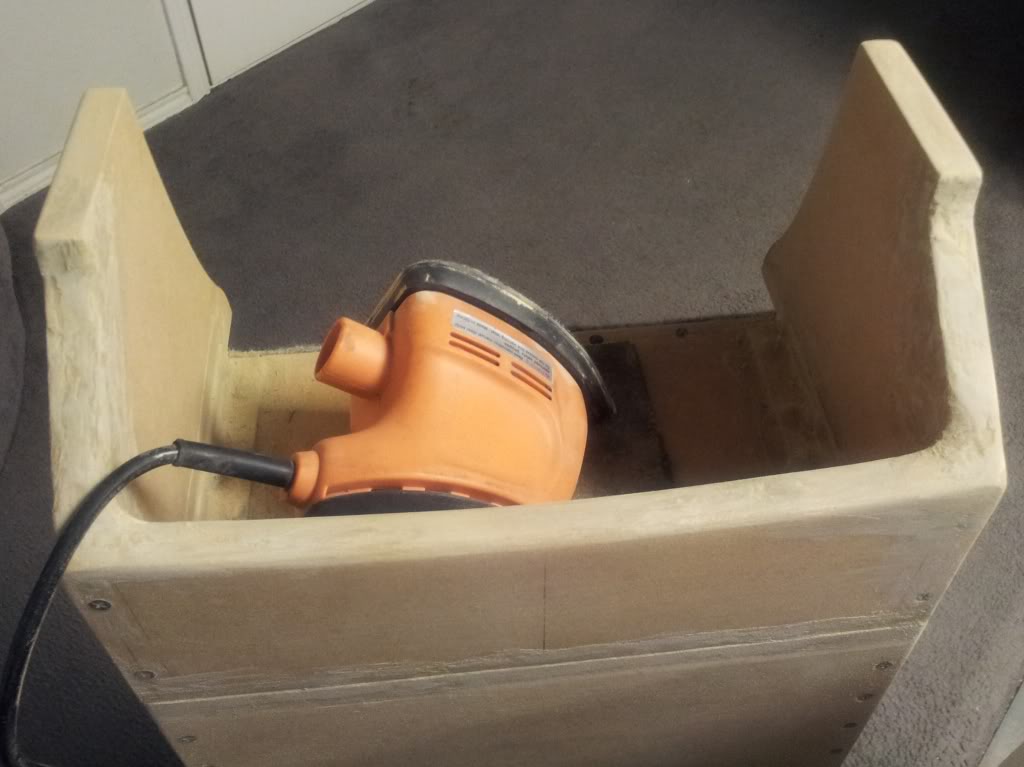
I only had a little bit of sand time on my console today..

