
TRS HID PROJECTOR RETROFIT: Installation thread
 09-10-2011, 10:31 PM
#131
BAMF Club

I used windshield installation urethane to re-install the covers - im sure theres no taking them apart again! i wouldn't suggest using this stuff, anything it touches it pretty much ruins, including your hands!
What kit did you use for the fogs? Did you re-buy a wiring harness or make your own?
What kit did you use for the fogs? Did you re-buy a wiring harness or make your own?


 09-11-2011, 01:06 PM
#134
Member

Join Date: Jul 2011
Location: Lompoc, CA.
Posts: 43
Likes: 0
Received 0 Likes
on
0 Posts
You will need to manual aim. If the black rings your referring to are hard plastic with gripping tabs on them they are to hold the shrouds to the projectors. If that's not it we may need a pic, or you could contact TRS.
got my extra set of new headlights for the retrofit on tues and last night I pulled them apart. They was very easy took about 2 hours to get both lights apart and cleaned up. Used a heat gun, Hyde 5-in-1 painter's tool and screw driver. Plan on tinting the yellow sidemarker with a light coat of VHT-Night Shades. I have a 07 HD and my kit came with a black ring. Can someone tell my what this ring is for and do I have to manual aim my lights or can I use the washer in the kit.
Thanks in advance.
Thanks in advance.
09-11-2011, 09:14 PM
#135

After the bulb was inserted used dielectric grease around the bulb seal. It is a great moisture repellent.
The fog lights since they sit right in front of the tire, in addition to the above I wrapped the bulb connection with 3M Moisture sealing tape:
I found my water leak was coming thru the bulb seal. I actually redid my driver side fog light with my leftover light. Once you do them, it only takes a couple hours to put one together again.
I cut my fog light mounting brackets tonight, got my fogs aimed. Will check them out in the morning for my final thoughts on them.
09-14-2011, 09:50 AM
#136
Junior Member

Join Date: Jul 2011
Posts: 13
Likes: 0
Received 0 Likes
on
0 Posts
I noticed that the shutter on the matchbox lights doesn't drop down enough on high beams. If I manually push it down further, the beam is much, much better. I plan to modify the shutter, perhaps putting a spacer between it and the solanoid. Anyone else have this with their matchbox lights?
09-16-2011, 11:55 AM
#137
Junior Member
Join Date: Jul 2011
Posts: 13
Likes: 0
Received 0 Likes
on
0 Posts
Alright, everyone here had me really concerned about getting the lights apart. It was trivial! I set my oven to 285, baked the light until the glued edge hit 230 degrees (17 minutes), pried back a tab, put a screwdriver on the clear tab, grabbed the back of the light and pushed. It just peeled back in less than 60 seconds!!! (An IR thermometer to measure the temperatures was nice!
No cutting the lip, no cracking, no slow prying, just one good pull to start and work around!
(I posted this on another forum as well, but thought it was important enough to posting on both.)
UPDATE: 285 did cause some light crazing on the outside of the lens. If I were doing this again, I would insulate the top of the lens, perhaps using tape and a few layers of cloth. I will likely wait until I seal my lights back up to sand and polish the marks out.
On another note, as far as removing the reflector bowl, you can remove one torx screw directly with a short torx driver or holding the driver at an angle. The second one can be easily removed by drilling a hole behind it in the black housing. The third (the horizontal adjuster), can just be slid off, because it is a "U" slot. For my alignment, I had to remove the horizontal adjustor from the ball before reassembling. I rocket it to one side to lift one of the tabs, put a small screwdriver under it and rocked it back the other way to remove.
As far as trimming the shrouds to make them fit back a littler farther, I used a sanding drum on my dremmel, which worked well. I used a very strong pair of tin snips to cut off the two lower mounting tabs on the projectors and cleaned up the cut with my dremmel as well. I used my grinding wheel on the first one, but the snips were easier.
Last edited by 09kr; 09-17-2011 at 06:11 PM.
09-18-2011, 07:54 PM
#138
Ford Tough since 06'
I installed the MH1 5,000K retrofit kit into my 02' supercrew and loved them! I will post a night shot of them tonight.
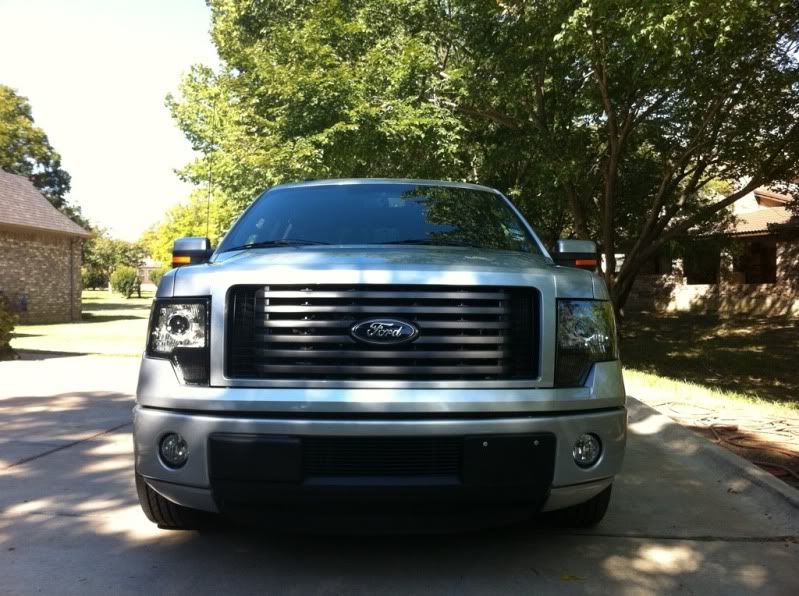
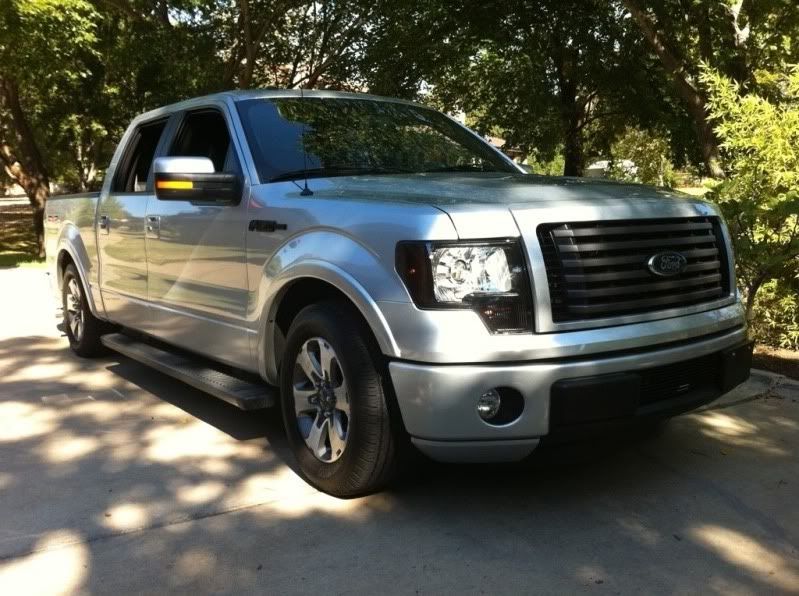
Here is the pics

Stroud installed

Barely cleared the headlight lens


Here is the pics
Stroud installed
Barely cleared the headlight lens

 09-21-2011, 09:40 PM
#140
Junior Member
Join Date: Jul 2011
Posts: 13
Likes: 0
Received 0 Likes
on
0 Posts
For reference, here is how the matchbox compares with the FX-R (both are on low-beam, I may post high beam pictures later if anyone cares). Clearly, the FX-R is more intense at the cutoff, where the matchbox is more intense in the foreground and above the cutoff. The FX-R has Moto 50W 5000K and the matchbox has Moto 35W 5000K.
Matchbox

FX-R

These were just taken with my phone, so take the overall intensity with a grain of salt. The FX-R likely isn't THAT much darker above the cutoff, the increased intensity of the main beam makes the rest look dim. The foreground limiter of the FX-R can clearly be seen in comparison to a light without one. I do, however, think the 'above the cutoff' light from the matchbox would be quite welcomed to light road signs and show hazards above the cutoff. I am a little concerned about running the FX-R's alone because of this. (My stock fog lights help here, but the matchbox lights will likely help more.)
On another note, setting the step to the outside edge of the hotspot of my stock lights resulted in the steps being dead ahead of the truck - not converging or diverging in the distance. I think I like this better - better width and a nice wide spot for the high beam.
Note: The block wall that I am using is painted brown on the bottom half.
Matchbox
FX-R
These were just taken with my phone, so take the overall intensity with a grain of salt. The FX-R likely isn't THAT much darker above the cutoff, the increased intensity of the main beam makes the rest look dim. The foreground limiter of the FX-R can clearly be seen in comparison to a light without one. I do, however, think the 'above the cutoff' light from the matchbox would be quite welcomed to light road signs and show hazards above the cutoff. I am a little concerned about running the FX-R's alone because of this. (My stock fog lights help here, but the matchbox lights will likely help more.)
On another note, setting the step to the outside edge of the hotspot of my stock lights resulted in the steps being dead ahead of the truck - not converging or diverging in the distance. I think I like this better - better width and a nice wide spot for the high beam.
Note: The block wall that I am using is painted brown on the bottom half.
Last edited by 09kr; 09-22-2011 at 04:51 PM.

