When you click on links to various merchants on this site and make a purchase, this can result in this site earning a commission. Affiliate programs and affiliations include, but are not limited to, the eBay Partner Network.
I would love to find a grill somewhat similar to the Raptor grill (like style and especially like Amber pin lights) for my 2015 Black Lariat. Has anyone come across anything like this that will fit a 2015? Doesn't have to be the exact raptor grill, but like that style- black not chrome.
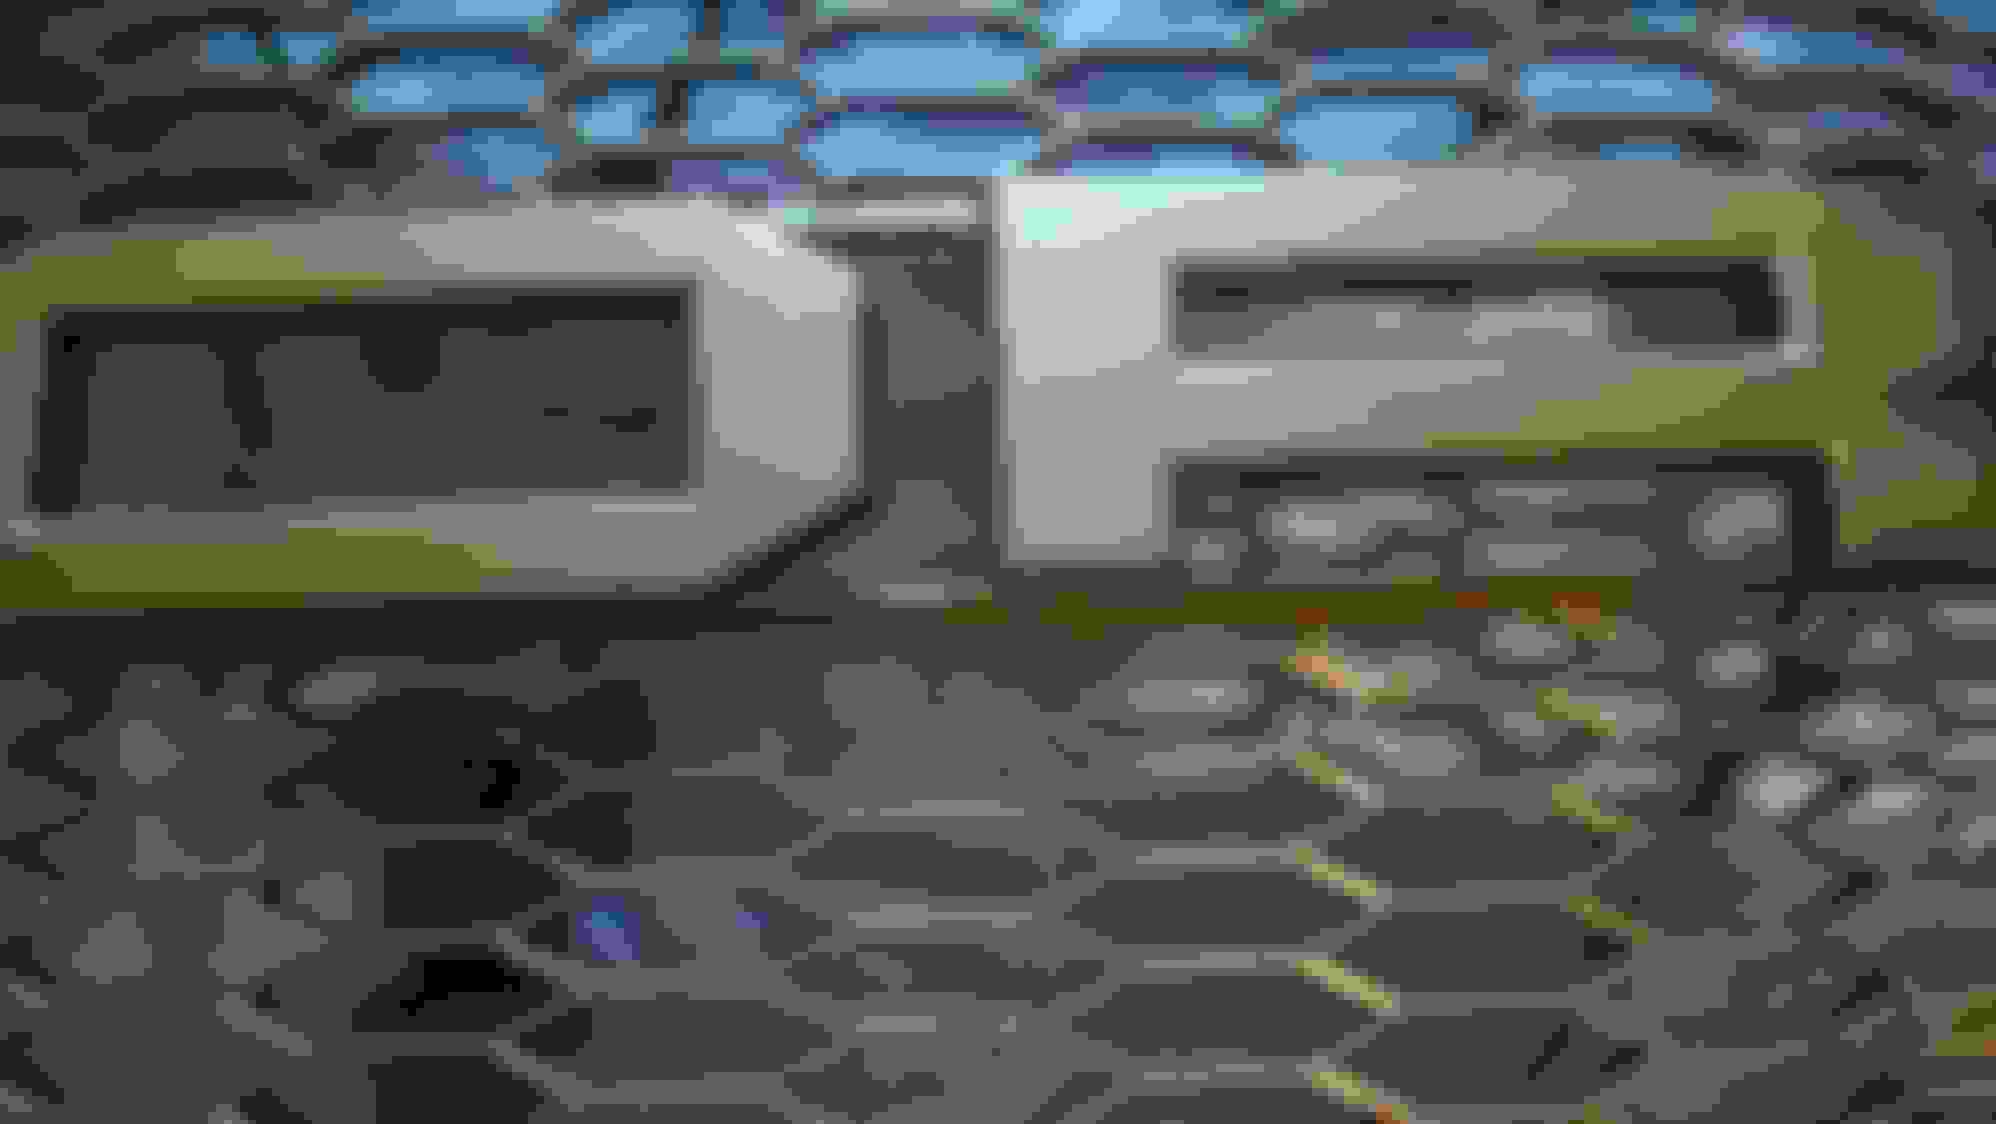
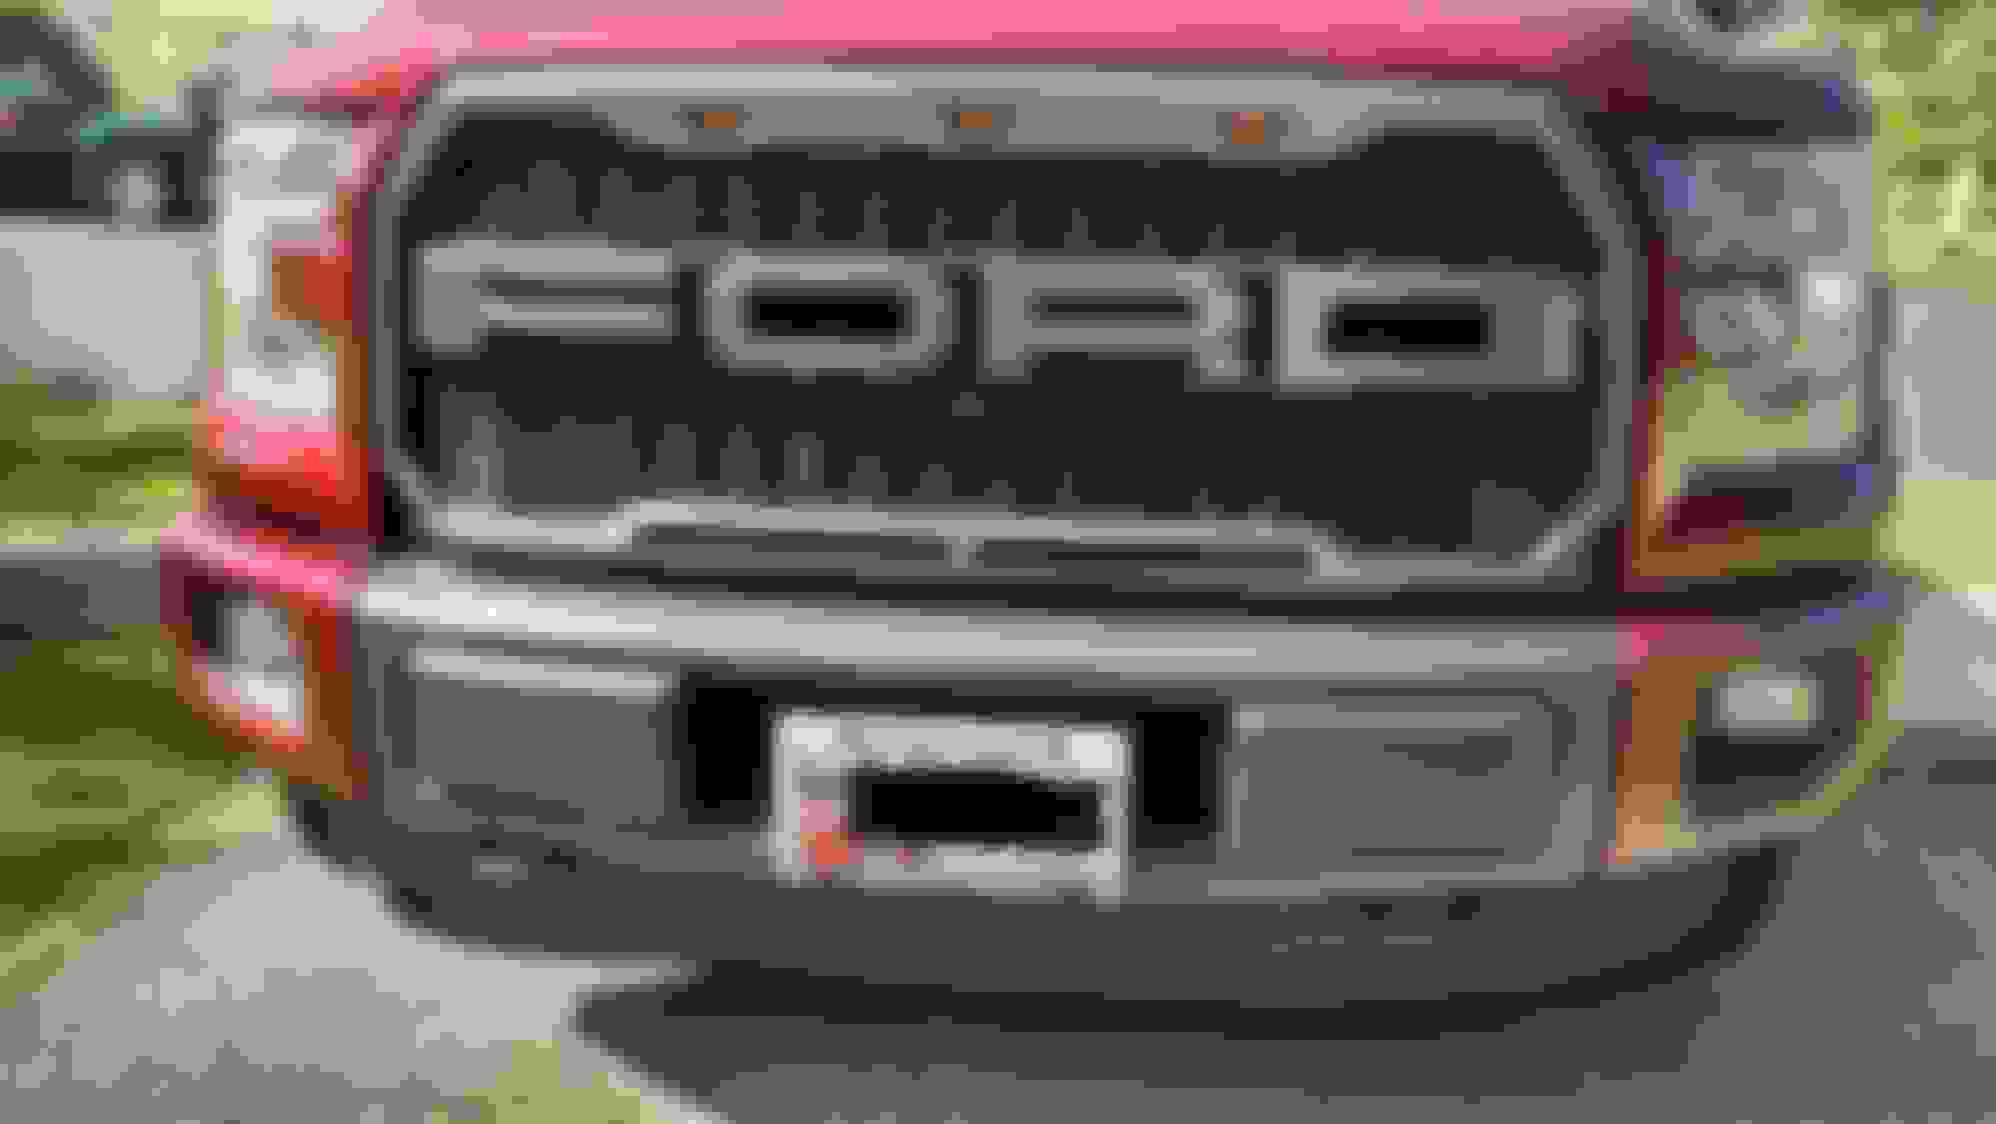
Finally got around to figuring out how to mount the front camera to Paramount grill. It wasn't terribly difficult, but took me a while to figure out how I wanted to proceed.
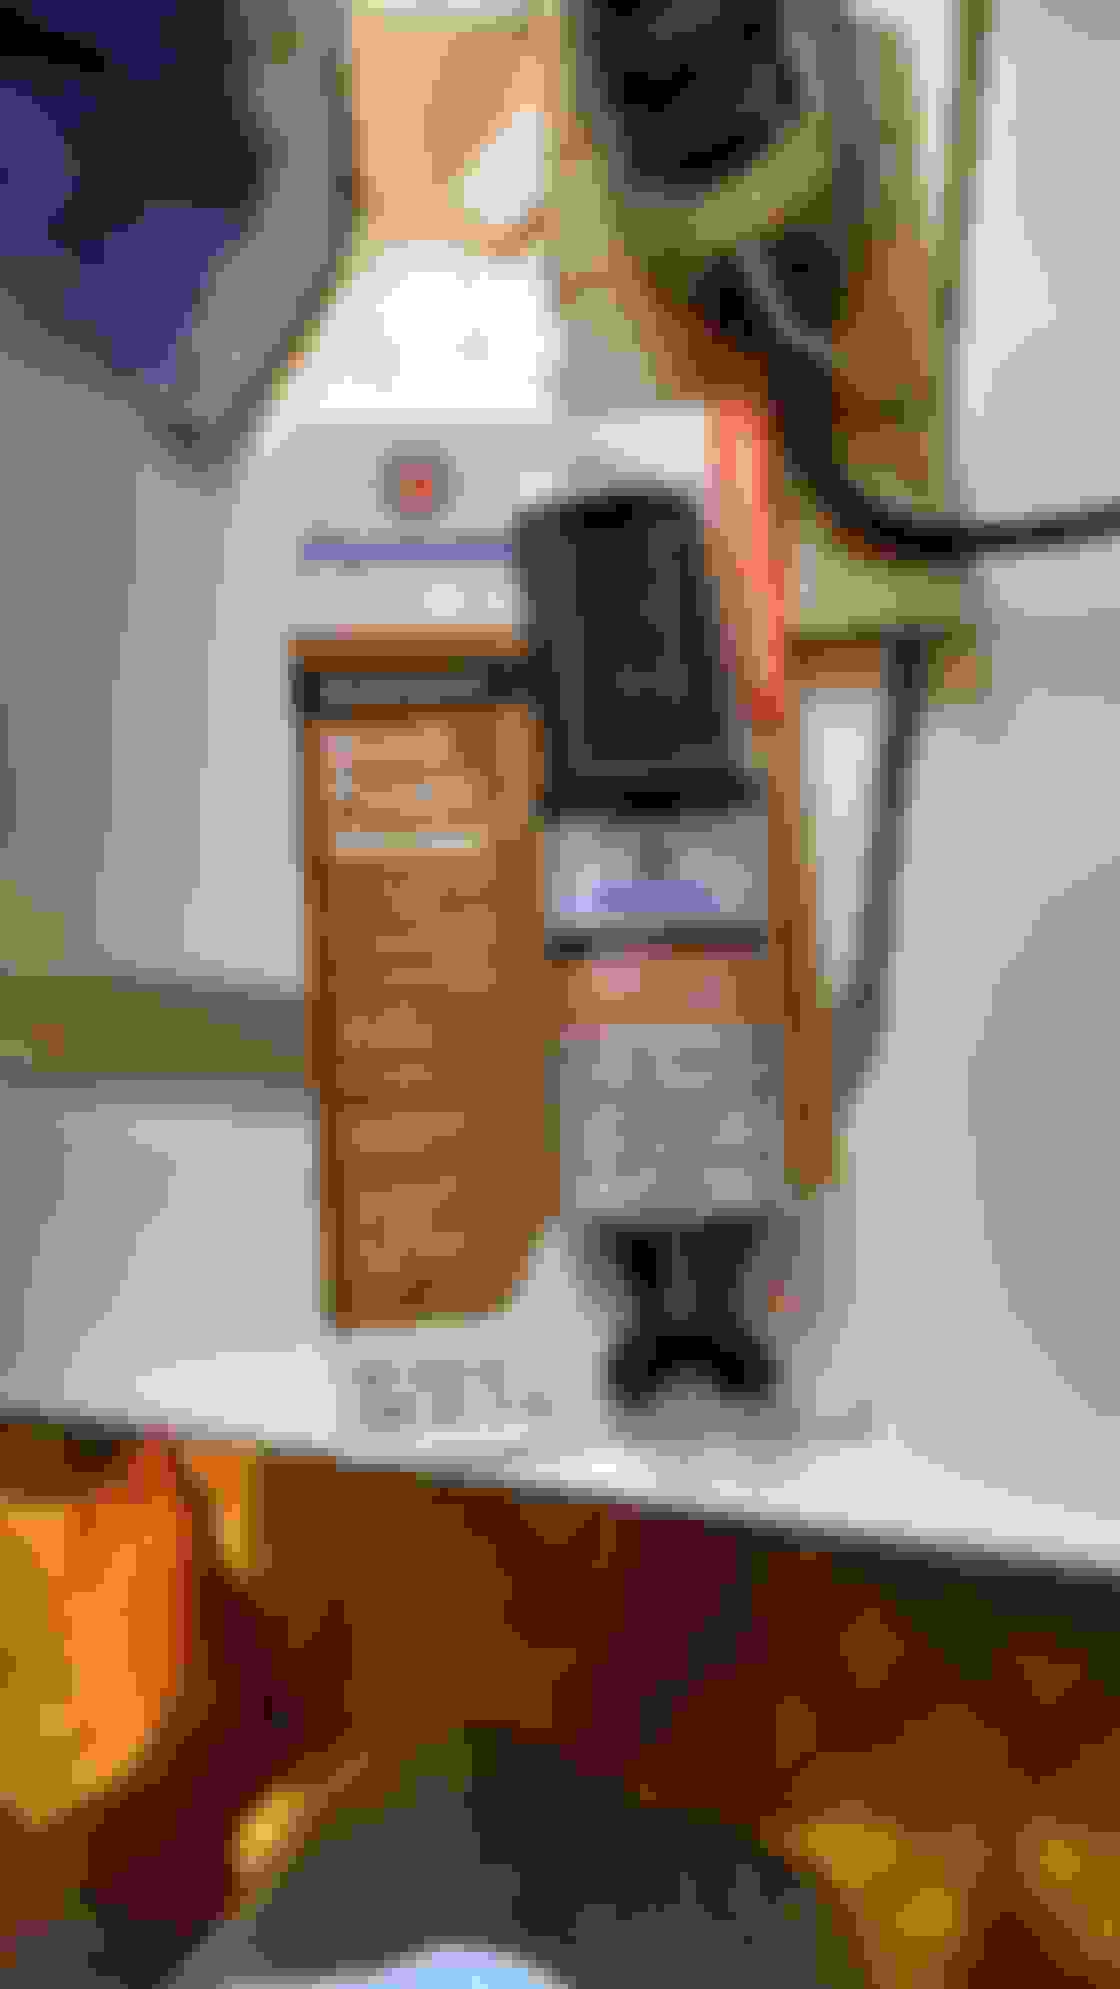
Taking apart the stock grill, you'll notice there is a fairly elaborate mount that attaches just below the oval. I also discovered there is a line from the windshield washer to the small square above the lens. I honestly had no idea what the square was for, but now I know. Anyway, you'll remove the electrical connection and the washer fluid line then you can disassemble the exterior grill from the interior frame.
I struggled with how I wanted to proceed for a while. The stock mounting bracket is not compatible with the Paramount grill at all. I considered fashioning a mount to the center bar of the interior frame to try to preserve the stock mounting bracket in case I ever wanted to return to the stock grill but one I test fit the Paramount grill, I knew I wasn't going back. The Paramount grill is just so much better looking than the stock Lariat sport grill, which is just plain ugly IMO. So I decided to modify the Paramount grill and the mounting bracket as the most efficient and effective approach.
For those wanting to attempt this mod, you need to accept up front you might screw up a $300+ grill, so I advise caution.
You'll need the following to to duplicate my procedure:
Dremel w/ cutting and grinding attachments
Permatex plastic weld (this stuff is incredible)
Wire ties
Drill with ~ 1/8 in drill bit
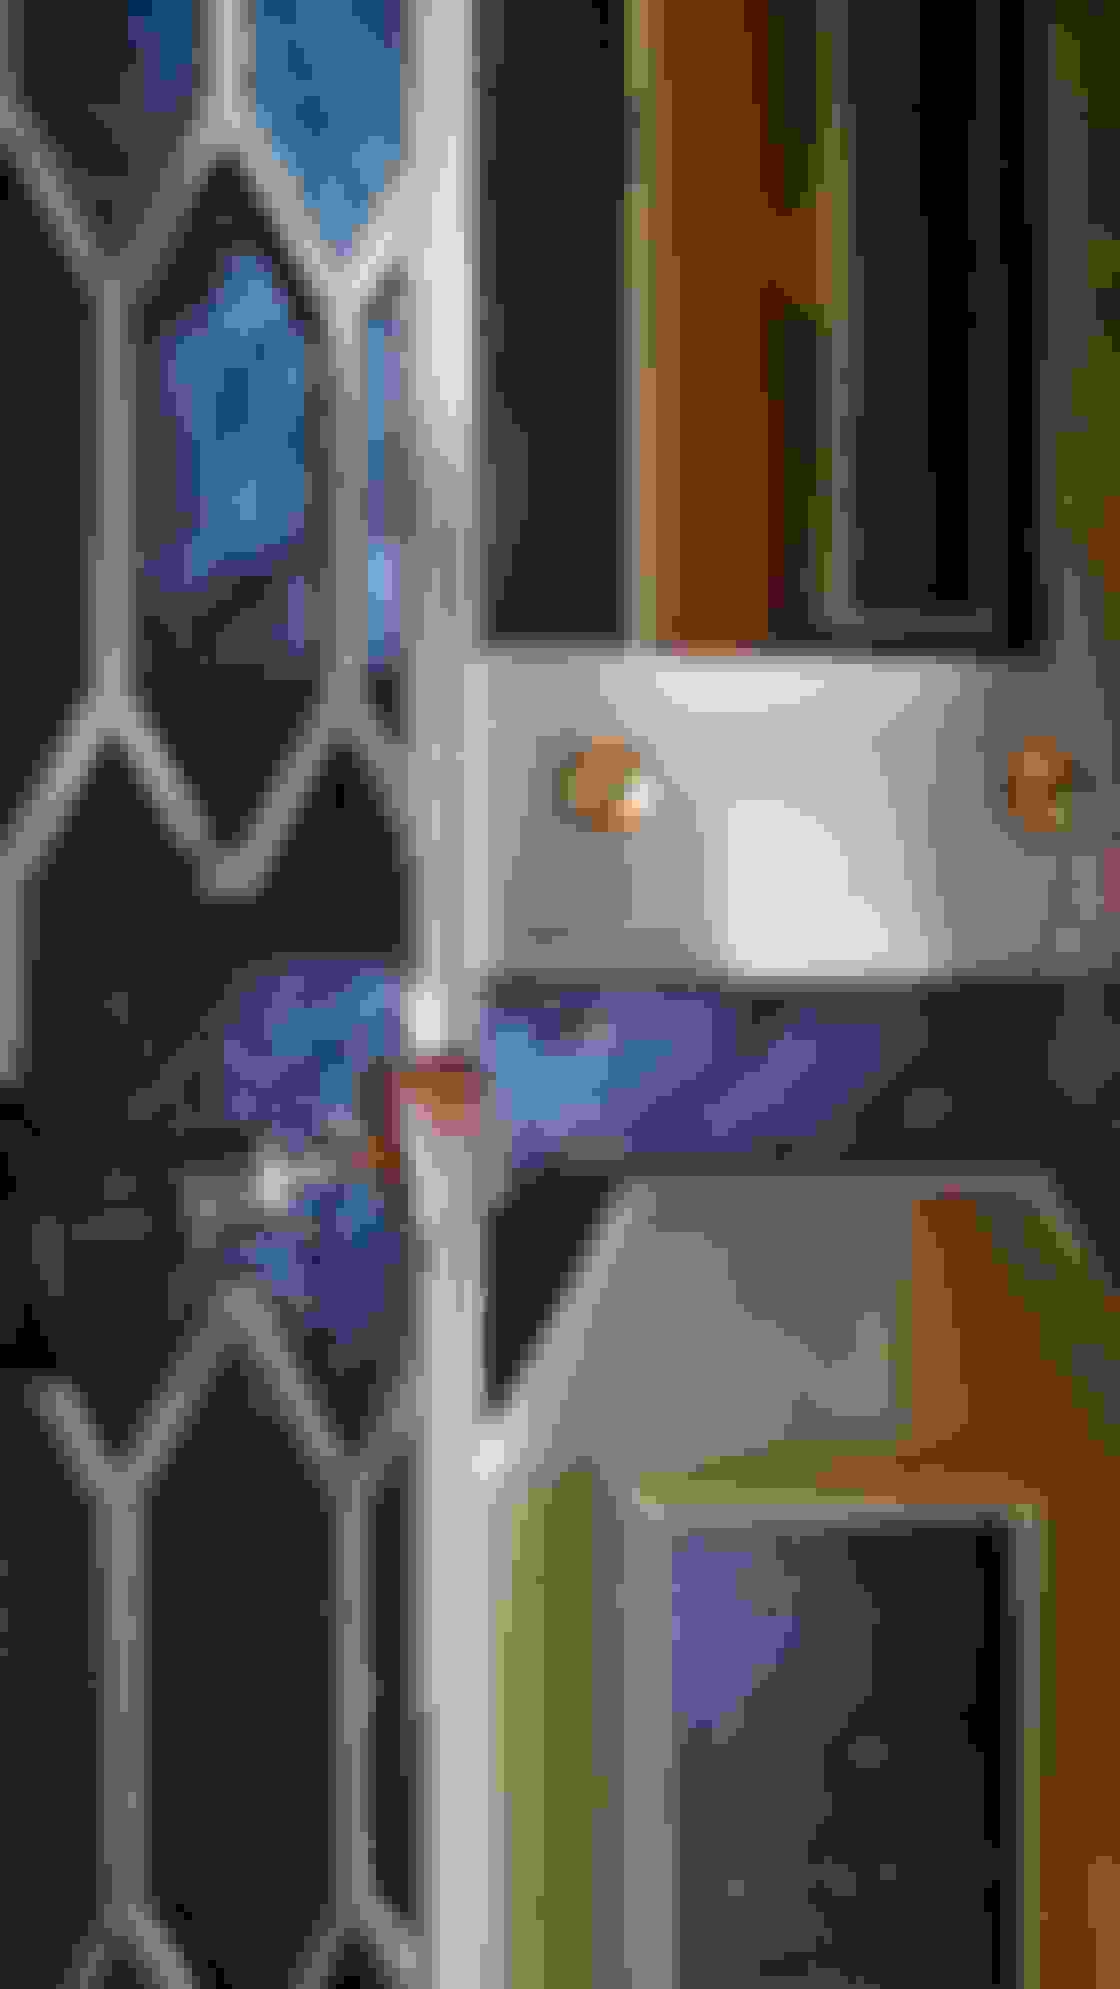
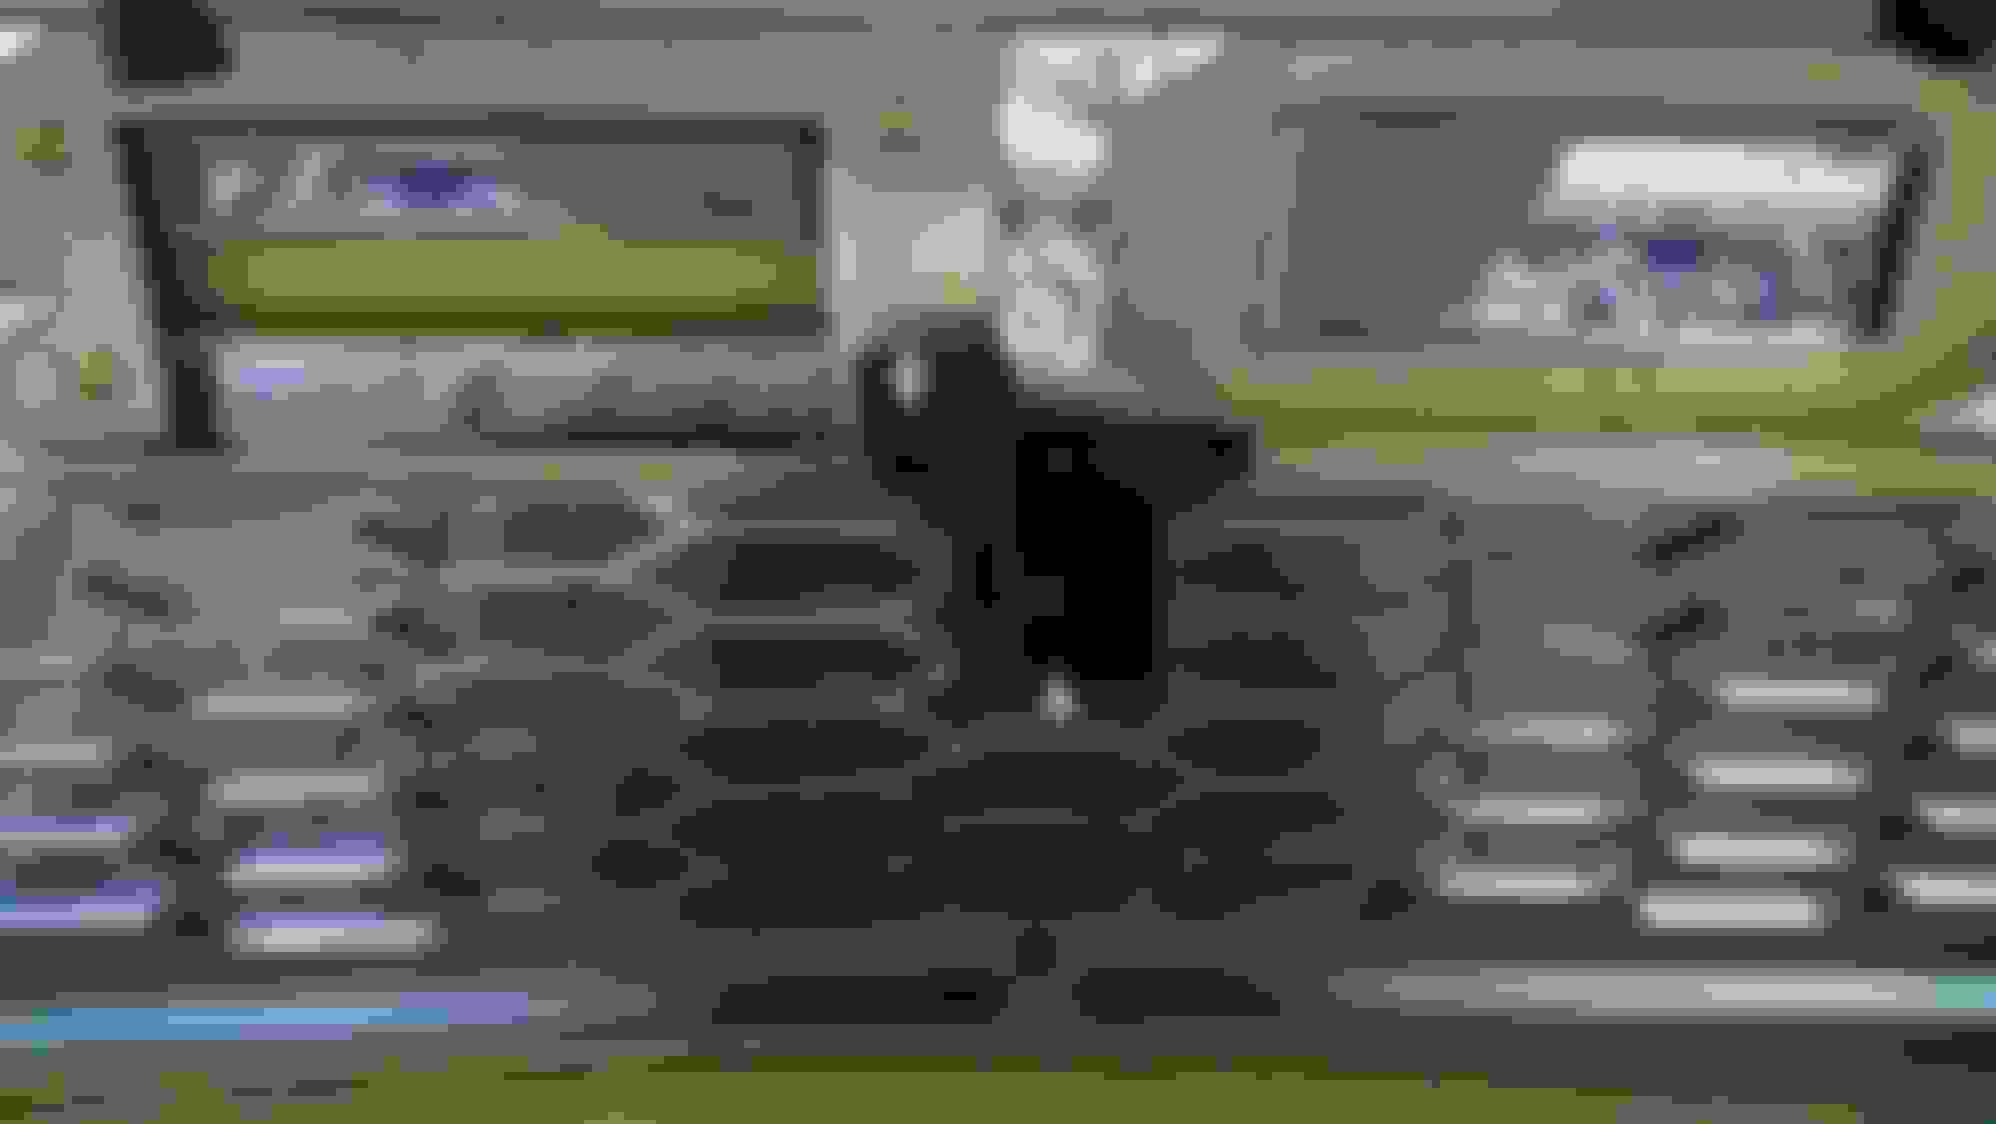
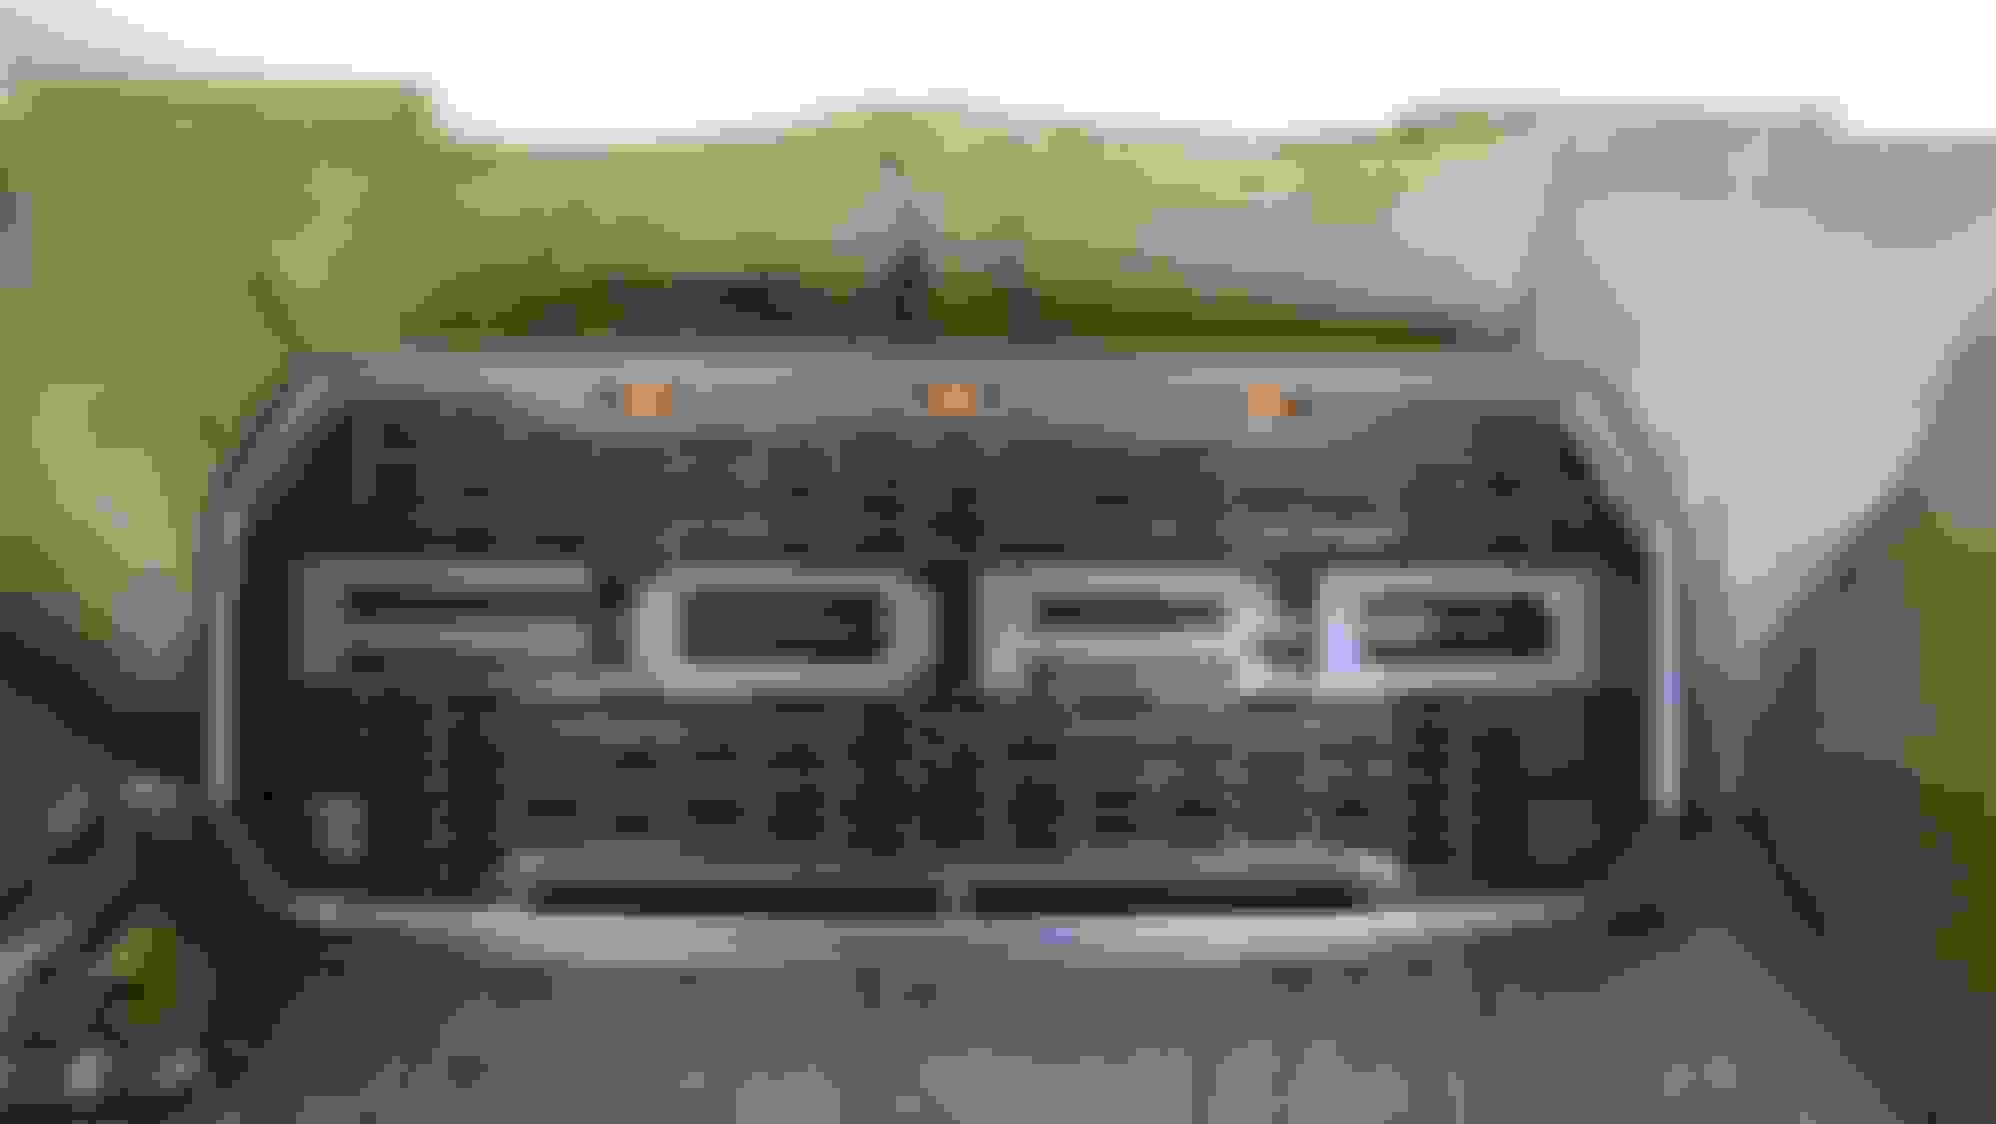
The first step is to cut out the lower horizontal bar in the first opening below the "O and R." Using your grinding wheel, open up the horizontal width slightly so the square portion of the mounting bracket where the camera sits fits in the center.
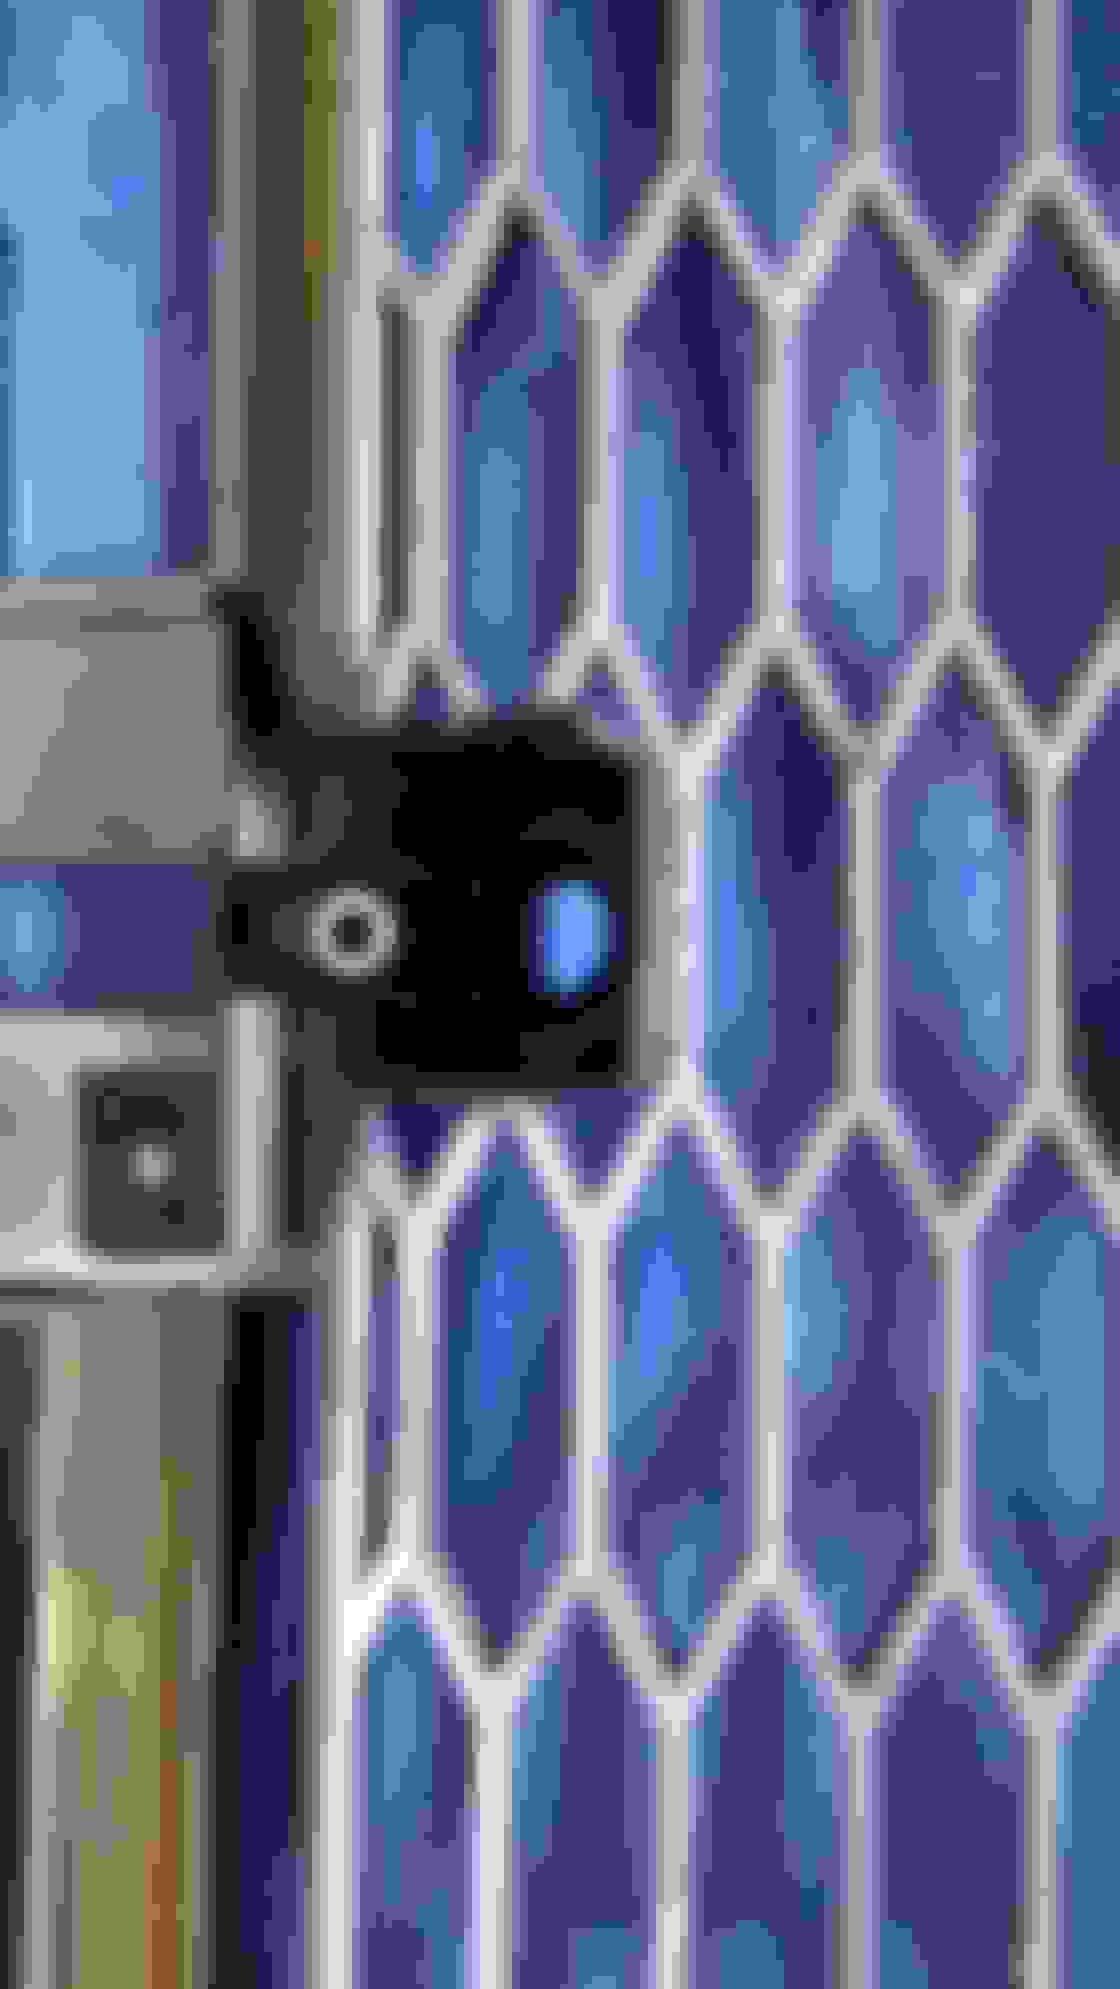
You will also have to create some clearance on the large lower horizontal bar that frames the "FORD" letters. You'll use your grinding wheel and slowly carve out a groove from the back that allows the top of the square portion of the camera bracket to sit properly within the opening while the bottom of the square sits flat on the horizontal piece of the pocket you just created. This will allow the bracket to sit properly within the opening and the camera will be pointing down about 20-30 degrees as it does with the stock grill. Here is a picture of the opening and what I used to create the additional clearance.
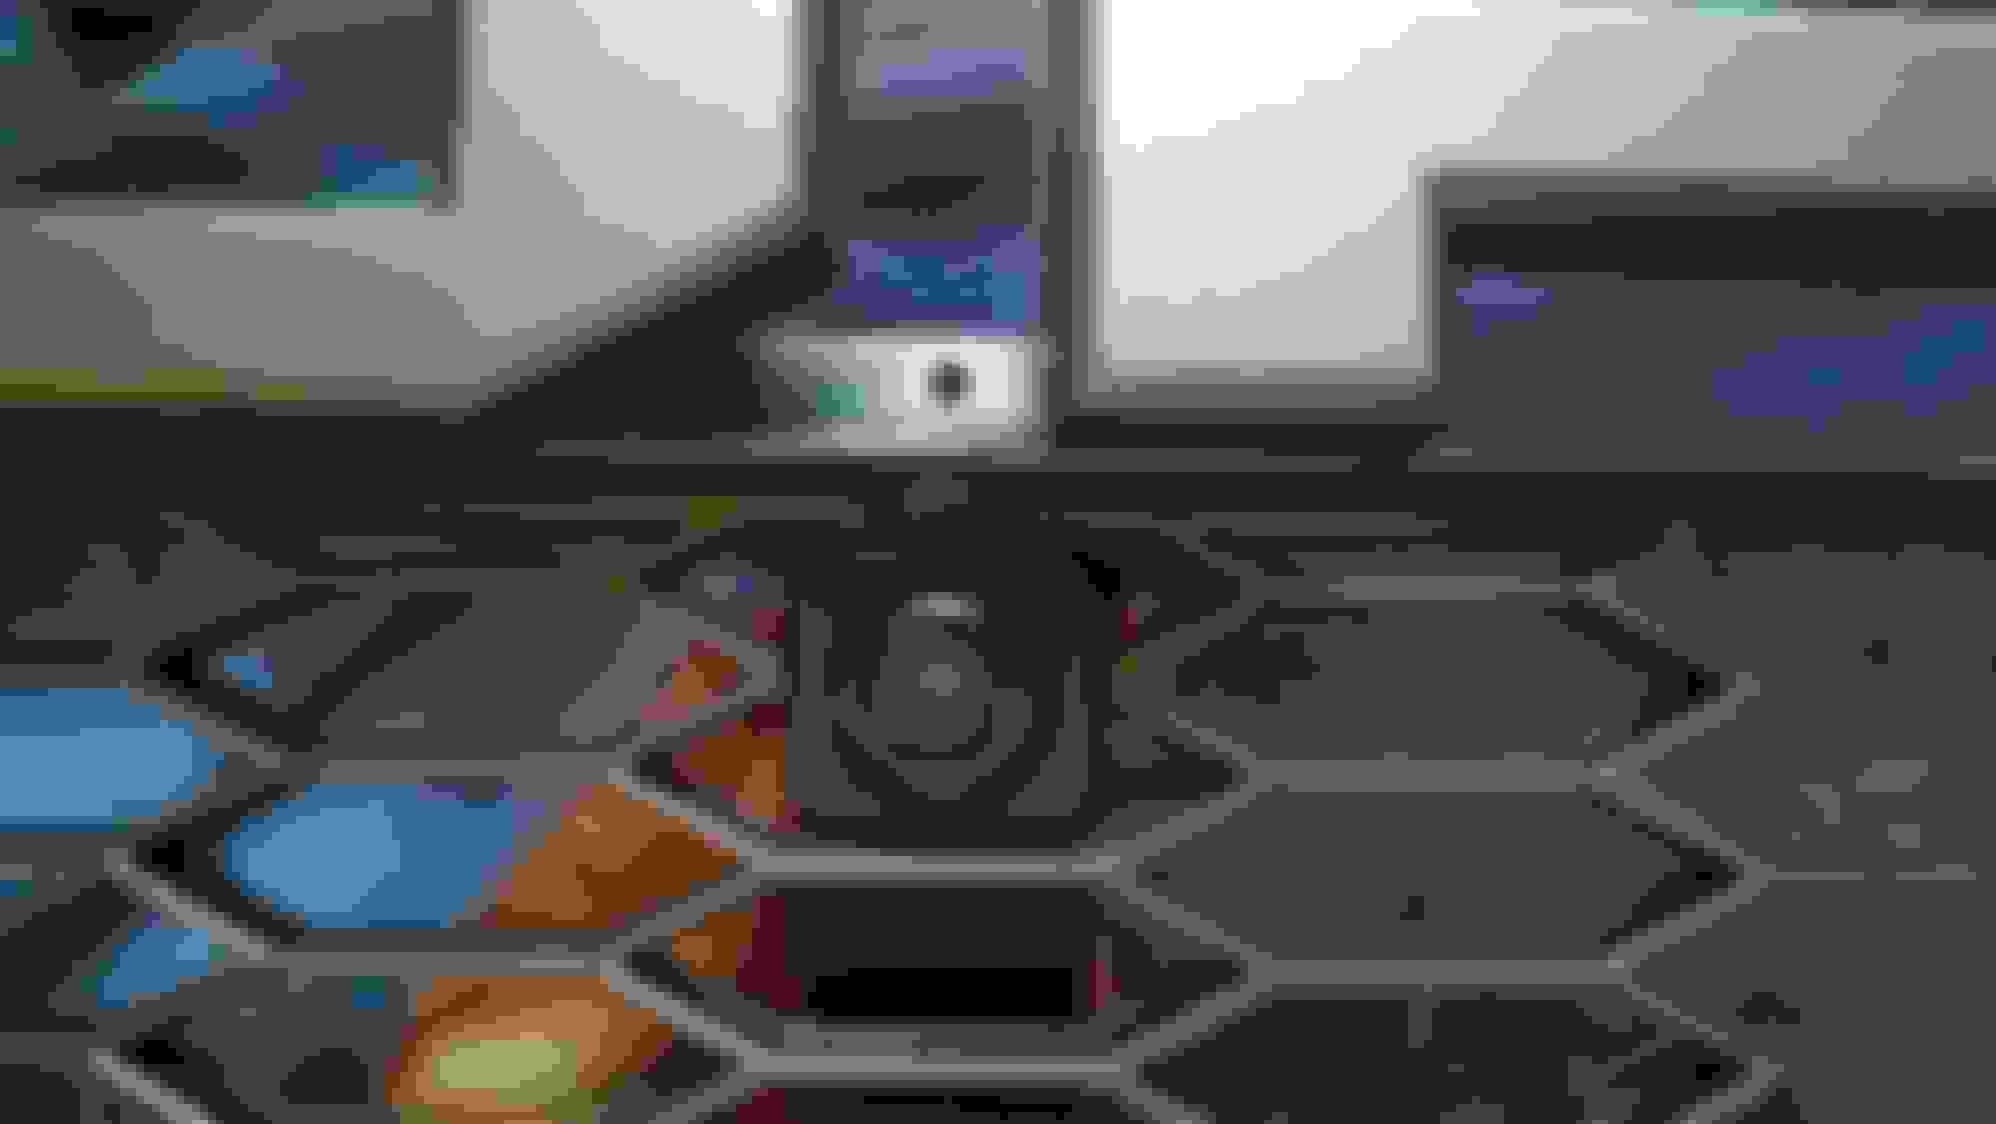
I would trim slowly and test fit as you trim. You'd like the space to be just large enough to allow the square portion of the bracket to fit nicely in the pocket you've created. Once properly cleared, the square portion of the bracket will sit in the pocket nicely and the top portion of the bracket will rest against the large horizontal bar below the "FORD." Here is a picture of my test fit once I finished the trimming process.
Once I finished fitting the bracket, I trimmed it to remove the additional mounting locations I didn't need. This allowed for a cleaner look behind the grill.
Once you're happy with the fit, use the Permatex Plastic Weld to secure the bracket to the grill. If you trimmed your pocket properly, you won't need a lot. I used it along the bottom of the bracket, at the two points on top of the bracket where it touches the grill, and at the two points on the side of the bracket where it touches the grill. This stuff literally makes the bracket a part of the grill once cured. Assuming you trimmed your pocket correctly, your camera bracket should be very solidly mounted.
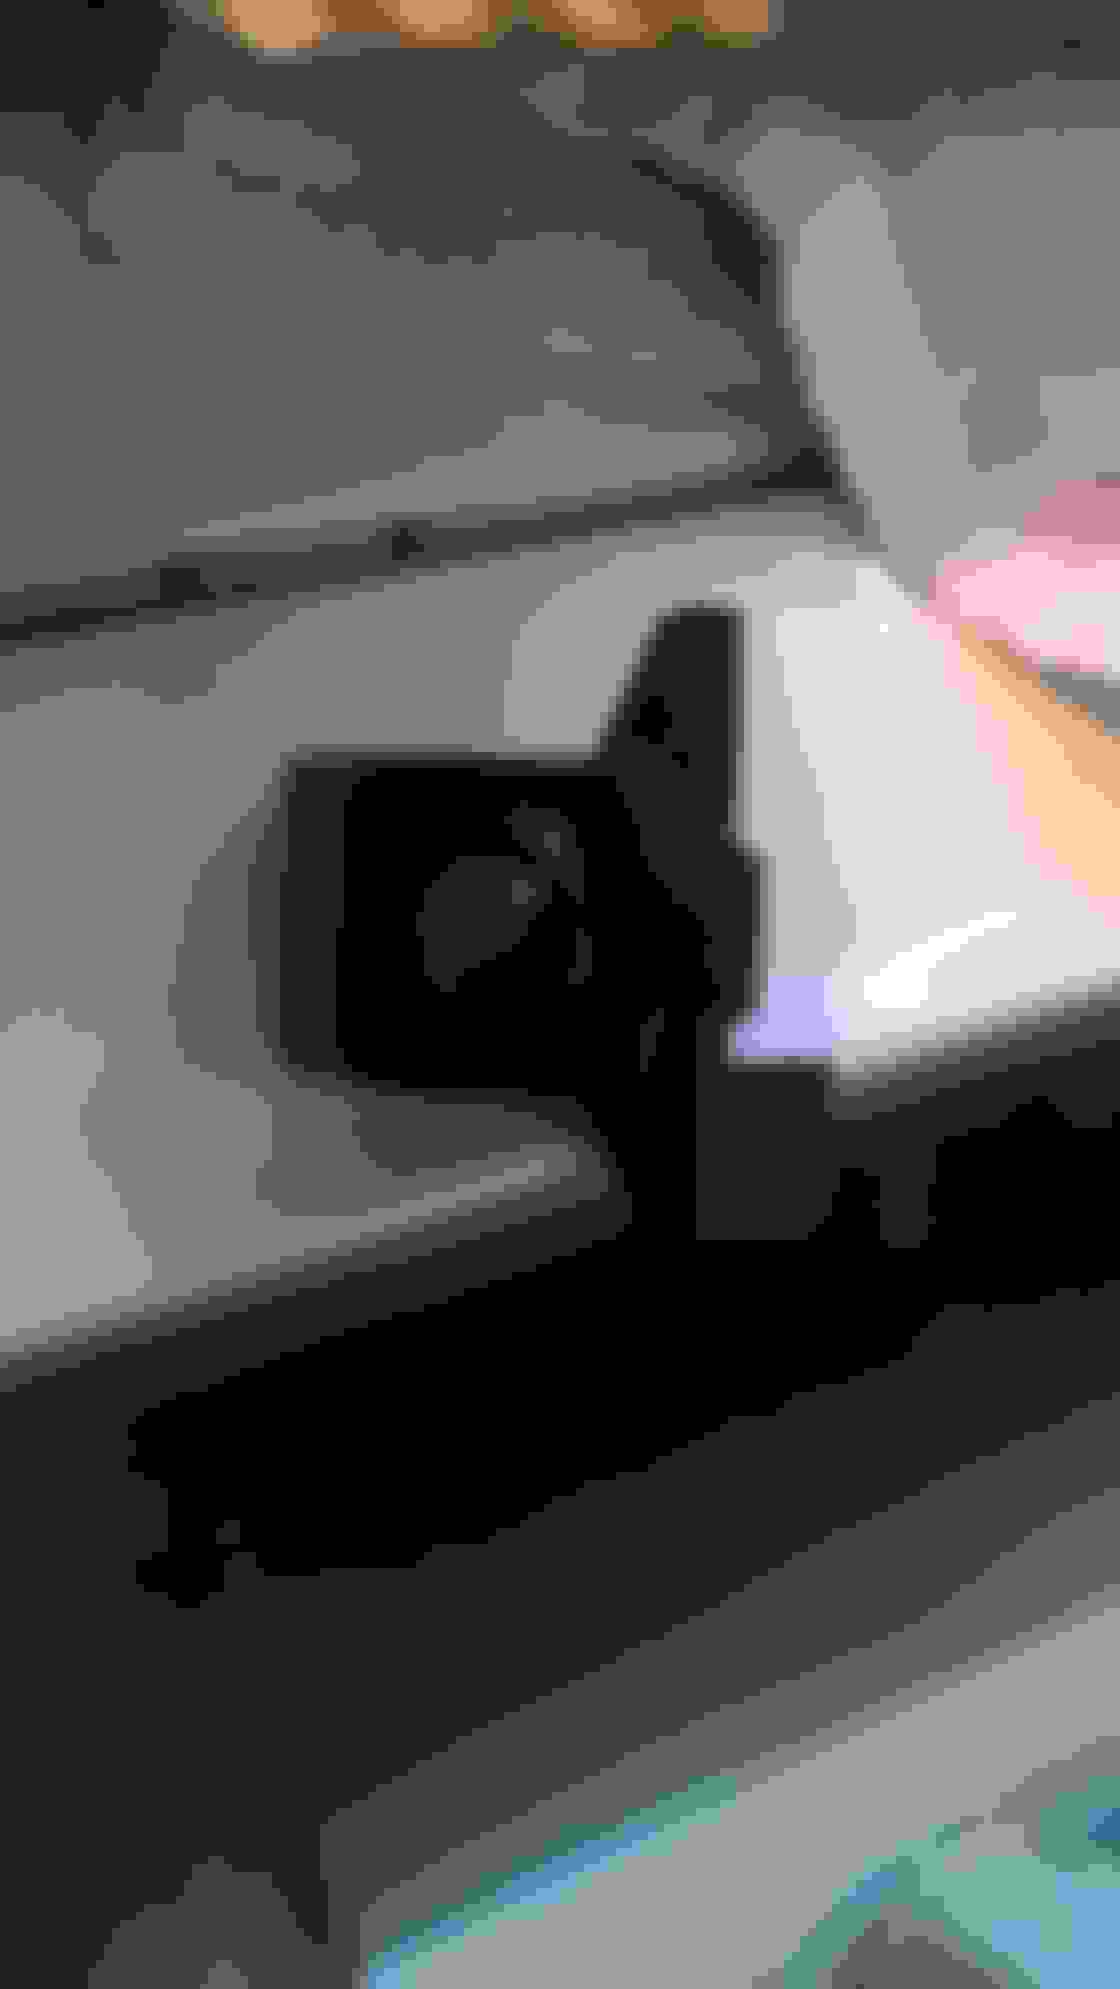
I also trimmed the piece that attaches to the bracket on the back that holds the camera in place. I used a zip tie on the top using the existing holes and drilled a small hole in the bottom of the bracket to use a zip tie there as well to hold everything in place. If something ever happens to the camera itself, it will be easy to change it out.
Once the plastic weld is set you can connect the wiring harness and the washer tube and reassemble the Paramount grill to the stock interior frame. I think the final assembly looks about as stock as you could hope for and the camera works perfectly with the same view as with the stock grill.
I know my phone camera isn't great, but hopefully this helps if you want to tackle this project on your own. From beginning to end it took me about 4 hours including a lot of time just sitting there looking at everything trying to figure out what I wanted to do.
I am very pleased with the how this grill looks. It is so much better looking than the stock Lariat grill. The Paramount grill is excellent quality. It has a very nice harness for the lights (still need to hook them up, but everything is routed - just need to get an "add-a-circuit" for the fuse box), and the color match to the stock sport grill is perfect. You can order the "F" and the "R" from a guy off of ebay that fit and match perfect.
I would love to find a grill somewhat similar to the Raptor grill (like style and especially like Amber pin lights) for my 2015 Black Lariat. Has anyone come across anything like this that will fit a 2015? Doesn't have to be the exact raptor grill, but like that style- black not chrome.
I want to know also I could not find anything in my searches.
Keep an eye with these guys, they have it for 09-14 so hopefully they'll make one for the 15 soon.
http://boost-bars.com
They're $600 CDN but they look good.
Keep an eye with these guys, they have it for 09-14 so hopefully they'll make one for the 15 soon. http://boost-bars.com
They're $600 CDN but they look good.
Just called Boost Bars and they have no immediate plans to make the Raptoid Grill for th 2015s

 03-15-2015, 10:07 AM