When you click on links to various merchants on this site and make a purchase, this can result in this site earning a commission. Affiliate programs and affiliations include, but are not limited to, the eBay Partner Network.
I want to thank all the members that have contributed to this thread. I can't get over how easy this feature is too add. I am very tempted, but my only roadblock is that after owning 4 trucks over 20 year span, I have never once paralleled parked one of them. I would be doing it just to do it.
To my fellow Forum members (and those reading from Ford),
Add me to the list of those who have successfully added APA. It took me a while to get
to it all, but we're done. Others have done an awesome job documenting this, but I will add a few comments from my install.
The posts on painting are spot-on, so follow those to the letter. It's important to prep well before painting. My paint color required a two-step process as it's white pearl coat.
1. Interior switch - Literally took 5 minutes. Unscrew two screws in the console and pull the trim back as others documented. Easy to pop out the old switch and drop in a new one. Easiest part of the install.
2. Software changes - Do everything in the original post. I already had 726-46 with PAM configured, so no change required here. These changes are pretty straight-forward.
3. Installation:
A. If you have OEM splash guards, they have to come off.
B. Wheel lip mouldings do not have to come off. I did not have to pull any trim retainers from the moulding.
C. Tires do not need to come off.
D. Once I pulled the two lower screws (7/32 socket), two liner plugs, and two screws around the moulding leading up to the top (center) of the wheel I was able to push the liner out of the way to get to the connectors. It is tight and you have to firmly push the liner to get it moving. I used trim tools to "pry" it and was able to get it out of the way.
E. Each connector behind the liner has a "cap" type plug on the end. Pull that off and the harness slides right on. When you push the liner out of the way and look behind it, you can't miss seeing where the sensors plug in.
F. Easy to route the harness. You can see where it is to be routed.
G. I drilled a small pilot hole then used the larger bit to make the large hole. It did cut easy.
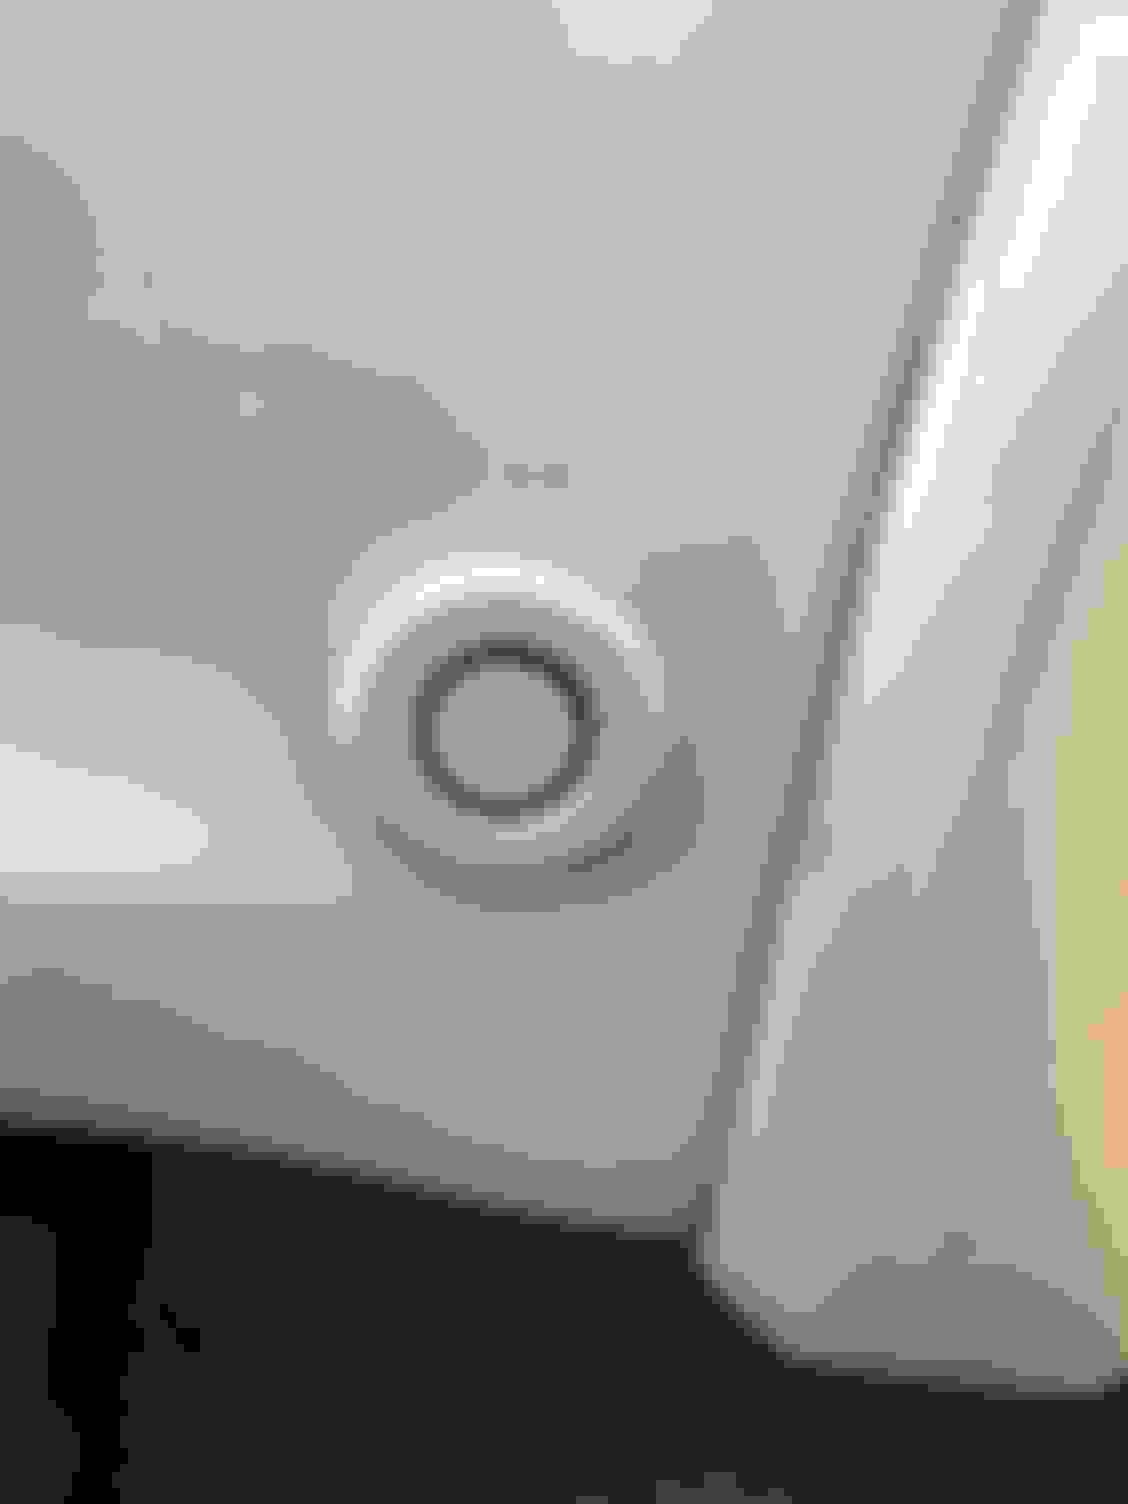
H. I used the measurements from listed earlier, 7 3/8 down from the body seam and 1 1/8 off the wheel lip moulding, and the final look is perfect. Hole side down on the bezel.
Two screws holding the liner in place.
Drivers side harness routing.
Drivers plug. Some said this was in the engine compartment. Mine was behind the liner.
Removing liner screws grants more flexibility to move the liner out of the way.
Liner plugs - remove using trim tools to get more liner flexibility.
More liner plugs. Located in the rear section.
Passenger side plug. Orange wire is the antenna wire. Follow it and you will find the plug.
Interesting that your Driver's side plug was already mounted in the fender. Mine was taped up in the engine bay.
This is a really easy mod, fairly cheap, and it adds class and sale-ability to the truck! I have used APA a couple of times to test it and it really is remarkable how it can park the truck pretty well.
Thanks. You were of great help on paint, parts, and the bezel.
Speaking of the bezel, your hole measurements were spot on. It looks perfect with the contour.
Regarding the plug, I went looking under the hood but when I could not find, into the liner I went.
What is needed for your steering wheel to be able to move on its own for this mod? I have a 2015 Lariat, but do not have Lane Assist or PBTA.
Don't need lake keep or pro trailer in order to have this. Make all the software changes and the system works, which includes power steering control module changes.
Don't need lake keep or pro trailer in order to have this. Make all the software changes and the system works, which includes power steering control module changes.
Is there a parts list buried in this thread? I am not seeing it.


 06-18-2017, 10:13 AM