When you click on links to various merchants on this site and make a purchase, this can result in this site earning a commission. Affiliate programs and affiliations include, but are not limited to, the eBay Partner Network.
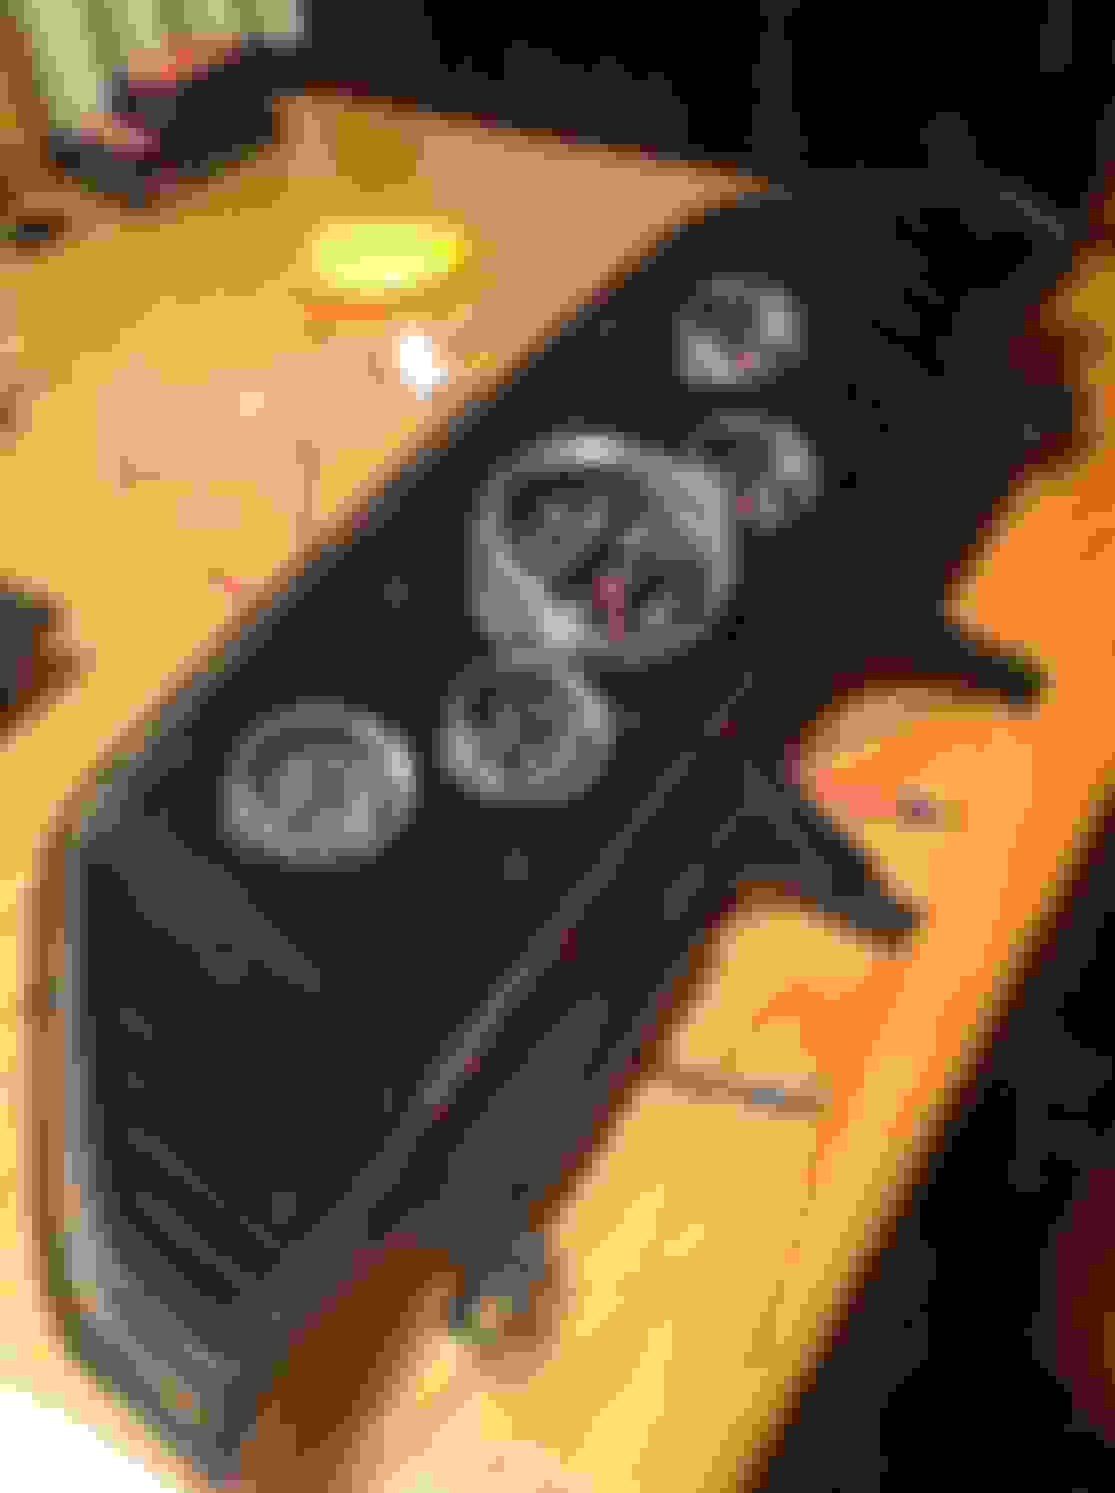
Inside Man, that is a real nice looking gauge cluster arrangement you've built!
Excuse me for not reading everything yet, but, in round numbers, what did that cost for the gauges, materials, wiring and hardware, and your time?
I had the piece of sheet metal for the bezel in the garage but I would guess to say that it would be around $15.00
Dash Dis-Assembly ( 1 hour )
Laying out and design of new gauge bezel ( 2.5 hour )
Making new gauge bezel ( 3 hours )
Modifications to the rear of the dash panel ( approx 3 hrs )
Research Wiring / Wiring Modifications ( 6-8 hours )
Currently in the process of letting the paint dry for the gauge bezal.
Afterwords I will assemble the new cluster ( 1hr )
Wire the cluster ( 2hrs)
Integrate new cluster harness into factory truck harness ( 2hrs )
Test gauges and trouble shoot ( ?? hrs)
Dash reassembly ( 1hr )
Installation of required senders ( ?? hrs )
Senders came with specific gauges where required however I may have to purchase for my specific engine. ( ?$? )
All prices were rounded to the nearest dollar after taxes.
Last edited by Inside Man; 12-31-2018 at 11:53 AM.
Finally got the gauges mounted for the last time on the painted cluster bezel and got the entire cluster mounted in the upper dash panel.
I ended up going with semi gloss instead of Satin because that's all I could find after three different automotive stores and I'm not happy with the results but it is what it is at this point. The pics makes it look cloudy but it turned out very nice in person.
By the way, I'll never use Rust Oleum again on an auto project. This is the first I've attempted this as I was assured that the results would be just as good as automotive paint.
Last time I listen to him.
Got a little cluster wiring done tonight but I'm beat so I'll hang it up for now. Gonna be a busy weekend with family and a couple side jobs but I'm gonna try to bang this thing out.
Last edited by Inside Man; 01-04-2019 at 08:47 PM.
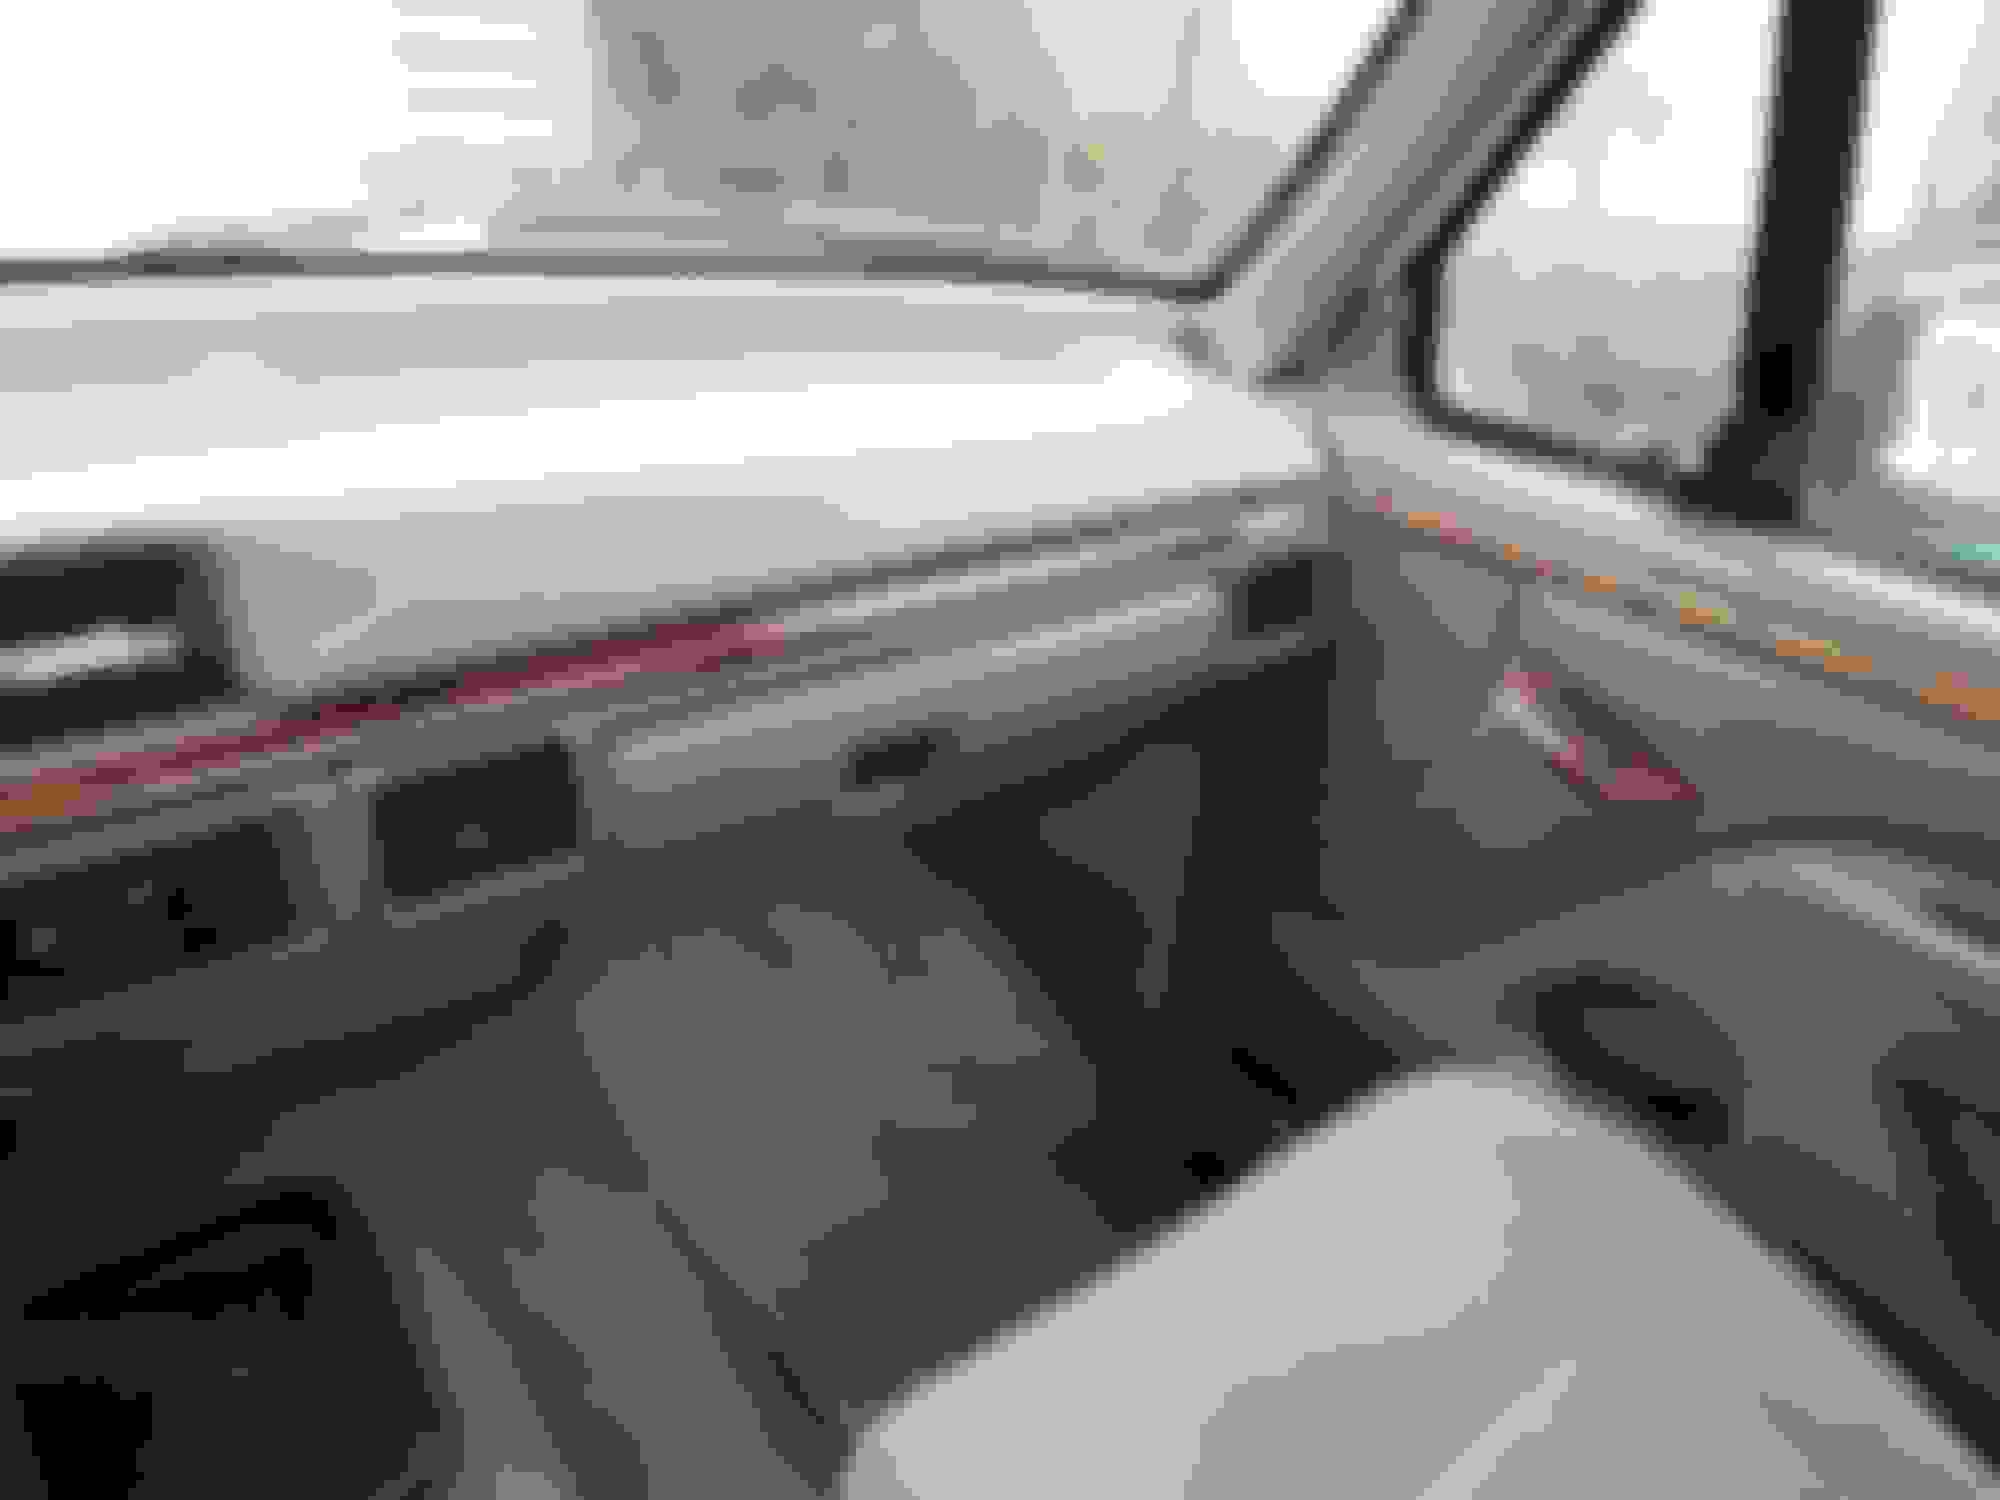
Been working on my dash a bit the last few weeks. Added a new turn signal switch, new fuel selector switch, and a new headlight switch that all have the white lettering that I can see now! The headlight switch is Motorcraft, the others are aftermarket. Also removed the vinyl wrap from the dash trim and window switch pieces and re-did them with some hydrographic film in a wood burl pattern. I think they look much better now compared to the door trim that I still need to do. The film follows the contours of the trim exactly where the vinyl was not so good. But the film is a lot trickier to deal with, even though all the YouTube videos say it's "easy"! Still looks pretty good though!
I was at a loss for a container long enough (needed about 4 feet) to to fit the biggest trim piece, then my wife suggested using a section of rain gutter. And as it happens, there's a rain gutter place not too far away and I got a scrap piece about 6 feet long for free! I just cut and folded over the open ends and used good old duct tape to hold them and they worked just great! I used some automotive white primer under the film as a basecoat, then used an automotive clear coat over the film after it was dry.
The dash pad was made by a friend of mine with some vinyl I found on eBay. The original pad had a couple of cracks so I filled and smoothed those with silicone caulk, then my friend glued some thin foam over that and then the vinyl cover was put down. It's been on there several years and continues to look really good.
I finally found an LED bulb for under the hood that is actually worth a damn. I'm so impressed with it. Gave the second one to a buddy and we got a shot of it on his powerstroke last night
 12-31-2018, 11:29 AM