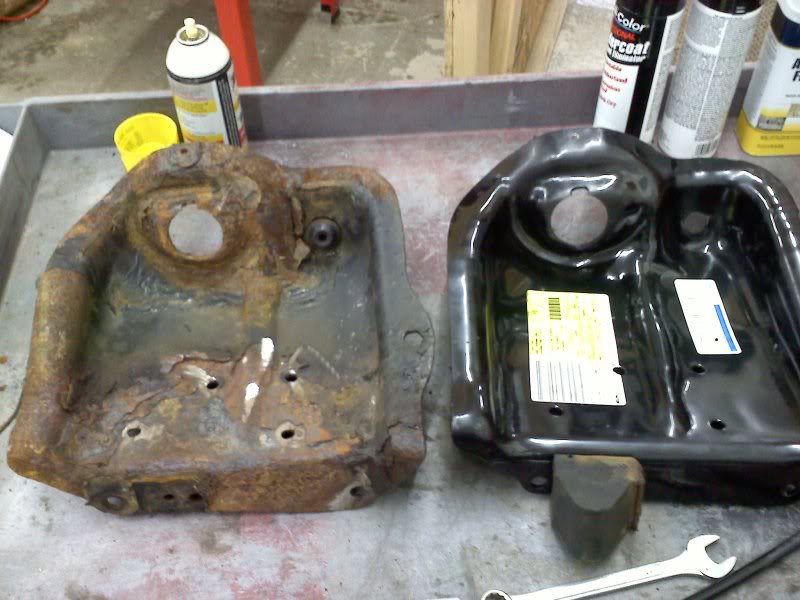
I replaced my coil spring towers today
 04-30-2011, 09:51 PM
#1
Junior Member
Thread Starter
Well, actually, I did the drivers side last night and the passenger side today. The passenger side was a little more stubborn, took me around 6 hours to get the passenger side done, including 40 minutes driving to the the parts store and back. I had a torch available, but it's my grandpa's and it was so worn out it didn't function properly. So, I used a grinder to grind off the heads of the rivets, then punched them through.
Luckily, the brake lines that run through the frame broke loose without too much drama. I've been soaking everything with PB Blaster the last couple of weeks preparing for this weekend, so I think that helped.
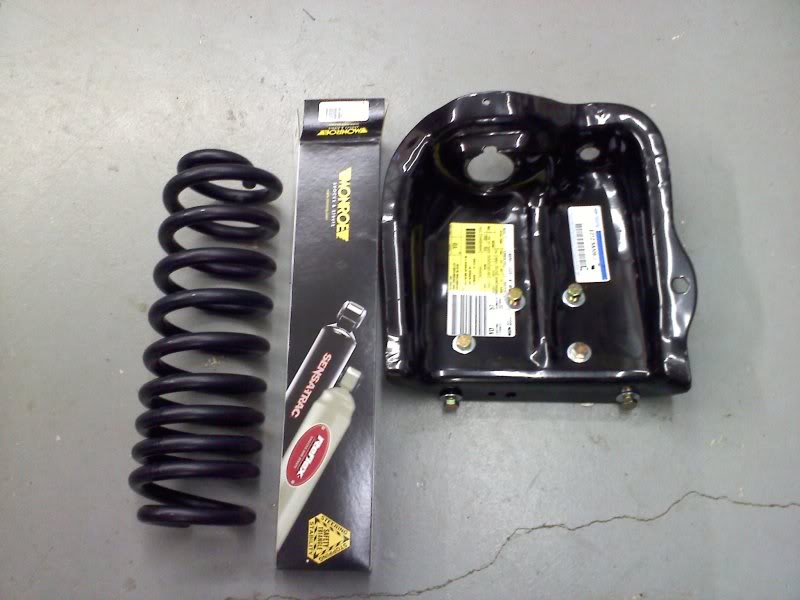
I also installed
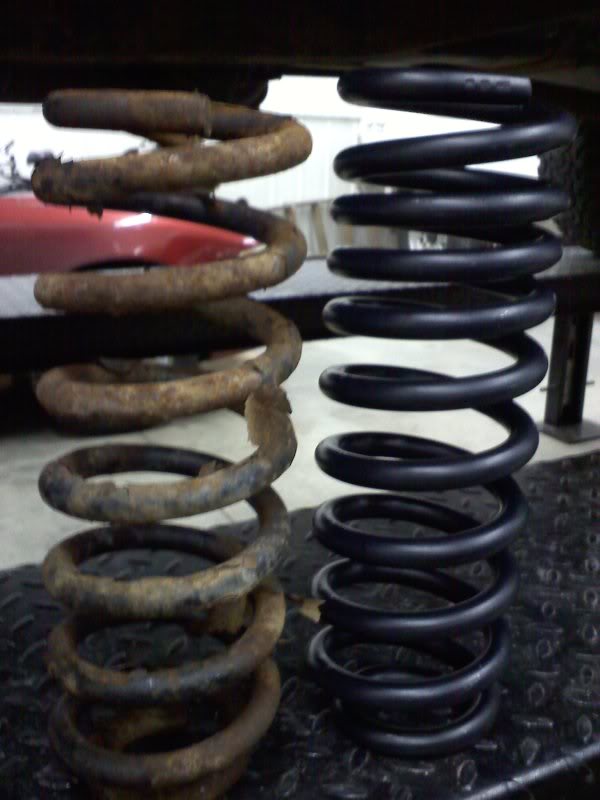
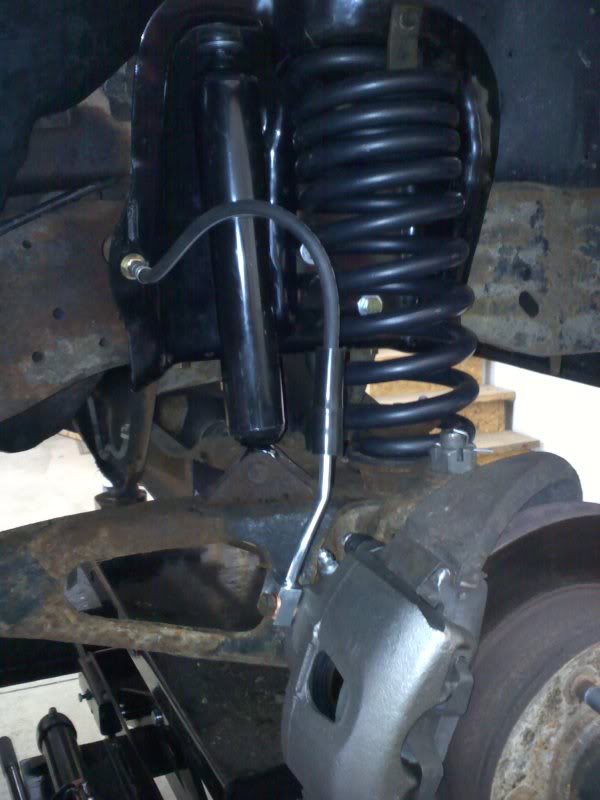
- New coil springs (gained an inch of lift back, the old ones were sagging. Moog 822 I believe is the part number)
- New shocks (Monroe Sensatracks)
- New calipers (the bleeders were seized)
- New brake hose on passenger side (clip on tower was rusted so bad I couldn't get it off)
Here's some sizes to help anybody that does a search in the future.
- Front shocks top nut is 15mm (18mm on the body to keep it from spinning)
- Front shocks bottom bolts are 18mm on both sides
- Coil spring hook on the top is 1/2"
- Coil spring cup on bottom is 1 1/8" (when I let the axle down and the coil spring was no longer under tension, I was able to squeeze a 1 1/8" socket in between the coils and use that.)
- Rubber bumper is a 9/16" head. Use a 6 point, the bolt was very corroded.
- My rivet replacement bolts are 7/16" bolts. Not 1/2" like I've read. I used grade 8, with washers and a lock washer.
- Coil spring towers = $175 for both
- Shocks = $46 each
- Coil springs = $100 a set
- Calipers = $40 each with $25 core charge
- Brake hose = $18
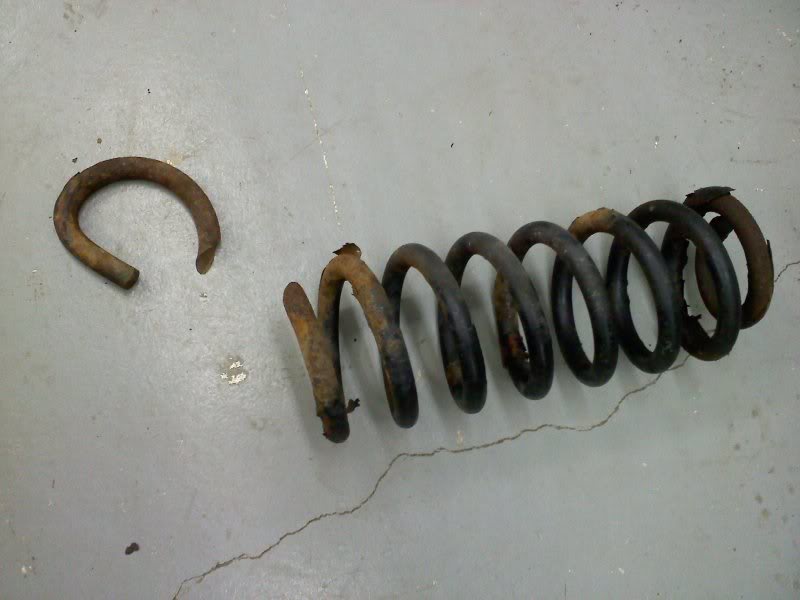
I also discovered that the passenger side coil spring was broken. How it stayed in place and didn't come shooting out is beyond me. I'm glad I decided to do this when I did.
Since the new springs were a tad longer, they didn't want to go in very well. I could of went into the parts store and rented a coil spring compressor, but I have the luck of having a lift at my use. So, I took a ratchet strap around the spindle and down under the ramp of the lift. I was able to pull the axle down far enough with the ratchet to fit the spring into position. The passenger side was harder, because the axle is shorter on that side.
I can't think of any other tips right now, but I highly recommend soaking everything with PB Blaster a few weeks before you tackle this job. It made it much easier.
Here's some pics.
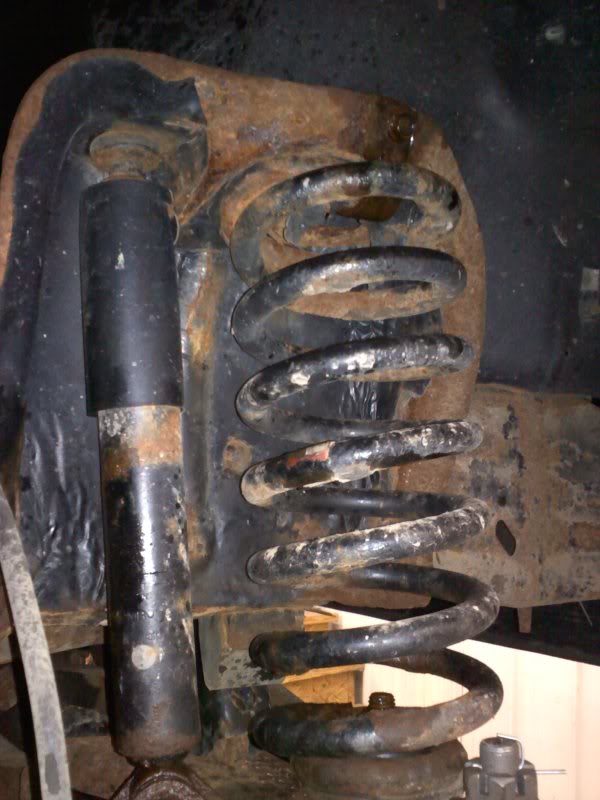
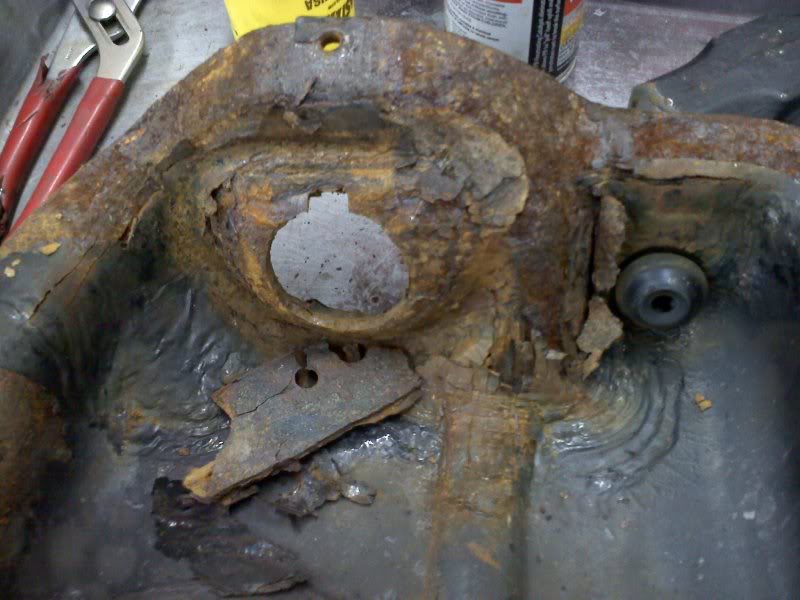
Who knows how long its been like this. Judging by the rust where the break is, it's been a while. I consider myself lucky this never bit me.
Luckily, the brake lines that run through the frame broke loose without too much drama. I've been soaking everything with PB Blaster the last couple of weeks preparing for this weekend, so I think that helped.
I also installed
- New coil springs (gained an inch of lift back, the old ones were sagging. Moog 822 I believe is the part number)
- New shocks (Monroe Sensatracks)
- New calipers (the bleeders were seized)
- New brake hose on passenger side (clip on tower was rusted so bad I couldn't get it off)
Here's some sizes to help anybody that does a search in the future.
- Front shocks top nut is 15mm (18mm on the body to keep it from spinning)
- Front shocks bottom bolts are 18mm on both sides
- Coil spring hook on the top is 1/2"
- Coil spring cup on bottom is 1 1/8" (when I let the axle down and the coil spring was no longer under tension, I was able to squeeze a 1 1/8" socket in between the coils and use that.)
- Rubber bumper is a 9/16" head. Use a 6 point, the bolt was very corroded.
- My rivet replacement bolts are 7/16" bolts. Not 1/2" like I've read. I used grade 8, with washers and a lock washer.
- Coil spring towers = $175 for both
- Shocks = $46 each
- Coil springs = $100 a set
- Calipers = $40 each with $25 core charge
- Brake hose = $18
I also discovered that the passenger side coil spring was broken. How it stayed in place and didn't come shooting out is beyond me. I'm glad I decided to do this when I did.
Since the new springs were a tad longer, they didn't want to go in very well. I could of went into the parts store and rented a coil spring compressor, but I have the luck of having a lift at my use. So, I took a ratchet strap around the spindle and down under the ramp of the lift. I was able to pull the axle down far enough with the ratchet to fit the spring into position. The passenger side was harder, because the axle is shorter on that side.
I can't think of any other tips right now, but I highly recommend soaking everything with PB Blaster a few weeks before you tackle this job. It made it much easier.
Here's some pics.
Who knows how long its been like this. Judging by the rust where the break is, it's been a while. I consider myself lucky this never bit me.

The following users liked this post:
Johnnymd (10-05-2013)


 05-01-2011, 06:27 AM
#4
Junior Member

Join Date: Apr 2011
Posts: 20
Likes: 0
Received 0 Likes
on
0 Posts
Looks like replacements are progressive springs compared to linear. How's the ride and are you getting any noise from the coils touching? I know on progressively wound lowering springs for cars I've used thin vinyl tubing from Lowes to wrap the coils to keep them from clanging.
05-01-2011, 07:45 AM
#5
Senior Member

Nice job Jason. I did that last year myself. Those Moog's are F250 coil springs. Same ones I used. They ride fantastic once they settle. I did notice that I did have to get realigned after they settled in. Other than that, couldn't be happier with them. I know you'll enjoy them.
05-01-2011, 11:07 AM
#6
Junior Member
Thread Starter
Definitely gooder

Looks like replacements are progressive springs compared to linear. How's the ride and are you getting any noise from the coils touching? I know on progressively wound lowering springs for cars I've used thin vinyl tubing from Lowes to wrap the coils to keep them from clanging.
Nice job Jason. I did that last year myself. Those Moog's are F250 coil springs. Same ones I used. They ride fantastic once they settle. I did notice that I did have to get realigned after they settled in. Other than that, couldn't be happier with them. I know you'll enjoy them.

Trending Topics
05-02-2011, 12:00 AM
#8
Junior Member
Thread Starter
http://www.sears.com/shc/s/p_10153_1...7&blockType=G7
I'll have to check.
05-02-2011, 04:56 PM
#9
Junior Member
Thread Starter
It is indeed a Black and Decker grinder.
Truck seems to ride much better now. Ride seems quieter too. I love the inch of lift it gave me in the front, truck sits a lot better now, very level. Next up is some shocks for the rear, as those are original too.
Truck seems to ride much better now. Ride seems quieter too. I love the inch of lift it gave me in the front, truck sits a lot better now, very level. Next up is some shocks for the rear, as those are original too.
