Rigid DOT Approved Dually fog lights installed - pic heavy
 02-04-2015, 08:48 PM
#1

So I've had these on the workbench now for a while. I pulled the trigger right after their release and upon the last round of XB fogs release date pushing again. I didn't want to go the conventional mounting route and just drill a hole in the existing bumper mounted fog light bracket. Since the beam pattern on these is so well defined I decided to attempt to mount the Duallys inside an opened fog light reflector housing. As it turns out there is enough lip once the lens is removed for the Rigid mount to sit, and even be "clocked" a few degrees left or right if you so desire.
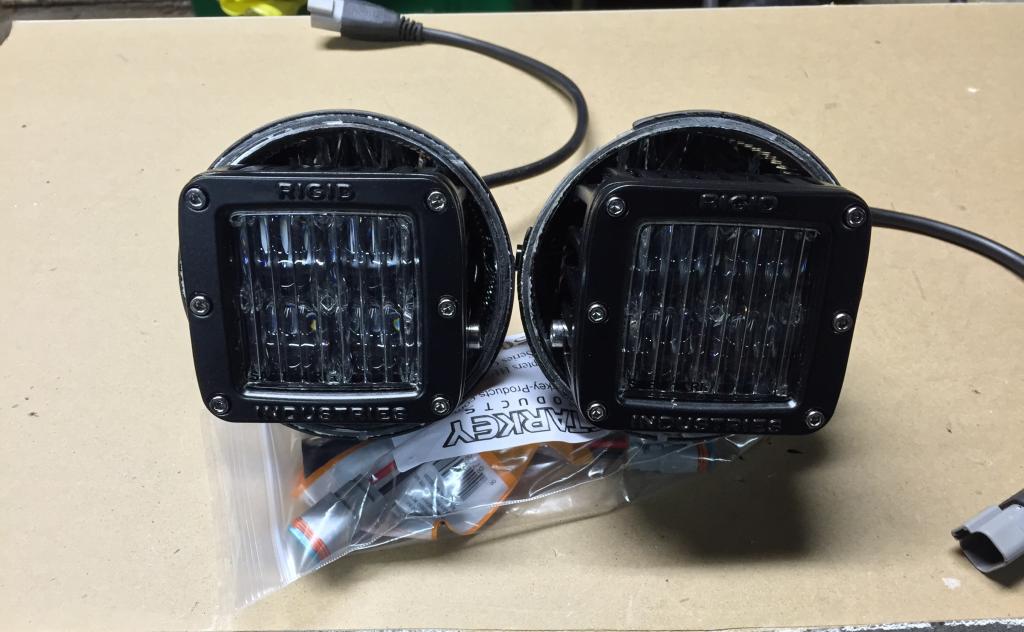
The box as it arrives from Rigid:

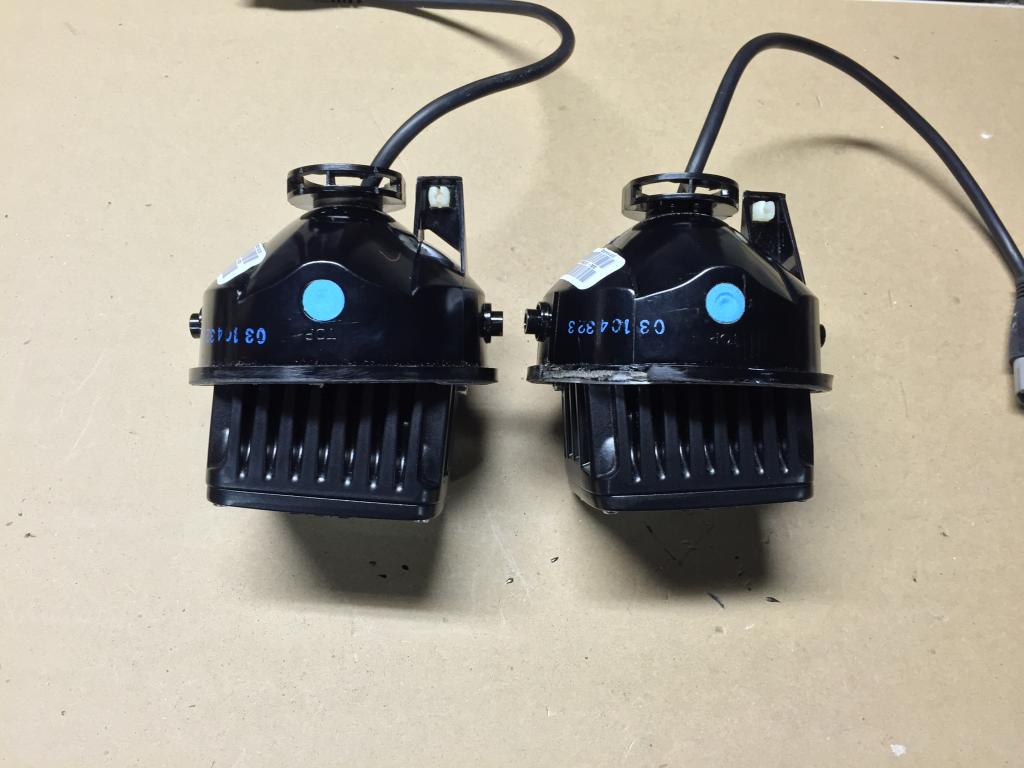
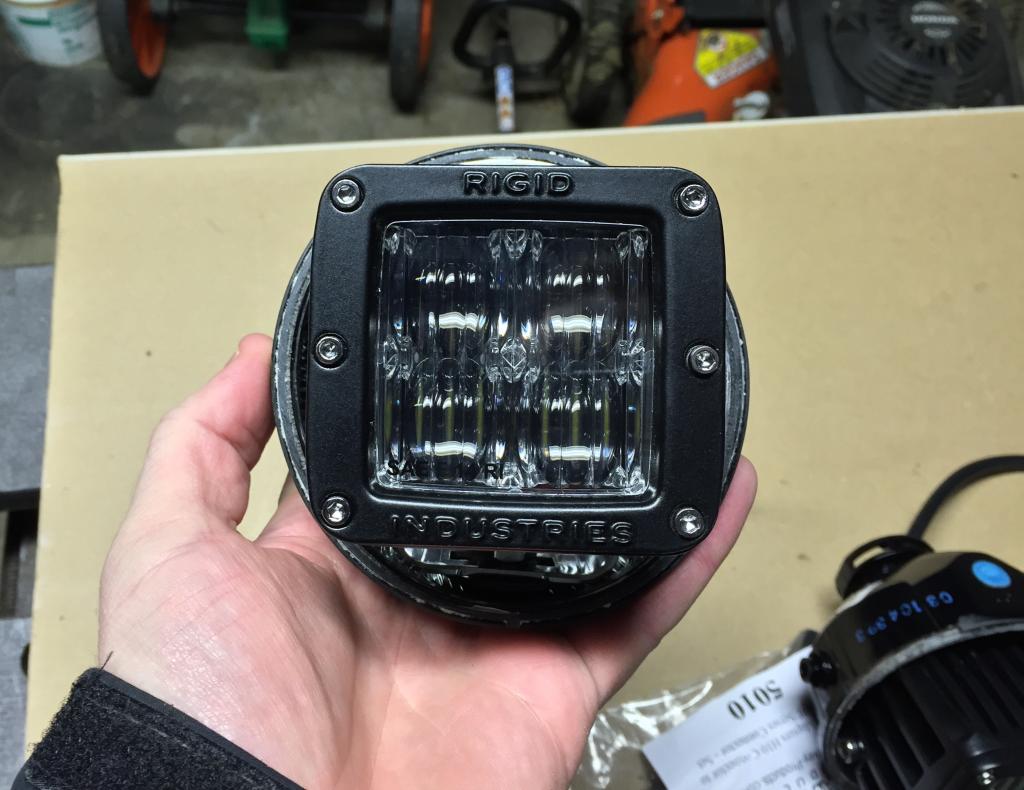
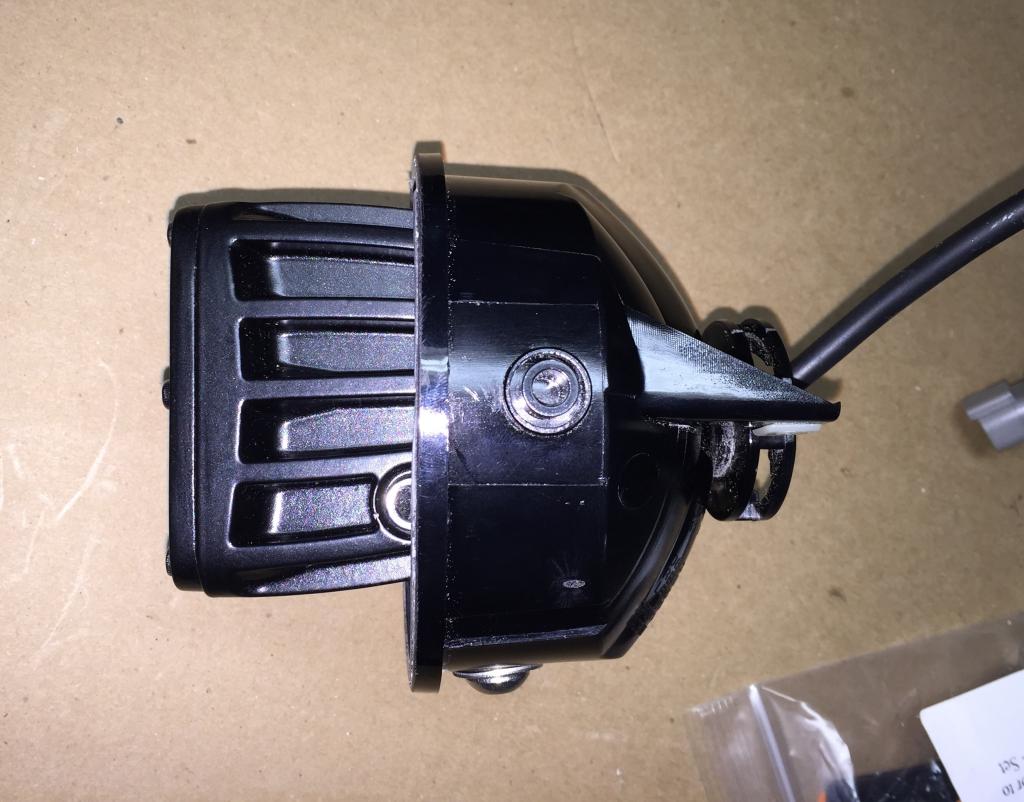
Anyone who has held a Dually knows they are stout...1.1lbs each and well built.
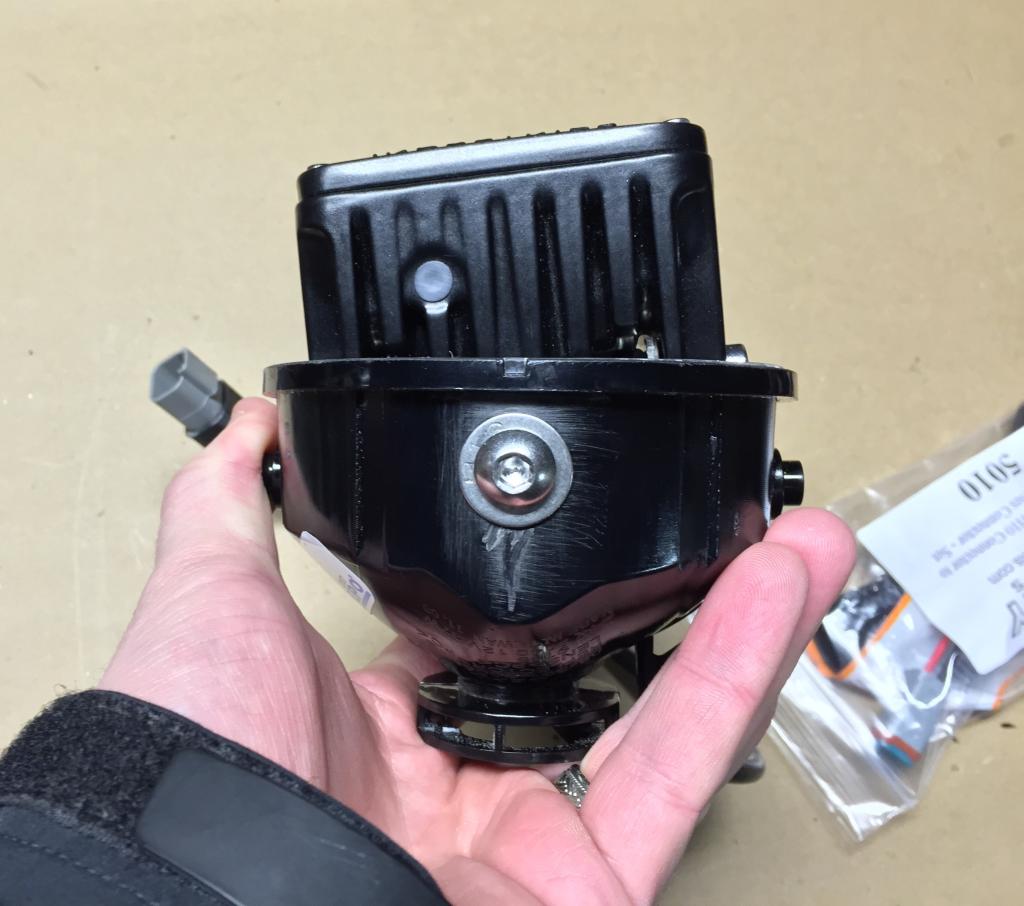
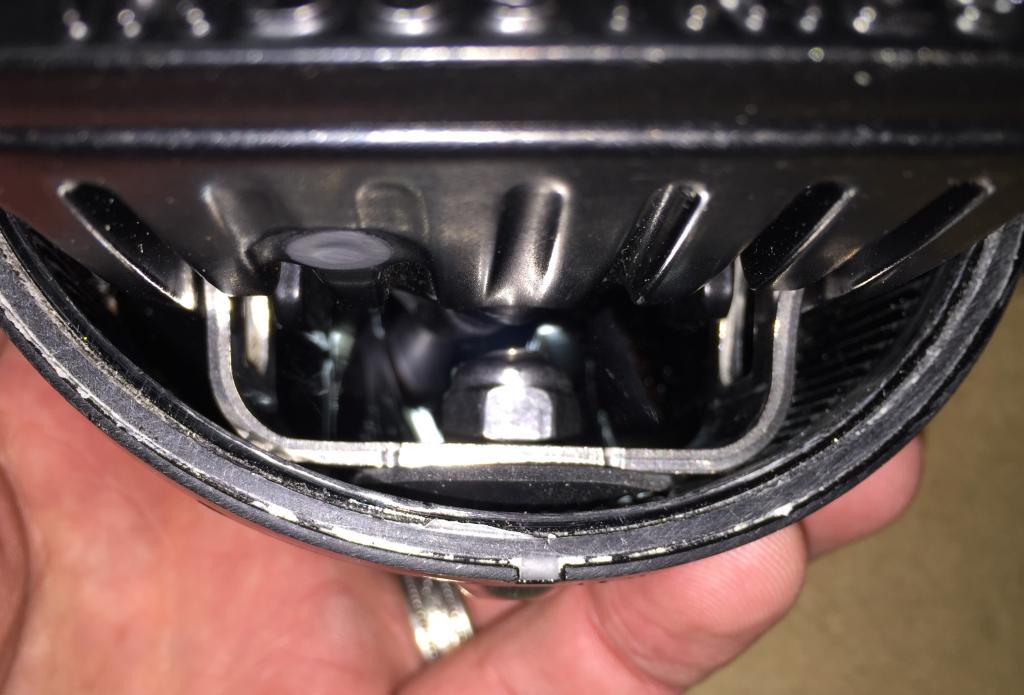
So on with the install. I wanted to mount them on the bottom lip of the reflector housing so that I could I could retain the vertical adjustment of the factory fogs. This greatly aids in the ability to get them aimed/aligned properly and perfectly. Much better than trying to manipulate them by hand. I ventured to the local big box hardware supplier to gran a stainless buttonhead bolt, small washers and a nylock nut. I left with those items and a neoprene washer for each side. I took a fine tooth hacksaw to the lens for removal, cutting directly behind the lens in between the lens and the housing itself. (sorry, forgot a picture of this step). From there it was a matter of drilling a hole in the bottom/center of the housing so that the Dually would sit as far back as possible. Buttonhead bolt up from the bottom with a washer bent to follow the curve of the housing...inside the housing: neoprene washer against the housing, then two small flat washers and the mount sat perfectly flush across the washers and barely contacted the housing. Tightened it all down, clocked each Dually outward a few degrees to avoid overlap and provide additional light to the sides of the truck. I utilized Starkey's H10 to Deutsche adapter so that I didn't have to hack up the truck's wiring or the Dually's connectors. Overall I think it came out pretty well. The one thing I haven't done is paint the reflector buckets...and I'm still thinking that one through.
Enough talk...here are the pics:
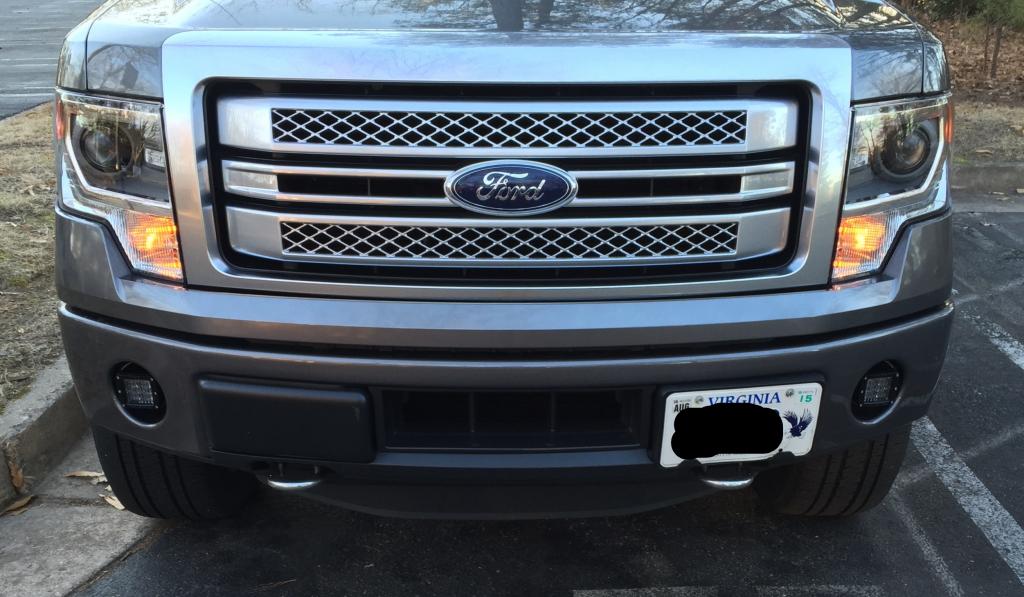
I'll post output shots in the next post. However, here's one with them in the truck:
The box as it arrives from Rigid:

Anyone who has held a Dually knows they are stout...1.1lbs each and well built.
So on with the install. I wanted to mount them on the bottom lip of the reflector housing so that I could I could retain the vertical adjustment of the factory fogs. This greatly aids in the ability to get them aimed/aligned properly and perfectly. Much better than trying to manipulate them by hand. I ventured to the local big box hardware supplier to gran a stainless buttonhead bolt, small washers and a nylock nut. I left with those items and a neoprene washer for each side. I took a fine tooth hacksaw to the lens for removal, cutting directly behind the lens in between the lens and the housing itself. (sorry, forgot a picture of this step). From there it was a matter of drilling a hole in the bottom/center of the housing so that the Dually would sit as far back as possible. Buttonhead bolt up from the bottom with a washer bent to follow the curve of the housing...inside the housing: neoprene washer against the housing, then two small flat washers and the mount sat perfectly flush across the washers and barely contacted the housing. Tightened it all down, clocked each Dually outward a few degrees to avoid overlap and provide additional light to the sides of the truck. I utilized Starkey's H10 to Deutsche adapter so that I didn't have to hack up the truck's wiring or the Dually's connectors. Overall I think it came out pretty well. The one thing I haven't done is paint the reflector buckets...and I'm still thinking that one through.
Enough talk...here are the pics:


I'll post output shots in the next post. However, here's one with them in the truck:


The following 2 users liked this post by MCDavis:
mainemustang (02-05-2015),
RajunKajun59 (03-02-2015)
02-04-2015, 08:49 PM
#2
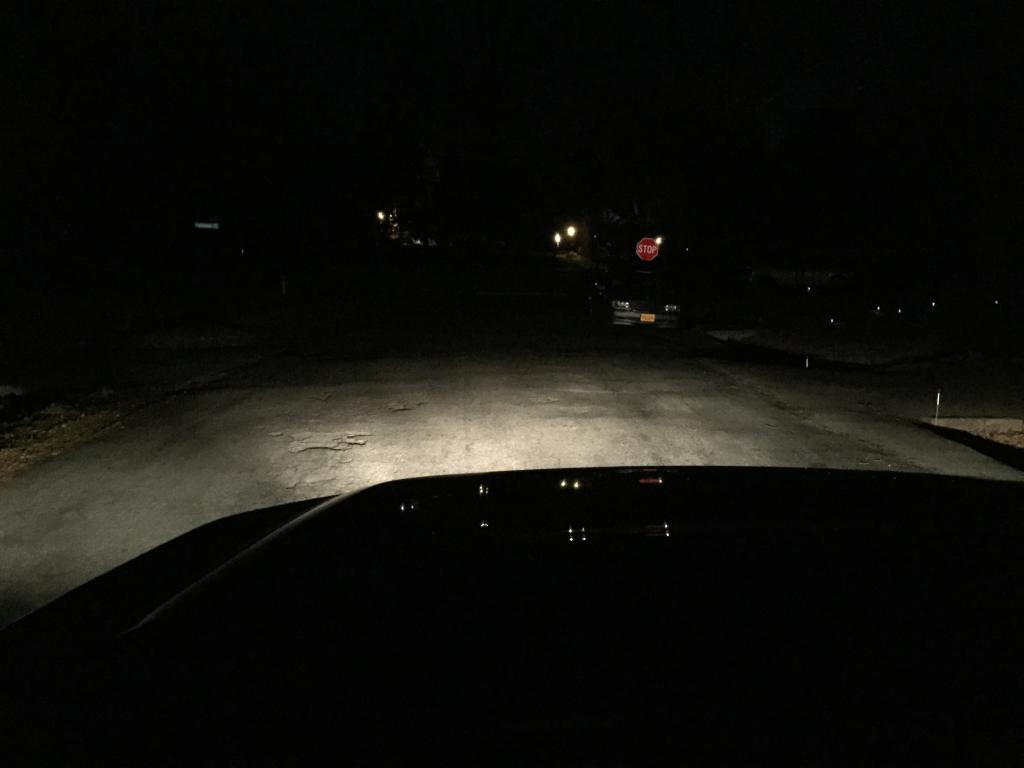
As promised, here are output shots of the stock halogen (9145 Philips bulb) fog lights and then the DOT Duallys.
Stock fogs and HIDs:
Stock fogs only:
DOT Duallys and stock HIDs:
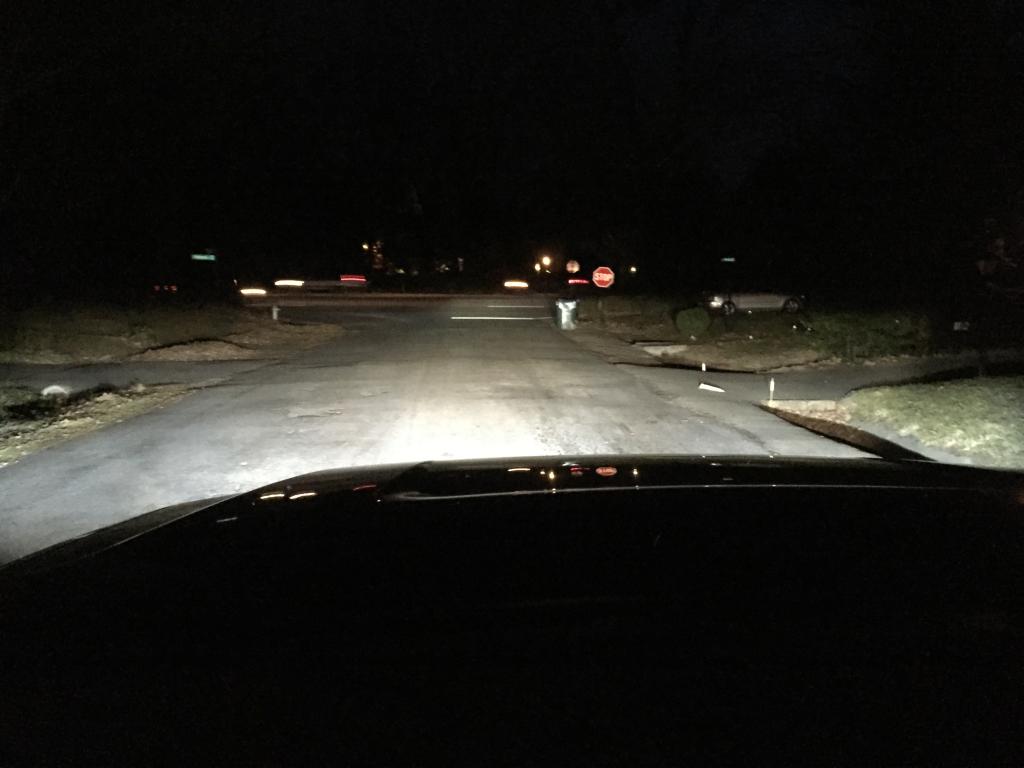
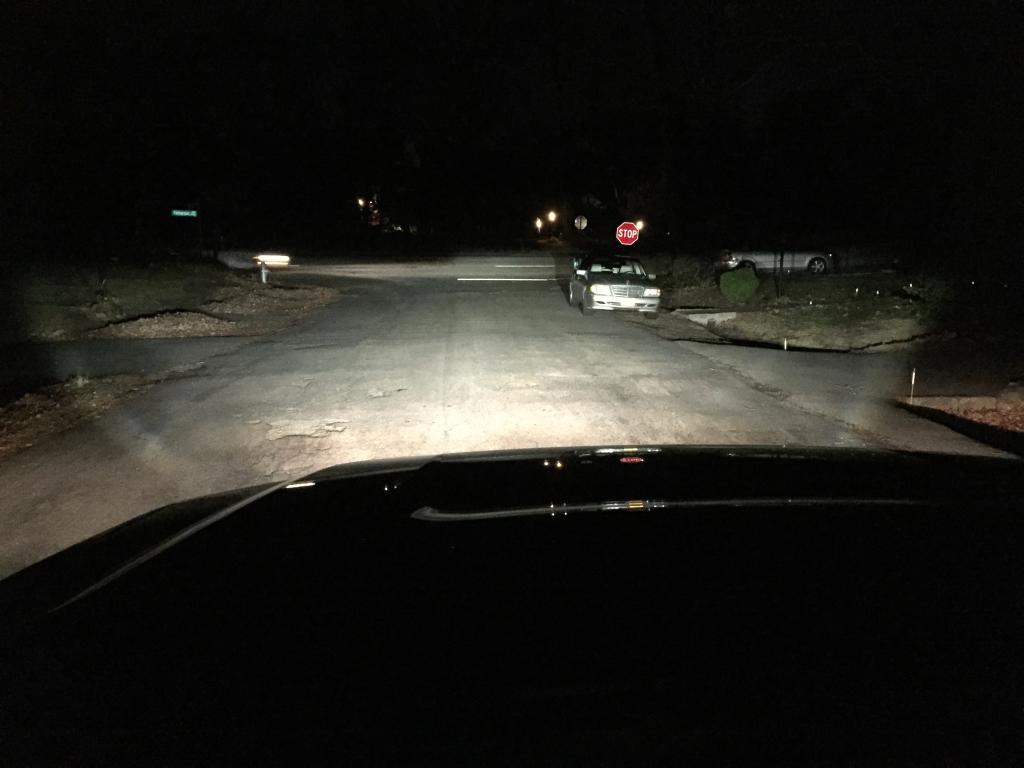
DOT Duallys only:
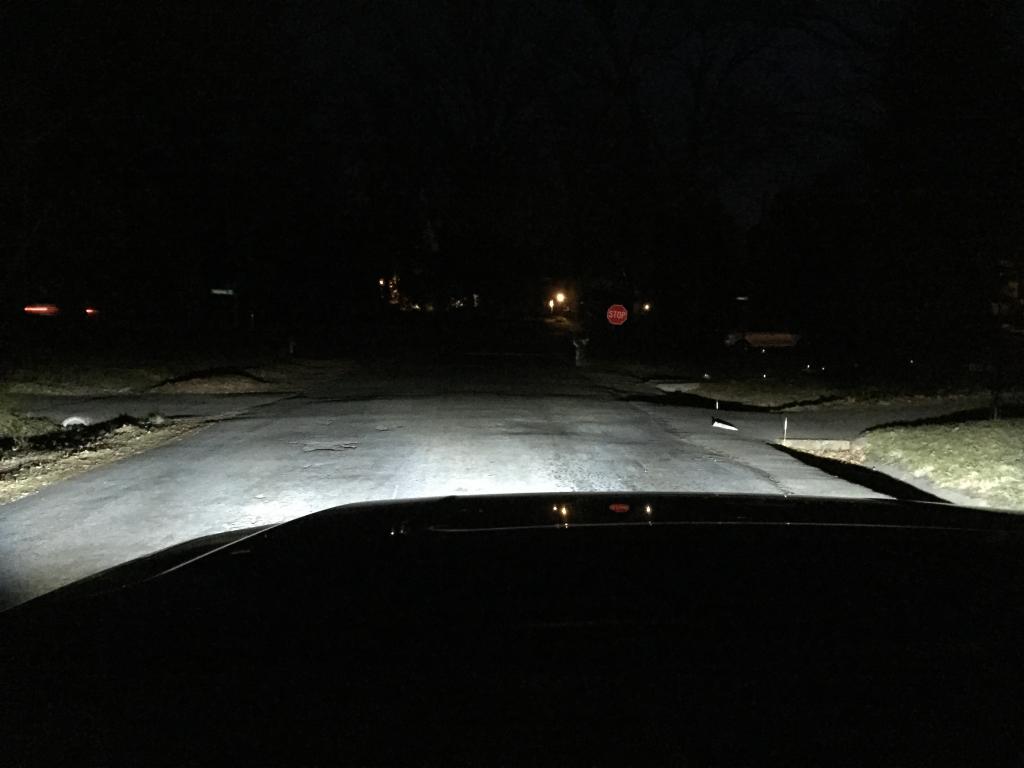
So the two shots were taken back to back nights, and it looks like I was about 20' further back tonight with the Duallys. I'm amazed at how wide the Duallys throw light...claimed to be a 45 degree beam. I clocked them outward quite a bit so that the overlap in front of the truck was minimal. The distribution is great and bright! The cutoff is well defined and I have them aimed to stay well below the HIDs. The light up the ditches really well, much better than I was expecting actually. Sadly, my HIDs now look more yellow than white. Gonna be a while til I correct that though, as I just sold my retrofit for financial reasons.
Enjoy!
Stock fogs and HIDs:

Stock fogs only:

DOT Duallys and stock HIDs:

DOT Duallys only:

So the two shots were taken back to back nights, and it looks like I was about 20' further back tonight with the Duallys. I'm amazed at how wide the Duallys throw light...claimed to be a 45 degree beam. I clocked them outward quite a bit so that the overlap in front of the truck was minimal. The distribution is great and bright! The cutoff is well defined and I have them aimed to stay well below the HIDs. The light up the ditches really well, much better than I was expecting actually. Sadly, my HIDs now look more yellow than white. Gonna be a while til I correct that though, as I just sold my retrofit for financial reasons.
Enjoy!
The following users liked this post:
MCDavis (02-05-2015)
02-05-2015, 08:21 AM
#4
Thanks. I'm happy with the final product. Still need to clean them up a bit (i.e. paint) but the fog housing sits so far back that you basically have to be kneeling and within a few feet of the truck to see the rim where I cut. Also, the driver's side adjustment is such a PITA (thanks Ford) that I may just leave them until its warmer and clean it all up in a few months.

The following users liked this post:
MCDavis (02-05-2015)

The following users liked this post:
MCDavis (02-05-2015)
02-05-2015, 10:10 PM
#10
Thanks guys. For what it's worth, the buttonhead bolt barely drags the fog bucket. The passenger side seems to clear without issue, but the driver's side wasn't 100% aligned tonight...might have to investigate and may need to remove and hit it with a grinding disc...the bolt that is, not the bucket.