Let the fun begin - My 2012 King Ranch Retrofit + Planned step by step
 02-25-2015, 10:40 AM
#31
Senior Member
Thread Starter


Well, thinks have changed a bit.
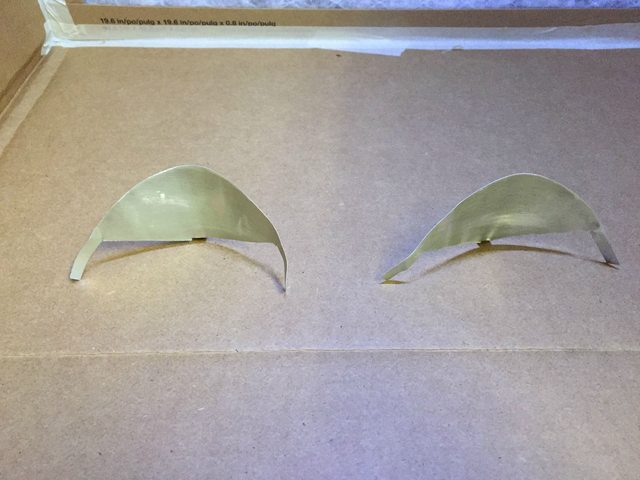
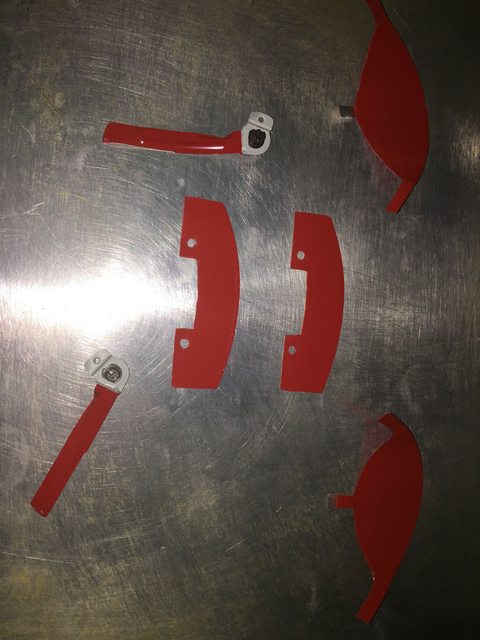
It took a LOT of trial and error to make the proper solenoid cover for the passive demon eye. The stella glass helped a great deal but there was still some minor things to deal. Such as the mounting tab lenght/width and location...
Here's just a few of the many types of shields I cut out of paper.
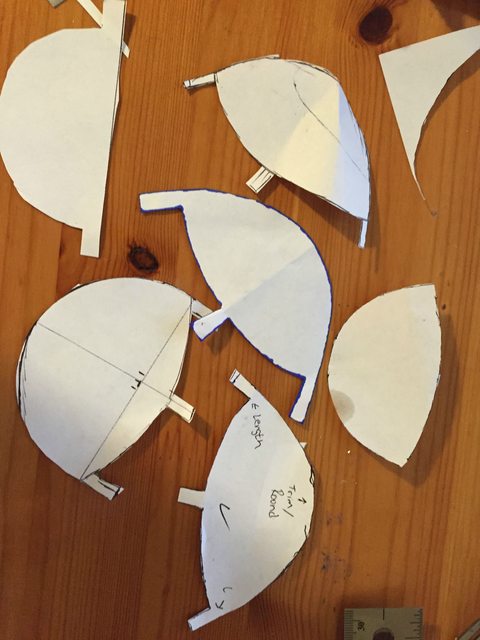
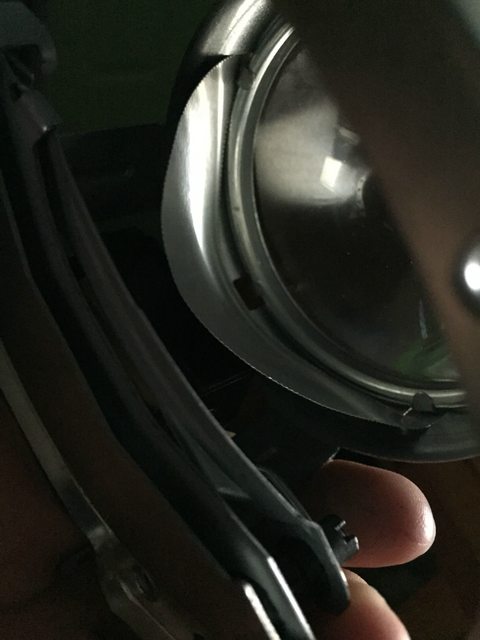
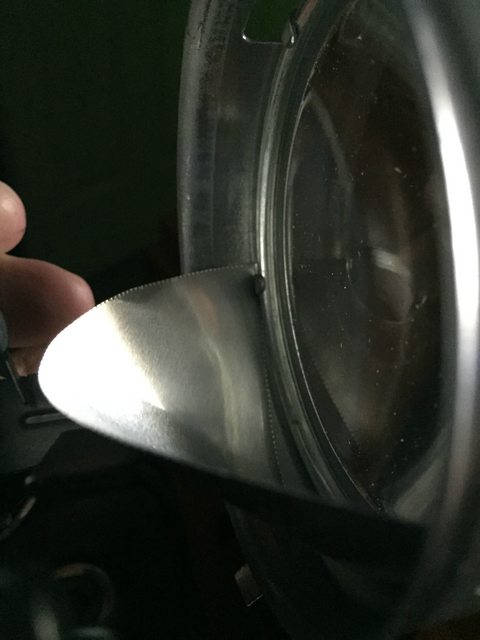
I want to use the slots already available in the lens holder to hold the shield into place. You can see how that mounts in this photo. I've made the curve of the bottom of the shield fit nearly perfectly with the lens clip. However, due to the size of the slot it wiggles a bit and you can see how much it wiggles back also in this pic. A slight oversigt, but it still works. once the tabs are bent into their final place
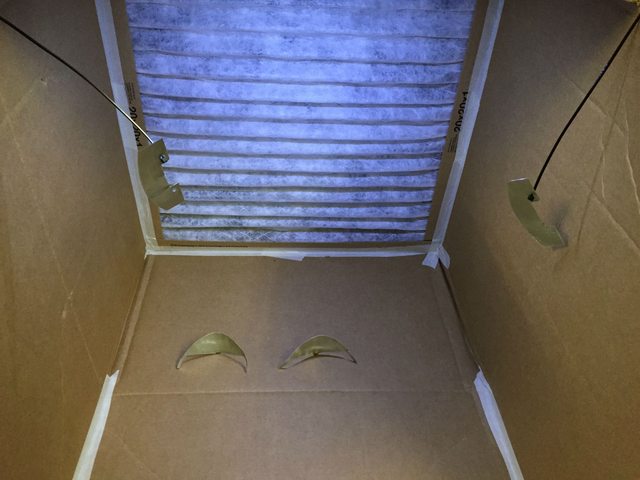
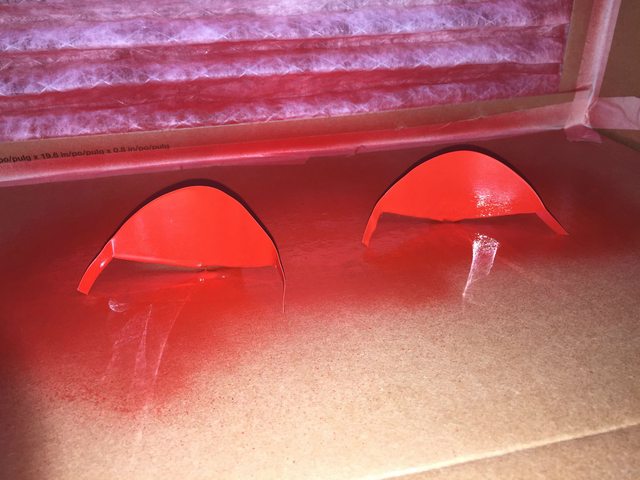
Trying the paint booth. I'll be making a painting how to when I do the bigger pieces. I needed to get these complete as I've been working on the damn shields for a week now because I keep getting interrupted.
I also changed the design of the foreground limiter. I found a thread on HID planet and used someone elses design. They are asymmetrical and designed to put light where it needs to be. I figured I'll try them and if I like them I'll put the details up for everyone. You can see them hanging at the top of the box
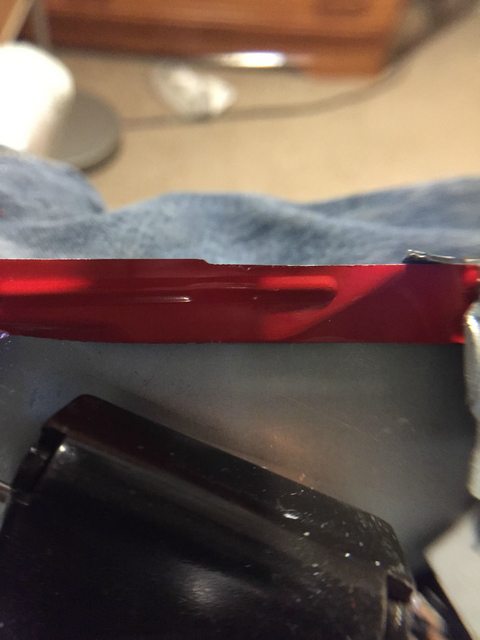
The bend doesn't look great. I used a rolling pin handle to roll the plates into their perfect shape... Unfortunately I had to flatten them some to scuff and paint them. they will be re-rolled once baked
Normally, I wouldn't paint directly onto the surface like this. But these shields won't be seen. I did end up placing them on sockets for their second coating through.
I used Ford Engine Red Engine Enamel for this
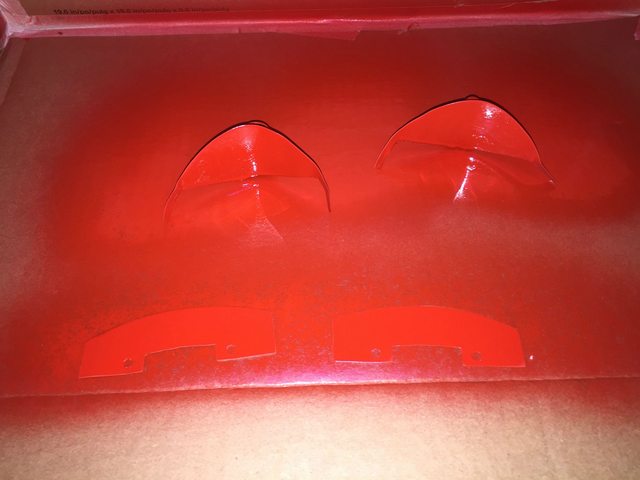
Here you can see the paint booth doing it's job.
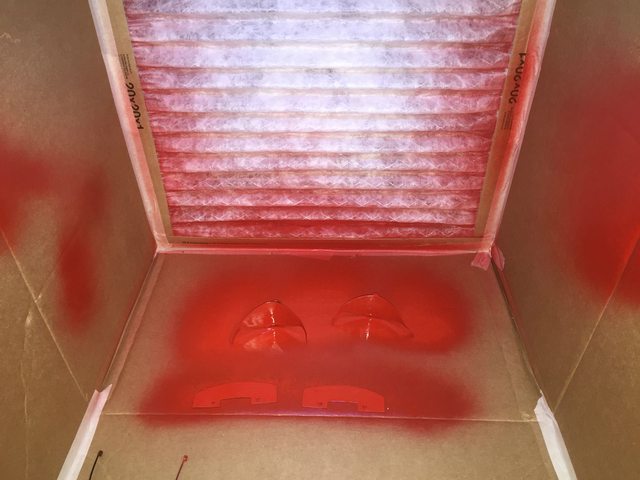
Just in case, I placed a tarp draped over the back of the fan to catch any overspray that may make it through. Id rather the tarp get paint on it than my covered bikes, grill, tools, etc.
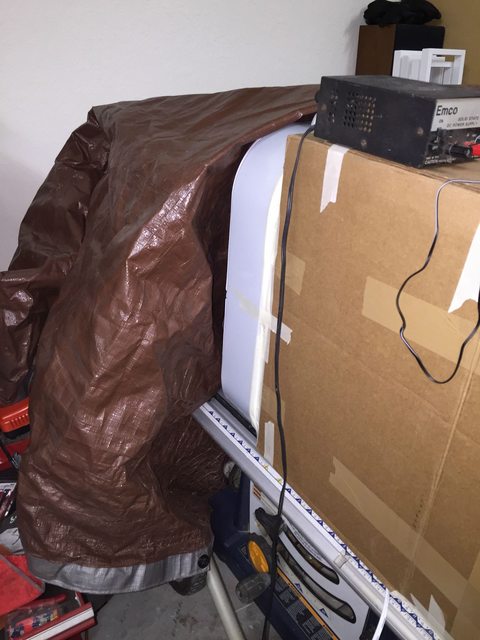
here's my paintbooth with the garage lights off

SOOOOOOO Upon preparing the pieces for baking, i snapped a tab on one of my solenoid covers... I have to recreate a new one and paint it. So this pushes these back a day.
I also removed the cutoff shield from the projector and painted it red, but no photos were taken of that process. I'll do that later.
It took a LOT of trial and error to make the proper solenoid cover for the passive demon eye. The stella glass helped a great deal but there was still some minor things to deal. Such as the mounting tab lenght/width and location...
Here's just a few of the many types of shields I cut out of paper.
I want to use the slots already available in the lens holder to hold the shield into place. You can see how that mounts in this photo. I've made the curve of the bottom of the shield fit nearly perfectly with the lens clip. However, due to the size of the slot it wiggles a bit and you can see how much it wiggles back also in this pic. A slight oversigt, but it still works. once the tabs are bent into their final place
Trying the paint booth. I'll be making a painting how to when I do the bigger pieces. I needed to get these complete as I've been working on the damn shields for a week now because I keep getting interrupted.
I also changed the design of the foreground limiter. I found a thread on HID planet and used someone elses design. They are asymmetrical and designed to put light where it needs to be. I figured I'll try them and if I like them I'll put the details up for everyone. You can see them hanging at the top of the box
The bend doesn't look great. I used a rolling pin handle to roll the plates into their perfect shape... Unfortunately I had to flatten them some to scuff and paint them. they will be re-rolled once baked
Normally, I wouldn't paint directly onto the surface like this. But these shields won't be seen. I did end up placing them on sockets for their second coating through.
I used Ford Engine Red Engine Enamel for this
Here you can see the paint booth doing it's job.
Just in case, I placed a tarp draped over the back of the fan to catch any overspray that may make it through. Id rather the tarp get paint on it than my covered bikes, grill, tools, etc.
here's my paintbooth with the garage lights off
SOOOOOOO Upon preparing the pieces for baking, i snapped a tab on one of my solenoid covers... I have to recreate a new one and paint it. So this pushes these back a day.
I also removed the cutoff shield from the projector and painted it red, but no photos were taken of that process. I'll do that later.
 02-25-2015, 10:21 PM
#32
Senior Member
Thread Starter
Quickly recreated the new Solenoid cover, painted it, let it sit for an hour, then baked everything at 200 degrees for 1 hour today.
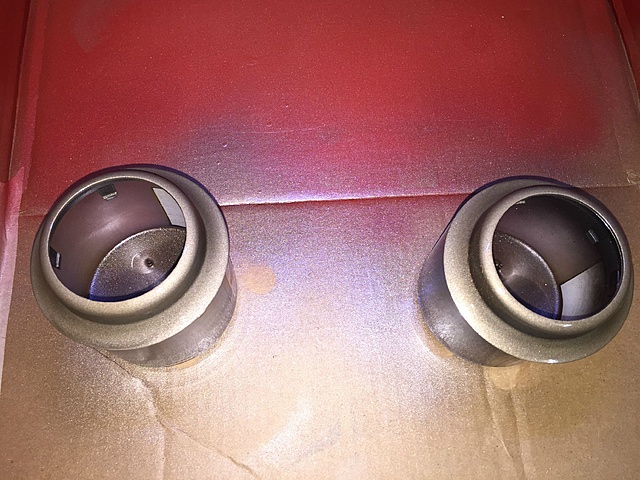
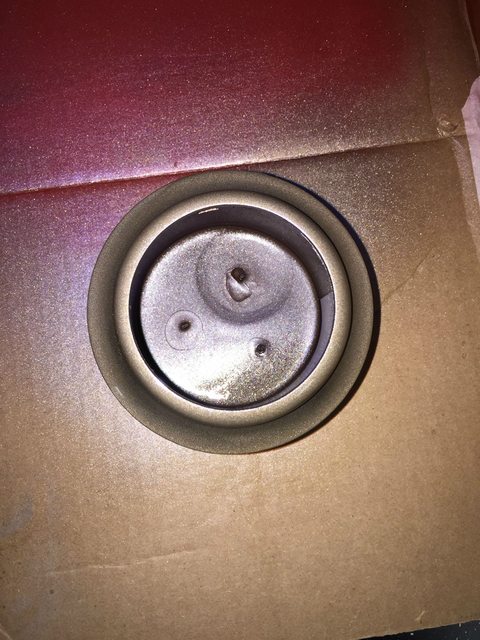
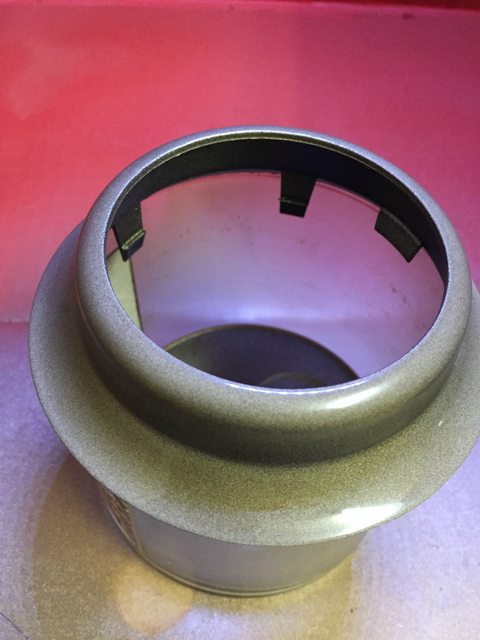
This arm is the high beam arm, it moves down to open up the high beam area. A VERY IMPORTANT NOTE - I screwed up. I didn;t know how these arms released so I bent back the retaining tab, tilted it up, then used a screwdriver to pop them off their plastic swivels. This is WRONG.
Once you bend the retaining tab out of the way, gently allow the solenoid to pull the arm into the fully up position, then with a little maneuvering you need to get the arm tilted even more and it'll gently slide right off. The plastic swivel is notched to retain the cutoff arm. It'll still work if you put it together, but I'm now forever worried about the arm coming loose. It shouldn't though I shook these things all over the place and it never moved.
Arm through the lense
02-25-2015, 11:03 PM
#33
Senior Member
Thread Starter
FINALLY ONTO PAINT PREP:
If you've never ever painted with aerosol cans before. I highly suggest you practice first. There's a right way to spray and a wrong way to spray. But your most important thing about painting is PREPARATION.
Paint is simply a pretty colored mirror of what is underneath it... These shrouds, are BARELY visible, but I completely sanded them and prepped them for the purpose of this walkthrough AND to be sure the paint never peels in any way.
Materials used:
200 grit sandpaper
600 grit sandpaper
denatured alcohol - http://en.wikipedia.org/wiki/Denatured_alcoholtack cloth - http://en.wikipedia.org/wiki/Tack_clothDuplicolor Adhesion Promotor
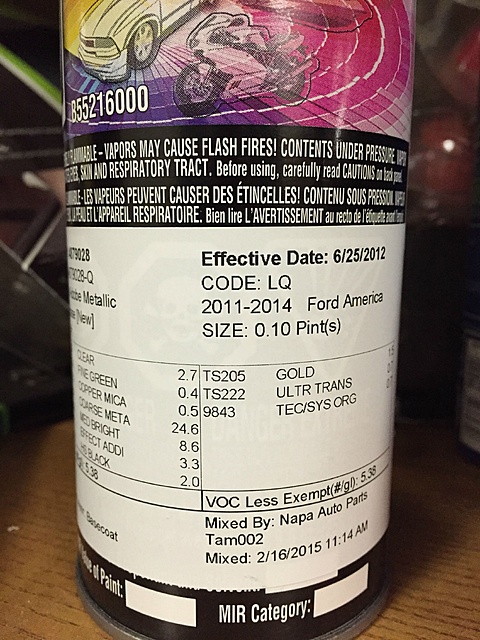
NAPA/Martin Senour/Krylon mixed paint - Pale Adobe Metallic
Duplicolor Clear Cote
Step 1:
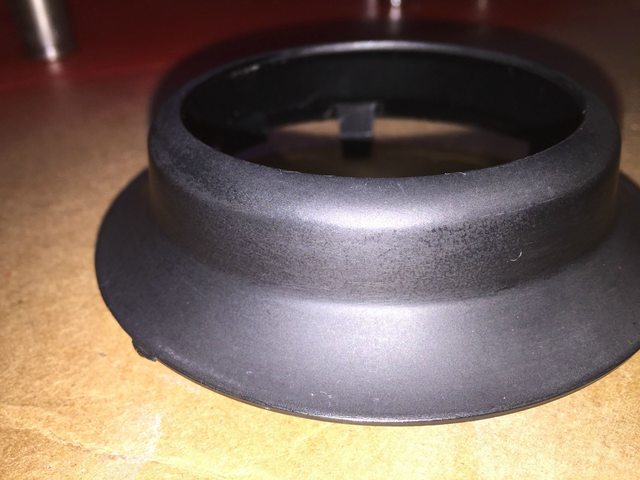
Sand! Sanding is critical to painting. You can't paint a super smooth surface, paint would never stick to it and peel right off like plastidip. It'll look horrible too. These shrouds are gloss finished plastic and are very very smooth.
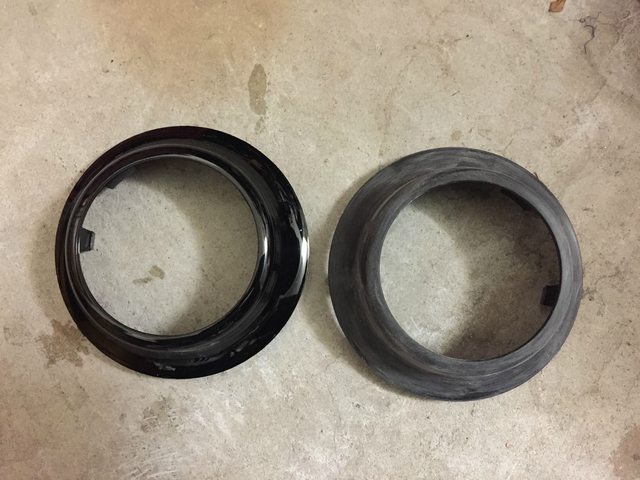
2 - Starting with the 200 grit, I began lightly sanding the nice shiny shroud around the edges. I worked clockwise around the shroud and with the shape of the item. starting from the very outter edge up the sides and to the opening for the lens. I paid careful attention to the lens opening and face since this will be very very visible.
Before Sanding:
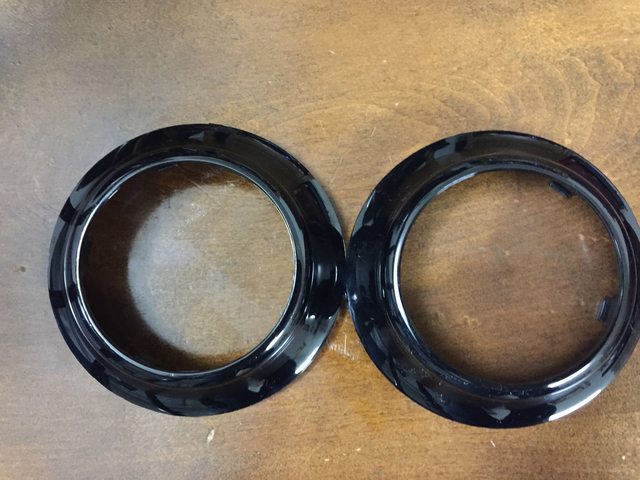
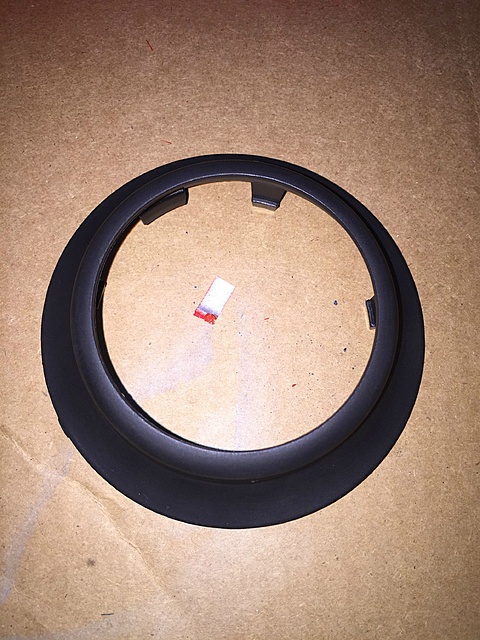
After Sanding with 200 grit.
I then repeated the steps with 600 grit. I would normally do 200-400-600 but since the item was already very smooth with no imperfections, and the 200 was to put the scuffs in it, the 600 simply removed the deep marring and smooth everything out, while still leaving enough scratches for the paint to grab to. No pics of that process, because it's the same.
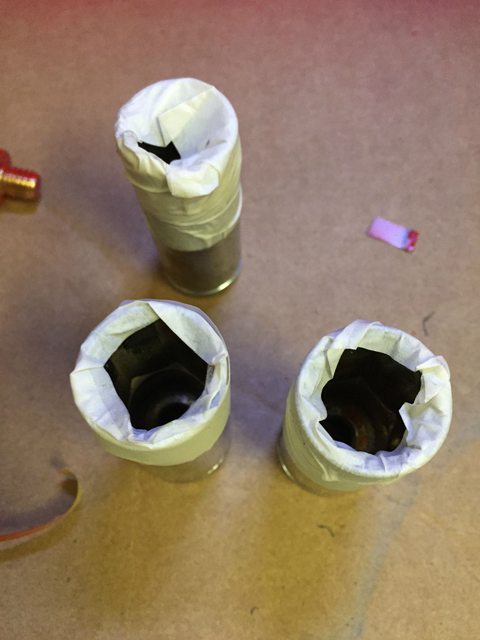
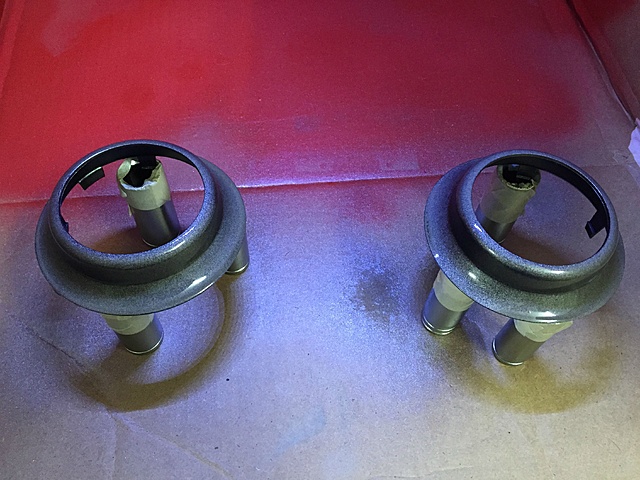
I have not yet created my lazy susan for painting in the booth yet. I improvised. I wanted the shrouds to be raised but still very accessible from all sides for paint to reach. I took 6 sockets, wrapped them in masking tape and used them as stands for the shrouds for the adhesion promoter.
Step 2) de-greasing and tacking
-After you've handled the part, even if you're wearing nitrile gloves, there is a chance of oils being on the shroud from allt he handling they've been through at this point. Denatured alcohol is a great thing to use for the oil/grease removal. Simply wet a CLEAN towel and begin to wipe the item you're painting down. Wear nitrile/latex gloves during this process to avoid reintroducing a contaminate to your part.
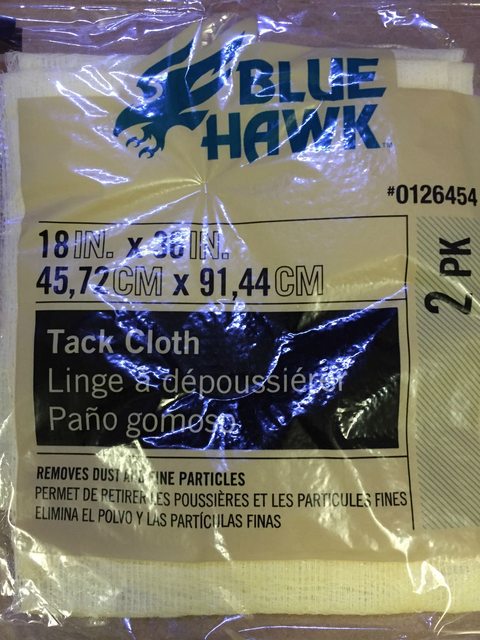
- After your de-greasing open your tack rag hold your shroud/part by a place that won't be painted and gently wipe the tack rag over your part. This removes all remaining dust/dirt that may be on your part to be painted.
Tack rag -
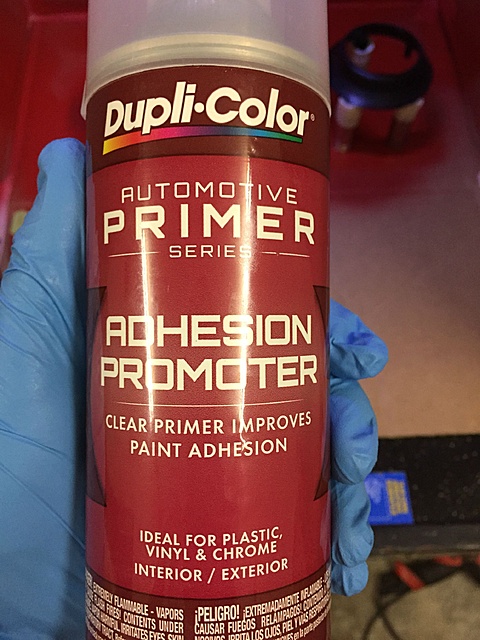
Now for the adhesion promotor. I've never ever ever used the stuff to paint plastics before. So this is a new one for me. I've always prepped and primered with standard primer. Due to the heat these will be subjected to, I wanted to be sure there were zero issues.
I like the adhesion promoter. It did a decent job, but it took me a few practice pieces to get it right. Even then, the humidity in my garage due to the rain outside (I had the door cracked) and the fan pulling everything past the parts created a bit of dew. I had to wet sand the parts, shut the door, let the humidity go down and respray (Didn't take photos of this as I was too concentrated)
here's the dewy part, it looks like overspray/run but it really is not.
oh I lied, I did take one photo after redoing the primer before the actual base coat
For the initial primering and base coat I had the shrouds on my sockets. It worked great for getting under them without needing to touch them. This is my first, very light, coat of Pale Adobe
It's VERY VERY VERY important to note, that when spray painting with aerosol you don't just hold the button and shake your hand all over the place like a fly roaming around stinky poo or a garbage can.... There's a correct technique to it to make it even. THis video I found on youtube is the closest thing I could find in a hurry to help you out
Nice even back and forth motions.
Here is my 2nd coat of Pale Adobe. I've now moved them into old candles since they were the perfect size. I could reach in and turn the candles as needed to turn the shrouds
If you've never ever painted with aerosol cans before. I highly suggest you practice first. There's a right way to spray and a wrong way to spray. But your most important thing about painting is PREPARATION.
Paint is simply a pretty colored mirror of what is underneath it... These shrouds, are BARELY visible, but I completely sanded them and prepped them for the purpose of this walkthrough AND to be sure the paint never peels in any way.
Materials used:
200 grit sandpaper
600 grit sandpaper
denatured alcohol - http://en.wikipedia.org/wiki/Denatured_alcoholtack cloth - http://en.wikipedia.org/wiki/Tack_clothDuplicolor Adhesion Promotor
NAPA/Martin Senour/Krylon mixed paint - Pale Adobe Metallic
Duplicolor Clear Cote
Step 1:
Sand! Sanding is critical to painting. You can't paint a super smooth surface, paint would never stick to it and peel right off like plastidip. It'll look horrible too. These shrouds are gloss finished plastic and are very very smooth.
2 - Starting with the 200 grit, I began lightly sanding the nice shiny shroud around the edges. I worked clockwise around the shroud and with the shape of the item. starting from the very outter edge up the sides and to the opening for the lens. I paid careful attention to the lens opening and face since this will be very very visible.
Before Sanding:
After Sanding with 200 grit.
I then repeated the steps with 600 grit. I would normally do 200-400-600 but since the item was already very smooth with no imperfections, and the 200 was to put the scuffs in it, the 600 simply removed the deep marring and smooth everything out, while still leaving enough scratches for the paint to grab to. No pics of that process, because it's the same.
I have not yet created my lazy susan for painting in the booth yet. I improvised. I wanted the shrouds to be raised but still very accessible from all sides for paint to reach. I took 6 sockets, wrapped them in masking tape and used them as stands for the shrouds for the adhesion promoter.
Step 2) de-greasing and tacking
-After you've handled the part, even if you're wearing nitrile gloves, there is a chance of oils being on the shroud from allt he handling they've been through at this point. Denatured alcohol is a great thing to use for the oil/grease removal. Simply wet a CLEAN towel and begin to wipe the item you're painting down. Wear nitrile/latex gloves during this process to avoid reintroducing a contaminate to your part.
- After your de-greasing open your tack rag hold your shroud/part by a place that won't be painted and gently wipe the tack rag over your part. This removes all remaining dust/dirt that may be on your part to be painted.
Tack rag -
Now for the adhesion promotor. I've never ever ever used the stuff to paint plastics before. So this is a new one for me. I've always prepped and primered with standard primer. Due to the heat these will be subjected to, I wanted to be sure there were zero issues.

I like the adhesion promoter. It did a decent job, but it took me a few practice pieces to get it right. Even then, the humidity in my garage due to the rain outside (I had the door cracked) and the fan pulling everything past the parts created a bit of dew. I had to wet sand the parts, shut the door, let the humidity go down and respray (Didn't take photos of this as I was too concentrated)
here's the dewy part, it looks like overspray/run but it really is not.
oh I lied, I did take one photo after redoing the primer before the actual base coat

For the initial primering and base coat I had the shrouds on my sockets. It worked great for getting under them without needing to touch them. This is my first, very light, coat of Pale Adobe


It's VERY VERY VERY important to note, that when spray painting with aerosol you don't just hold the button and shake your hand all over the place like a fly roaming around stinky poo or a garbage can.... There's a correct technique to it to make it even. THis video I found on youtube is the closest thing I could find in a hurry to help you out
Nice even back and forth motions.
Here is my 2nd coat of Pale Adobe. I've now moved them into old candles since they were the perfect size. I could reach in and turn the candles as needed to turn the shrouds
 02-25-2015, 11:03 PM
#34
Senior Member
Thread Starter
Overhead view:
Clearing is the same instructions as painting. Nice even side to side motion. My only complaint with Aerosol clear is that it always leaves the part a little hazy.
After curing for at least a week, I'll lightly buff the parts. (Being careful not to overheat/warp them) and it'll bring their shine back
Then they will sit for 3-4 agonizing weeks to off-gas. You do NOT want to put these into housings and seal them up immediately, as your housings will fog beyond belief.
important note, in case you're not waiting for my instructions NEVER EVER EVER EVER EVER put Denatured Alcohol onto CLEAR plastic. It's a different composition. The extreme cold nature of denatured (haha) alcohol will crack the plastic!
Tomorrow I will prep the headlight inserts for painting of Golden Bronze Metallic. Maybe I'll charge the gopro and make a painting vid.
02-27-2015, 06:20 PM
#35
Senior Member
Thread Starter
ONE OF A B-WORD!
I was priming the internal bezelss and a bug flew in UNDER my cracked garage door, flitted around a bit and landed right on my freshly sprayed passenger side bezel and proceeded to roll around until I got the tweezers to get him out
NOW, i have to wait for the adhesion primer to dry, so I can wet sand it, and start all over.... I really want to get these painted so they can outgas and I can continue on preparing the rest!
03-01-2015, 02:04 PM
#36
Texas A&M Aggie

I'm about to embark on this myself in my 07's headlights. Is 3-4 weeks how long automotive paint takes to off-gas? I'm impatient and don't want to wait that long! Haha
Also, do you have any pictures of a passive demon eye lit up with HIDs? I'm interested in doing it, but I don't want a red tint to my lights when my low beams are on.
Also, do you have any pictures of a passive demon eye lit up with HIDs? I'm interested in doing it, but I don't want a red tint to my lights when my low beams are on.
Last edited by tareed94; 03-01-2015 at 02:44 PM.
03-01-2015, 03:00 PM
#37
Senior Member
Thread Starter
I'm about to embark on this myself in my 07's headlights. Is 3-4 weeks how long automotive paint takes to off-gas? I'm impatient and don't want to wait that long! Haha
Also, do you have any pictures of a passive demon eye lit up with HIDs? I'm interested in doing it, but I don't want a red tint to my lights when my low beams are on.
Also, do you have any pictures of a passive demon eye lit up with HIDs? I'm interested in doing it, but I don't want a red tint to my lights when my low beams are on.
I know that Bilinvic Retrofits waits that long. Having worked in plastics and painting plastics in the past, I can tell you it takes a while for the paint to gas out/offgas.
I'm probably the most impatient when it comes to cool toys like this. However, it's not a small undertaking, there's been a lot of re-figuring and re-doing things in order to make this work correctly.
I won't have these installed onto my truck fully until the end of March, at least.
I'm shooting for a final completion date of April 11. There will be a lot more pictures of progress tonight.
I'll get the projectors fully together for the demon eye view too. THey won't be visible with the lights on. Only with them off.
03-01-2015, 03:22 PM
#38
Senior Member
Thread Starter
PERFECT EXAMPLE of why you don't rush....
So I took a break between coats, to respond to this thread that I got a notification for. I set the CAP to the spray can on top of my paint booth. I've had another cap up there for a week, didn't think anything of it.
The new cap is much lighter, apparently... and shook off the edge of the box, right onto the passenger side bezel.
Now, there's a nice 1/2" gash in the fresh Golden Bronze Metallic paint that I must let dry/cure a bit so that I can wet sand it and fix the gouge.
As I said before, I'm typically very careful with this stuff, I like my stuff to be perfect, tiny little details with F your day up. Now I'm set back some more but only by a day or so as I sand, fix, repaint and clear.