Let the fun begin - My 2012 King Ranch Retrofit + Planned step by step
 02-14-2015, 01:13 AM
#11
Senior Member
Thread Starter


So both headlights are open. It's been a while since I've worked with plastics of this magnitude so I was being overly cautious, but once I got things dialed in it's a piece of cake.
The first headlight ~30 minutes and three warm ups until I could get it open. Started at 250 for 10 minutes. Finally settled on 285 for 13 minutes (Just made sense since it's Friday the 13th lol).
The 2nd headlight ~5 minutes to get it open - 285 Degrees for 13 minutes. Then 285 for 2 minutes because I had one corner that had cooled down too quickly and I wasn't about to break anything by pulling more.
STEP 1: Gather Supplies
Gloves to protect your hands... I'm using an old set of motorcycle gloves.
Flat head screwdrivers (1-3 for leverage)
Miniature metal rubber coated pry bar
flashlight was used to look inside housings for extra screws
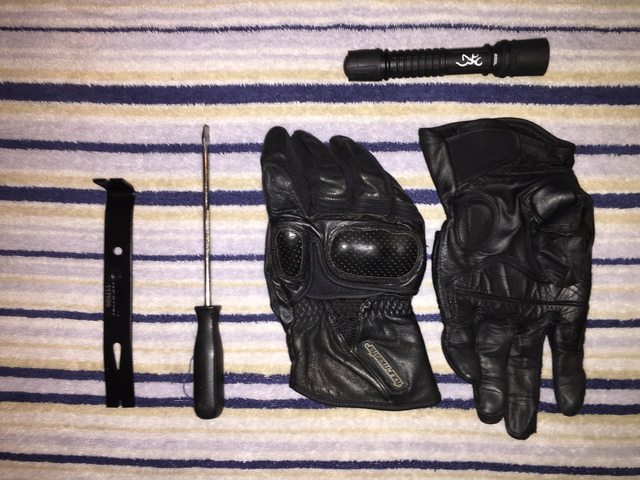
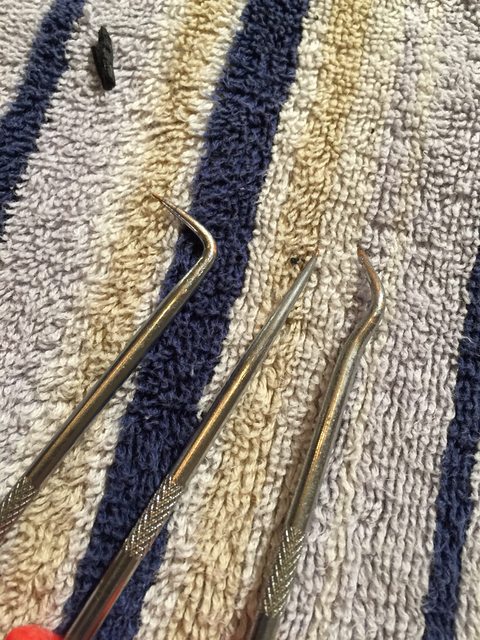
The most helpful tools were these picks from Harbor Freight
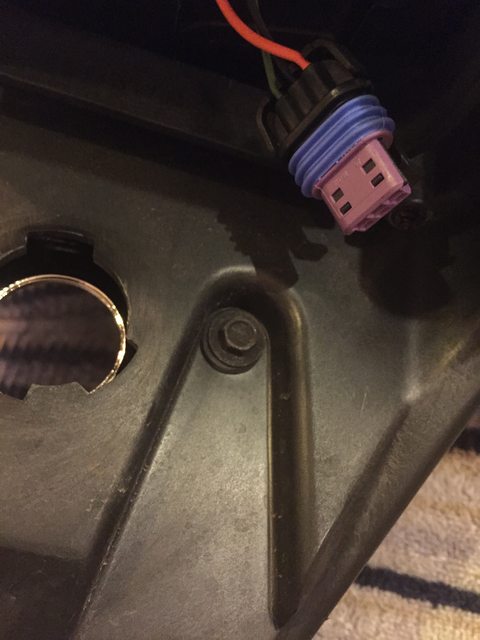
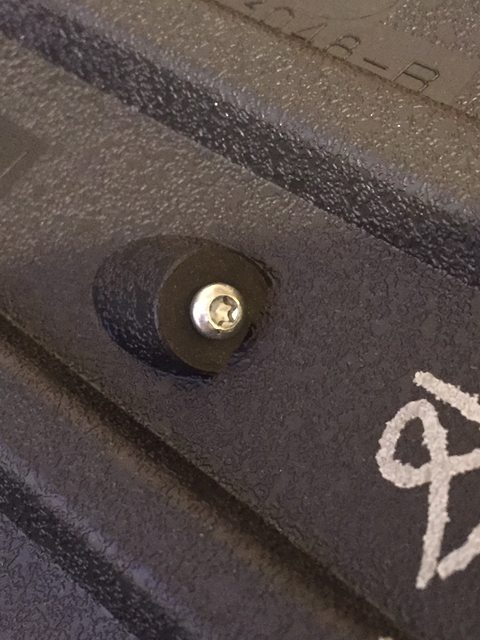
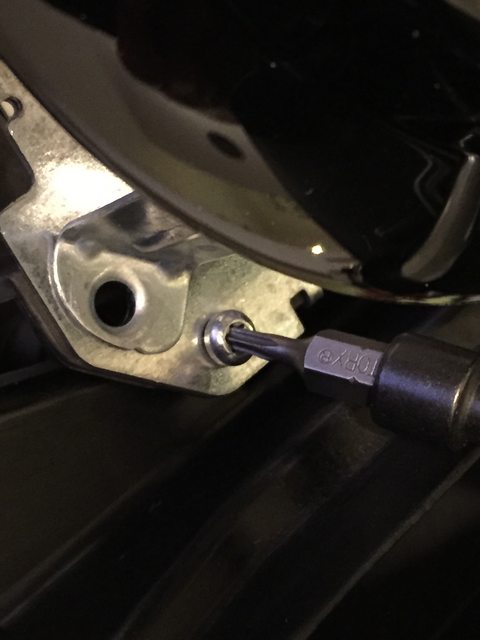
Step 2: Remove this screw using a 7mm Socket from the back of the housing near the turn signal bulb socket - Don't forget to take the rubber washer off with it. Store in a safe place
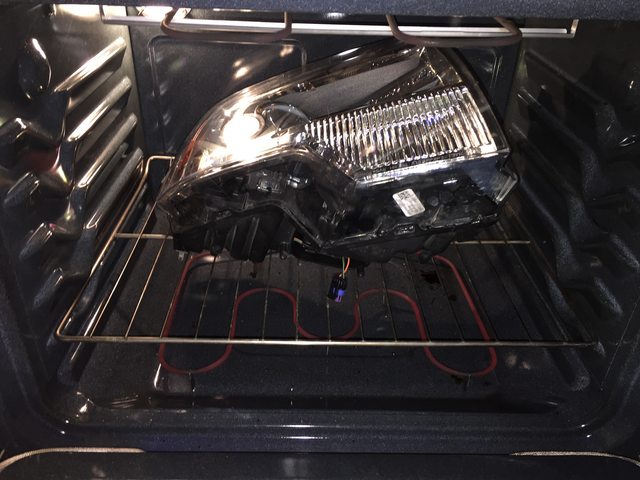
Step 3: Preheat Oven to 285 - Place housing in over... Not pictured - I used a piece of 2x4 to hold the housing up in the back so the big bracket didn't melt/bend
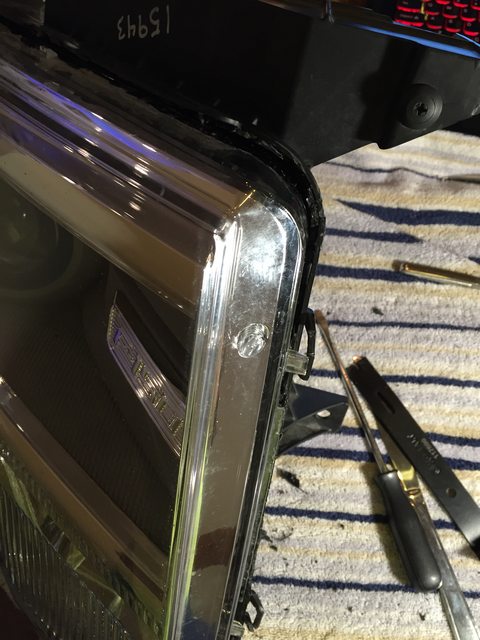
Strep 4: I started in the top corner of the housings as it's a very tight corner. The other corners toward the bottom fo the face of the housing and near the turn signal aren't as tight with spacing and I wanted to start with the hardest part and go from there.... I used the angled pick to get between the clear plastic and the abs plastic housing to simply pull out the Permaseal.... It didn't get it all out but it made a huge difference.
This is after using a pick to start, then the flathead, then the pry bar to open the housing..
the 2nd headlight had more permaseal along the long edge of the lens. I used a utility knife to score the permaseal then the pick the scrape it away. This will be cleaned up with a dremel to look new again.
After pulling the clear plastic from the housing, wrap the clear lens in cling wrap to keep it protected... You can also put it in a bag. You don't want dirt getting inside the lens!
OR - If you'll be doing work to the insides of the housing... Remove the T10 screws located around the inside of the housing
Carefully separate the chrome surround from the grey insert
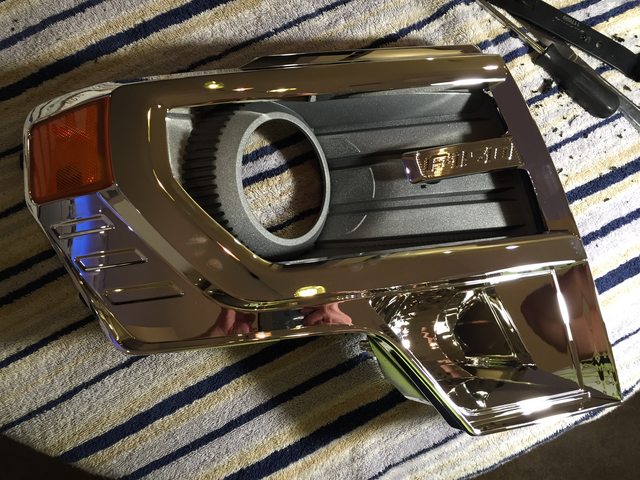
Wrap/Bag the chrome to keep it from getting scratched!
I will be painting this insert Golden Bronze Metallic to match the truck
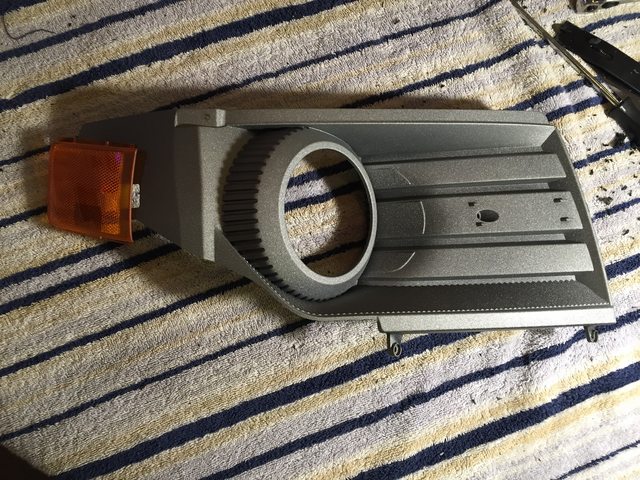
Additionally... I'll be installing some Alpeena MAX LED Strips behind the reflector to take place of the stock Incandescent bulb... I had the option of going with XBLed's but, I have extra amber strips laying around.
The first headlight ~30 minutes and three warm ups until I could get it open. Started at 250 for 10 minutes. Finally settled on 285 for 13 minutes (Just made sense since it's Friday the 13th lol).
The 2nd headlight ~5 minutes to get it open - 285 Degrees for 13 minutes. Then 285 for 2 minutes because I had one corner that had cooled down too quickly and I wasn't about to break anything by pulling more.
STEP 1: Gather Supplies
Gloves to protect your hands... I'm using an old set of motorcycle gloves.
Flat head screwdrivers (1-3 for leverage)
Miniature metal rubber coated pry bar
flashlight was used to look inside housings for extra screws
The most helpful tools were these picks from Harbor Freight
Step 2: Remove this screw using a 7mm Socket from the back of the housing near the turn signal bulb socket - Don't forget to take the rubber washer off with it. Store in a safe place
Step 3: Preheat Oven to 285 - Place housing in over... Not pictured - I used a piece of 2x4 to hold the housing up in the back so the big bracket didn't melt/bend
Strep 4: I started in the top corner of the housings as it's a very tight corner. The other corners toward the bottom fo the face of the housing and near the turn signal aren't as tight with spacing and I wanted to start with the hardest part and go from there.... I used the angled pick to get between the clear plastic and the abs plastic housing to simply pull out the Permaseal.... It didn't get it all out but it made a huge difference.
This is after using a pick to start, then the flathead, then the pry bar to open the housing..
the 2nd headlight had more permaseal along the long edge of the lens. I used a utility knife to score the permaseal then the pick the scrape it away. This will be cleaned up with a dremel to look new again.
After pulling the clear plastic from the housing, wrap the clear lens in cling wrap to keep it protected... You can also put it in a bag. You don't want dirt getting inside the lens!
OR - If you'll be doing work to the insides of the housing... Remove the T10 screws located around the inside of the housing
Carefully separate the chrome surround from the grey insert
Wrap/Bag the chrome to keep it from getting scratched!
I will be painting this insert Golden Bronze Metallic to match the truck
Additionally... I'll be installing some Alpeena MAX LED Strips behind the reflector to take place of the stock Incandescent bulb... I had the option of going with XBLed's but, I have extra amber strips laying around.
 02-14-2015, 01:36 AM
#12
Senior Member
Thread Starter
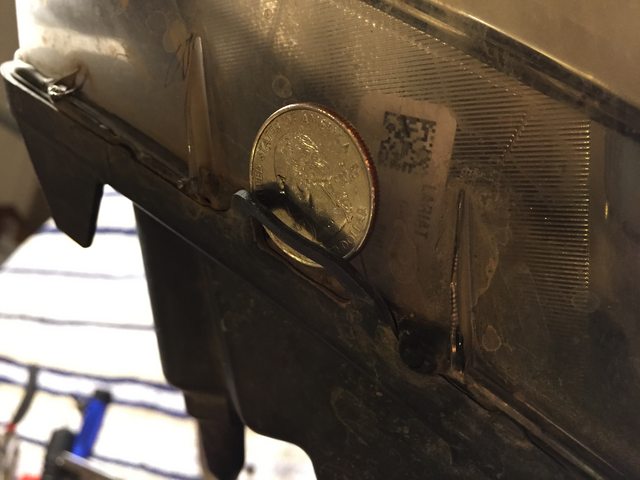
One thing that helped me save tabs was QUARTERS... They were the perfect size to stick into the tabs and keep them pried up. Unfortunately some of my tabs were busted when I received the lights so they won't all be there unless I do some molding of the plastic and make new tabs.. But they won't be needed
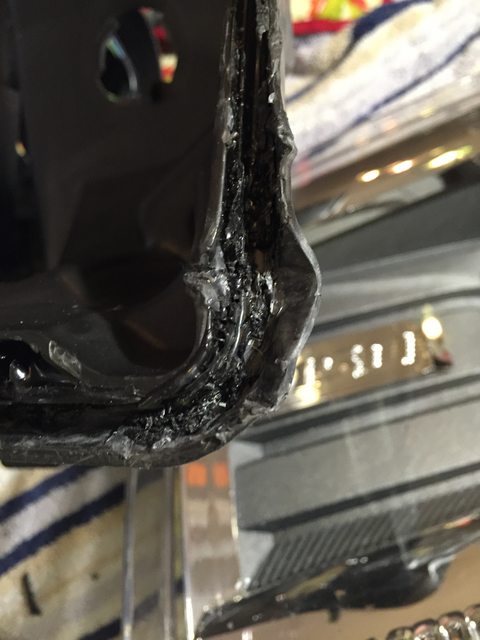
This is the corner of the one housing I had kept warming up... Too little heat = Too much prying... = Bendy Bendy....
This is an easy fix though with a pair of pliers and a heat gun... The housing was still a little warm when I got the face off so I straightened it using two butter knifes... Tomorrow I'll get all my tools out to form the plastic smooth again. Just a few minutes of work.
Before:
After cooling with work to go:
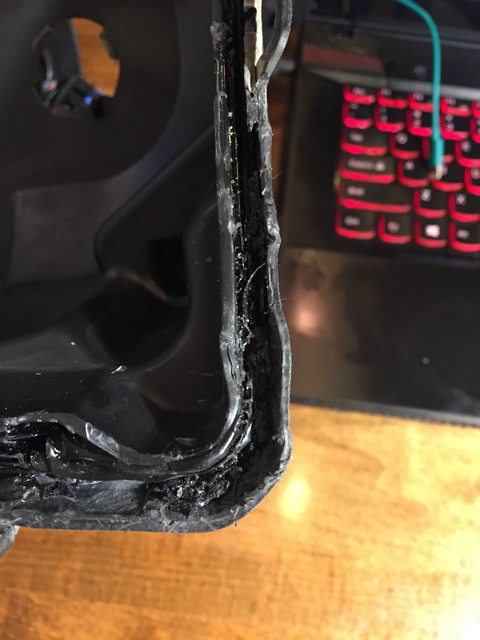
If you bend up the BLACK plastic - Don't worry it's fairly easy to repair and return to a semi normal state. Some people leave it alone. But I won't. I take pride in what I build or disassemble... I still have to remove all of the permaseal but that can be done at a later date since these will be apart for a long time.
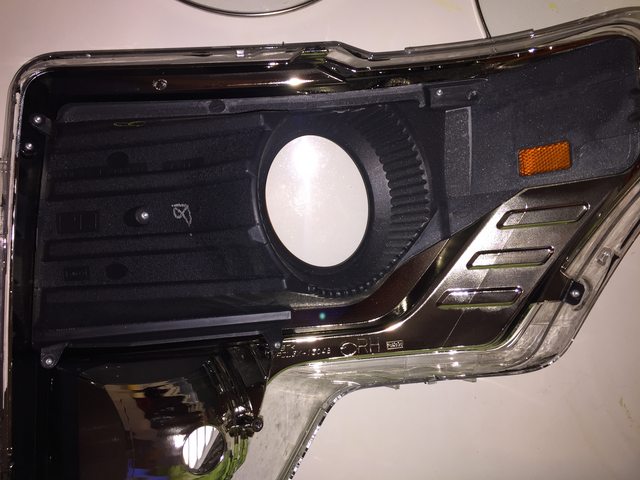
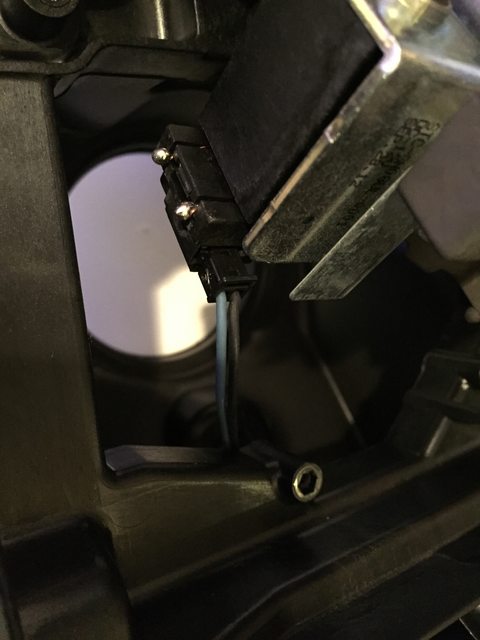
Here's the inside of the other headlight - the one I took apart in a few minutes. As you can see, the projector has a black plastic shroud on it.... It's rather thin plastic... But I'm considering painting it the PALE ADOBE METALLIC that the truck's bottom is to give it a contrast with the Chrome and Gold Bronze Metallic... I'll photoshop the paint scheme together tomorrow and post it up for opinions
Removing the stock projectors is a piece of cake... 4 Screws hold them in place. T-9. T-10 will work but it's a little small
As you pull the projector out be careful of the solenoid wire... Carefully pull it out of the socket, and lift the projector straight out
Bottom view of stock (left) vs EvoX-R (right) the Stock projector's high beam plate swings down where as the EvoX-R has a more intricate system that slides the plate up and down. It's actually a much faster high beam system than the stock swing action.
More in the step by step over the weekend..
IMPORTANT THINGS TO NOTE ABOUT SEPARATING THE HOUSINGS
If you heat your clear plastic too often or too quickly or for too long the plastic will develop what looks like spiderweb cracks on the OUTSIDE of the lens. It's nearly unavoidable with plastics that have been exposed to UV and then high heat. The only thing you can do if this occurs is to wet sand and buff/polish the FACE of the lense.
NEVER EVER EVER EVER EVER use paper towel to clean the INSIDE of the lens (the part you can otherwise never touch)
Use Rubber gloves or cotton gloves to avoid fingerprints on your chrome surrounds and projector lens!
TAKE YOUR TIME!!!! Don't rush the seperation... Don't muscle it too much either. The clear plastic WILL SNAP if you force it too hard.
This is the corner of the one housing I had kept warming up... Too little heat = Too much prying... = Bendy Bendy....
This is an easy fix though with a pair of pliers and a heat gun... The housing was still a little warm when I got the face off so I straightened it using two butter knifes... Tomorrow I'll get all my tools out to form the plastic smooth again. Just a few minutes of work.
Before:
After cooling with work to go:
If you bend up the BLACK plastic - Don't worry it's fairly easy to repair and return to a semi normal state. Some people leave it alone. But I won't. I take pride in what I build or disassemble... I still have to remove all of the permaseal but that can be done at a later date since these will be apart for a long time.
Here's the inside of the other headlight - the one I took apart in a few minutes. As you can see, the projector has a black plastic shroud on it.... It's rather thin plastic... But I'm considering painting it the PALE ADOBE METALLIC that the truck's bottom is to give it a contrast with the Chrome and Gold Bronze Metallic... I'll photoshop the paint scheme together tomorrow and post it up for opinions
Removing the stock projectors is a piece of cake... 4 Screws hold them in place. T-9. T-10 will work but it's a little small
As you pull the projector out be careful of the solenoid wire... Carefully pull it out of the socket, and lift the projector straight out
Bottom view of stock (left) vs EvoX-R (right) the Stock projector's high beam plate swings down where as the EvoX-R has a more intricate system that slides the plate up and down. It's actually a much faster high beam system than the stock swing action.
More in the step by step over the weekend..
IMPORTANT THINGS TO NOTE ABOUT SEPARATING THE HOUSINGS
If you heat your clear plastic too often or too quickly or for too long the plastic will develop what looks like spiderweb cracks on the OUTSIDE of the lens. It's nearly unavoidable with plastics that have been exposed to UV and then high heat. The only thing you can do if this occurs is to wet sand and buff/polish the FACE of the lense.
NEVER EVER EVER EVER EVER use paper towel to clean the INSIDE of the lens (the part you can otherwise never touch)
Use Rubber gloves or cotton gloves to avoid fingerprints on your chrome surrounds and projector lens!
TAKE YOUR TIME!!!! Don't rush the seperation... Don't muscle it too much either. The clear plastic WILL SNAP if you force it too hard.
02-16-2015, 03:28 PM
#13
Canadian EH?
May I ask where you got the rubber boots to cover the bulb? I bought a set and didn't have the rubber boots, and would like to purchase some before I actually install them in my truck.
02-16-2015, 08:52 PM
#14
Senior Member
Thread Starter
I bought them off amazon. The two ford parts departments I went to said 2-3 weeks for delivery. Which I though is pretty silly. They are available on eBay for a lot less and get them a lot faster, but I had some leftover money from an Amazon gift card and bought them there.
You want 2 of part number - 4S4Z-13N019-AA
You want 2 of part number - 4S4Z-13N019-AA
02-17-2015, 11:08 AM
#15
Senior Member
Thread Starter
SOB! I was considering selling the XBLED C-Bars and switching to angel eyes.
However, TRS Dropped the price of their C Bars to 130... I bought them for 180 just last week. I was expecting to take a little hit when I sold them. But not that much.
grumble grumble
However, TRS Dropped the price of their C Bars to 130... I bought them for 180 just last week. I was expecting to take a little hit when I sold them. But not that much.
grumble grumble
02-17-2015, 06:13 PM
#16
Official Bass Slapper
Ouch! Could always email them. The worst you'll get is tough luck.
02-17-2015, 08:03 PM
#17
Senior Member
Thread Starter

 02-17-2015, 11:58 PM
#19
Canadian EH?
I bought them off amazon. The two ford parts departments I went to said 2-3 weeks for delivery. Which I though is pretty silly. They are available on eBay for a lot less and get them a lot faster, but I had some leftover money from an Amazon gift card and bought them there.
You want 2 of part number - 4S4Z-13N019-AA
You want 2 of part number - 4S4Z-13N019-AA
02-18-2015, 08:19 AM
#20
Senior Member
Thread Starter
I'll be able to do it just fine with aerosol. I've painted a lot of stuff. It's just not my preferred method.