Let the fun begin - My 2012 King Ranch Retrofit + Planned step by step

 03-30-2015, 04:10 PM
#92
Official Bass Slapper

I'd leave the F150 tab chrome entirely. Some contrast is nice, imho
03-30-2015, 04:25 PM
#93
Senior Member
Thread Starter

Funny you say that.
I can't find my xacto set and I don't want to buy another one. To perfectly stencil something out may possibly result in some scratches. Not worth the risk. It's staying stock fully chrome
I'm going to put the one light fully together this week. It's had it's time to cure/offgas/etc. The other one still need to wait a few weeks. Plus I still need another ballast blockoff plate.

 03-30-2015, 10:23 PM
#95
Senior Member
Thread Starter
Believe me [MENTION=192074]SteveEH[/MENTION] if they were black, I'd be all over it! But with the chrome being so slick, I'd have to cut it out, get adhesion promoter on it, and paint it. I'm trying to track down my xacto set before I even try it. But knowing how I've changed my mind so much already. Who knows what I'll do!
03-31-2015, 02:34 PM
#96
Canadian EH?
Do you plan on leaving the housings Chrome? Then I'd say to leave the F150 chrome too, but if you painted the housings, then I'd paint the F150 background black, and paint to match the F150.
03-31-2015, 02:45 PM
#97
Senior Member
Thread Starter
I need to get a headlight restore kit and some buffing compound to redo the outside of the plastic lenses. They both had some stress cracking that was only intensified by heating in the oven. Thankfully, I'm used to working with clear plastics and can get it pretty well gone. It'll never truly go away though. This usually happens with they are covered in film like lamin-x.
The one headlight did have residue on it like it was wrapped... It is very possible that's what happened but I'll never know.
Steps for clearing and buffing headlights will be written up too.
The following users liked this post:
RES4CUE (03-31-2015)
03-31-2015, 07:54 PM
#98
Canadian EH?
I was thinking of putting Lamin-X on my headlights after my retro is done, to protect then lens. Should I go a different route, like tint or something? If any of the LEDs fail, I want to make sure I can take them apart again and fix them.
04-01-2015, 01:07 PM
#99
Senior Member
Thread Starter
Plastic will expand and contract as it heads up and cools down, much like other products. The laminX acts as an insulator and instead of allowing the front of the headlight to cool down with the wind, keeps the heat trapped and the headlight begins to get stressed... Then gets all sorts of stress cracks in it.
The same thing happens with lighted signage in front of restaurants and grocery stores... Since the switch to cathode and LED this isn't so much of an issue, but in early flourescents and incandescent lighting, you would see the plastic getting brittle a lot from constant expansion/contraction.
If the lights were LED, like the XBLED lights, I'd say no problem..> most of the heat is at the rear of those. On HID'S, the heat is spread throughout the housing.
04-06-2015, 11:35 AM
#100
Senior Member
Thread Starter
HOME STRETCH!!!!
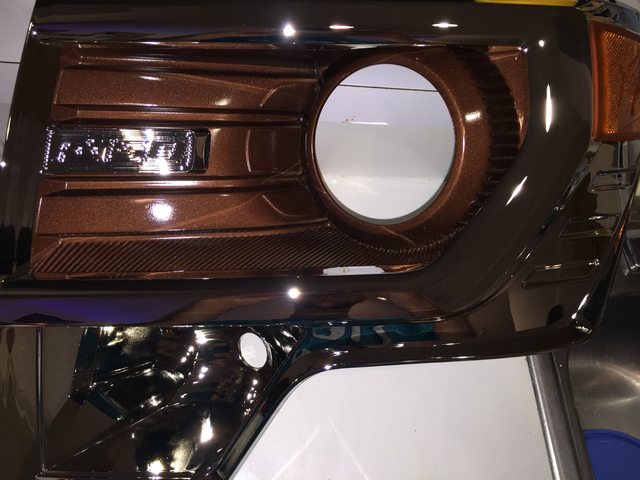
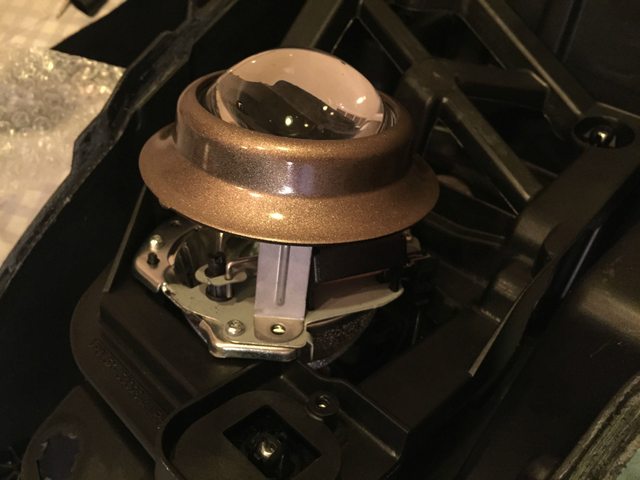
The redone bezel has met its chrome mate!
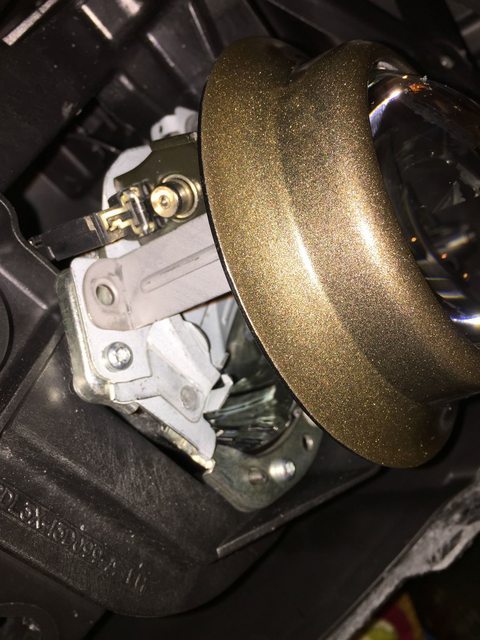
Remember to snap your shield onto the projector... Be sure it sits snug and tight. In this photo you can just barely make out a small GAP between the shield and the lens holder. Keep pushing and slightly twist until it falls into place
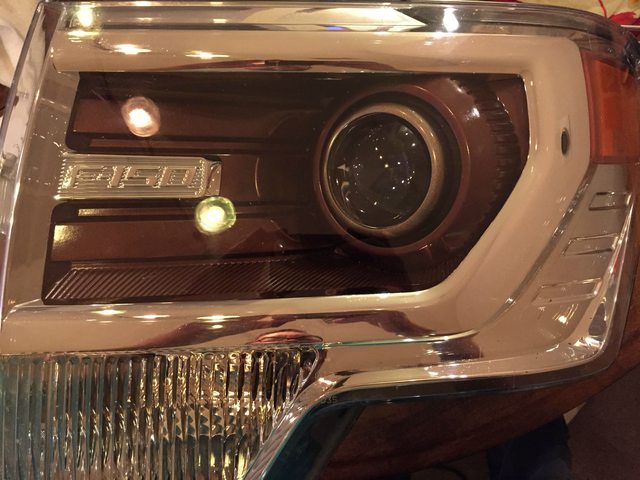
This is just with the two halves sitting loosely together. I won't put the butyl in and seal them up until I find a place with a wall to do the aiming. My condo is worthless for this part.
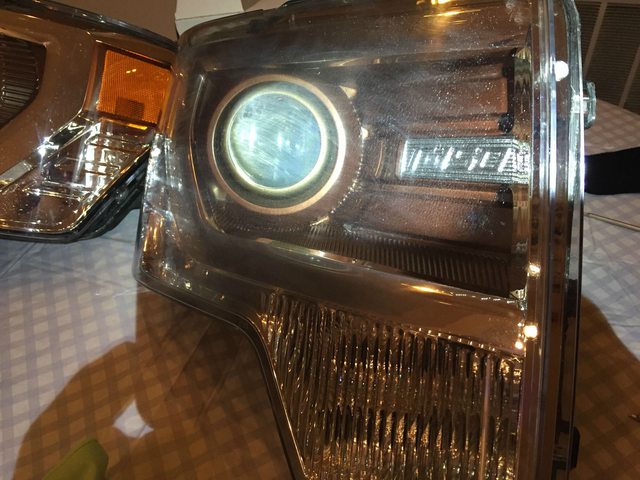
Other side going together
Proper fit on this one vs the other one
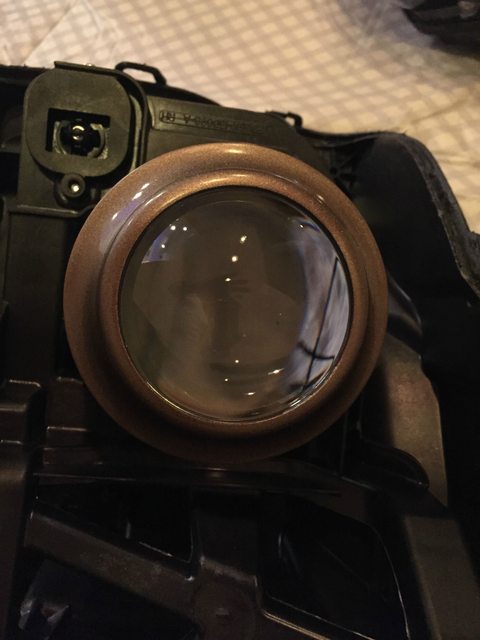
This is the light that I got that had Lamin-X on it. It's bad... The problems I had getting this one apart didn't help. I have already hand sanded it and it has helped a lot. I need to get a headlight kit to get rid of them more.
Clear plastic is a pain, once these little marks appear they don't really ever go away. You can feel them on the face of the lens, but they are actually stress cracks throughout the plastic. You won't see them once they are properly sanded and polished unless you look at certain angles. If it bothers me, I'll just redo the lights with a brand new set of housings instead of used ones. Now that I've learned what to do and what not to do. I'm confident I could disassemble a set, remove all the previous butyl, swap the internals, and have them back together in a day.
This one has a tiny bit of cracking around the turns signal bulb... I'll also sand/buff that out

I will get the 3m headlight kit and do the howto on that this week. Then, they get sealed!
The redone bezel has met its chrome mate!
Remember to snap your shield onto the projector... Be sure it sits snug and tight. In this photo you can just barely make out a small GAP between the shield and the lens holder. Keep pushing and slightly twist until it falls into place
This is just with the two halves sitting loosely together. I won't put the butyl in and seal them up until I find a place with a wall to do the aiming. My condo is worthless for this part.
Other side going together
Proper fit on this one vs the other one
This is the light that I got that had Lamin-X on it. It's bad... The problems I had getting this one apart didn't help. I have already hand sanded it and it has helped a lot. I need to get a headlight kit to get rid of them more.
Clear plastic is a pain, once these little marks appear they don't really ever go away. You can feel them on the face of the lens, but they are actually stress cracks throughout the plastic. You won't see them once they are properly sanded and polished unless you look at certain angles. If it bothers me, I'll just redo the lights with a brand new set of housings instead of used ones. Now that I've learned what to do and what not to do. I'm confident I could disassemble a set, remove all the previous butyl, swap the internals, and have them back together in a day.
This one has a tiny bit of cracking around the turns signal bulb... I'll also sand/buff that out
I will get the 3m headlight kit and do the howto on that this week. Then, they get sealed!