Cargo light circuit (for lighting in topper/canopy)
 05-04-2015, 12:52 PM
#21

OK, I am essentially done with just a few touch ups left. This will be a long post so I can try to get it all in one. This was on a 2013 Crew Cab.
First, here are the items I used for this project:
Lights
Wire
Connectors
Tube of Permatex Clear RTV Silicone Adheasive/Silicone
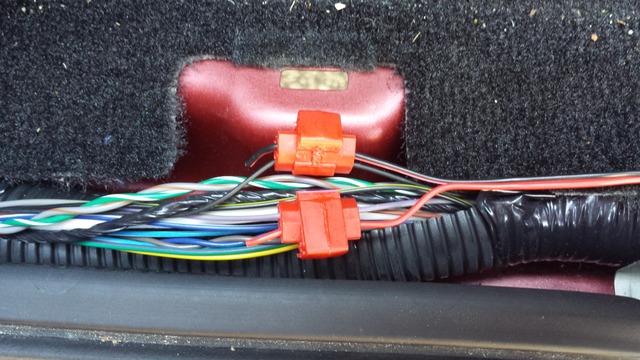
Next, I located the wires I needed in the wiring harness. I started on the passenger side to begin with, but then realized that I didn't have the right wires. I went to the driver side under the rear door plate. I located a purple with gray stripe wire that others had mentioned. There was also a black wire that I assumed would be my ground. I cut the sheathing enough to use alligator clips and test with a short piece of LED that I had left from another project. They worked.
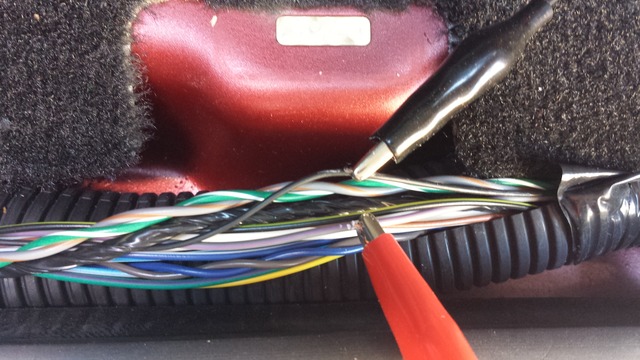
Then I used the same method to test the ability to light the entire 16 ft roll of LEDs without blowing a fuse. No issues.
Since I was going to work off the driver side of the truck, I went to the bed and pulled a length of LEDs that would go from the front driver side corner of the bed to the passenger side and then back to the rear of the bed down the passenger side. I marked it for a cut. I measured the driver side of the bed for a separate run down that side.
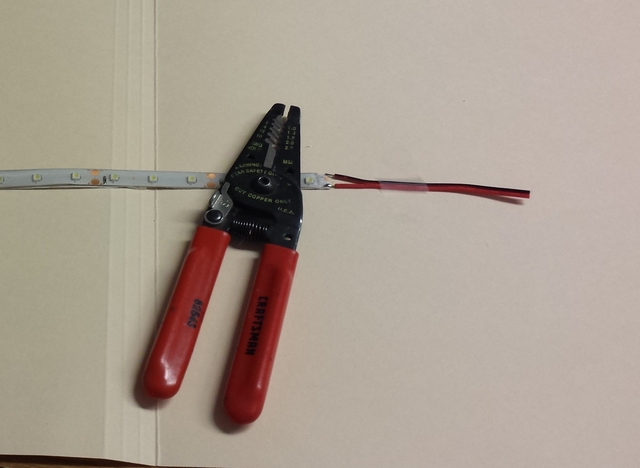
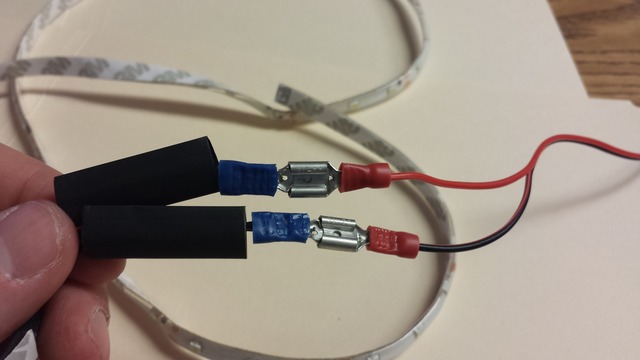
Since I pulled the long end off the spool, it already had wire soldered and wrapped on the end. I cut the length for the driver side. I cut and peeled off enough of the waterproofing to expose the connections on the LEDs for soldering. I soldered a short length of wire to the LEDs and then put heat shrink on it.
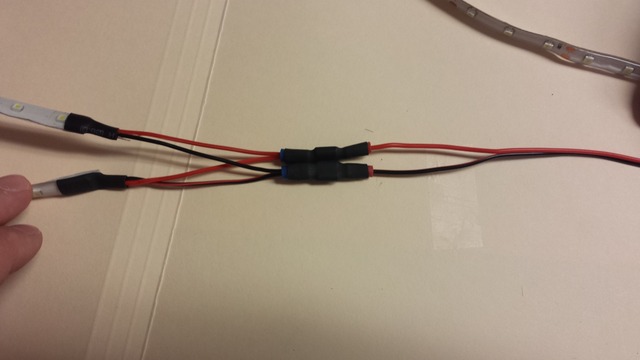
Next I soldered the 2 small wire sections together to essentially create a Y-connection for running to the truck wiring.
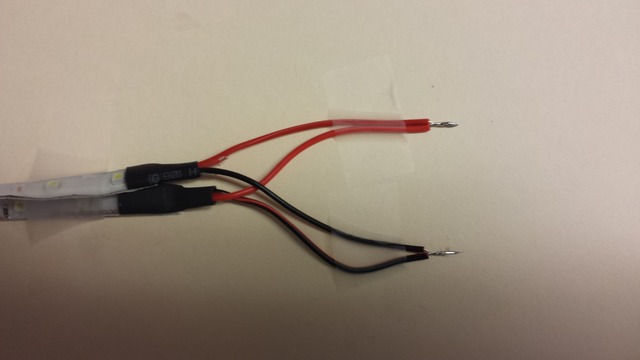
Then I crimped on a male blade connector to the wires. I crimped a female blade connector to the wiring I was going to run to the truck wiring. Then I used heat shrink on the connectors for added insurance. Probably not necessary, but I thought it finished it off well and wouldn't need to worry about it pulling out.
Now back out to the bed of the truck. I drilled a small hole in the rubber grommet at the front of the truck bed. Just big enough for the wiring to tightly slide through. I think it was a 3/8" bit. I cut a cut a longer than expected piece of wire and ran it though the hole to under the truck.
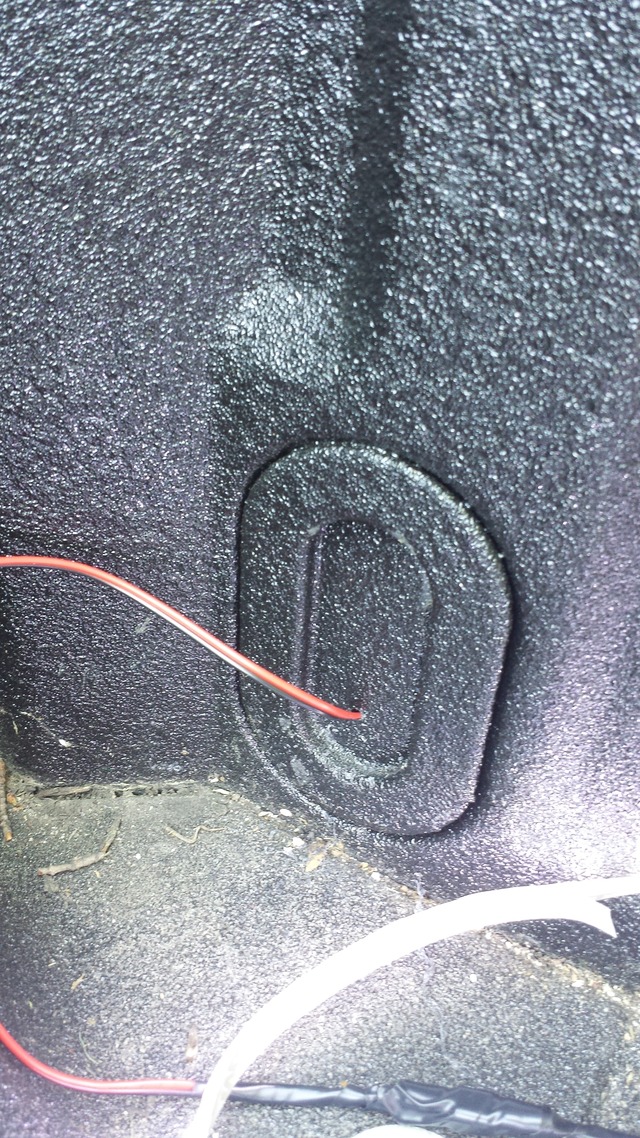
I ran the wire under the truck and up through the hole that the door sill plate pops into. The hole is elongated and there is ample room for the wire. The connector for the sill plate also has a rubber grommet that will help seal the hole.
Then I used the quick splice connectors to connect the red wire from the LEDs to the Purple with Gray stripe wire and the black to the black.
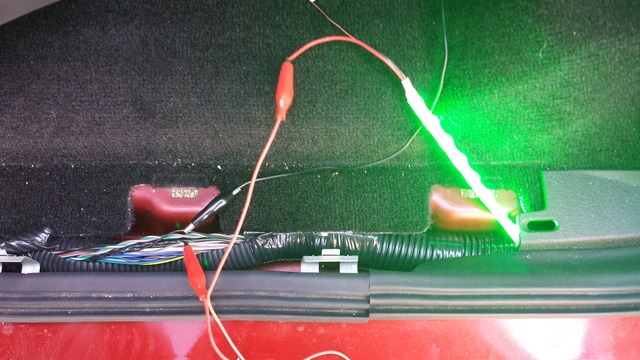
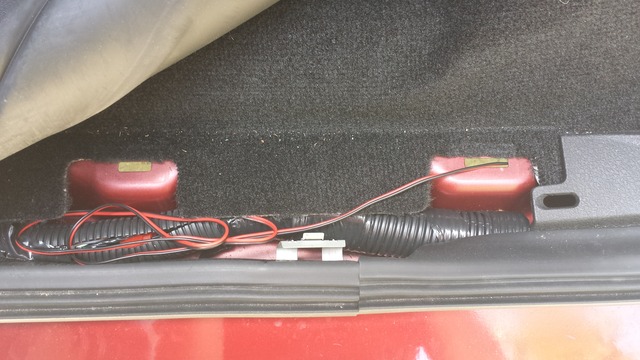
The LEDs immediately lit up since the door was open and the cargo light was on. Now on to putting the lights in place. I did not have a lot of luck with the 3M backing on the LEDs sticking to the bed. I'm guessing it had something to do with the spray in liner. I ended up sticking the LEDs on, then using small strips of duct tape every 6 inches or so to ensure the lights stayed on. Then I went back with the silicone and put a thin layer down each side of the strip. When it dried, this helped to adhere the LEDs to the bed. Also, once it dried, I pulled off the duct tape and put silicone on those spots.
For the placement of the LEDs, instead of using the flat portion under the bed rail, I moved them to the slightly angled portion between the side wall and under the bed rail. This aims the lights more toward the center than straight down the wall.
The results at night?
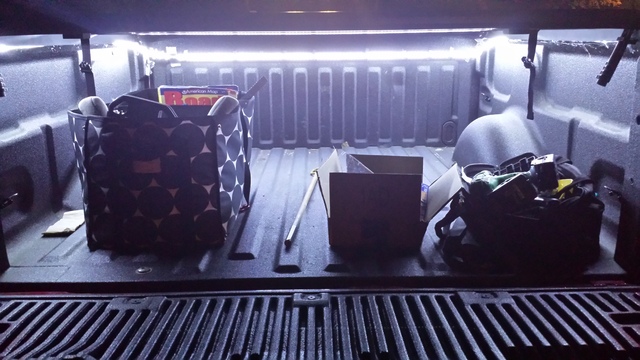
They come on when the unlock button is hit or a door is opened. They turn off with the cargo light or by simply locking the truck. I am pleased. Let me know if I've left anything out that you still have a question about.
Brian
First, here are the items I used for this project:
Lights
Wire
Connectors
Tube of Permatex Clear RTV Silicone Adheasive/Silicone
Next, I located the wires I needed in the wiring harness. I started on the passenger side to begin with, but then realized that I didn't have the right wires. I went to the driver side under the rear door plate. I located a purple with gray stripe wire that others had mentioned. There was also a black wire that I assumed would be my ground. I cut the sheathing enough to use alligator clips and test with a short piece of LED that I had left from another project. They worked.


Then I used the same method to test the ability to light the entire 16 ft roll of LEDs without blowing a fuse. No issues.
Since I was going to work off the driver side of the truck, I went to the bed and pulled a length of LEDs that would go from the front driver side corner of the bed to the passenger side and then back to the rear of the bed down the passenger side. I marked it for a cut. I measured the driver side of the bed for a separate run down that side.
Since I pulled the long end off the spool, it already had wire soldered and wrapped on the end. I cut the length for the driver side. I cut and peeled off enough of the waterproofing to expose the connections on the LEDs for soldering. I soldered a short length of wire to the LEDs and then put heat shrink on it.

Next I soldered the 2 small wire sections together to essentially create a Y-connection for running to the truck wiring.

Then I crimped on a male blade connector to the wires. I crimped a female blade connector to the wiring I was going to run to the truck wiring. Then I used heat shrink on the connectors for added insurance. Probably not necessary, but I thought it finished it off well and wouldn't need to worry about it pulling out.


Now back out to the bed of the truck. I drilled a small hole in the rubber grommet at the front of the truck bed. Just big enough for the wiring to tightly slide through. I think it was a 3/8" bit. I cut a cut a longer than expected piece of wire and ran it though the hole to under the truck.

I ran the wire under the truck and up through the hole that the door sill plate pops into. The hole is elongated and there is ample room for the wire. The connector for the sill plate also has a rubber grommet that will help seal the hole.

Then I used the quick splice connectors to connect the red wire from the LEDs to the Purple with Gray stripe wire and the black to the black.

The LEDs immediately lit up since the door was open and the cargo light was on. Now on to putting the lights in place. I did not have a lot of luck with the 3M backing on the LEDs sticking to the bed. I'm guessing it had something to do with the spray in liner. I ended up sticking the LEDs on, then using small strips of duct tape every 6 inches or so to ensure the lights stayed on. Then I went back with the silicone and put a thin layer down each side of the strip. When it dried, this helped to adhere the LEDs to the bed. Also, once it dried, I pulled off the duct tape and put silicone on those spots.
For the placement of the LEDs, instead of using the flat portion under the bed rail, I moved them to the slightly angled portion between the side wall and under the bed rail. This aims the lights more toward the center than straight down the wall.
The results at night?

They come on when the unlock button is hit or a door is opened. They turn off with the cargo light or by simply locking the truck. I am pleased. Let me know if I've left anything out that you still have a question about.
Brian

The following 4 users liked this post by Havok1:
05-05-2015, 10:25 AM
#22


Awesome! Thanks for getting to this and taking your time to post. Many members will be thankful.
You can measure the amps of your lighting strip with an ohm-meter, just disconnect one of your blade connectors (lights powered up) and run the entire current thru the meter. Then find the fuse in question, remove it and run the entire "fuse current" thru the meter. You can see how close the fuse is to "blowing". If your meter has 10A capacity and the fuse is 20A you probably should NOT try to measure it (unless you've replaced all interior lights with LEDs). Anyway this is how you can " measure" if your fuse has the headroom to add more amps of lighting.
In general, if you replace incandescent bulbs with LEDs you have reduced the amps of the circuit thus can add more LEDs.
My canopy light is pirated to my taillight for now, i'll dig for that purple wire and change over to the cabin lighting soon. Thanks again!
The following users liked this post:
duxslayer (06-06-2015)

 06-11-2015, 10:26 PM
#24
Brian I looked under the left rear door plate & found two "gray with purple stripe" wires. One is twisted with a blue wire, the other is by itself.
My truck (2013) has no purple with gray stripe wire. Are you sure its purple with gray stripe? There is a LARGE wire, purple with white stripe. There is no solid purple wire.
My truck (2013) has no purple with gray stripe wire. Are you sure its purple with gray stripe? There is a LARGE wire, purple with white stripe. There is no solid purple wire.
Last edited by Fyaboy; 06-11-2015 at 10:39 PM.

 06-12-2015, 03:29 PM
#26
BoostKing Tuning

Brian I looked under the left rear door plate & found two "gray with purple stripe" wires. One is twisted with a blue wire, the other is by itself.
My truck (2013) has no purple with gray stripe wire. Are you sure its purple with gray stripe? There is a LARGE wire, purple with white stripe. There is no solid purple wire.
My truck (2013) has no purple with gray stripe wire. Are you sure its purple with gray stripe? There is a LARGE wire, purple with white stripe. There is no solid purple wire.
Last edited by Boostking; 06-12-2015 at 03:32 PM.