Roush Stage 3 build-up
 09-12-2014, 11:34 AM
#21
Senior Member
Thread Starter

Thanks! It's supercharged from Ford. I haven't ran a dyno or anything, but according to Roush it's 445 hp, 500 ft/lb torque at the flywheel. Probably lose about 100 of that when it gets down to the wheels. Still pulls great, though!! I'll definitely check out your pre-runner build!

The following users liked this post:
patclarke (09-12-2014)
09-12-2014, 12:09 PM
#22

Man a super charger would be so cool! I have been on the fence about getting one. Does yours have the intercooler or is yours the one they made that did not need one? What gears do you have in your truck?
09-12-2014, 04:27 PM
#23
Senior Member
Thread Starter
I have the intercooled supercharger. Its an Eaton and looks similar to the Lightning. I have the stock 4.56 gears though I may upgrade to 4.10s because of the wheels I have. Get the supercharger! You will not regret it!
The following users liked this post:
patclarke (09-12-2014)

 09-13-2014, 08:43 PM
#26
Senior Member
Thread Starter
10-02-2014, 09:10 PM
#27
Senior Member
Thread Starter
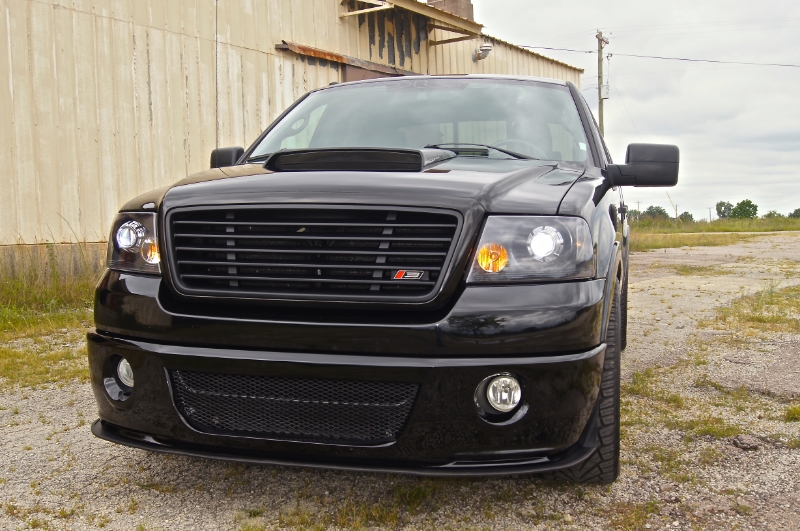
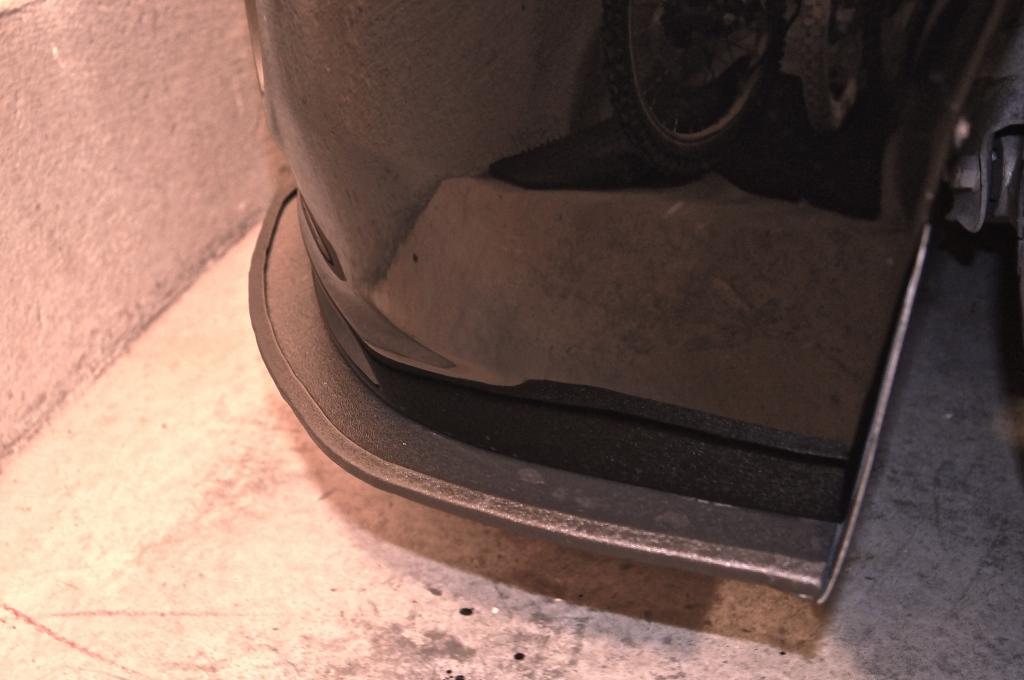
So next I wanted to do the front splitter that's on the bottom of the front bumper cover. Not wanting to pay 500.00 for a carbon fiber one which might get destroyed being on the front, I decided to try and make my own. I looked at a lot of sports car forums to see how they made their own. I decided on 1/4" thick ABS and ordered a sheet from my local plastic supplier for about 60.00. I laid the abs sheet underneath the bumper cover and traced out a design I thought looked similar to the Super Snake F150. Then I cut it out with a jigsaw and attached it using pre-drilled holes in the bumper with stainless bolts. I then covered the edge with rubber edging I found on-line. I think it turned out ok:

 10-02-2014, 09:31 PM
#29
Senior Member
Thread Starter
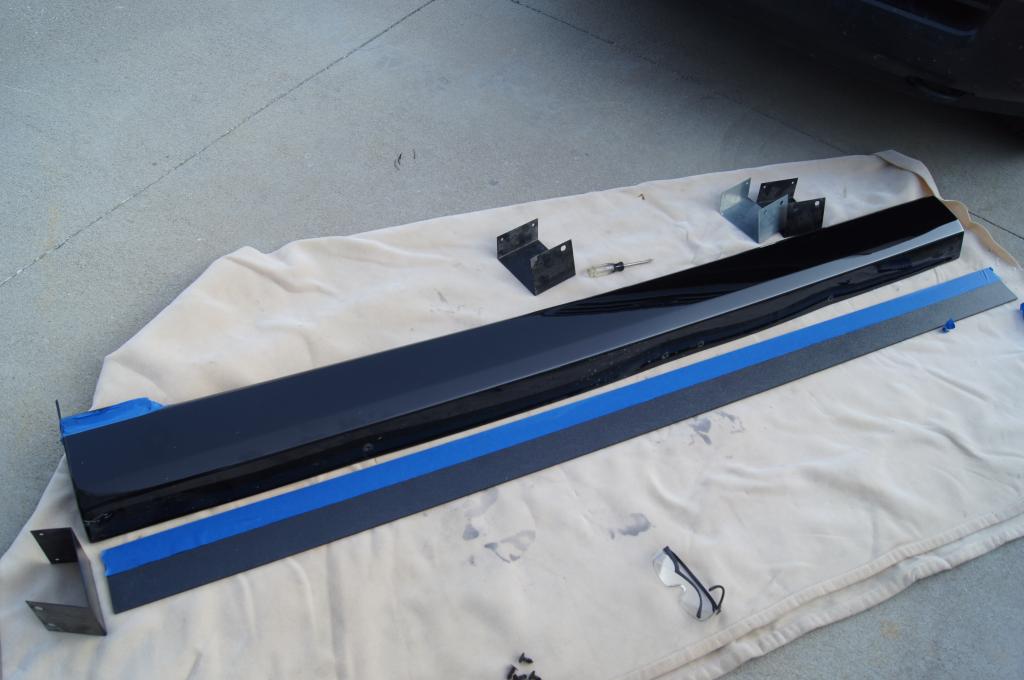
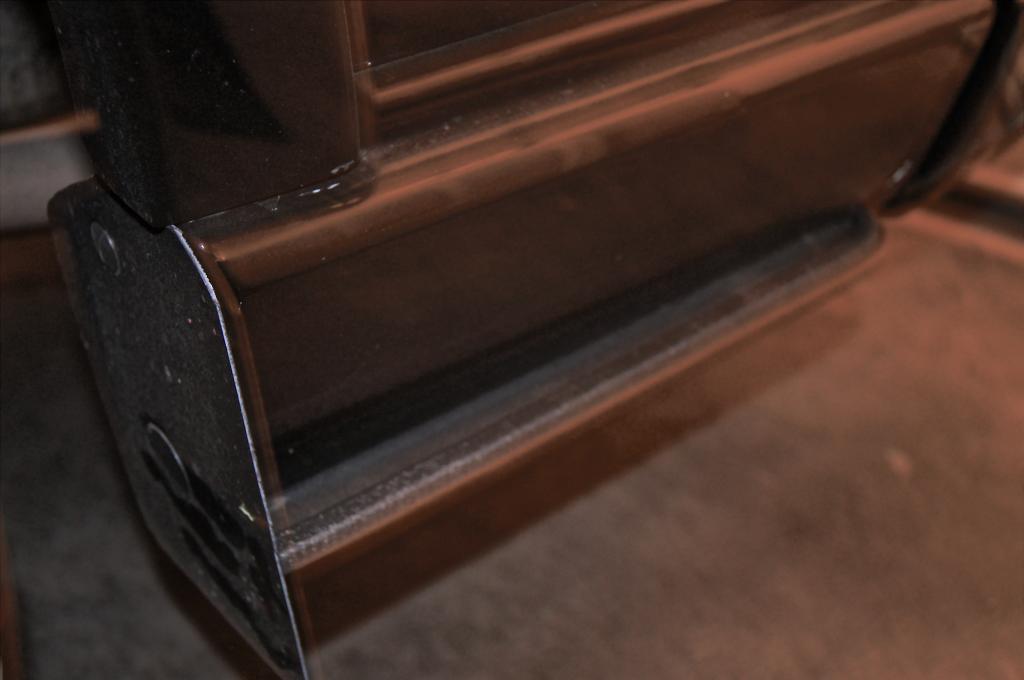
I noticed recently that my long side skirt on the passenger side was sagging a little on the back end. I crawled underneath and to my surprise, there were 3 brackets instead of 4 securing the side skirt! Curious, I looked on the opposite side and found the same thing! 2 support brackets missing! I called the body shop and asked them where my brackets were. They told me they noticed the same thing and called 3Dcarbon. 3Dcarbon told them that particular bracket wasn't necessary anymore and they don't include it with their kits! Wow! Ok, so I wasn't comfortable with that and called 3dcarbon and they confirmed what they told the body shop! I sent them a photo of what was going on, and they quickly sent me a pair of brackets to correct the sagging. So now I had to take them off, drill new holes and reinstall which was no big deal.
I also noticed under the side skirts especially behind the tires were getting beat up. I decided to use 1/4" ABS the length of the side skirts and custom make some splash guards to guard against debris hitting them. I love the look of the side splitters on the Roush Mustangs and I decided to do something similar. I've never seen side splitters on a truck before, so I took a gamble. It only cost a total of 100.00 dollars, and if I didn't like it, I could easily remove it.
This is a photo of the side skirt off. I installed the side splitters then reinstalled the side skirts with the new brackets 3Dcarbon sent me:
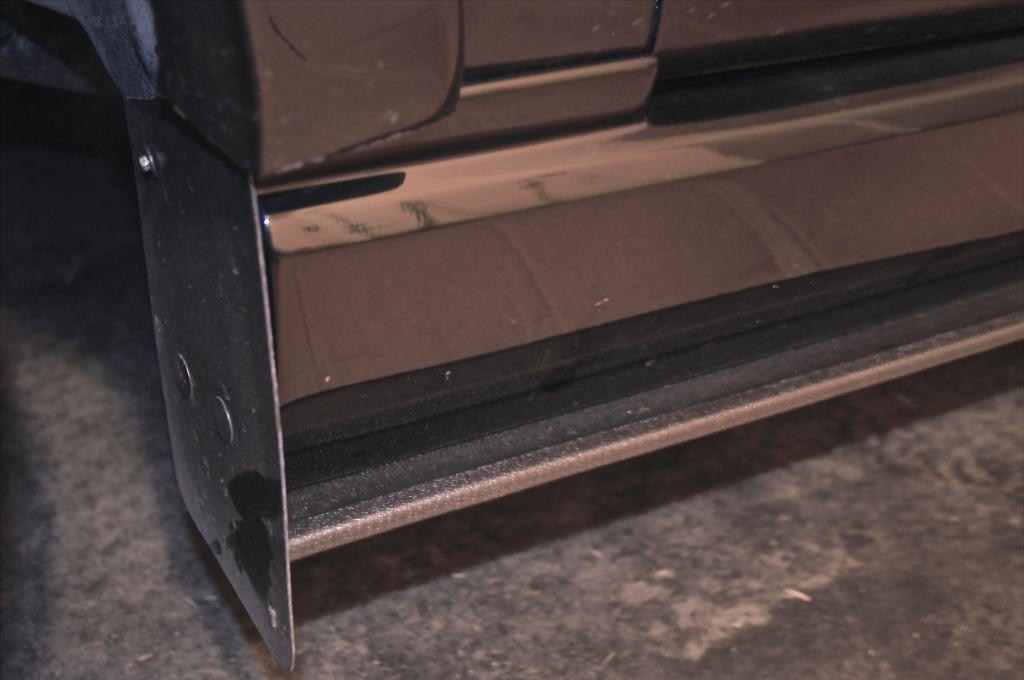
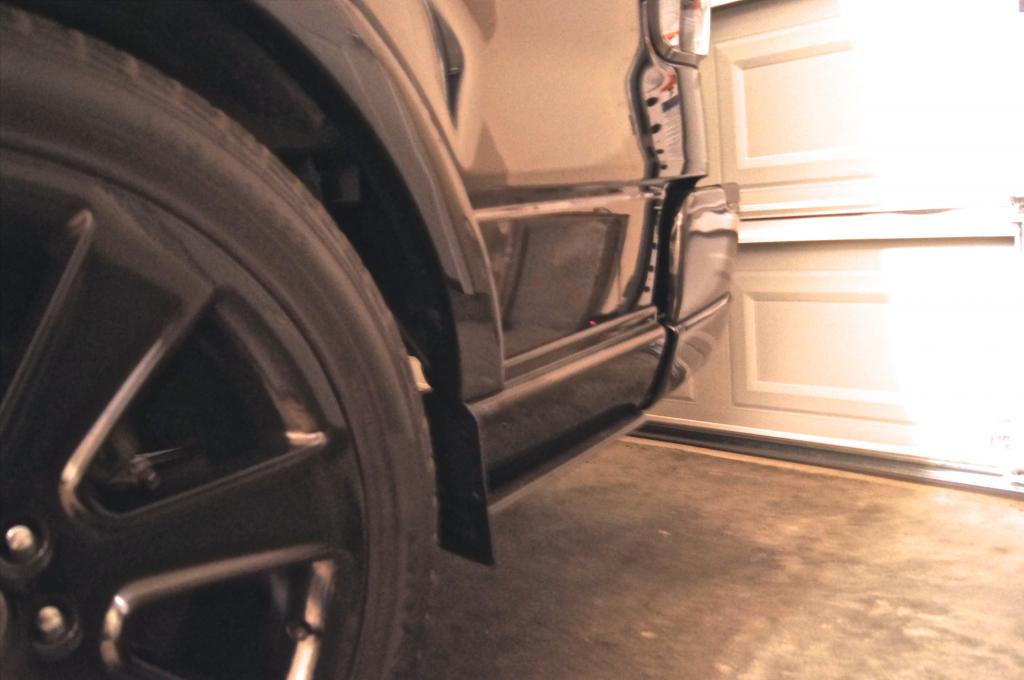
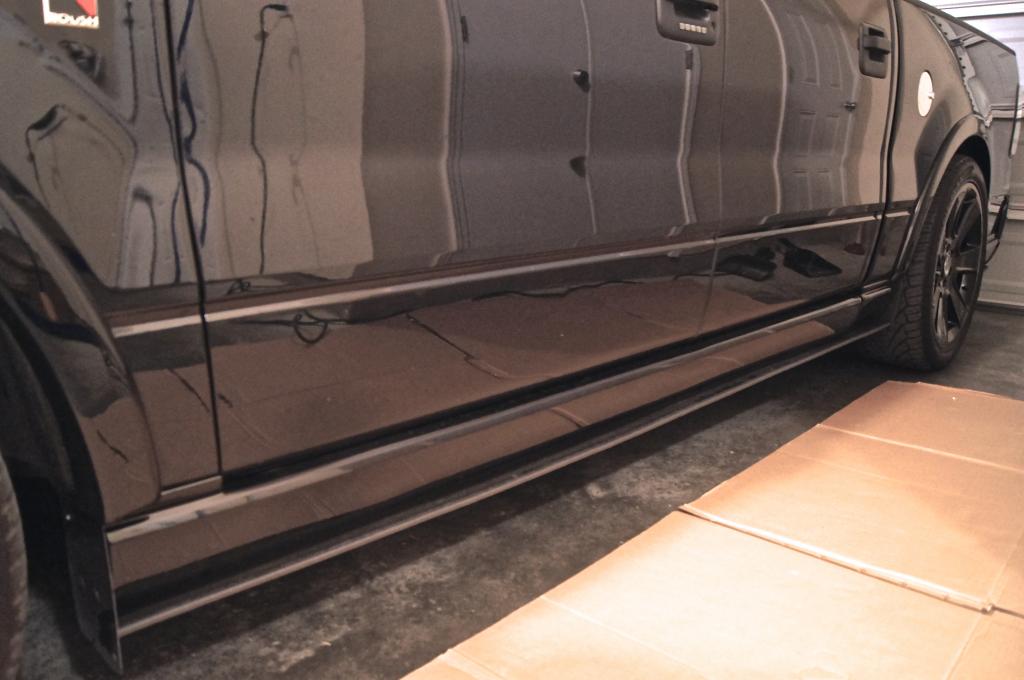
I used the same rubber edging that I used on the front splitter to finish it off. Now I have great protection for my painted body kit!
I also noticed under the side skirts especially behind the tires were getting beat up. I decided to use 1/4" ABS the length of the side skirts and custom make some splash guards to guard against debris hitting them. I love the look of the side splitters on the Roush Mustangs and I decided to do something similar. I've never seen side splitters on a truck before, so I took a gamble. It only cost a total of 100.00 dollars, and if I didn't like it, I could easily remove it.
This is a photo of the side skirt off. I installed the side splitters then reinstalled the side skirts with the new brackets 3Dcarbon sent me:


I used the same rubber edging that I used on the front splitter to finish it off. Now I have great protection for my painted body kit!
10-02-2014, 09:33 PM
#30
Senior Member
Thread Starter