My '69 F100 build
 02-02-2012, 11:02 PM
#21
Senior Member
Thread Starter

The original cluster had idiot lights and non functional gauges so I opted to buy a new set of aftermarket ones and custom build a panel to house them. The truck is somewhat of a 'rat rod' (not a big fan of the term) so I felt that this fit the overall look of the truck.
Had some scrap diamond plate sheet kickin' around...
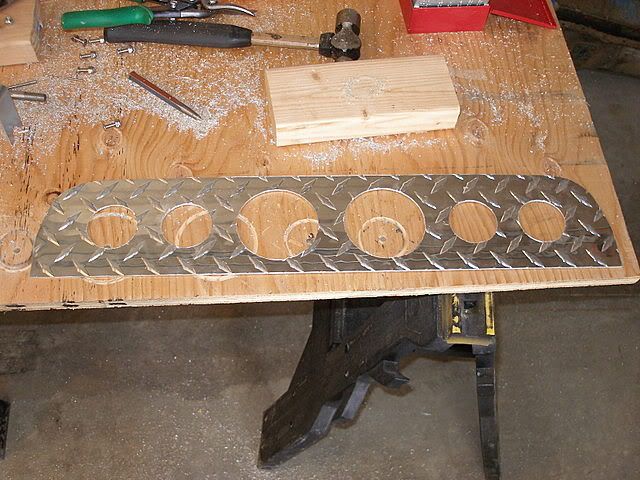
...so I drilled some big holes and then some bigger holes! I had a spare gauge bezel from the wrecking yard that someone had already cut a hole in so I didn't mind cutting it up more so that I could fasten the panel to it.
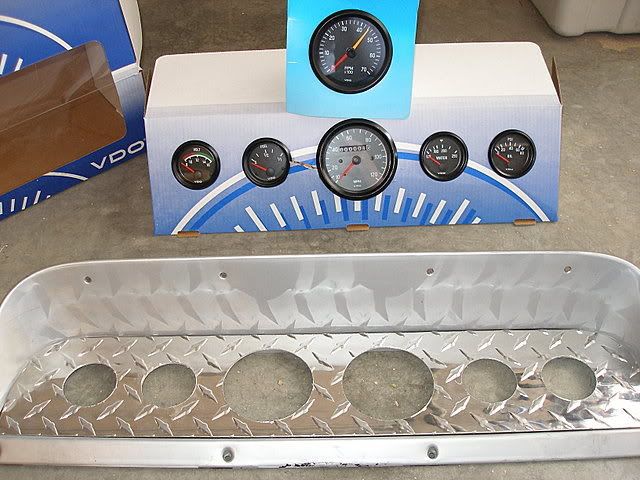
I painted the bezel with Duplicolor's silver wheel paint (it's tougher paint than most), mounted the VDO's, and wired it up. Part of the new harness is shown hanging everywhere in this photo! Yes, the shifter is for REAL!
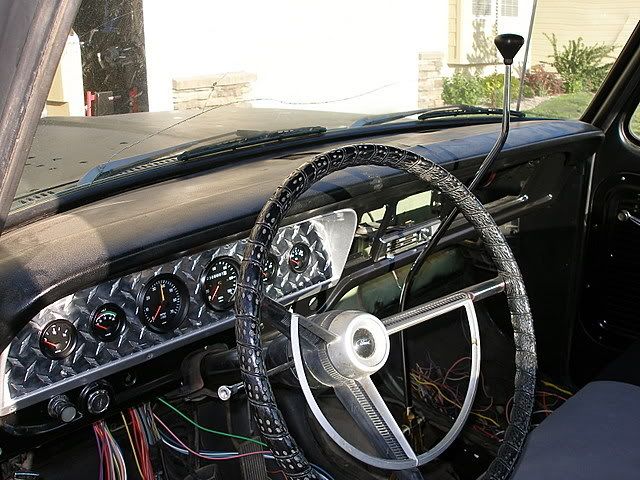
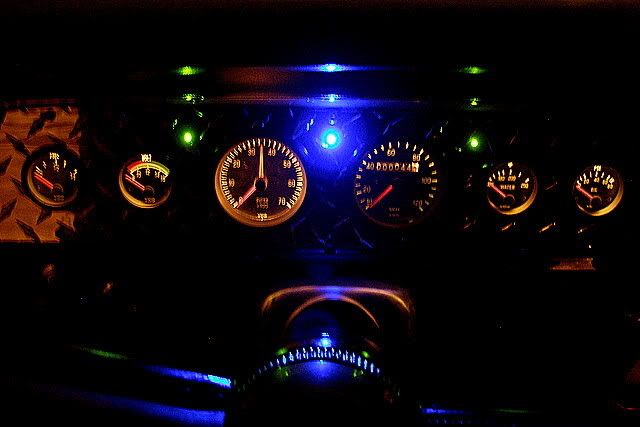
This pic is already shown earlier in this thread but it fits here too. I drilled three 1/8" holes to house the LED indicators for signals and high beams...they're barely noticeable in the day.
Had some scrap diamond plate sheet kickin' around...
...so I drilled some big holes and then some bigger holes! I had a spare gauge bezel from the wrecking yard that someone had already cut a hole in so I didn't mind cutting it up more so that I could fasten the panel to it.
I painted the bezel with Duplicolor's silver wheel paint (it's tougher paint than most), mounted the VDO's, and wired it up. Part of the new harness is shown hanging everywhere in this photo! Yes, the shifter is for REAL!
This pic is already shown earlier in this thread but it fits here too. I drilled three 1/8" holes to house the LED indicators for signals and high beams...they're barely noticeable in the day.
 02-02-2012, 11:17 PM
#22
Senior Member
Thread Starter
Here are some old, crusty, hood hinges...
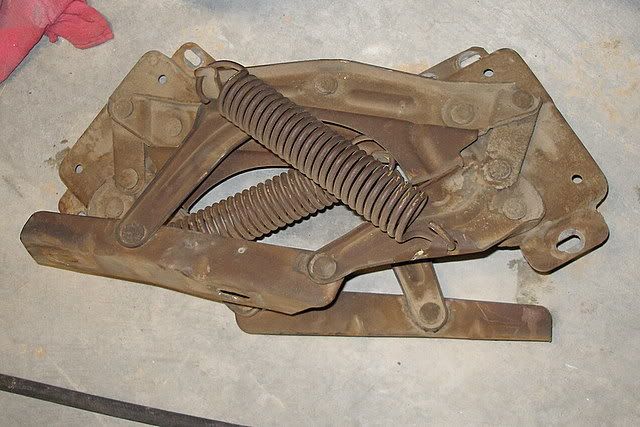
I blasted them and wired them to my oven rack...
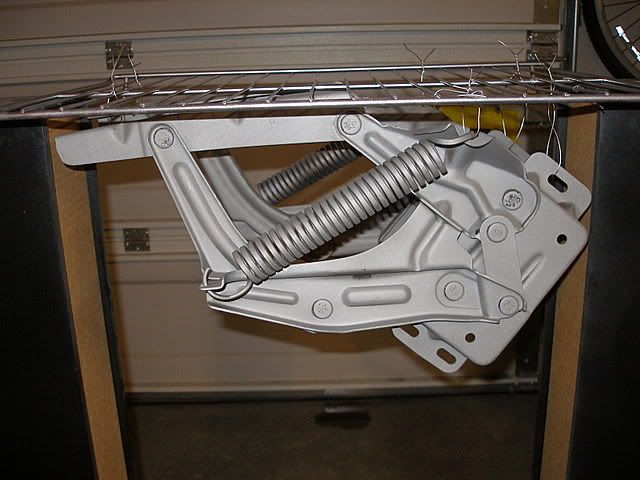
...and shot them with a 'stamped steel' powder. Bake at 425 until flowing and additional 20 minutes at 400. Ta daaa!!!
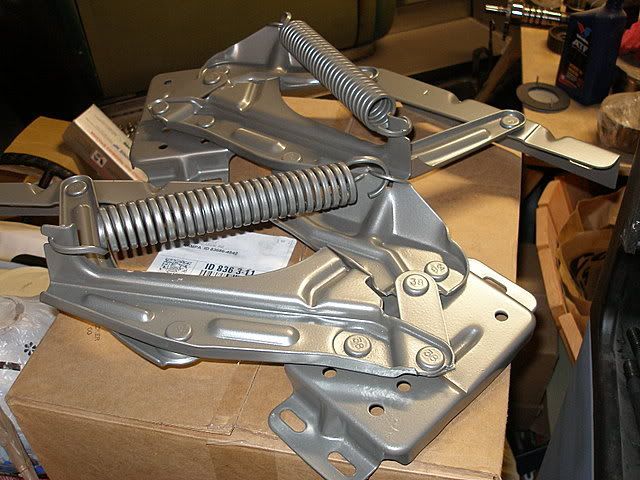
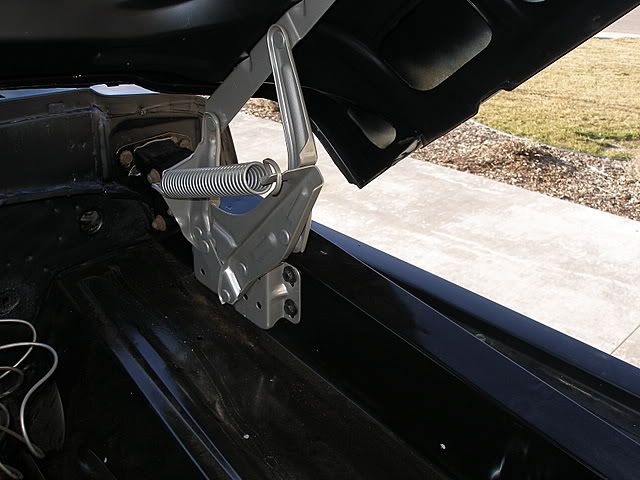
In the truck. The inner fenders were powdercoated too.
I blasted them and wired them to my oven rack...
...and shot them with a 'stamped steel' powder. Bake at 425 until flowing and additional 20 minutes at 400. Ta daaa!!!
In the truck. The inner fenders were powdercoated too.
 02-03-2012, 11:50 PM
#26
Senior Member
Thread Starter
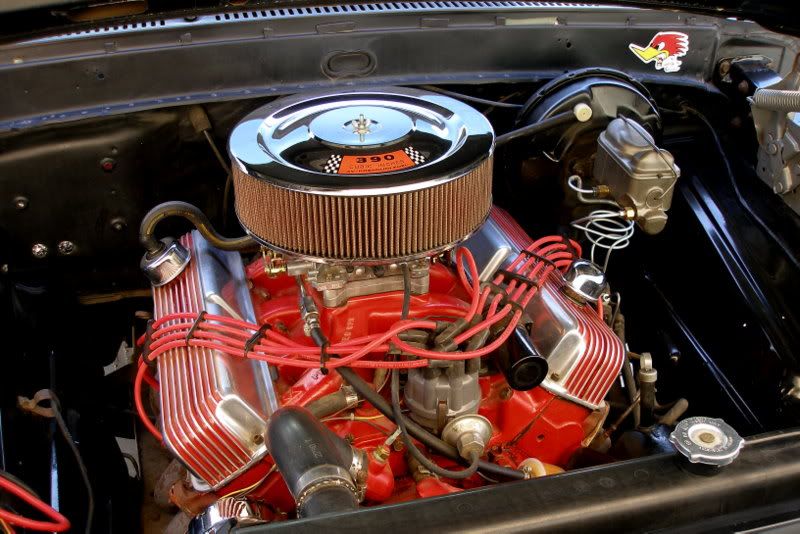
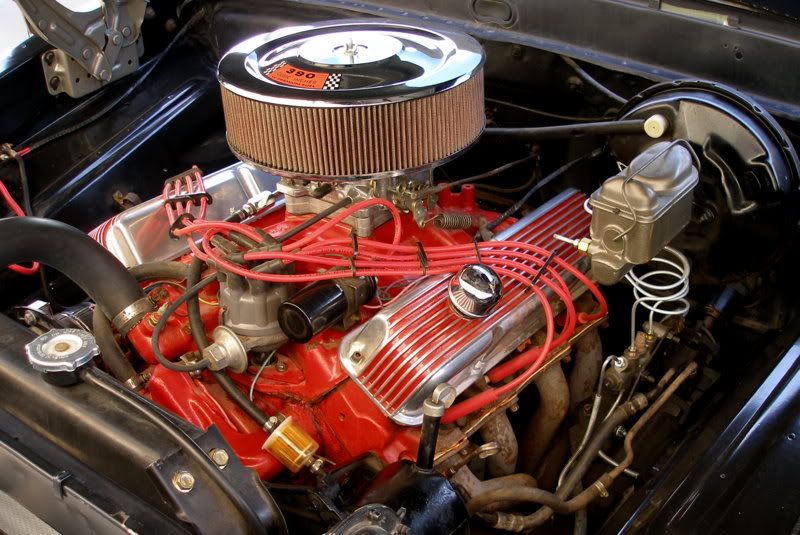
 Thanks guys! I've touched nearly every square inch and every nut and bolt on this truck and it's been an absolute blast! I'll admit it's not perfect by any stretch of the imagination but it's been such a fun project and it feels like a million bucks to have people dig it! From the start, it was to be a budget hot rod that I could still use for the occasional run to the dump or Home Depot. I believe I have roughly 3300-3500 bucks in it as it sits (not counting the C6 I just built or the 390 in progress). I highly recommend a low-budget build like this to EVERYONE. Great fun!
02-05-2012, 02:07 AM
Thanks guys! I've touched nearly every square inch and every nut and bolt on this truck and it's been an absolute blast! I'll admit it's not perfect by any stretch of the imagination but it's been such a fun project and it feels like a million bucks to have people dig it! From the start, it was to be a budget hot rod that I could still use for the occasional run to the dump or Home Depot. I believe I have roughly 3300-3500 bucks in it as it sits (not counting the C6 I just built or the 390 in progress). I highly recommend a low-budget build like this to EVERYONE. Great fun!
02-05-2012, 02:07 AM
#27
Beer Gut Extraordinaire

Had my eye on a 66 long bed 4 speed that needed light restoration for $3400 OBO, but don't have the room to do it, my mom won't let my dad and I do it 
03-16-2012, 10:42 PM
#29
Senior Member
Thread Starter
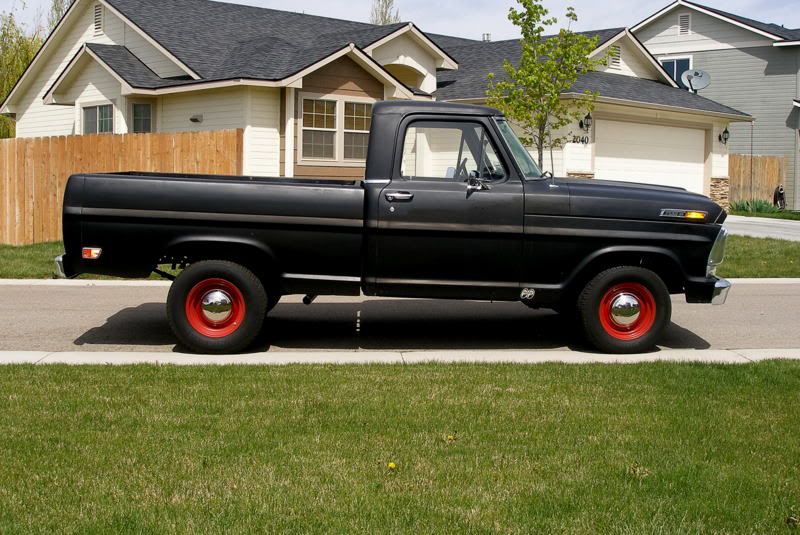
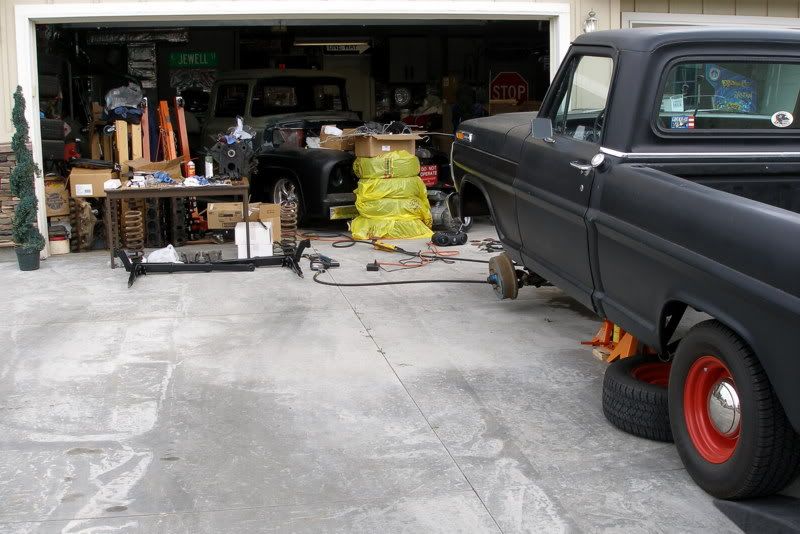
Here's what she looked like for almost a year...I hated the rake more than the overall height of the truck but I wanted it lower and more level. I had been collecting parts for several months as my paychecks would allow and not only did I want to lower the whole truck as well as level it more but I wanted to ditch the drums and add power disc brakes up front too.
I started with dropping the back first. DJM makes a dropped shackle kit for these trucks but I've been trying to stay on a budget and found that I could simply flip the front leaf spring hangers and that each one would bolt right up into 2 of the original frame holes. I enlarged them from 7/16" to 1/2" and also drilled two new holes for each hanger.
Here, I've ground off the rivets, wire brushed the rust off, and sprayed a little primer and paint...
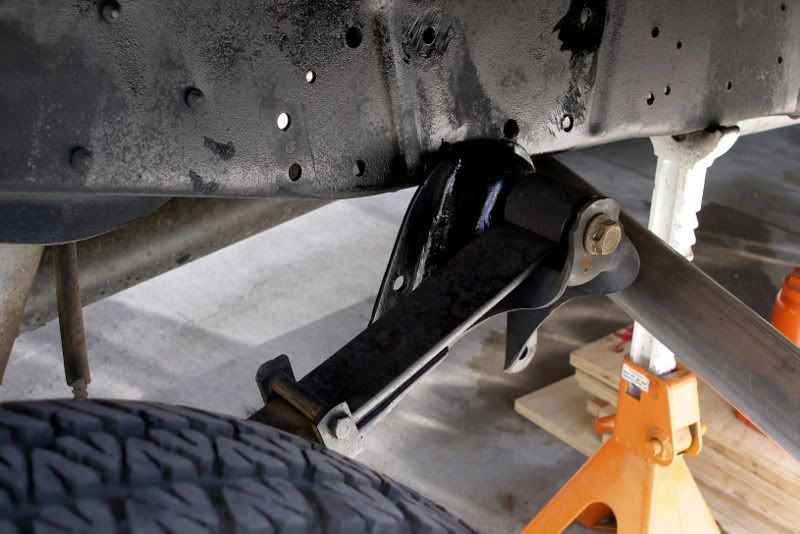
Not my photo but this shows the result. The flip netted me about a 4.5" drop in the back. Since this only moves one end of each leaf pack and the rear shackle is the pivot, the pinion angle needed to be corrected. I installed some 6 degree wedged shims on top of the spring perches.
Now, for the front...
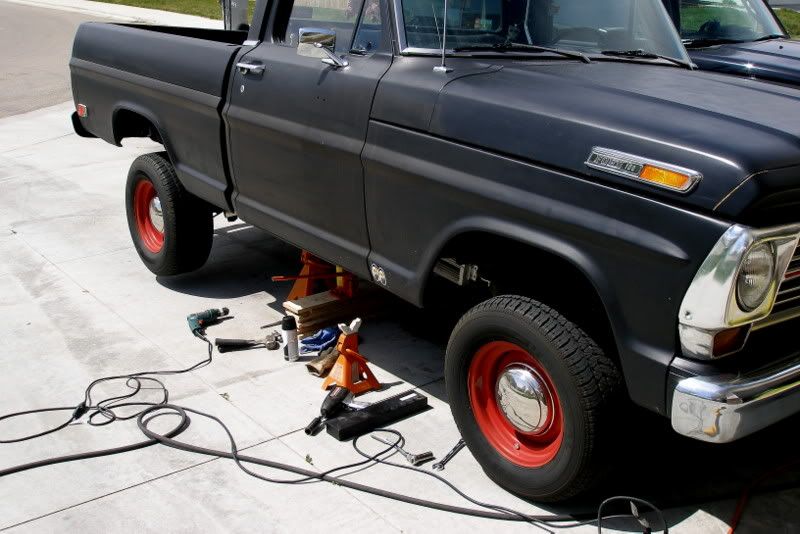
I had sourced a complete front end, brake booster, prop. valve, steering linkage, etc. from a '75 F100 sitting in a wrecking yard so, due to the difference in king pin size between '69 and '75, I also ordered DJM's 3" dropped beams for a '75. The beams came with all new king pins, bushings, grease fittings, and tie rod relocators. Shown below are the new beams (I ended up with new coils in the end too) and the work had begun. My '56 has pretty much taken over my garage so I did all of this in the driveway too...
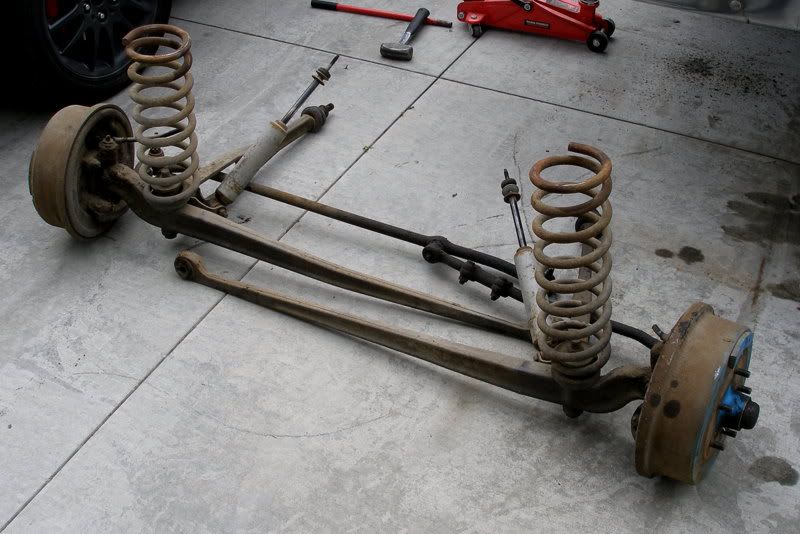
Out with the old...
I started with dropping the back first. DJM makes a dropped shackle kit for these trucks but I've been trying to stay on a budget and found that I could simply flip the front leaf spring hangers and that each one would bolt right up into 2 of the original frame holes. I enlarged them from 7/16" to 1/2" and also drilled two new holes for each hanger.
Here, I've ground off the rivets, wire brushed the rust off, and sprayed a little primer and paint...
Not my photo but this shows the result. The flip netted me about a 4.5" drop in the back. Since this only moves one end of each leaf pack and the rear shackle is the pivot, the pinion angle needed to be corrected. I installed some 6 degree wedged shims on top of the spring perches.
Now, for the front...
I had sourced a complete front end, brake booster, prop. valve, steering linkage, etc. from a '75 F100 sitting in a wrecking yard so, due to the difference in king pin size between '69 and '75, I also ordered DJM's 3" dropped beams for a '75. The beams came with all new king pins, bushings, grease fittings, and tie rod relocators. Shown below are the new beams (I ended up with new coils in the end too) and the work had begun. My '56 has pretty much taken over my garage so I did all of this in the driveway too...
Out with the old...
03-16-2012, 10:43 PM
#30
Senior Member
Thread Starter
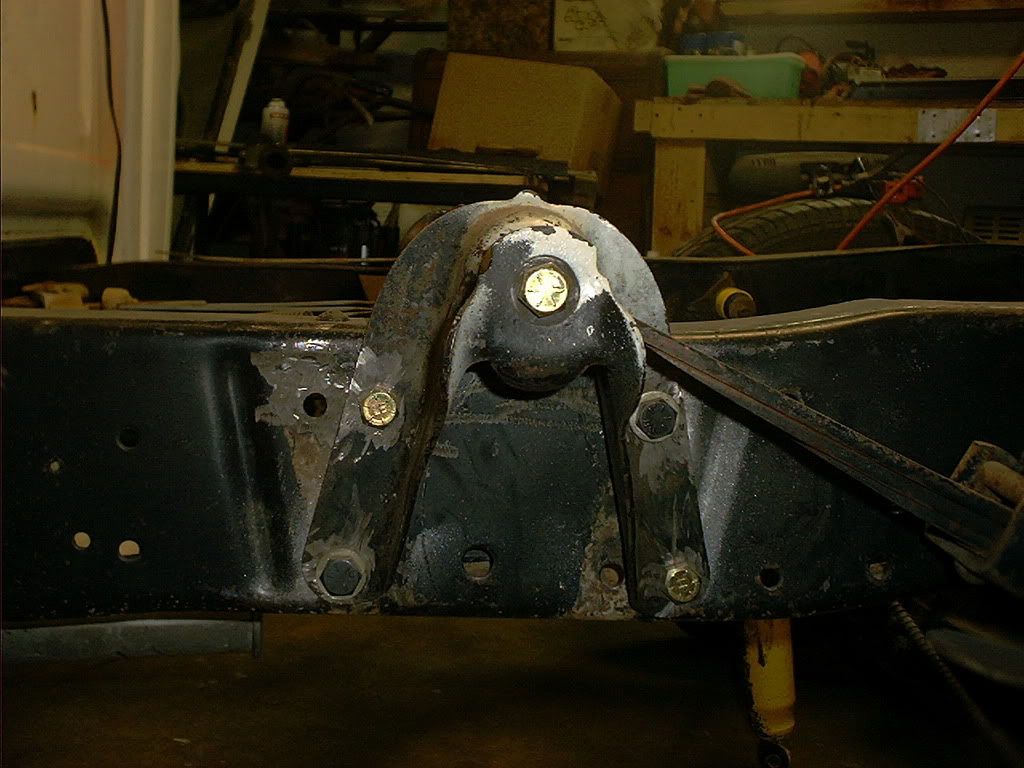
In with the new...
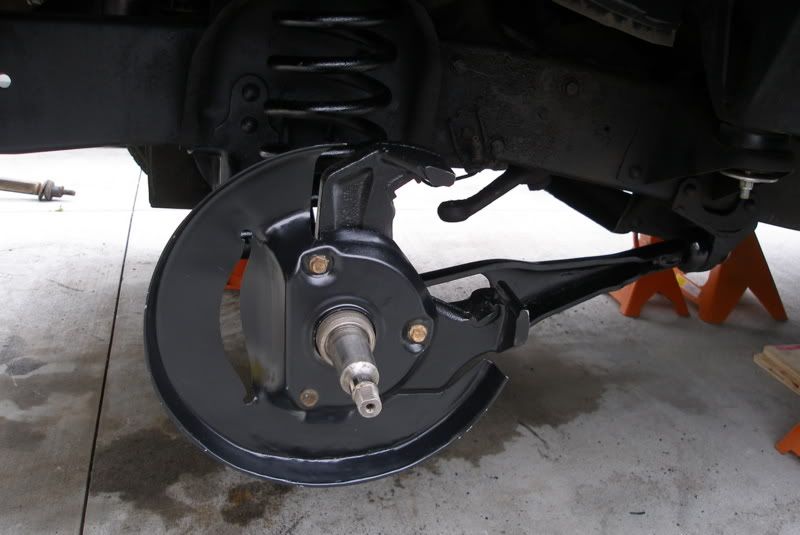
I bought new brake hoses, rotors, calipers, pads, bearings, seals, radius arm bushings, and a little black and cast gray paint.
Next, I cleaned up the booster and prop. valve, installed a new master cylinder, and bent up, flared, and installed all new hard lines front and back...
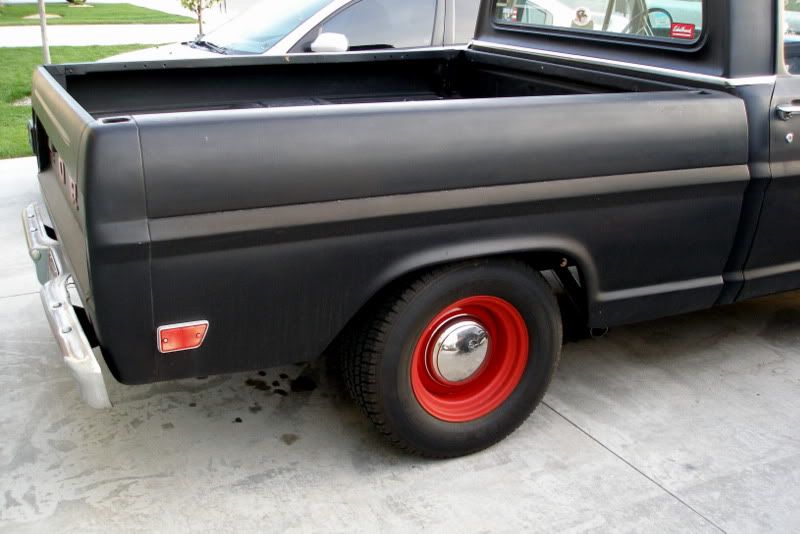
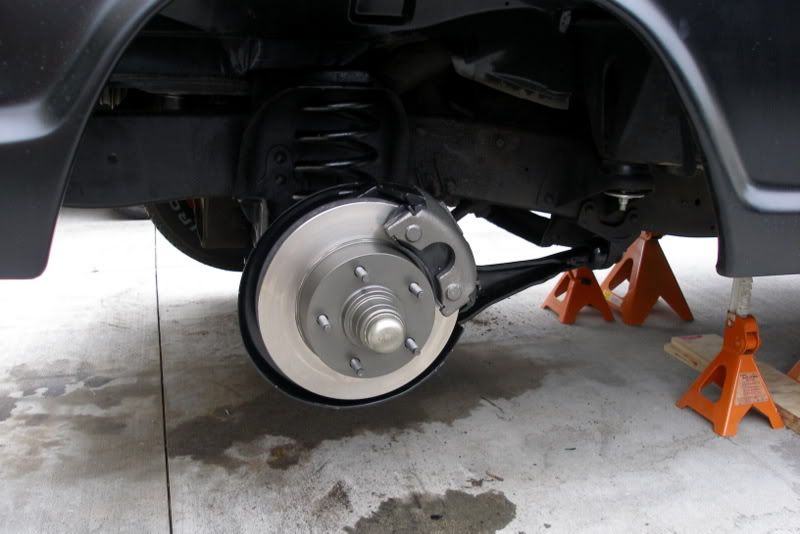
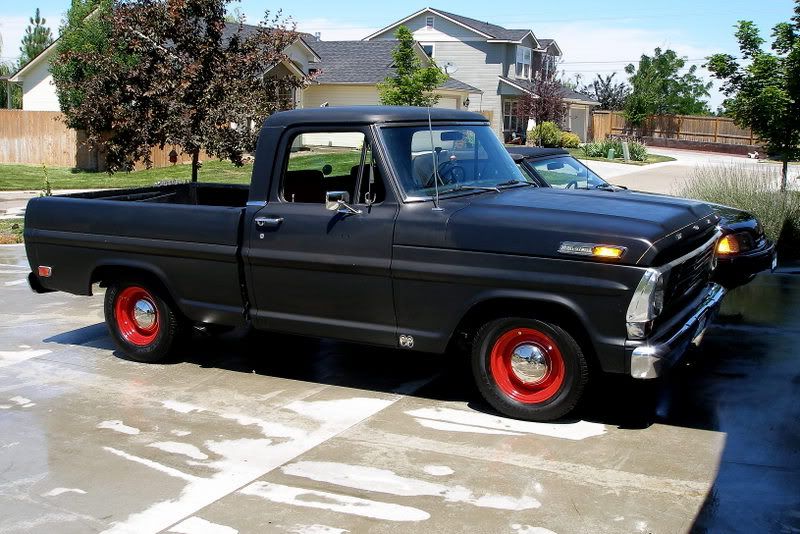
And now...it's not in the weeds or anything but I really like the new stance and the brakes work great! This pic was taken before I installed the stainless exhaust tips.

Tips are on now...washed it too.
I bought new brake hoses, rotors, calipers, pads, bearings, seals, radius arm bushings, and a little black and cast gray paint.
Next, I cleaned up the booster and prop. valve, installed a new master cylinder, and bent up, flared, and installed all new hard lines front and back...
And now...it's not in the weeds or anything but I really like the new stance and the brakes work great! This pic was taken before I installed the stainless exhaust tips.
Tips are on now...washed it too.