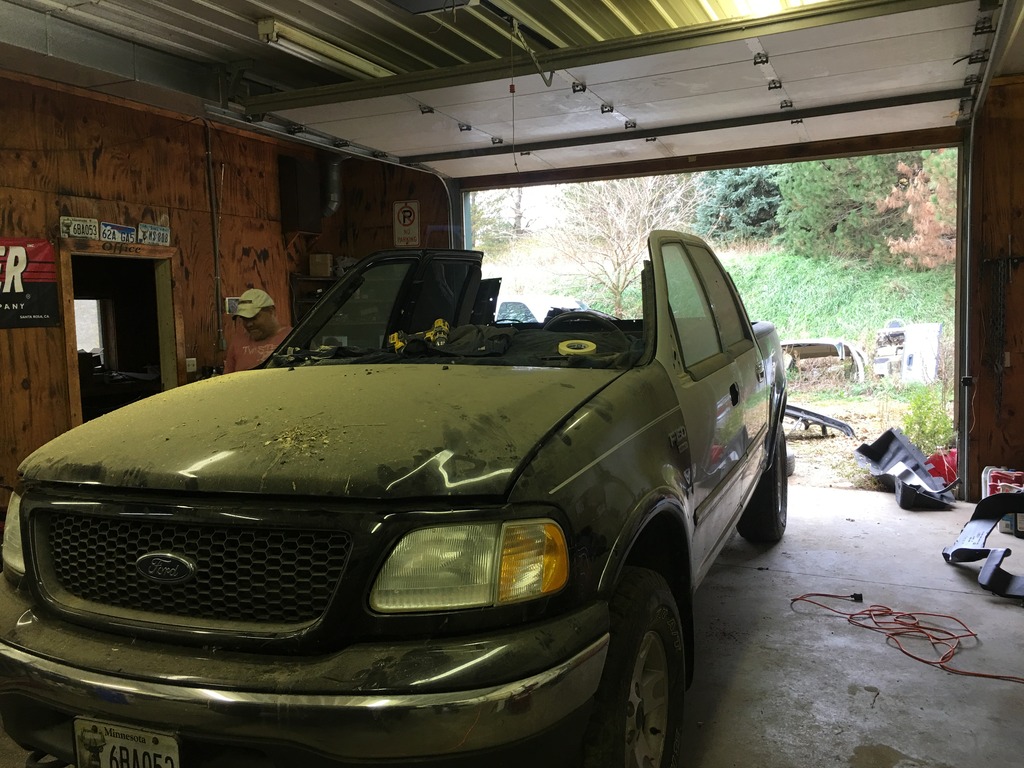
My 2002 F150 Screw(Resto/Build Thread)


The following users liked this post:
4THGENCAMAROFAN (12-21-2016)
 01-01-2015, 07:50 PM
#22


Okay I'll probably get Navi mirrors then.
The Super Duty turned out great. It was hit in the front driverside. They hit a pine tree. Ended up replacing front bumper&grill, hood, driverside fender and the whole inner structure behind the fender all the way up to the firewall. Also had to replace both driverside doors, inner&outer rockers, cab corners, the box and the engine harness from where it was damaged inside the fender.
The Super Duty turned out great. It was hit in the front driverside. They hit a pine tree. Ended up replacing front bumper&grill, hood, driverside fender and the whole inner structure behind the fender all the way up to the firewall. Also had to replace both driverside doors, inner&outer rockers, cab corners, the box and the engine harness from where it was damaged inside the fender.
10-24-2016, 11:17 AM
#23
Bringing this back. Project got put on the back burner for quite awhile. Had several other projects that took place. Also ended up moving twice. Sold a couple cars. But another car.
Anyway. The project is back underway.
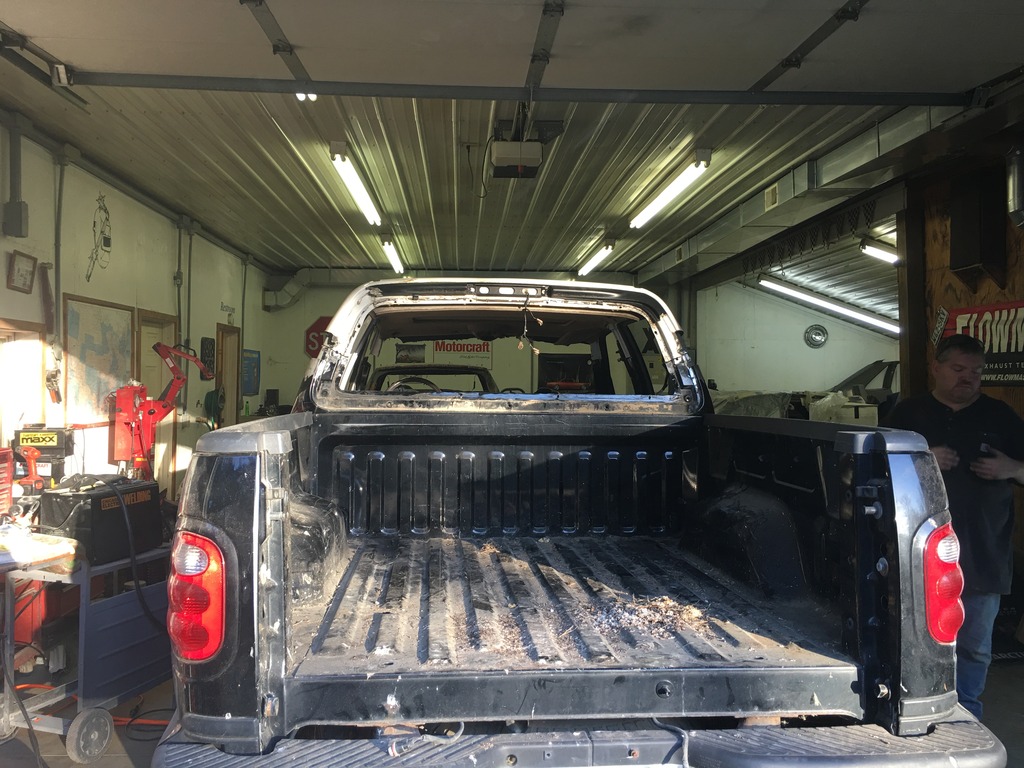
Got the old roof cut off and the new roof tacked in place on both B&C pillars.
Still have to do the A pillars yet but everything is lining up very nicely
New roof tacked in place. Not finished but this is the most time consuming part of the project.
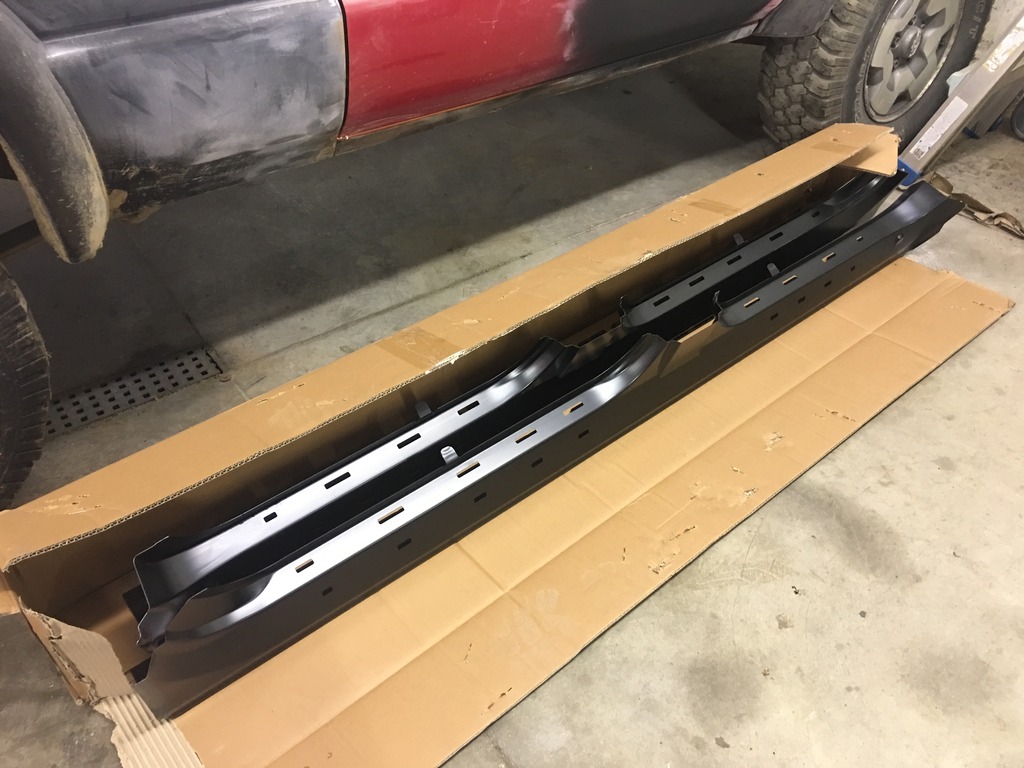
Also I ordered rockers and cab corners from Fixmyrust.com. I'm hoping they fit nicely.
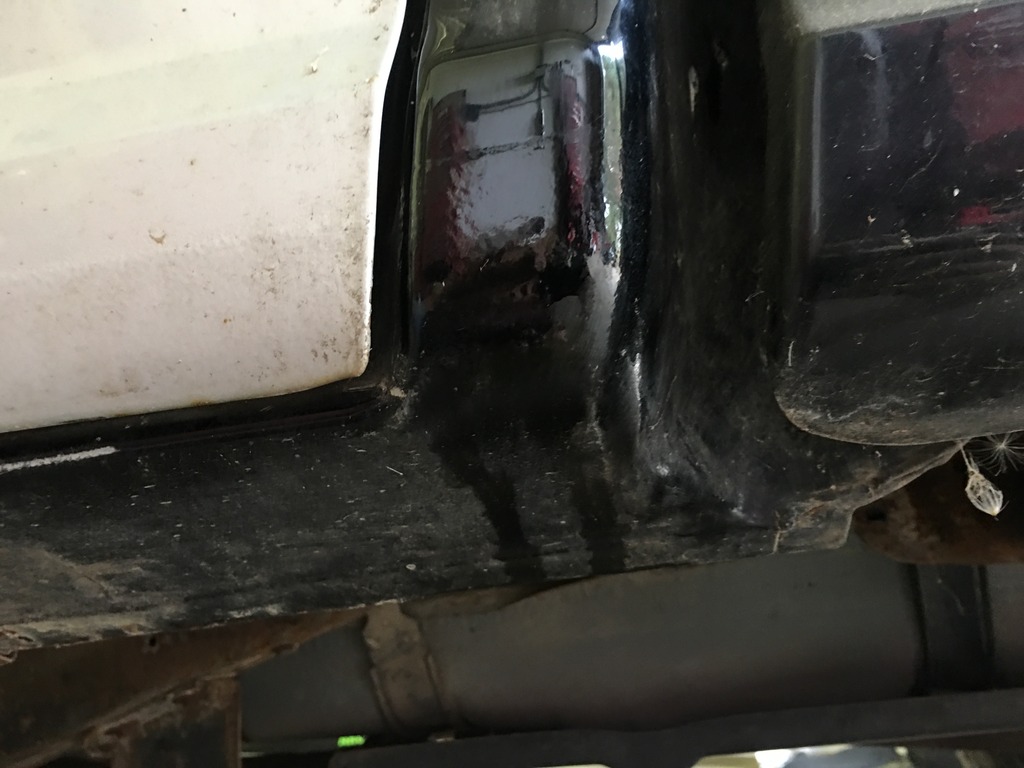
Here's some before shots of the rockers and corners.
Passenger side rocker. Doesn't look that bad but it's very soft and pushes through relatively easy.
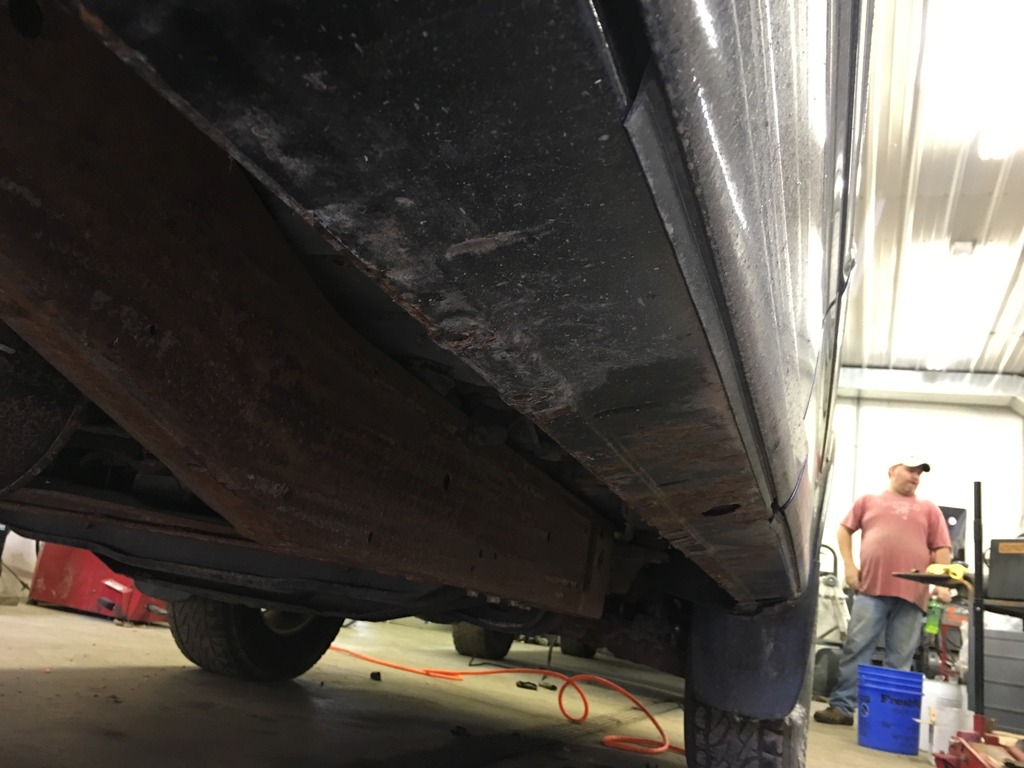
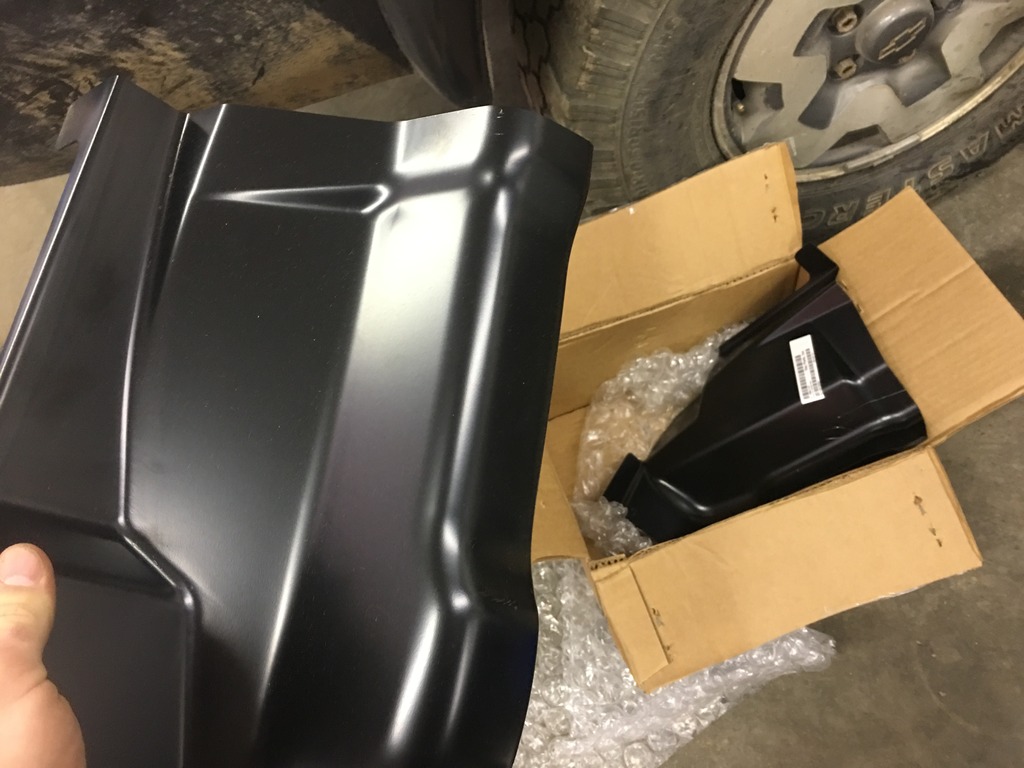
Passenger corner. Not soft but it's starting to rust and bubble so we're doing it now before it gets bad.
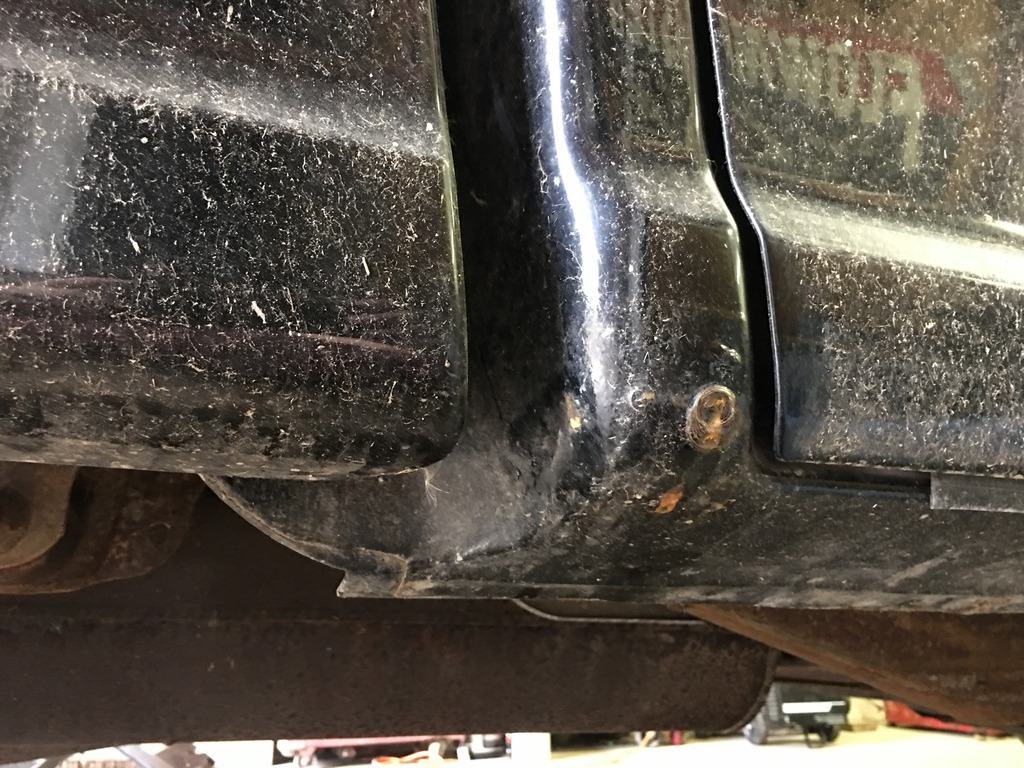
Driver rocker, very very soft.
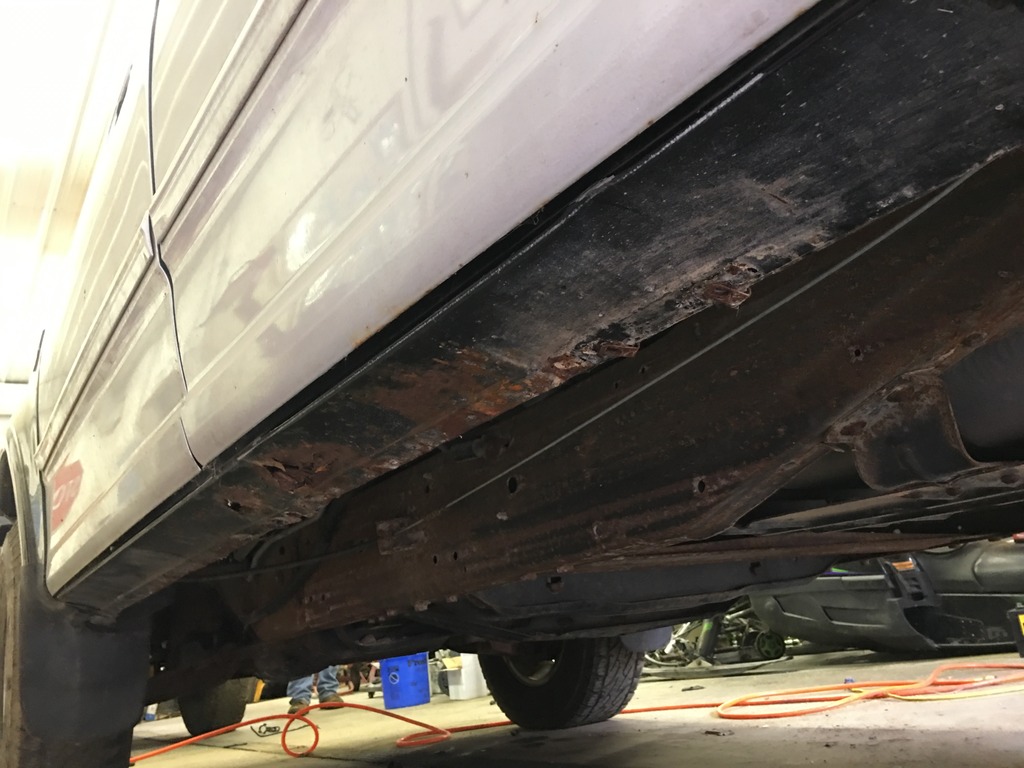
Driver corner, small bubbles. Can't see them cause it's dirty
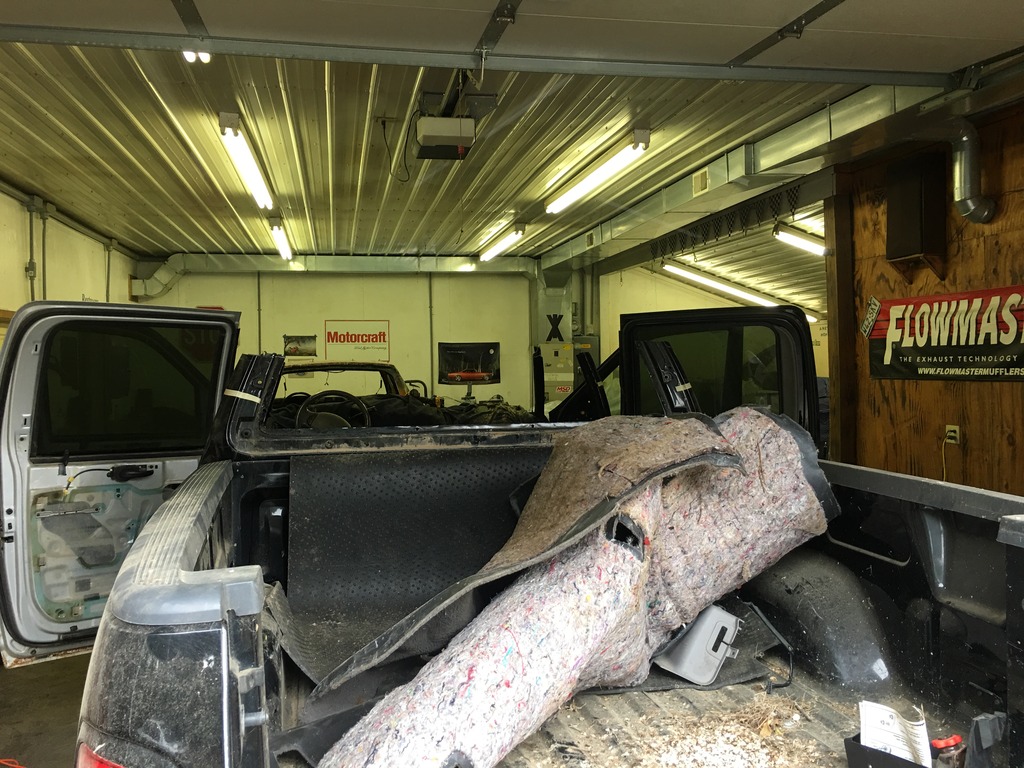
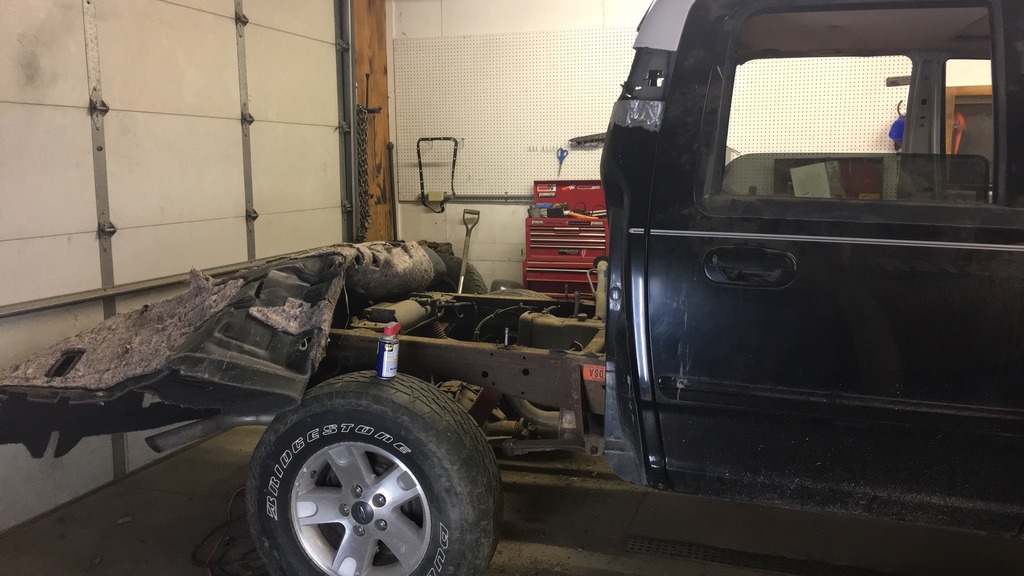
So in preparation for the corners we got the box pulled off. Got 4 out of 6 bolts out which isn't bad. Both of the front ones the weld holding the nut to the clip broke so we ended up cutting those 2 off.
And the box off
I'm also planning on laying sound dampener and a noise blocker while the interior is out.
CLD on all of the panels. Foam decoupler and an MLV layer.
Replacing all of the speakers etc.
Anyway. The project is back underway.
Got the old roof cut off and the new roof tacked in place on both B&C pillars.
Still have to do the A pillars yet but everything is lining up very nicely


New roof tacked in place. Not finished but this is the most time consuming part of the project.


Also I ordered rockers and cab corners from Fixmyrust.com. I'm hoping they fit nicely.
Here's some before shots of the rockers and corners.
Passenger side rocker. Doesn't look that bad but it's very soft and pushes through relatively easy.

Passenger corner. Not soft but it's starting to rust and bubble so we're doing it now before it gets bad.

Driver rocker, very very soft.

Driver corner, small bubbles. Can't see them cause it's dirty

So in preparation for the corners we got the box pulled off. Got 4 out of 6 bolts out which isn't bad. Both of the front ones the weld holding the nut to the clip broke so we ended up cutting those 2 off.

And the box off

I'm also planning on laying sound dampener and a noise blocker while the interior is out.
CLD on all of the panels. Foam decoupler and an MLV layer.
Replacing all of the speakers etc.
Last edited by 4THGENCAMAROFAN; 10-25-2016 at 10:52 AM.
 10-24-2016, 11:47 AM
#25
Senior Member
Nice build so far. Looks like you stay busy. Lol
The following users liked this post:
4THGENCAMAROFAN (12-21-2016)
10-24-2016, 12:09 PM
#26
I try lol. I'm probably going to be wirewheeling the frame today while the box is off. Anybody ever used POR-15 or an undercoating of any sort? I'd like to do the frame in POR-15 and do the brand new rockers and corners with an undercoating so they don't rust again.
Also debating on doing new shocks while the box is off since it'll be easier than with it on. It's got Rancho shocks now but I have no idea how old they are.
Input on shocks? I've always been a fan of Bilsteins. I debated on doing a body lift while all this is apart but I decided against it. I have no plans to ever lift it. So quality stock replacement shocks are what I'm after.
10-24-2016, 12:34 PM
#27
Senior Member
There's a couple threads on POR-15. Prep work seems to be the most important.
The following users liked this post:
4THGENCAMAROFAN (12-21-2016)
10-24-2016, 07:00 PM
#28
Well POR-15 is out of the question. Started wire wheeling the frame today and a lot of it already has a rubber coating on it. So I guess I'm just gonna clean it up decent and respray it with more rubber coating since it's going to be waaaaaayyy to hard to remove all of the old rubber. It would take hours and hours and hours. Pass.
Anywho. More pics.
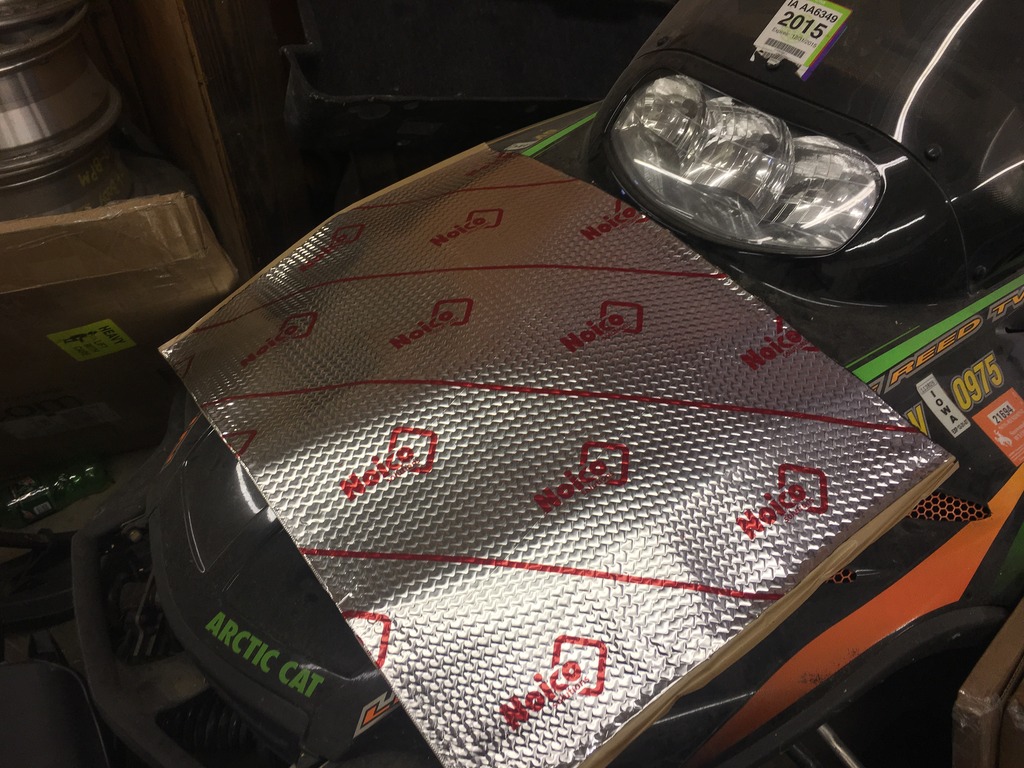
These are the CLD tiles I'm using to "stiffen" up the sheet metal. These stick on and add mass to the panel making them transmit vibration less and keep the panels from making new noises from vibrating.
I used a different product called Second Skin Damplifer Pro in my Grand Prix. Spec wise the SS is better than this stuff. 50mil vs 80mil. BUT this stuff is muuuuch cheaper at 64 bucks for 50 sq ft. The SS is over 200 bucks for 36sq ft

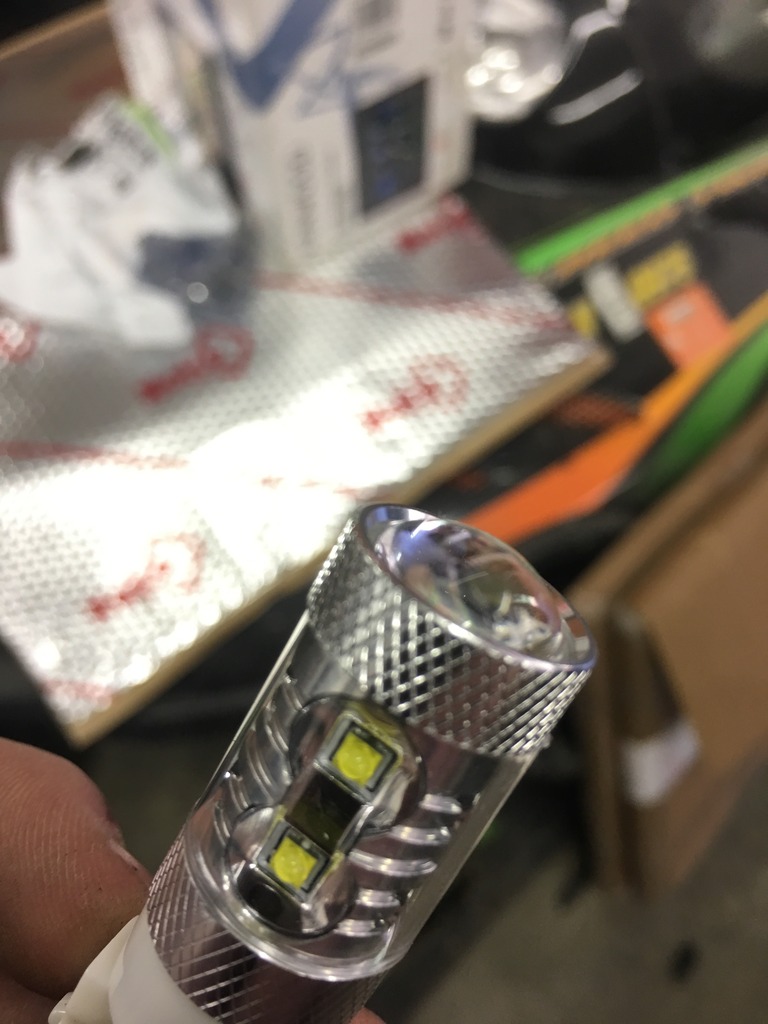
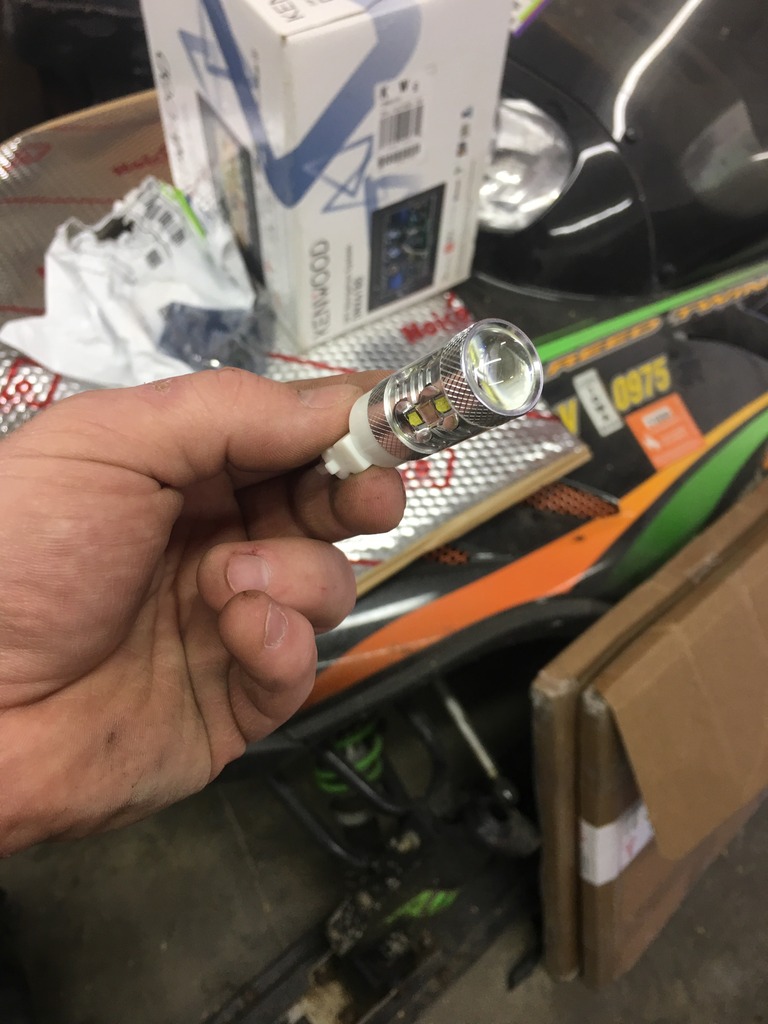
Next up is LED reverse lights. I have a similar bulb in my Grand Prix and they're very bright. They have LED's around the side and LED's at the end with a lense. ~30 bucks for a pair. Threw those in quick.
Here's the foam decoupler that goes on over top of the CLD tiles. This stuff doesn't really absorb sound or do anything other than keep the MLV off of the CLD tiles/metal. Nothin fancy.

The MLV. I have yet to take it out of the box because it's HEAVY. Weighs 1lb/sq ft. 100 sq ft roll. 100 lbs. I'm not messing with this until I have to lol This stuff will probably make the most difference in noise reduction. It should be a great sound barrier
And the rockers and corners.
Anywho. More pics.
These are the CLD tiles I'm using to "stiffen" up the sheet metal. These stick on and add mass to the panel making them transmit vibration less and keep the panels from making new noises from vibrating.
I used a different product called Second Skin Damplifer Pro in my Grand Prix. Spec wise the SS is better than this stuff. 50mil vs 80mil. BUT this stuff is muuuuch cheaper at 64 bucks for 50 sq ft. The SS is over 200 bucks for 36sq ft


Next up is LED reverse lights. I have a similar bulb in my Grand Prix and they're very bright. They have LED's around the side and LED's at the end with a lense. ~30 bucks for a pair. Threw those in quick.


Here's the foam decoupler that goes on over top of the CLD tiles. This stuff doesn't really absorb sound or do anything other than keep the MLV off of the CLD tiles/metal. Nothin fancy.

The MLV. I have yet to take it out of the box because it's HEAVY. Weighs 1lb/sq ft. 100 sq ft roll. 100 lbs. I'm not messing with this until I have to lol This stuff will probably make the most difference in noise reduction. It should be a great sound barrier

And the rockers and corners.


Last edited by 4THGENCAMAROFAN; 10-24-2016 at 07:09 PM.
10-30-2016, 09:48 PM
#29
Got some more work done on the pillars. No pics however. Mainly my Dad and brother doing the roof. I'm not a body guy. I work on heavy duty diesels. Anyway
Other things that got ordered in the last couple days:
4 New Alpine Type S 5X7's for the doors
The wiring adapter and radio mounting kit
Rear view cam for the Kenwood
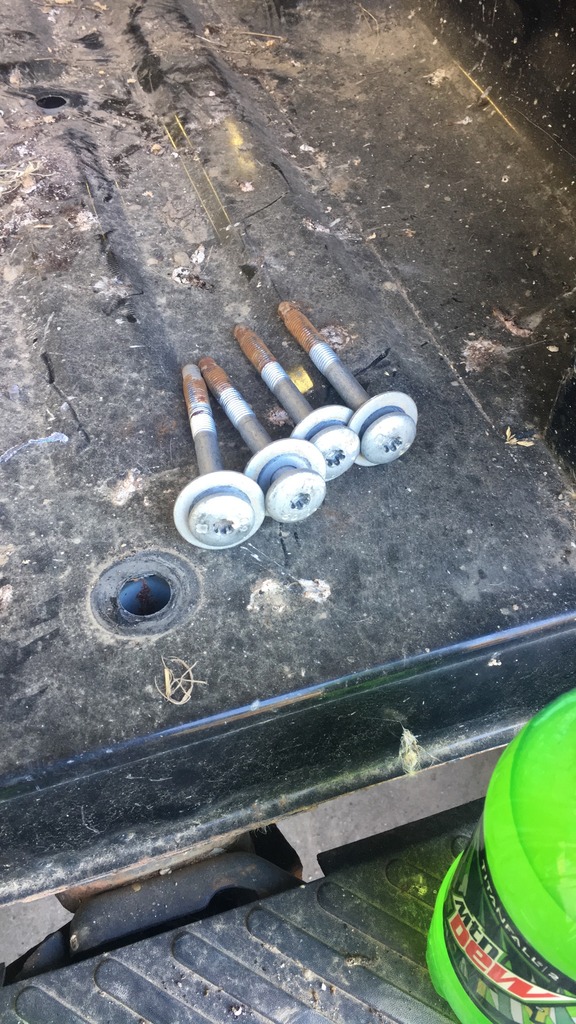
A set of box bolts since I had to cut two of them off.
8ga amp wiring kit. Putting a small 10" woofer under the back seat. Nothing crazy at all.
A quart of POR-15 to do the frame under the cab where there's isn't any rubber coating.
A couple cans of 3m undercoating
A new Motorcraft coil
Other things that got ordered in the last couple days:
4 New Alpine Type S 5X7's for the doors
The wiring adapter and radio mounting kit
Rear view cam for the Kenwood
A set of box bolts since I had to cut two of them off.
8ga amp wiring kit. Putting a small 10" woofer under the back seat. Nothing crazy at all.
A quart of POR-15 to do the frame under the cab where there's isn't any rubber coating.
A couple cans of 3m undercoating
A new Motorcraft coil
10-31-2016, 06:23 PM
#30
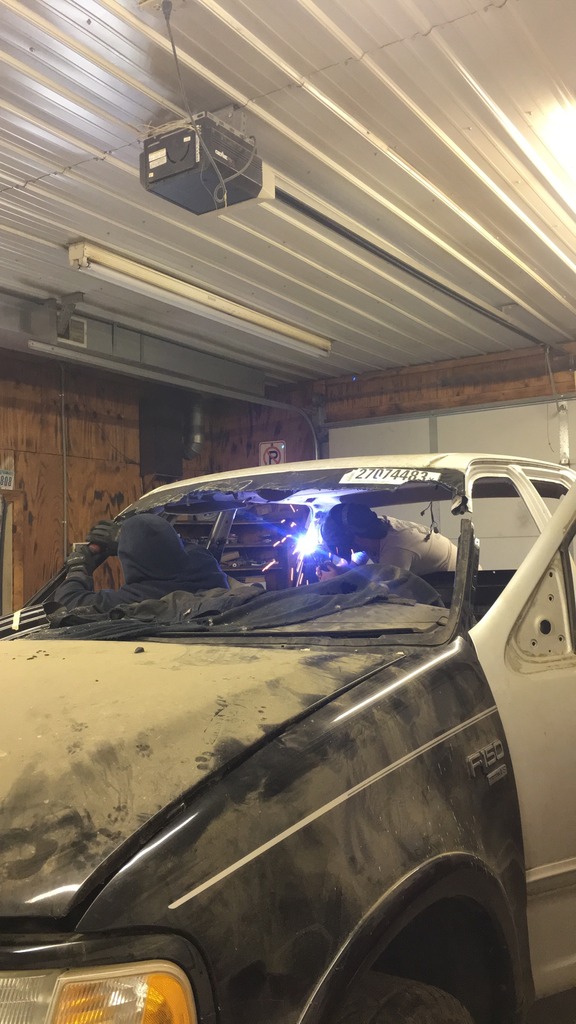
I forgot I did get one pic yesterday. My brother is welding and my dad is working on the a pillar.
For anyone curious how the pillars are being done.
The outer skins are being cut off so that the inner structure can be throughly welded. Then the outer skin is welded back on. It will all be finished smooth and you won't ever be able to tell the roof was ever off.
This also goes for the door jambs as well. Won't ever be able to tell they've had work done.
