HEYFOOL's FX4 build thread


 06-01-2015, 10:19 PM
#3
Member
Thread Starter
My original build list and accessories to buy:
There will be more for sure but that was what I initially wanted. A lot of these I already have since I am posting this kinda late
- Limo tint
- backflip tonneau cover
- remote locking tailgate
- curved led light bar
- led cubes for back bumper
- led cubes for front bumper
- bed mat
- exhaust
- power folding, power telescoping, power adjust, and heated towing mirrors
- led light strip for bed lighting
- remote start system
- aux fuse box
- all led lights throughout truck
- off road tools (hi lift jack, axe, shovel, tow rope)
- CB radio
- possible touch screen radio
There will be more for sure but that was what I initially wanted. A lot of these I already have since I am posting this kinda late
 06-01-2015, 10:26 PM
#5
Member
Thread Starter
My 50" inch curved led light bar by Totron. I just recently replaced it with a 54" curved light bar and better mounts. My previous mounts stood up like antlers and shook violently when going above 50mph

From my 50" curved bar. I dont' have a picture of my new light bar lighting up the night yet.
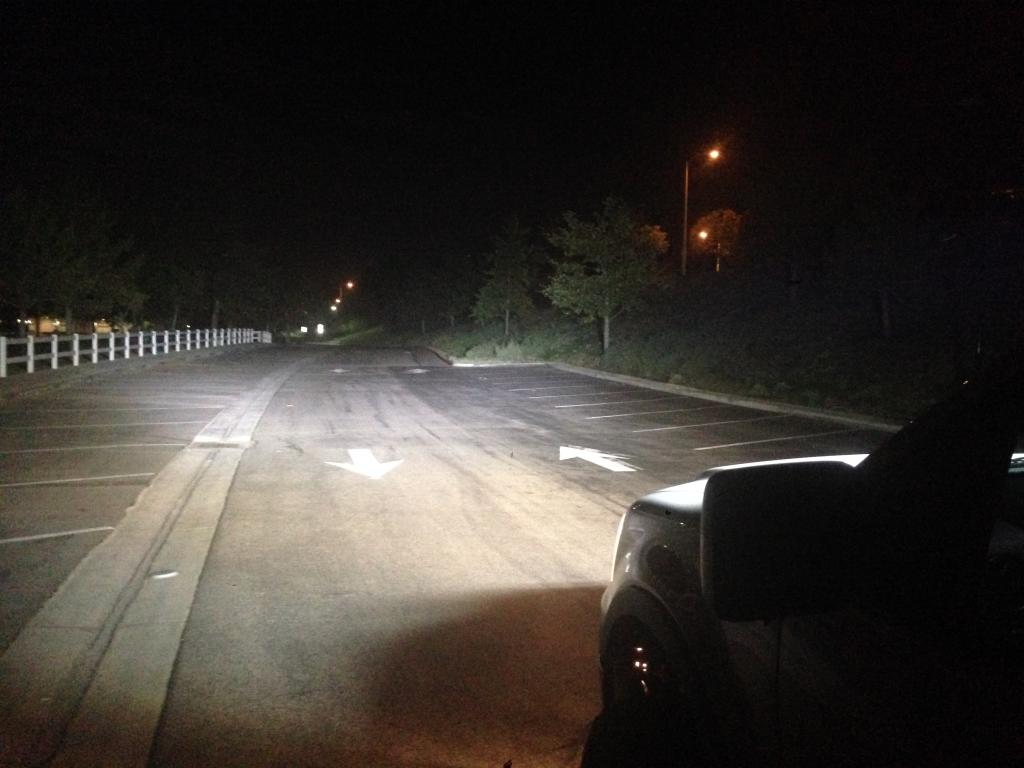


From my 50" curved bar. I dont' have a picture of my new light bar lighting up the night yet.
 06-01-2015, 10:31 PM
#6
Member
Thread Starter
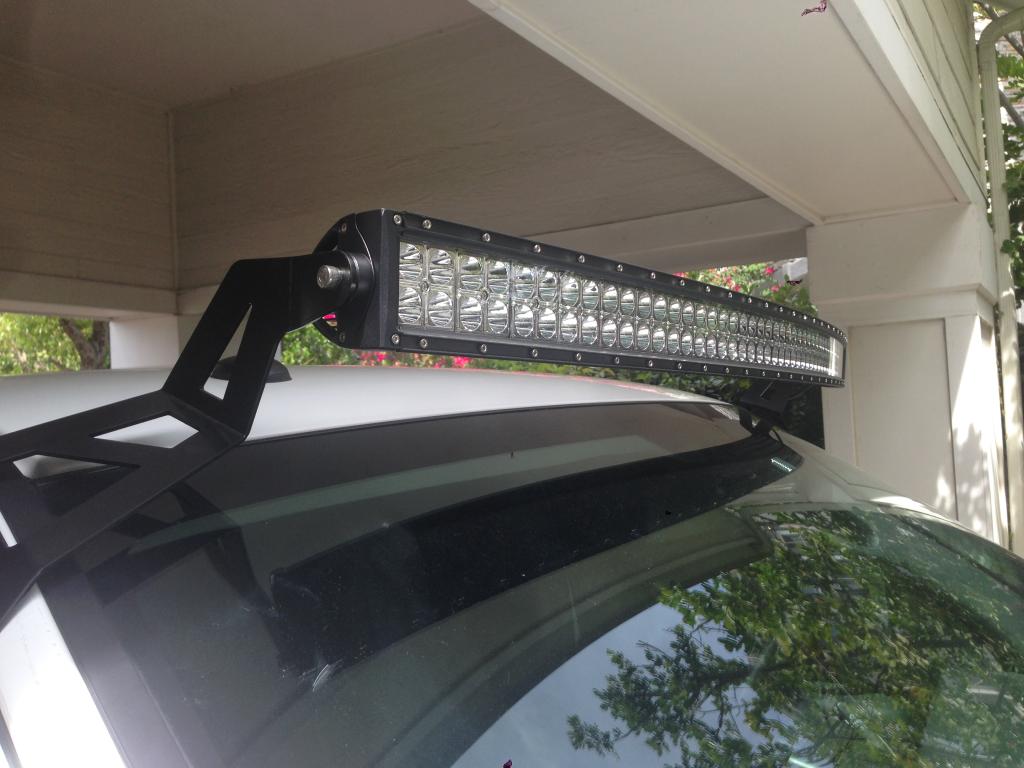
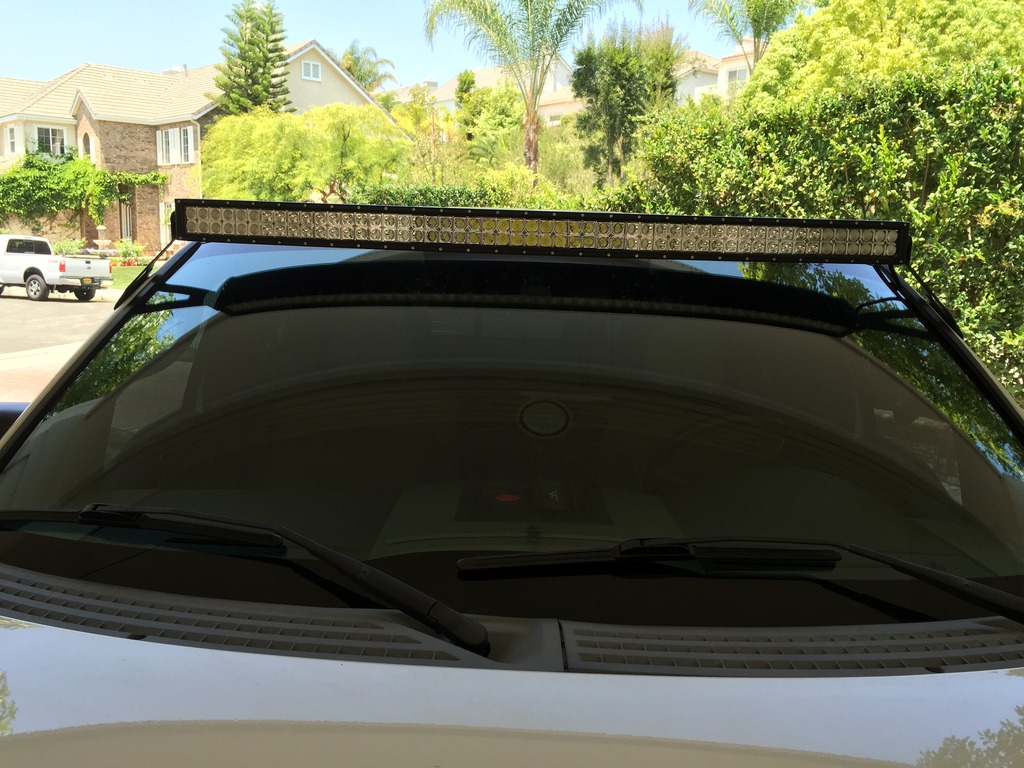
Here is my new 54" curved light bar with Rough Country Mounts. These mounts are amazing!!! They are very sturdy and my light bar does not shake at all.

It really hugs my windshield and was how the curved light bar was designed to be mounted.


It really hugs my windshield and was how the curved light bar was designed to be mounted.
06-01-2015, 10:40 PM
#7
Member
Thread Starter
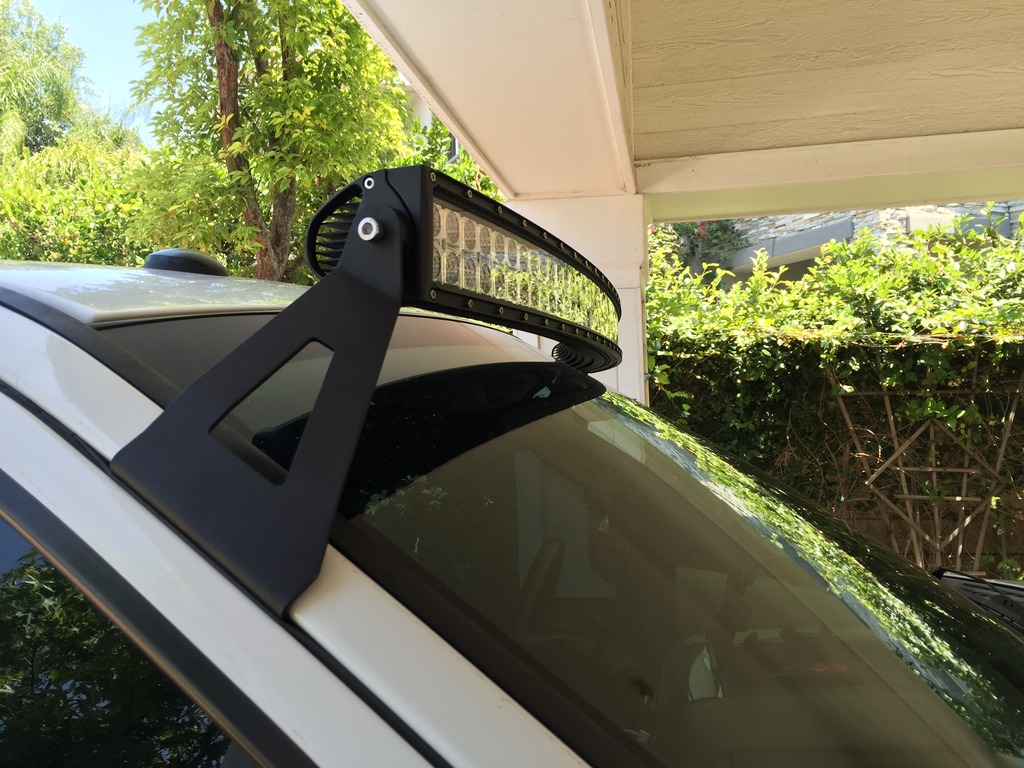
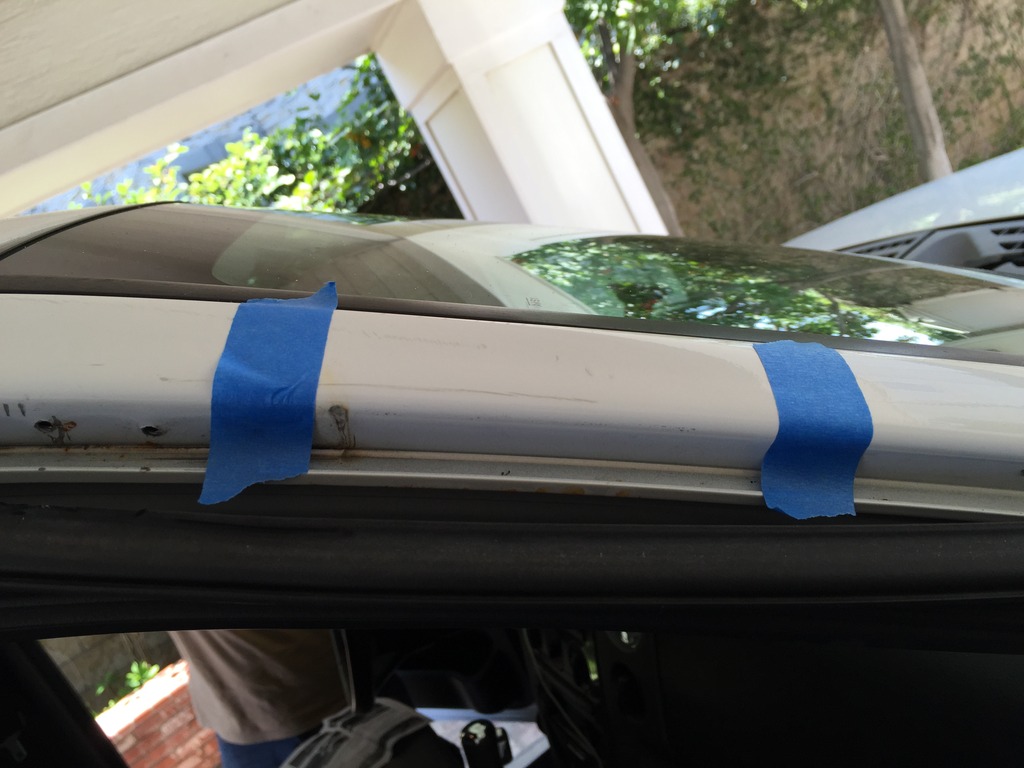
The instructions for the mounts were super easy. Here is my set up and what I used.
You just have to measure from the top of the windshield and place the mount on the truck and drill holes for the rivets. I used blue tap to mark my position. The holes to the left of the blue tape is from my last mounts, which used metal sheet screws. Terrible idea because few of them broke off from the high wind and off roading. This mount is rock solid from riveting it to the door frame.
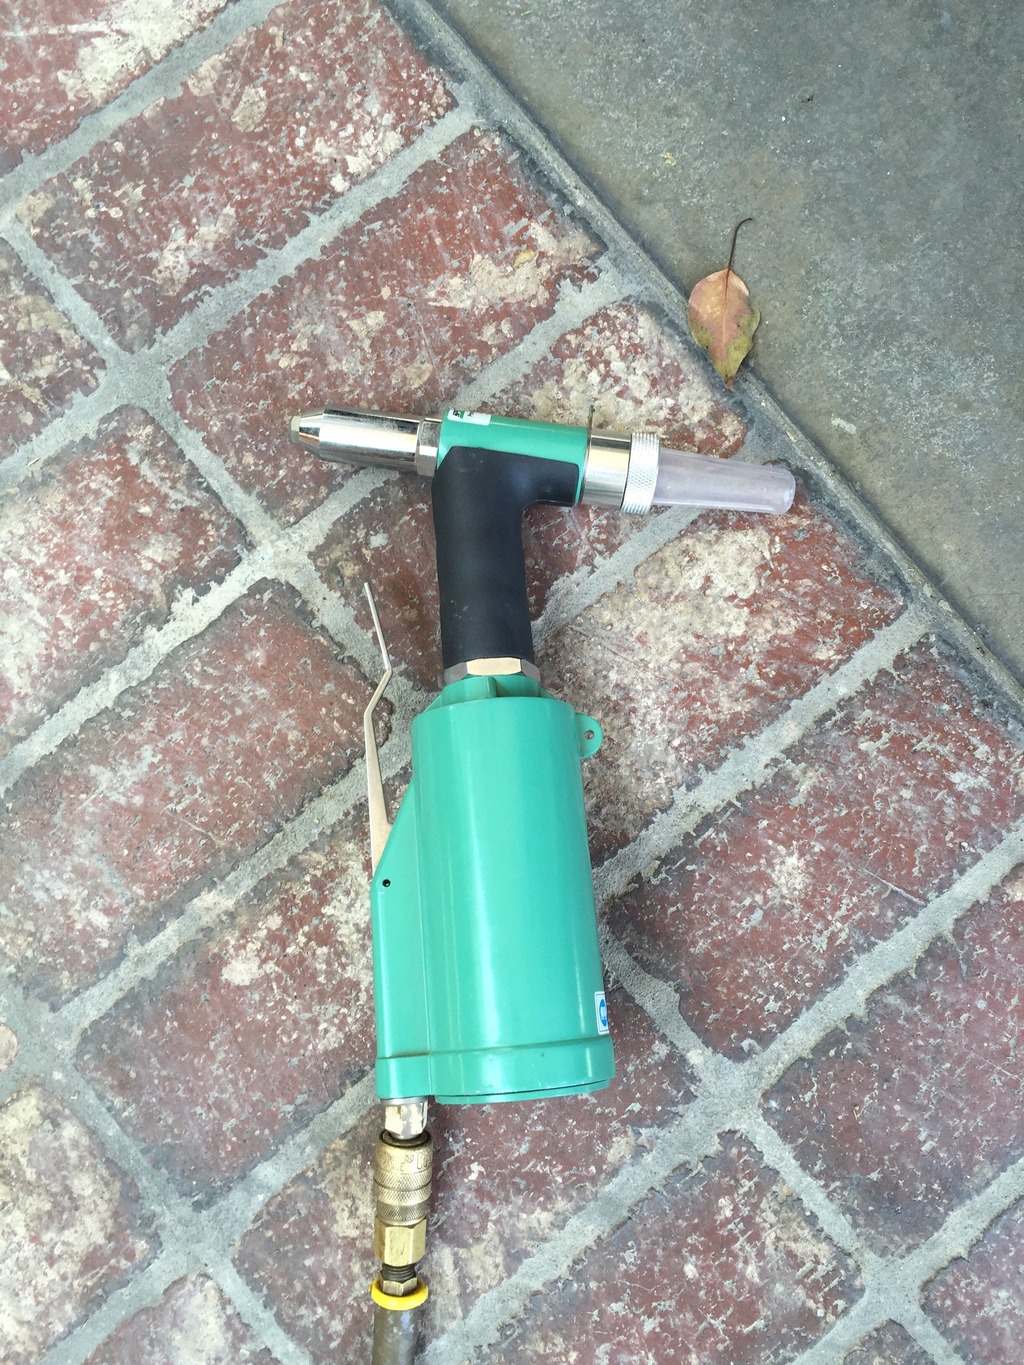
Next I just riveted the mounts to the door frame. The instructions say you can use a pop riveter hand gun but I have a air riveter.

Here is a close up of the bar
You just have to measure from the top of the windshield and place the mount on the truck and drill holes for the rivets. I used blue tap to mark my position. The holes to the left of the blue tape is from my last mounts, which used metal sheet screws. Terrible idea because few of them broke off from the high wind and off roading. This mount is rock solid from riveting it to the door frame.

Next I just riveted the mounts to the door frame. The instructions say you can use a pop riveter hand gun but I have a air riveter.


Here is a close up of the bar

Trending Topics
 06-03-2015, 12:40 AM
#9
Member
Thread Starter
06-04-2015, 02:30 AM
#10
Member
Thread Starter
I will be installing my aux fuse box and wiring my power folding/power telescoping mirrors next. I will post instructions and photos of the install

