KevinMac's 2016 XLT Build
 09-11-2016, 10:06 AM
#31
Member
Thread Starter

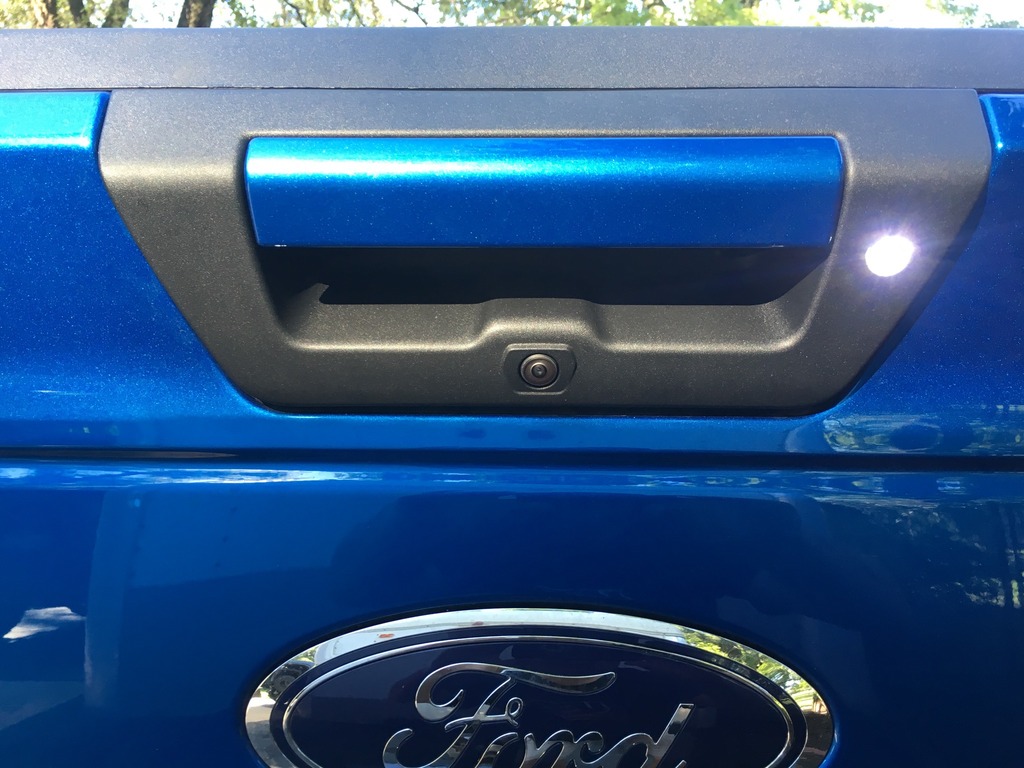
Project of the day...installing the Trailer Assist Light. This little guy helps light up your trailer ball when you are hitching up in the dark. Once again, only available on the higher trim levels but a nice option to have. 
You will need a few parts from the dealer for this swap. A new tailgate handle assembly, with the optional LED hole, the LED itself and a "service connector" to plug into the LED. You will also need about 8' of wire. I opted for 14/2 because I had some left over from a Jeep wiring project. 18/2 wire would have been fine though as the draw by the LED is very little.
The idea for this project came from the thread below. All the info you need on how to remove your existing handle/surround assembly and how to swap the handle itself, if painted, is in there. The only area where I deviated was in the wiring. The guys in that thread had the max tow package and had the wiring in their body side connector. I don't have max tow, so I don't have that existing wiring, I ran my wiring out the tailgate as they did but I then ran it up under the bed and out behind the passenger side tail light. I then tied my pos/neg into the reverse light circuit of the tail light. I apologize, I forgot to take a photo of that!
Trailer Assist Lamo Retrofit - XLT 302A Package
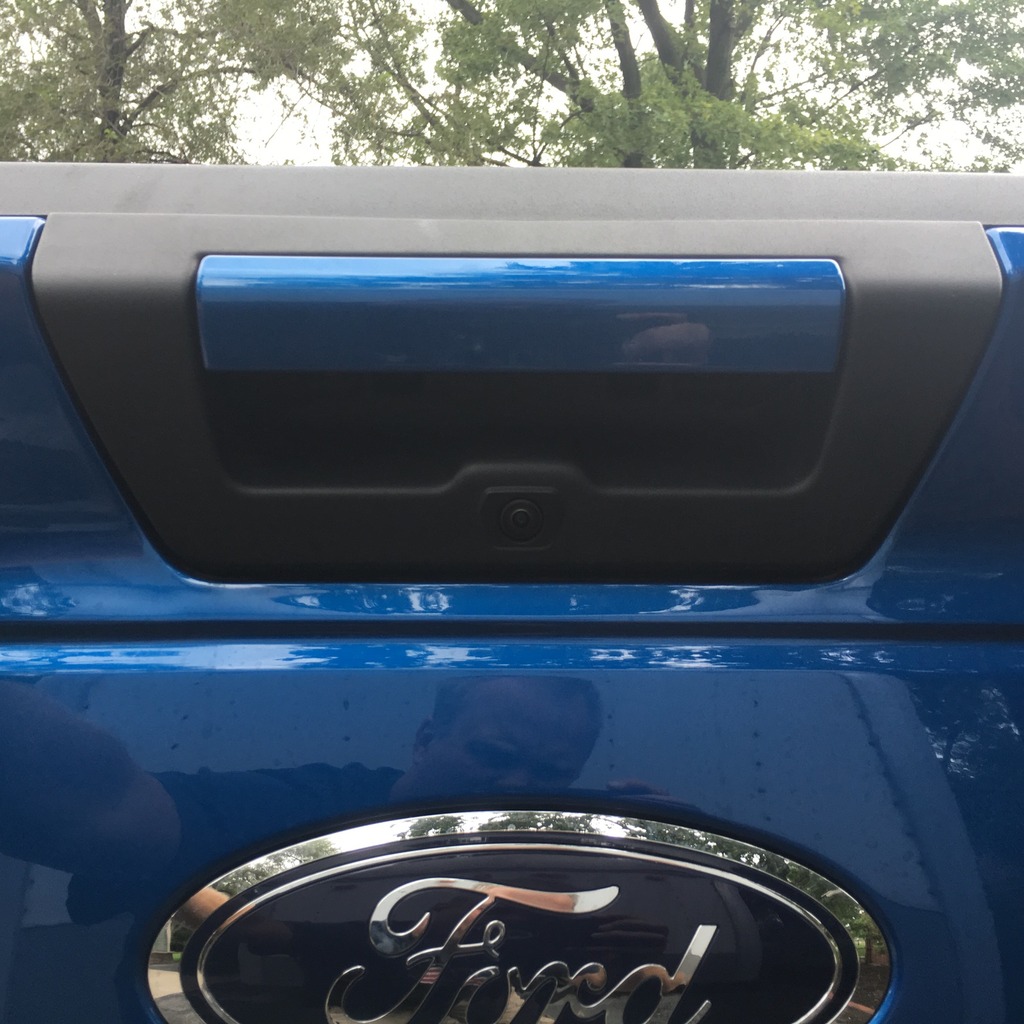
My original tailgate handle/surround assembly:
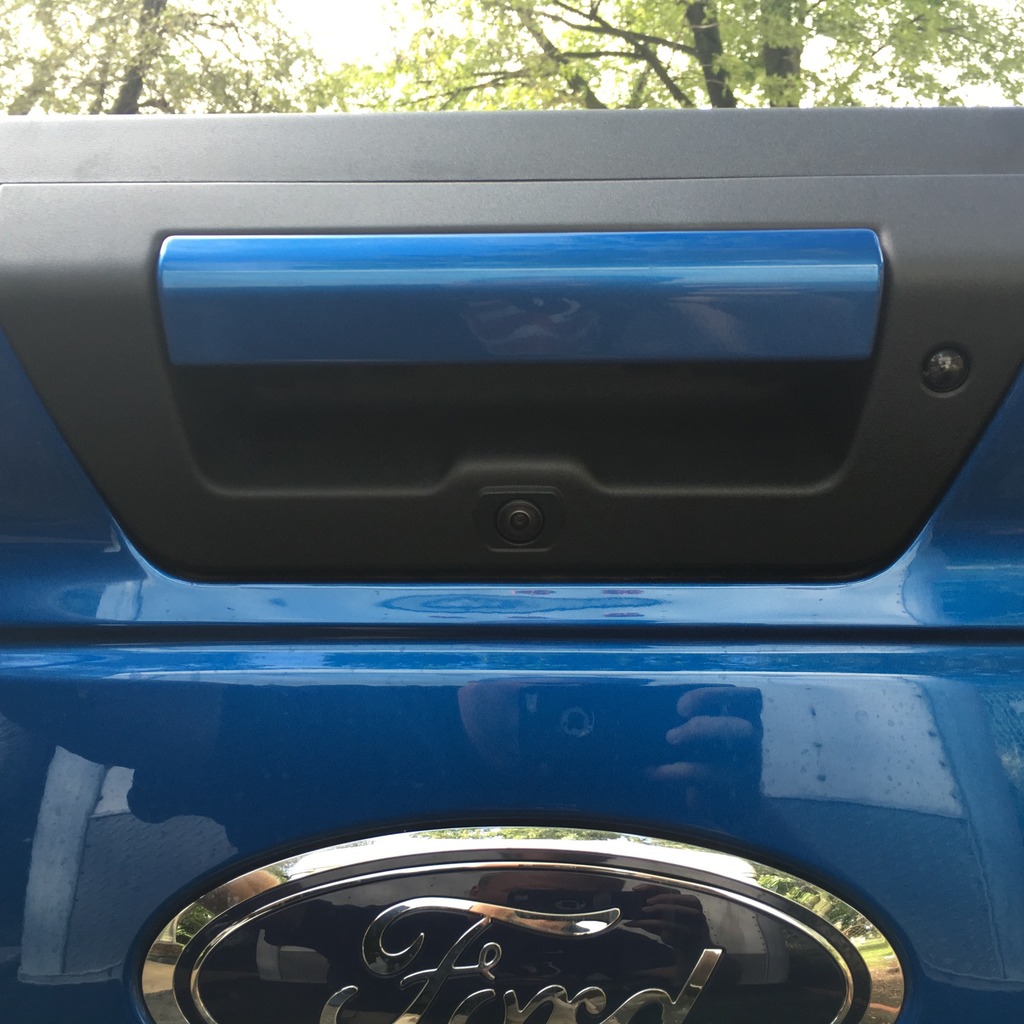
I then swapped my original painted handle into the new surround.
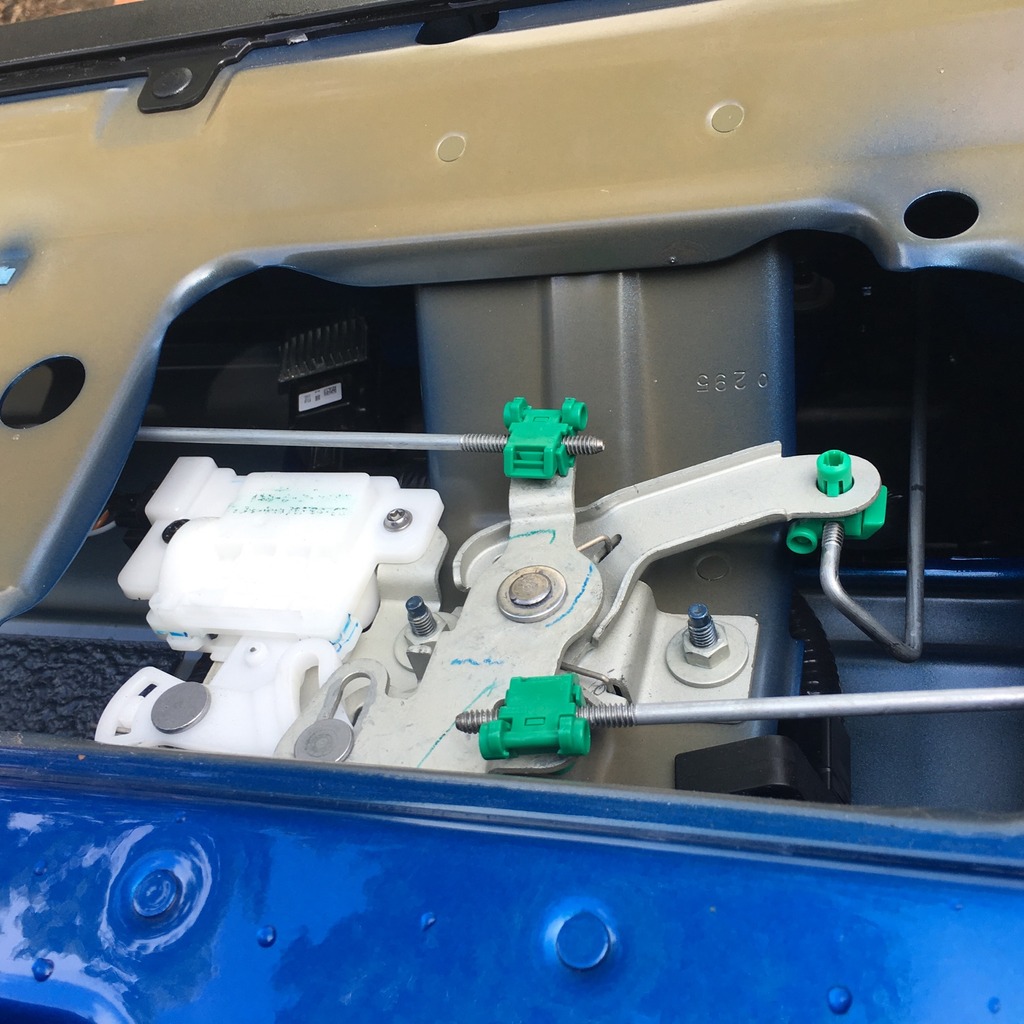
A shot of the inside of the tailgate where the handle/wiring is located:
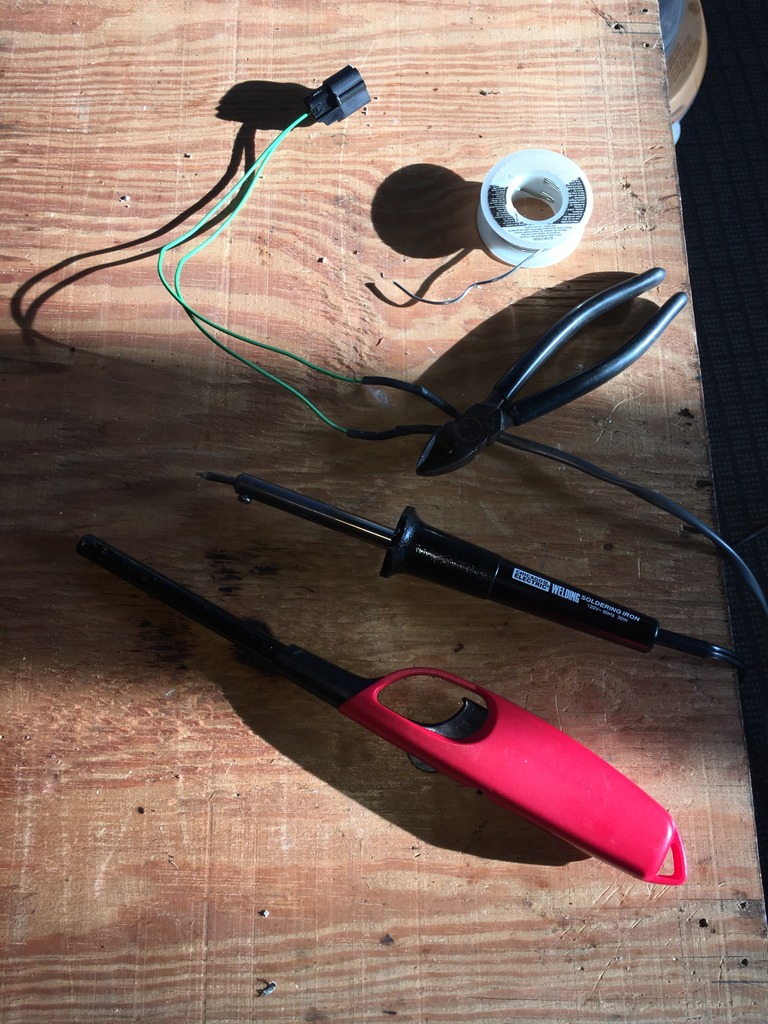
Soldering up the service connector to power the LED:
Installed and working (tied into the reverse light circuit)
Costs:
- Handle/Surround Assembly (unpainted) - FL3Z-9943400-BA - $36.86
- LED Lamp - FL3Z-15500-B - $51.17
- Service Connector - 8U2Z-14S411-AAC - $14.67
You will need a few parts from the dealer for this swap. A new tailgate handle assembly, with the optional LED hole, the LED itself and a "service connector" to plug into the LED. You will also need about 8' of wire. I opted for 14/2 because I had some left over from a Jeep wiring project. 18/2 wire would have been fine though as the draw by the LED is very little.
The idea for this project came from the thread below. All the info you need on how to remove your existing handle/surround assembly and how to swap the handle itself, if painted, is in there. The only area where I deviated was in the wiring. The guys in that thread had the max tow package and had the wiring in their body side connector. I don't have max tow, so I don't have that existing wiring, I ran my wiring out the tailgate as they did but I then ran it up under the bed and out behind the passenger side tail light. I then tied my pos/neg into the reverse light circuit of the tail light. I apologize, I forgot to take a photo of that!
Trailer Assist Lamo Retrofit - XLT 302A Package
My original tailgate handle/surround assembly:

I then swapped my original painted handle into the new surround.

A shot of the inside of the tailgate where the handle/wiring is located:

Soldering up the service connector to power the LED:

Installed and working (tied into the reverse light circuit)

Costs:
- Handle/Surround Assembly (unpainted) - FL3Z-9943400-BA - $36.86
- LED Lamp - FL3Z-15500-B - $51.17
- Service Connector - 8U2Z-14S411-AAC - $14.67


The following users liked this post:
KevinMac (09-14-2016)
09-16-2016, 04:17 PM
#33
Member
Thread Starter
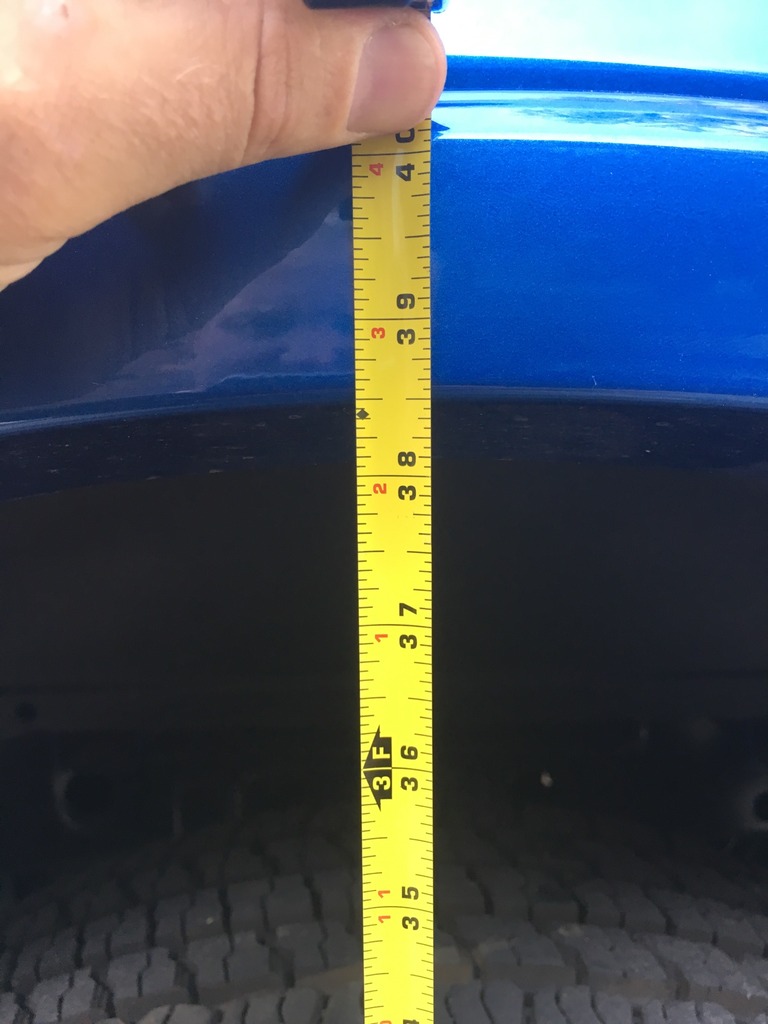
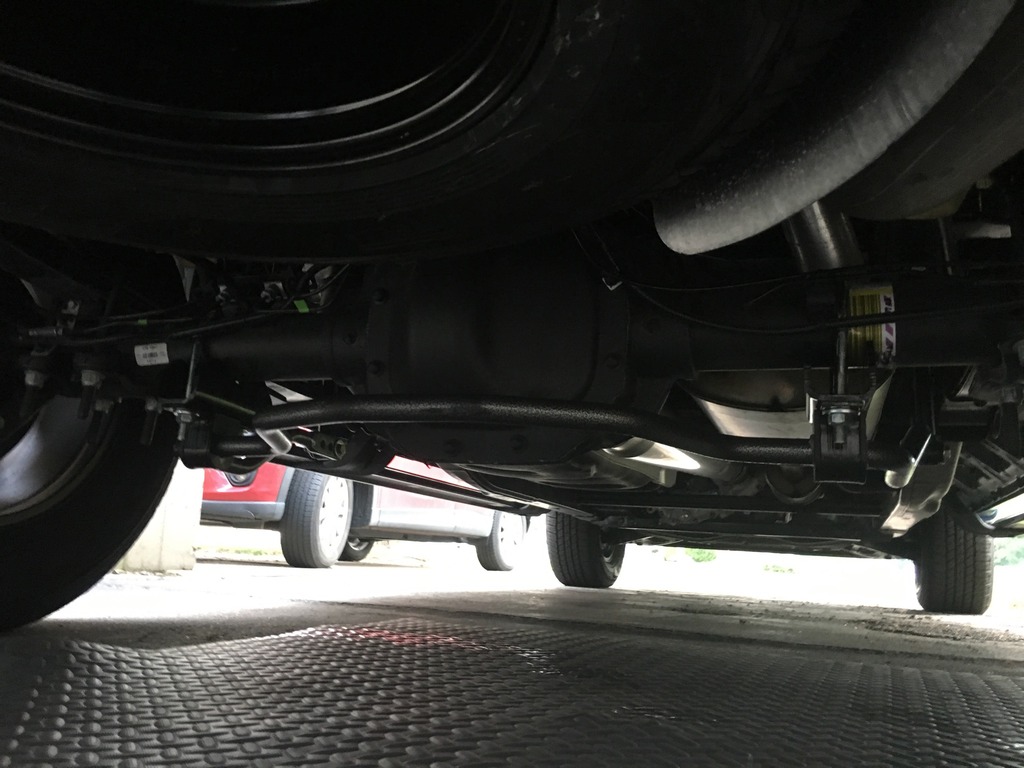
Took off a bit early from work today as it was a gorgeous day. As to not waste it, I took about 40 minutes and pulled the steel blocks from the rear leaf springs. Everything I read said to expect about a 1.5" drop in the rear and that is pretty much exactly what I got.
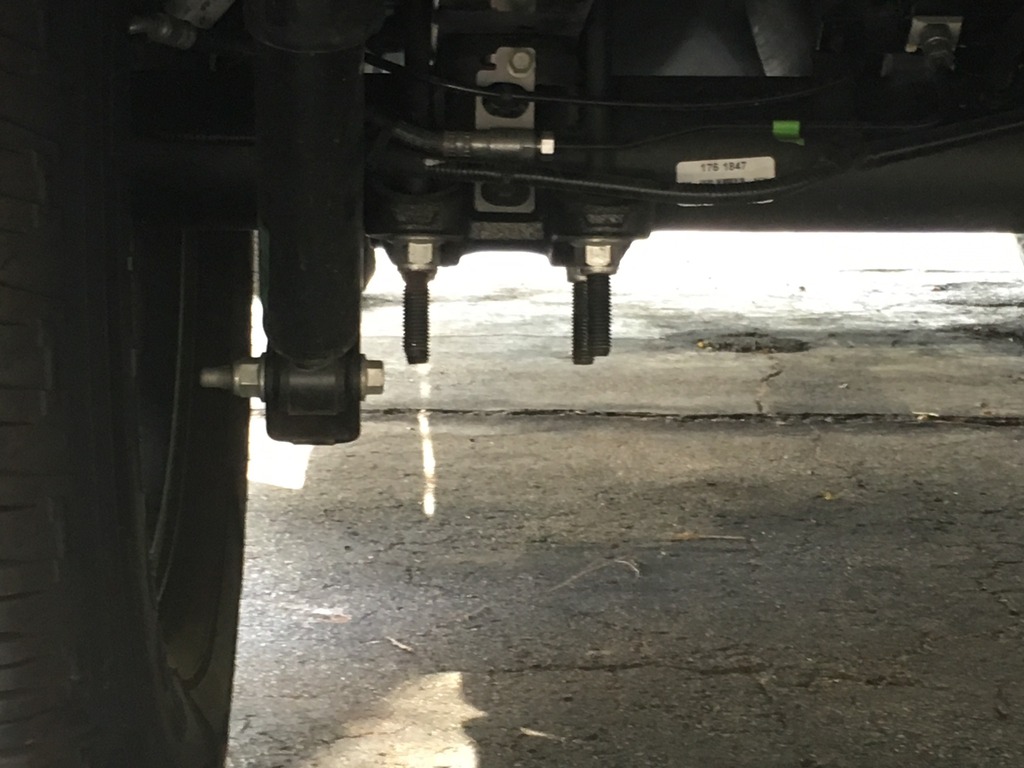
I did take before and after photos with a measuring tape at the top of the wheel well, 40" before, 38.5" after. The only side effect is that I now have excessively long U bolts sticking out under the truck (3rd photo) Some have opted to use 2wd bolts, which are shorter. I haven't decided if it bugs me enough yet, it if does, I will likely just crawl back under with my SawZall.
Also, the link below will take you to the torque specs for when reassembling the U bolts to the truck: TORQUE SEQUENCE AND SPECIFICATION

Costs: Freebie!!
I did take before and after photos with a measuring tape at the top of the wheel well, 40" before, 38.5" after. The only side effect is that I now have excessively long U bolts sticking out under the truck (3rd photo) Some have opted to use 2wd bolts, which are shorter. I haven't decided if it bugs me enough yet, it if does, I will likely just crawl back under with my SawZall.
Also, the link below will take you to the torque specs for when reassembling the U bolts to the truck: TORQUE SEQUENCE AND SPECIFICATION


Costs: Freebie!!
09-16-2016, 10:22 PM
#34
Member
Thread Starter
I work in Detroit for an automotive supplier of interior components. One of the biggest trends in that area is the addition of ambient lighting. With that, I decided to try the cup holder lighting kit from one of the site vendors.
The installation video seemed simple enough but I have to admit that once wrestling with the kit for an hour or so, the result is only 'so-so', in my opinion. The lighting seems a bit 'uneven' as there is really no good way to get a consistent effect. The LED rope itself is quite clever and the color, matches the OEM lighting color quite well. But as you can see in my photos below, it appears a bit spotty.
All in all, I give it 1 thumb out of 2.
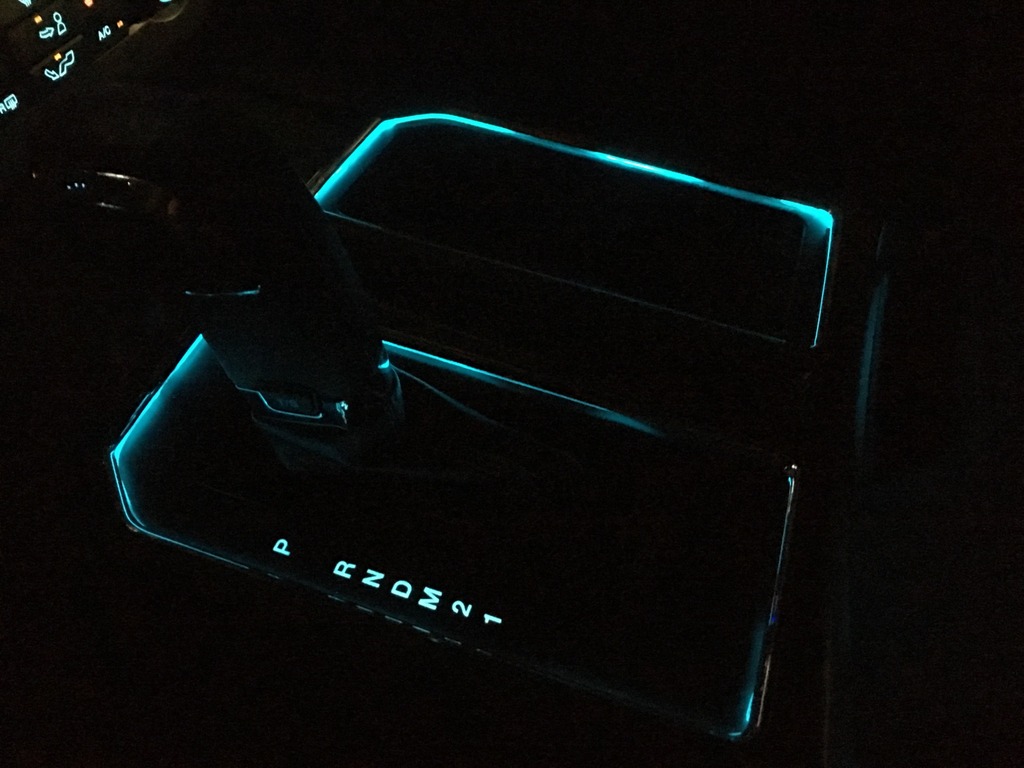
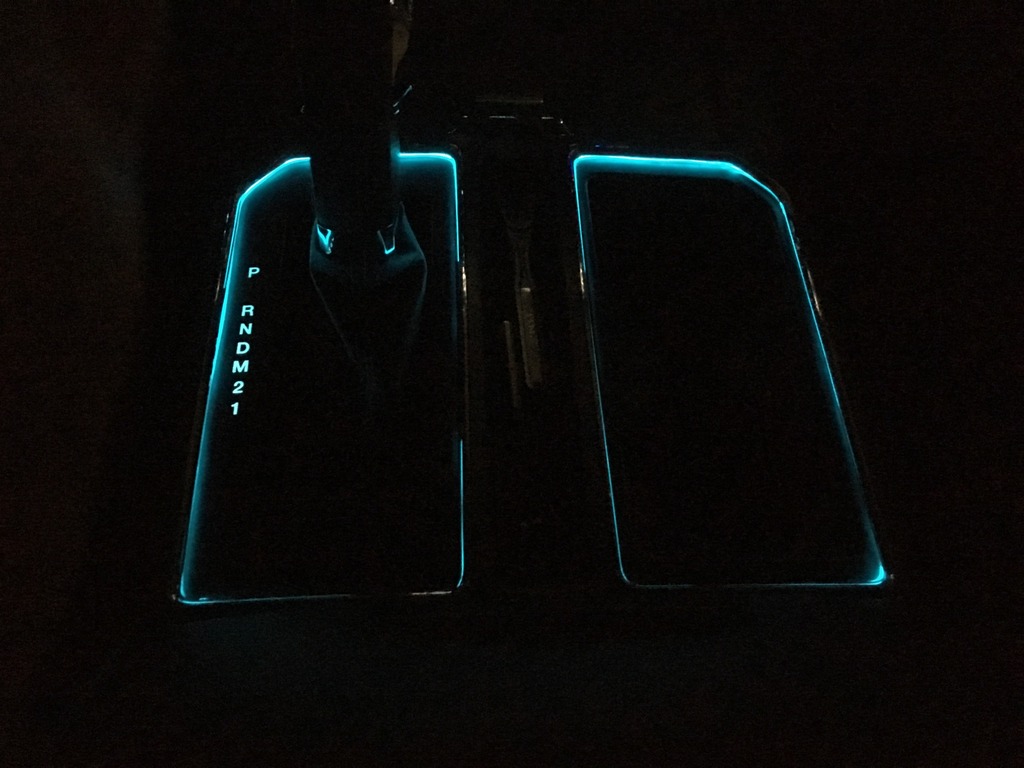
Cost: $55
09-22-2016, 07:33 PM
#36
Member
Thread Starter
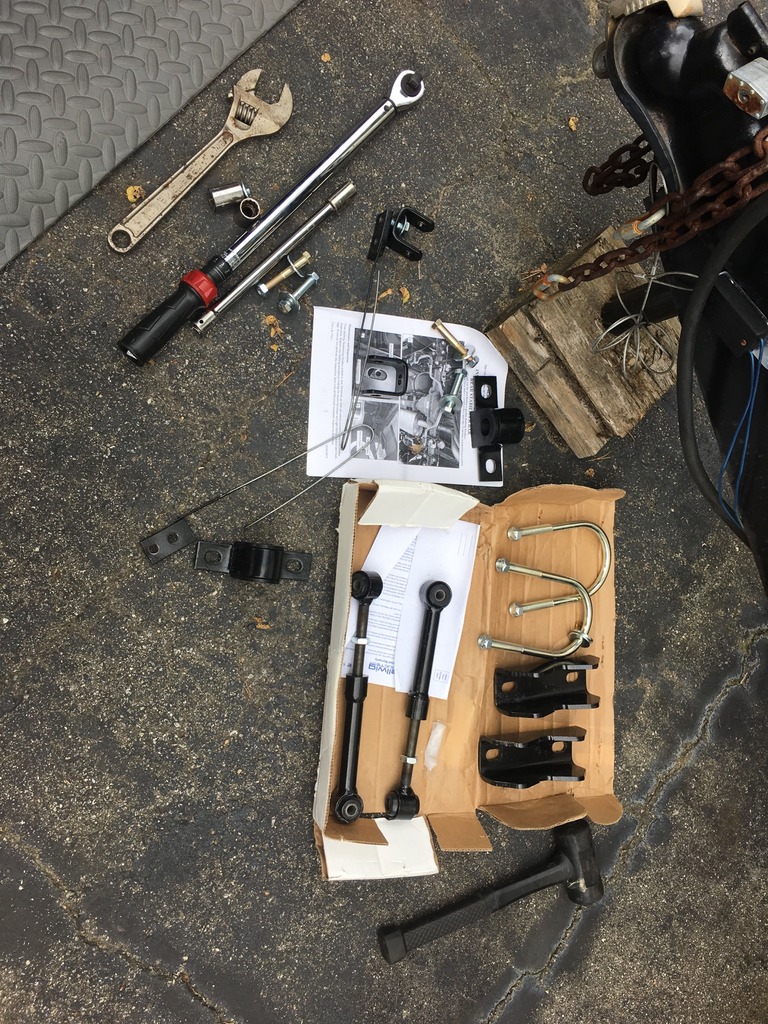
I had a major score over the weekend, I got a Hellwig rear anti sway bar...for $20.50!! Yeah, sure I paid $144 in shipping but that was still a steal! 
Yes, some vendor had the entire setup for $20, they just had a super inflated shipping price. The kit arrived today and I was not disappointed. The hardware and bar itself all look high quality and installation wasn't too bad. All in, I think it took a little over an hour to put on. The directions included were not great, the text wasn't easy to follow and the photos were black and white, so they lacked detail.
However, an online magazine site did a good step by step...with color photos, so that was what I used as the basis of my install. The site can be found here: 2015-2017 F150 Hellwig Install
 i
i

I didn't get a chance to put a lot of miles on after the install but she felt a bit tighter in the corner during my quick test drive. I will put a bunch more miles on over the next few days and am hoping to not be disappointed. Based on the feedback I read on this site, I doubt I will be!
Cost - $164.50
Yeah, sure I paid $144 in shipping but that was still a steal! Yes, some vendor had the entire setup for $20, they just had a super inflated shipping price. The kit arrived today and I was not disappointed. The hardware and bar itself all look high quality and installation wasn't too bad. All in, I think it took a little over an hour to put on. The directions included were not great, the text wasn't easy to follow and the photos were black and white, so they lacked detail.
However, an online magazine site did a good step by step...with color photos, so that was what I used as the basis of my install. The site can be found here: 2015-2017 F150 Hellwig Install

 i
i
I didn't get a chance to put a lot of miles on after the install but she felt a bit tighter in the corner during my quick test drive. I will put a bunch more miles on over the next few days and am hoping to not be disappointed. Based on the feedback I read on this site, I doubt I will be!
Cost - $164.50
The following users liked this post:
NITRO-FC (04-02-2024)
 Keep it up!!!!
The following users liked this post:
KevinMac (09-24-2016)
 09-27-2016, 01:53 PM
#39
Senior Member
Nice work on all!
I'm about 2 weeks into ownership on my '16 XLT Sport 2.7 2WD SCREW. Looks like you've done some of what I'm looking at, gives me some motivation.
I'm about 2 weeks into ownership on my '16 XLT Sport 2.7 2WD SCREW. Looks like you've done some of what I'm looking at, gives me some motivation.