Elrod's 93 F-150 Revival!
 07-14-2014, 03:11 PM
#1
Junior Member
Thread Starter

Join Date: Jan 2014
Location: SE Arkansas
Posts: 20
Likes: 0
Received 0 Likes
on
0 Posts

I haven't been very active since joining up on here and have actually been keeping track if this build over on sn95forums to share with my friends there. I figured I'd post it all here where some of you guys can enjoy it as well.
My dad bought it new in December of 92 (rhyme). It's a 93 XL, 2wd, 4.9L with 5 speed. It was originally charcoal grey, with silver painted wheels and front bumper, and a white diamond plate work-truck rear bumper. A few years after he got it, a guy who detailed it ruined the clearcoat, so for the next probably 10 years of its life it was a flat grey color and just became an all-purpose truck...hunting, fishing, work/haul, etc. When I became old enough to learn how to drive, it became mine, and I was instantly bitten by the mod bug. The truck had remained mostly stock throughout most of its life. I had dreams of repainting it back the original color and one day swapping a different motor in it. Over the next couple years I got to learn a lot about vehciles through that truck, and had my first wreck also...a small fender bender in which i busted a headlight and my grille. I worked to replace the grille and headlights but still wanted more. We didn't have the money to pay a body shop to do all the work, so dad told me I needed to learn a little about sanding and body work. I spent a ton of time wet sanding it and finally got a buddy of mine from the body shop to come to my house and prime it for me. At that point I was still in high school and still trying to convince my dad to let me lower it, which he was strongly against. After graduating and saving up money from work, I was finally able to win my old man over. Up until that point the only thing he let me change was an aftermarket CD player and a set of chrome stock rims and roll pan. I started with a Belltech flip kit, shackles and air shocks, and by then had also changed to a set of Cragar SS wheels. The factory bench seat later got ditched for a set of Eddie Bauer buckets with center jump seat. The front finally came down with a set of Belltech I-beams and cut factory coils. The front changed to a Carriage Works cut out billet grille, smoothie bumper with fog lights, clear headlights, and a Cervinni's ram air hood. Shortly into my first year out of school, I made a rookie mistake and let the truck overheat, resulting in a blown head gasket. Out came the old straight six for an overhaul. Really wish I had spent some more time on that but I'll get to that later. After that I drove the truck every day until February of 2011 when I upgraded to my 08, and since then I have only driven it a handful of times . I know I left out a few details but that's the basics of this project.
My goals of the truck have always been pretty simple: Slam it on its face, get a nice set of wheels and a fresh paint job, and one day put a V8 in it. Lately more and more of my friends have been asking why I don't drive it and urging me to get it back on the road, and it's finally gotten to me enough to light the fire under my *** that I needed for a while! My upcoming plans for the truck are to finally get my Lightning wheels on, get it back running, and do a little clean up under the hood. When we rebuilt the 6'er, we were in a rush to get me back on the road and didnt spend any time on making it look better under the hood. I plan on taking the intake back off and repainting it and all of my accessory brackets, cleaning up some vacuum lines and wires, and repainting the fenders and firewall, then start working on repainting the rest of the truck (finally).
Hope you guys will like it, as it's kind of an eye sore even I'll admit...white hood, black bumper, grey grill, primered body, etc. lol. I'll get some pics up in the next post, as well as a list of mods.
 07-14-2014, 03:22 PM
#2
Junior Member
Thread Starter
Join Date: Jan 2014
Location: SE Arkansas
Posts: 20
Likes: 0
Received 0 Likes
on
0 Posts
Current mod list:
Belltech 5/7 drop (coil springs and I-beams, flip kit and notches with air shocks)
Cervini's Ram Air hood, Carriage Works Billet Grille, Depot clear headlights soon to be replaced with a smoked version
Eddie Bauer bucket seats and all stereo and speaker equipment replaced with Pioneer (deck, door and rear speakers)
Welded steel roll pan, shaved and reversed tailgate handle, shaved badges and soon shaved stake pockets
Soon to be sitting on the Lightning wheels.
Once again hope you guys enjoy and I'll update this as more work is done...just wanted to go ahead and get it up here since I've been waiting to do it for a while now.
07-14-2014, 03:24 PM
#3
Junior Member
Thread Starter
Join Date: Jan 2014
Location: SE Arkansas
Posts: 20
Likes: 0
Received 0 Likes
on
0 Posts
3-5-14
This evening I got a couple friends to cone help me get the truck in my shop since it won't run right now. It was in the shed beside my shop, in front of the mustang. So therefore we had to roll the car out first, then the truck, then maneuver the truck back and forth between the big shop and my oddly placed smaller shop in the middle of the yard. Took a while but we got it lined up with the doors but still couldn't roll it up the ramps into the shop. So here was our solution: We wrapped a chain around the rafters, hooked a chainfall to it and to the lift point on the front of the engine, and as I took up slack on the chainfall, the other two guys kept pushing against the back to relieve some stress on the chain setup. We finally got it in though! This weekend I plan on dropping my fuel tank and cleaning/painting it, and cutting off my old unused exhaust hangers and getting the frame nice and clean and ready to be undercoated....again. Then I'll move on towards the engine bay cleanup and front suspension revival!
This evening I got a couple friends to cone help me get the truck in my shop since it won't run right now. It was in the shed beside my shop, in front of the mustang. So therefore we had to roll the car out first, then the truck, then maneuver the truck back and forth between the big shop and my oddly placed smaller shop in the middle of the yard. Took a while but we got it lined up with the doors but still couldn't roll it up the ramps into the shop. So here was our solution: We wrapped a chain around the rafters, hooked a chainfall to it and to the lift point on the front of the engine, and as I took up slack on the chainfall, the other two guys kept pushing against the back to relieve some stress on the chain setup. We finally got it in though! This weekend I plan on dropping my fuel tank and cleaning/painting it, and cutting off my old unused exhaust hangers and getting the frame nice and clean and ready to be undercoated....again. Then I'll move on towards the engine bay cleanup and front suspension revival!
07-14-2014, 03:27 PM
#4
Junior Member
Thread Starter
Join Date: Jan 2014
Location: SE Arkansas
Posts: 20
Likes: 0
Received 0 Likes
on
0 Posts
3-6-14
Finally got my wheels back from the machine shop and stuck one on to see how they fit, can't wait to get some tires and have em on permanent!
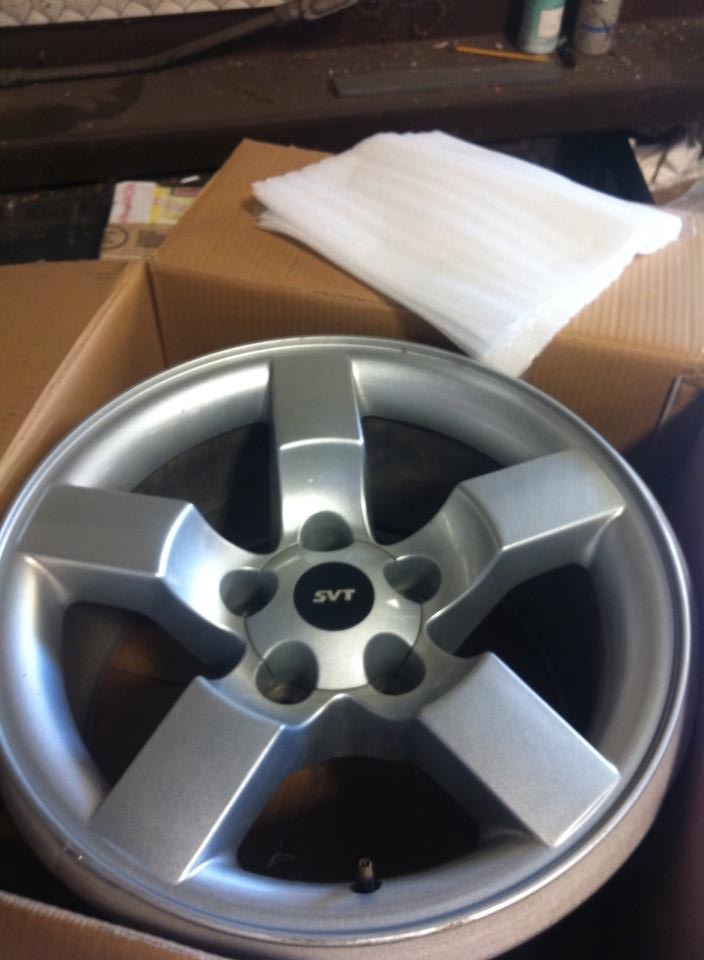


Thanks to Suspect for helping me track down the lug nuts I needed also! As soon as I can figure out what size tires I can run, and buy them, these will be on here to stay! (Atleast until I decide to have them powdercoated) Next step I'm gonna begin working on this weekend is cleaning the frame up and spraying it with some rubber undercoating. It's gonna take a while to clean with a grinder and brush but it'll be worth it. I'm also going to replace the u joints most likely since I already have easy access to them before putting the bed back on.
And in case anyone was wondering, I'm going to come back and add in some pictures here and there. I ran into a problem trying to copy the pictures over and will probably just wait til after work to get it all sorted out.
Finally got my wheels back from the machine shop and stuck one on to see how they fit, can't wait to get some tires and have em on permanent!
Thanks to Suspect for helping me track down the lug nuts I needed also! As soon as I can figure out what size tires I can run, and buy them, these will be on here to stay! (Atleast until I decide to have them powdercoated) Next step I'm gonna begin working on this weekend is cleaning the frame up and spraying it with some rubber undercoating. It's gonna take a while to clean with a grinder and brush but it'll be worth it. I'm also going to replace the u joints most likely since I already have easy access to them before putting the bed back on.
And in case anyone was wondering, I'm going to come back and add in some pictures here and there. I ran into a problem trying to copy the pictures over and will probably just wait til after work to get it all sorted out.
Last edited by ElrodKTPQ_89; 07-14-2014 at 05:43 PM. Reason: Added pictures
07-14-2014, 05:46 PM
#5
Junior Member
Thread Starter
Join Date: Jan 2014
Location: SE Arkansas
Posts: 20
Likes: 0
Received 0 Likes
on
0 Posts
6-15-14
Finally got off my *** and worked on this heap this weekend. Seems like not having the mustang around just made me lose all my motivation I had for this project again. But it's coming back around for now. I finally finished all the frame cleanup and undercoating of everything, cleaned and painted my brake drums, and redid the plumbing for my air shocks as well as relooming and taping my harness. Yesterday my friend helped me get the bed back on and we rolled the truck back into the open area of the shop and took the good off to see in the engine bay.
After that I started off just screwing around with it while we discussed our projects, but before the end of the night I went ahead and started degreasing everything and pulled all the old vacuum lines and removed a bunch of the wiring harness and harness for my HID's to get it all ready for a cleanup. I wound up spending a few hours on it that night til I decided to call it a night and get back on it the next day.


