When you click on links to various merchants on this site and make a purchase, this can result in this site earning a commission. Affiliate programs and affiliations include, but are not limited to, the eBay Partner Network.
Its been quite some time since I've been able to focus on the truck but recently i decided that "enough was enough" and gave it some attention.
Tuning -
I recently switched from my LMS tuner to a somewhat custom tune from Erik at LET. I haven't been able to wipe the smile off my face since i made the switch and now with almost 15,000 miles on the tune, i am so glad i made the switch. I can still spin my new 35's with this tune!!
Suspension -
I pride myself on the information i was able to gather from this site before i started my build but one thing i clearly never did my homework on was rims/tires. While i did enjoy the look of the rims, for what i wanted to do offload i was going about it all wrong. I have had my eyes on the Method Hole rims since the first time i saw them and when i saw that my local 4WP was having a sale on them i figured "why not". The problem was that i also thought that Toyo would honor their printed warranty for my tires which have become unsafe to drive after 37000 miles. Luckily for me, where i live, Les Shwab Tires has a legal monopoly on Toyo tires. So while normally 4WP would take care of me, they legally can't do anything to help me in the warranty process and the guys at Les Shwab basically told me to go **** my self on a warranty claim when they told me they would give me $30 per tire and then charge me $1800 for 4 Toyo R/T's. If you are unaware of the price of those tires i can fill you in now and let you know that they aren't supposed to cost anywhere near that lol So back to the drawing board i went, determined to find a new tire and start planning the bonfire for my Toyo's. At $30 a tire, it provided me more joy to set fire to them rather then turn them over for that price.
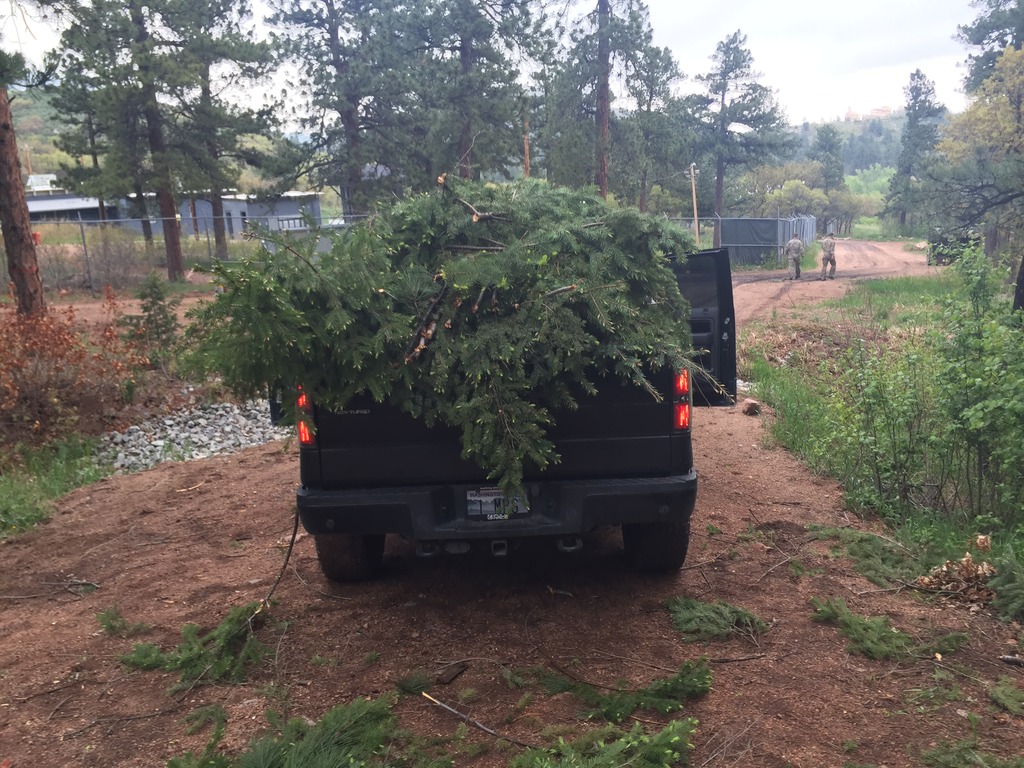
Rebuild/Rims & Tires -
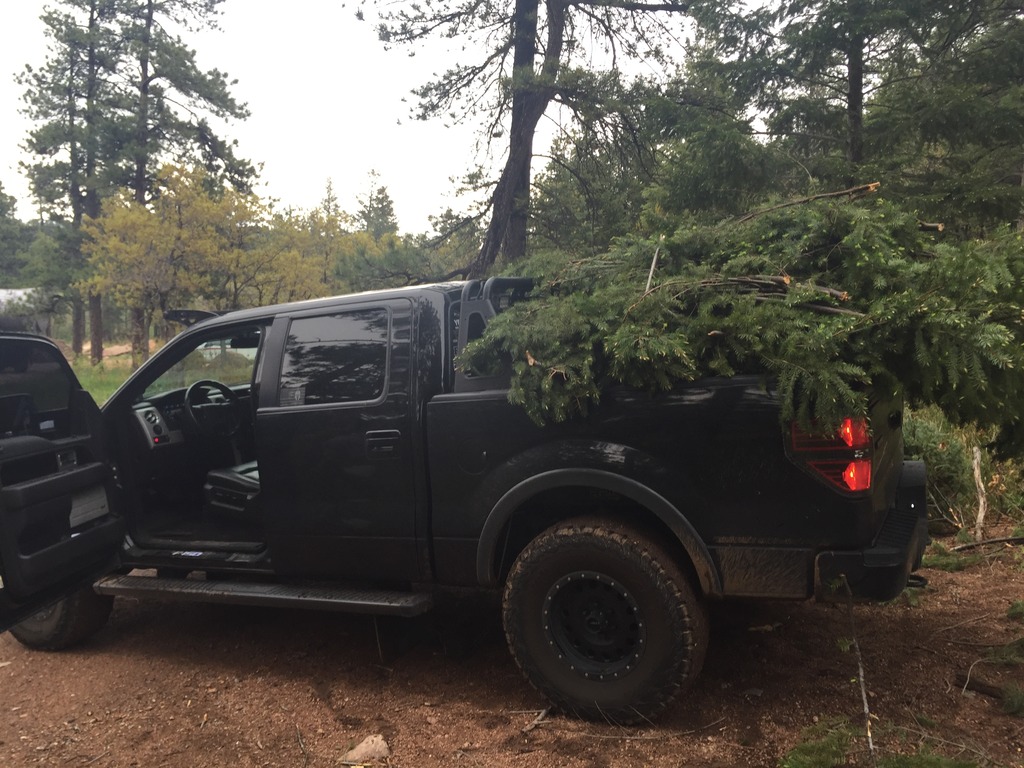
The winters here have not been kind to my shocks and i decided that i wanted to have them rebuilt. I was lucky enough to find a Fox certified tech who recently moved here, who was willing to tackle the job. He rebuilt all 4 shocks over the course of a day and with the new rims and tires on, it feels like a totally different truck but in a VERY good way. I went with Method Hole 17x9 rims and BFG TA KO 2 35x12.5R17 Tires. I have to admit that I've never seen such an aggressive looking AT tire. Of course i had to go test this new set up this weekend but luckily for me the weather wasn't cooperating so i had to settle for the local ORV park instead of the dunes. Either way the difference was very impressive. I wish i would have started off this way, with a smaller rim and a lot more tire. Please learn from mistake and realize that no matter how much "fancy" suspension things you put on your truck, your suspension starts with your rim/tire choice. You can spend a **** load on shocks and ruin it with the wrong rim/tire combo, trust me, I'm telling you from first hand experience now that I've seen what a 17" rim and 35" tire feel like off-road. The ride off-road is amazing and the truck seems to have really found its "groove", for lack of a better term. I haven't noticed any additional road noise from the tires and I'm very happy with how they perform on the slick roads. I chose to move my coilover reservoirs back up to their original position so that there 12.5" wide tires wouldn't shred them off the truck.
In case you were wondering about making them fit, its very easy!! It is possible to run a 35" tire with a 0 offset rim so long as you have adjustable coilovers or a leveling kit. The only trimming needed was simply putting screws into the fender liners to hold them to the body of the truck so they don't end up making contact with the tire as they flap around. Being able to hold the liners back makes it so that you don't have to cut as much. You will do a little trimming at the front end of the liners but if you have a stock bumper then your experience will be very different and you will probably have an aggressive amount of trimming to do lol Here are the pictures though, let me know what you think!!
I also swapped out my old Duallys for a set of Rigid DOT Approved Duallys and i love them so much I'm thinking about getting rid of the two 10" bars in my bumper an replacing them with the DOT E-series set
Last edited by Eco-BEAST 28; 02-28-2016 at 05:58 PM.
Picked up a very inexpensive set of Rigid A Series High Power Cool White lights tonight from someone on CL. Ive been through like 3 pairs of puddle lamps on this truck and wanted something that doesn't break every time i go offload. I always said that i wouldn't pass up a set if i could find them for cheap, and i got lucky today!!
Ill be doing some modifications to some stock pieces of plastic in order to make it all fit, i should have something by the end of tonight for you guys too see.
Hello everyone! Wanted to drop in and show you guys what I've been working on and some of the projects I've been doing and then whats next for the truck.
New Puddle Lamps:
I was really tired of breaking the cheaply made puddle lamps I always wanted to try a pair of Rigid A Series out so when i found a guy selling them on CL i jumped on them.
After a couple different ideas didn't pan out i finally figured out how i wanted them mounted.
The first thing i did was cut the lens that covers the puddle lamp off and drilled a hole as big as the wire coming from the A series. The reason i wanted to keep this is because the A series doesn't fill up the hole completely and i wanted it to be a water tight seal. I used 25lb 3m double sided tape to attach the light itself to the puddle lamp.
With everything mocked up in place the last thing i did was strip the extra wire and added quick connects to the wires and hooked them up.
Once I made sure they worked i then used some JB weld and 1 screw to attach everything to the underside of the mirror. I used a locking nut/washer system inside the mirror so that it would be a lot harder for someone to walk away with them but it also was a pain in the *** to get it on.
These things are crazy bright and they work amazing!!!
Up next was an awesome DIY project i saw on another forum. I had seen that some people were damaging their shocks on gravel roads from all the rocks being kicked back by the front tires. I thought it would be a fun project so i followed the simple directions and it came out amazing. Once again this was not my idea and i can't take credit for the install guide but maybe you guys would like to do this as well. A big thanks goes out to the guys who thought of this :thumb:
Also keep in mind this particular install is specific to Screw trucks with OEM running boards.
"What are Mid Flaps, and why do I need them?
Mid flaps are basically mud flaps which are located between the front and rear tires. They are critical for preventing debris impacts on the rear leafs, brakes, and especially your rear shocks. Replacement shocks can cost anywhere from $600 to well over $3k. Mid flaps are a low cost way of protecting your high cost investment.
Whether you never go off road or hit the trails every chance you can, Mid flaps will protect your vehicle. Anyone who has driven down a dirt road with the stock BFG�s knows how much debris is picked up and kicked out the rear by these tires. My first mod was mud flaps on the front wheel wells. Mid flaps are just as important and should be on everyone�s mod list.
Why not just buy some?
Mid flaps are available to buy, at around $300 a set. They bolt-on and are easily removable with a quick connect system. If you aren�t handy and you have plenty of fun-money then go ahead and buy a set, you will not be disappointed. But, if you enjoy doing things yourself, and like to work with your hands, or if you just hate to throw $300 out the window, then why not just make your own, like I did?
Wanted to put mid flaps on my 2011 SCREW.......after realizing that TheJoker's truck is a SCAB and the mounting points that he used don't line up on a SCREW, I crawled under my truck to see if there was another way to mounts the Mid Flaps.
First thing I ordered TWO truck mud flaps, $33.47 total.
Put this in Amazon --- Mud Flap anti spray Guard King 24"X24"X3/8", 242438GK, James King
Cheapest I found and they don't bend you over on the shipping.
Step 1.
Purchase a 3' piece of 1/8" x 1 1/4" stock. Cut two pieces 12 1/2" long.
Drill two 5/16" holes 1/2" in from the ends. Bend one end 2 1/2" from the end at a 90 on each piece.
Step 2.
Take one of the mud flaps and cut it 15" wide X 16 1/2" tall. Make sure that the proper side is facing the rear.
Cut a 3 1/2" wide X 3" tall notch out of the top inboard corner, this is to allow the flap to fit around the frame for better Shock protection.
Round the top outboard corner to fit to the running board mount, also round the bottom corner to match.
Repeat for the other side.
Step 3.
Use an old 8M U-nut from an old bumper mount or exhaust hanger, etc.....I know you have plenty of them laying around, and put into the square hole in the frame to aline with the round hole opposite the rearward bracket on the running board.
Step 4.
Use a 8M screw to snug up the bracket tight enough to hold the mud flap in place between the bracket and the running board mount. Drill a 5/16" hole through the bracket and the mud flap into the running board mount.
Level the mud flap, I ran mine 3" off of the ground, and drill the inboard hole and tighten things up, I suggest using a large washer on the inner mud flap mount."
After doing a lot of research i saw that A LOT of people are having the same fuel door problem that i had. There are a lot of good solutions out there but i wanted something that was less intrusive. My gas cap was literally swinging open all the time and it was really annoying so i went to the drawing board and came up with this.
I purchased a cabinet drawer magnet with a 20lb magnet. The portion with the magnet screws right in with the supplied self taping screws. I then used the 25lb 3m tape in order to secure the magnet to the door. The thing i like about this one is its super easy and it hold the cap flush to the body. It is strong enough to ensure it stays closed but still easy to open.
For those of you screaming at your computers going "You idiot, you're going to start a fire right there" I thought of that and solved that problem too. I put a very thin layer of liquid nail over the door magnet so that there is never any actual metal to metal contact. That is why i went with such a strong magnet in the first place.
Heres a little preview of what i have in mind for the next stages of the truck within the next 6 months.
I just ordered this set of lights off another forum member and he is currently updating them to add in some more personal touches i wanted. They should be on in a month or so but ill save the special detail list for when they actually come in. What ill say for now is that they are completely retrofitted with no stock lighting parts from Spyder (thank god) other then the housing.
As soon as the bank account recovers ill be looking to replace my transmission pan and rear diff pan with the AFE series pans and some royal purple :thumb::thumb: More to follow on that project when the time comes.
Right now my main concern is the fact that my blend door actuator has been broken for almost a year now and thats getting old to say the least. In addition my bluetooth and all sync inputs have also been broken for over a year and NONE of the solutions I've found online have worked.
 02-28-2016, 05:53 PM


 I always wanted to try a pair of Rigid A Series out so when i found a guy selling them on CL i jumped on them.