2013 black XLT to FX4 conversion... Slowish
 04-12-2016, 02:27 PM
#21


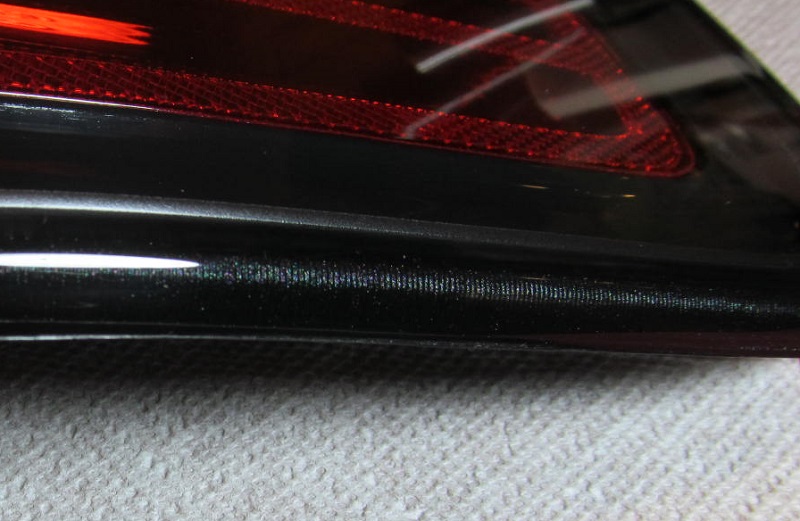
Not trying to steal your thread here but I was on the same mission but an STX -> FX2 build. Your truck looks so much better now. But, one thing I would do is grab a tube of black RTV sealant and squeeze it in the space around the tails to get rid of the silver lining they have. I am at work and this is the only pic I have to show the difference. I actually painted the inside of mine around the edge with Tuxedo Black touch up and then filled it in with the black RTV. They blend in so much better with the truck after that. Mine started as an STX. The tail light details are in my build thread.
Before trim painted:
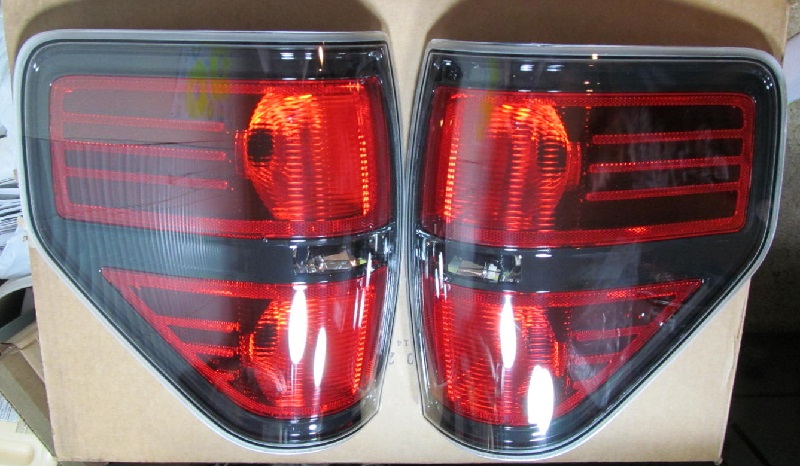
After:
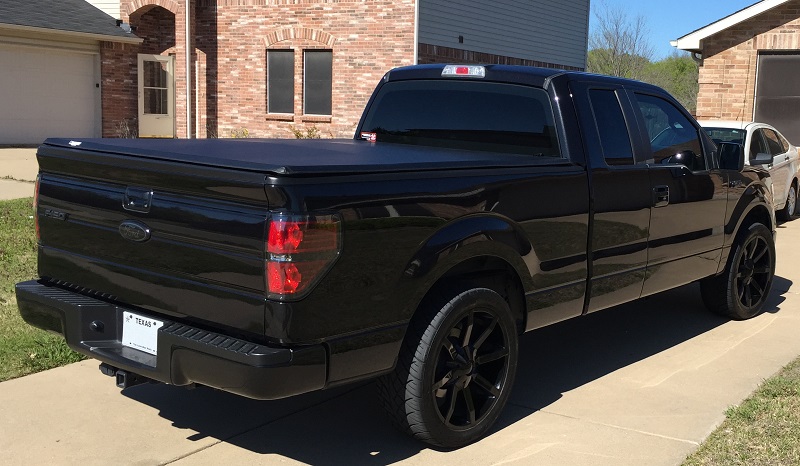
On the truck:
Before trim painted:
After:
On the truck:
 04-14-2016, 08:17 AM
#22
Member
Thread Starter
This is a mod I plan on doing. I just haven't got to it. I hear it's a real PITA to get the paint in there. I love the look though. Your truck looks awesome. I still need a recon third brake to finish the black look. I may also get PTM handles at some point. I really don't like the plastic bucket.
The following users liked this post:
Kommander (04-15-2016)
04-15-2016, 02:22 PM
#23
Thanks. I still haven't decided how I want to deal with my 3rd tail.
The trick is to pop all the bubbles in the light gray sealant Ford used as you go along. When I ordered all my paint to match supplies from here I included 2 small bottles of touchup in tuxedo lack. It comes with a brush like a bottle of nail polish. I took that brush and went all around the seam of each taillight. This allowed me to see where the bubbles were. As I encountered them I used the tiny screwdriver to pop them so the paint could get in. Some of them were pretty tough to pop but well worth the time. There are not very many of them. Maybe 7-10 on each light.I did 2 coats of paint on each light. Let dry for 24 hours after each coat and then do the black RTV.
The trick is to pop all the bubbles in the light gray sealant Ford used as you go along. When I ordered all my paint to match supplies from here I included 2 small bottles of touchup in tuxedo lack. It comes with a brush like a bottle of nail polish. I took that brush and went all around the seam of each taillight. This allowed me to see where the bubbles were. As I encountered them I used the tiny screwdriver to pop them so the paint could get in. Some of them were pretty tough to pop but well worth the time. There are not very many of them. Maybe 7-10 on each light.I did 2 coats of paint on each light. Let dry for 24 hours after each coat and then do the black RTV.
04-17-2016, 03:55 AM
#25