How to- Door Handle Led's for entering & puddle lamps
 06-05-2013, 10:07 PM
#1

Door Handle Led's for entering & puddle lamps
This difficulty of this mod on a scale to 5 is probably around a 1, it is super easy so don't get frustrated.
Tools and Materials.
Note: not all materials are show in the following two pictures.
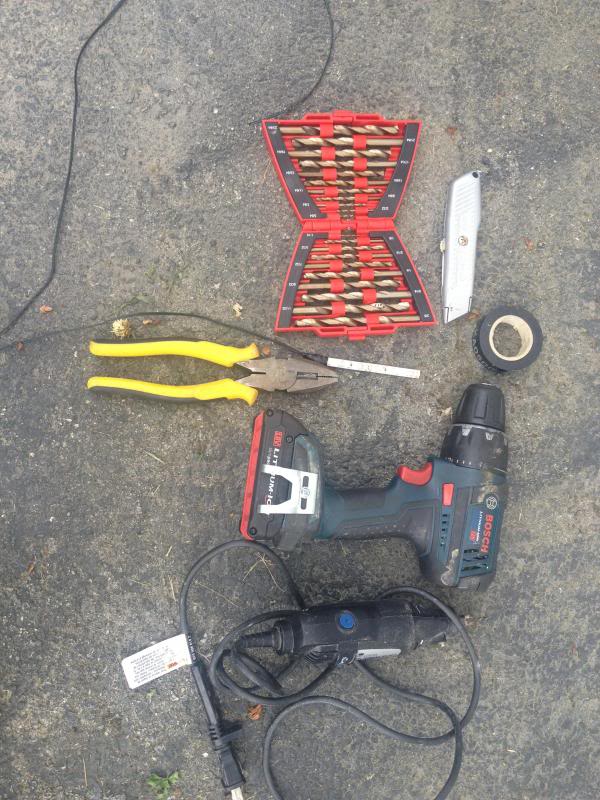
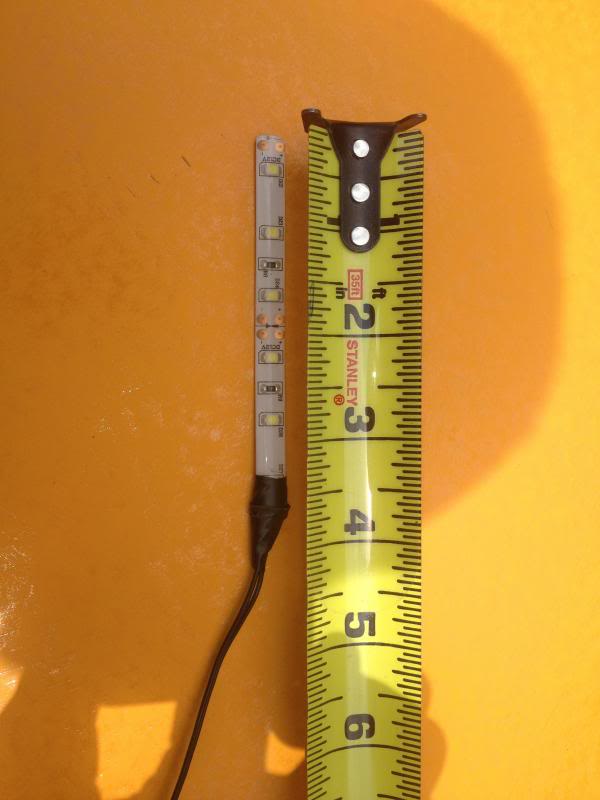
2-Led Strips (I used ones with 3m tape on the back)
Very thin gauge wire (approx 24-28 gauge) Led's pull mA's not amps.
Soldering iron and solder (optional)
Electrical Tape/Heat Shrink Tubing
Zip ties
1/8" drill bit
Drill
2- 3/16" washers (inner diameter) 1/8" will work
2- 1" springs
Something to clean door handles with.
Utility Knife
Phillips screw driver
Before you start make sure your windows are rolled up and remove the negative battery terminal.
Taking door trim off: Tools- Phillips screw driver
Remove the top left pillar on the door (it just pops off ).
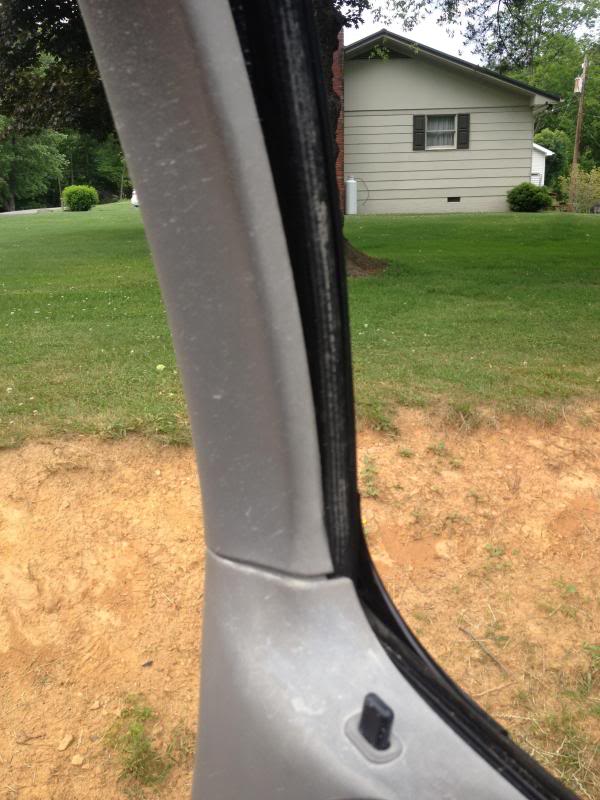
After the top left pillar is removed you should see a #2pt screw.
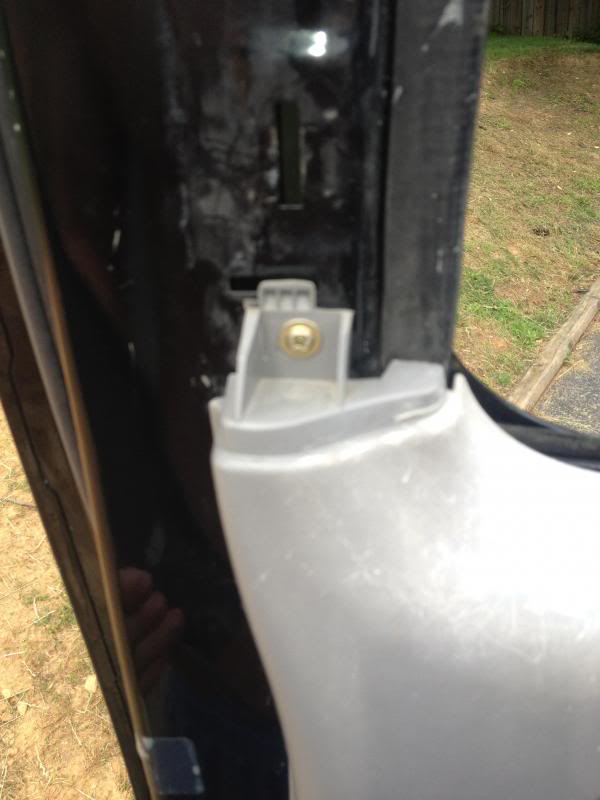
Leave that screw in, and remove the trim piece around the door handle(it also just pops loose).
Now you should see two #2-point brass screws that you need to remove.
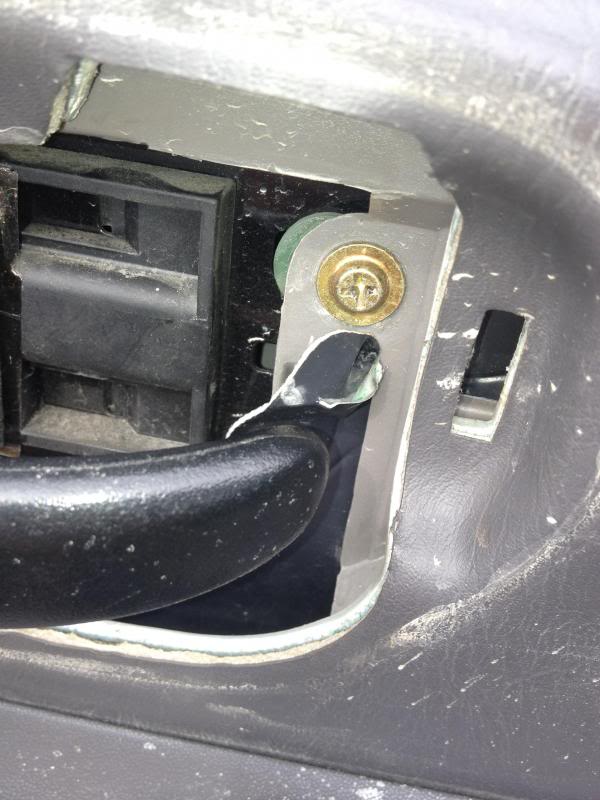
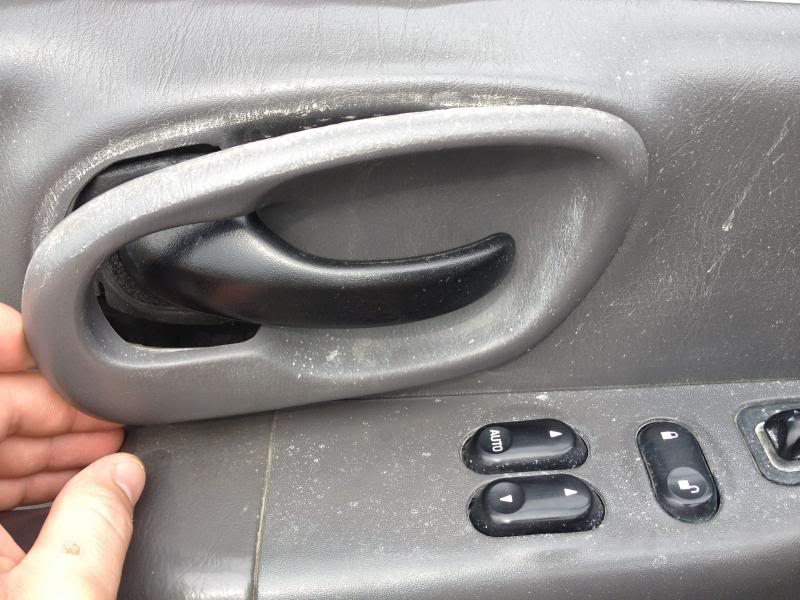
After removing the screws, pop up the power window assembly out of the door panel and un-clip the wiring harness's.
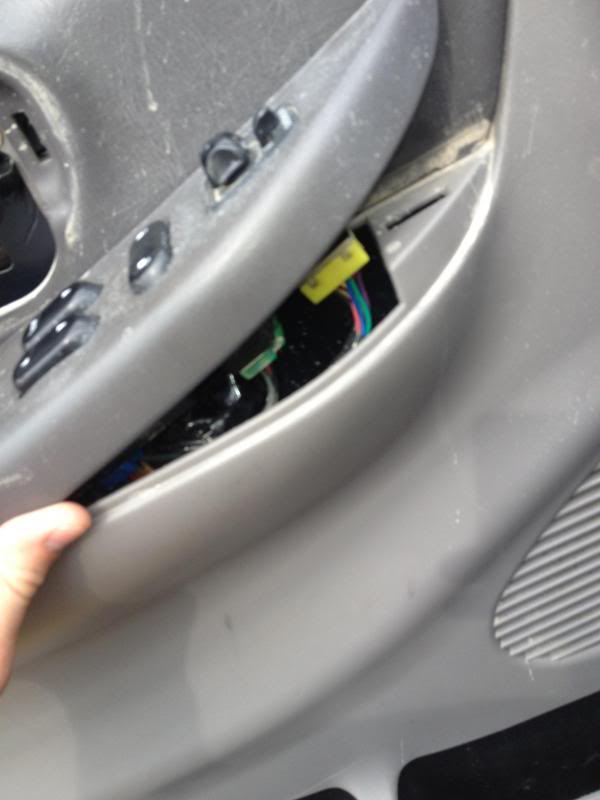
Once the screws are out and the harness's are unplugged pull up on the door panel and it will come off easily. The only thing left to up-plug is the courtesy reflector lights. This plug simply unscrews and pops out of the door panel.
Now lay the panel aside.
Gaining access to the door handle assembly and locating the rubber grommet in the handle.
With the panel off and your window rolled up, pull back the sound dampening material from the door on the left side to gain access to the door handle assembly.
This difficulty of this mod on a scale to 5 is probably around a 1, it is super easy so don't get frustrated.
Tools and Materials.
Note: not all materials are show in the following two pictures.


2-Led Strips (I used ones with 3m tape on the back)
Very thin gauge wire (approx 24-28 gauge) Led's pull mA's not amps.
Soldering iron and solder (optional)
Electrical Tape/Heat Shrink Tubing
Zip ties
1/8" drill bit
Drill
2- 3/16" washers (inner diameter) 1/8" will work
2- 1" springs
Something to clean door handles with.
Utility Knife
Phillips screw driver
Before you start make sure your windows are rolled up and remove the negative battery terminal.
Taking door trim off: Tools- Phillips screw driver
Remove the top left pillar on the door (it just pops off ).


After the top left pillar is removed you should see a #2pt screw.

Leave that screw in, and remove the trim piece around the door handle(it also just pops loose).

Now you should see two #2-point brass screws that you need to remove.

After removing the screws, pop up the power window assembly out of the door panel and un-clip the wiring harness's.

Once the screws are out and the harness's are unplugged pull up on the door panel and it will come off easily. The only thing left to up-plug is the courtesy reflector lights. This plug simply unscrews and pops out of the door panel.

Now lay the panel aside.
Gaining access to the door handle assembly and locating the rubber grommet in the handle.
With the panel off and your window rolled up, pull back the sound dampening material from the door on the left side to gain access to the door handle assembly.

 06-05-2013, 10:08 PM
#2

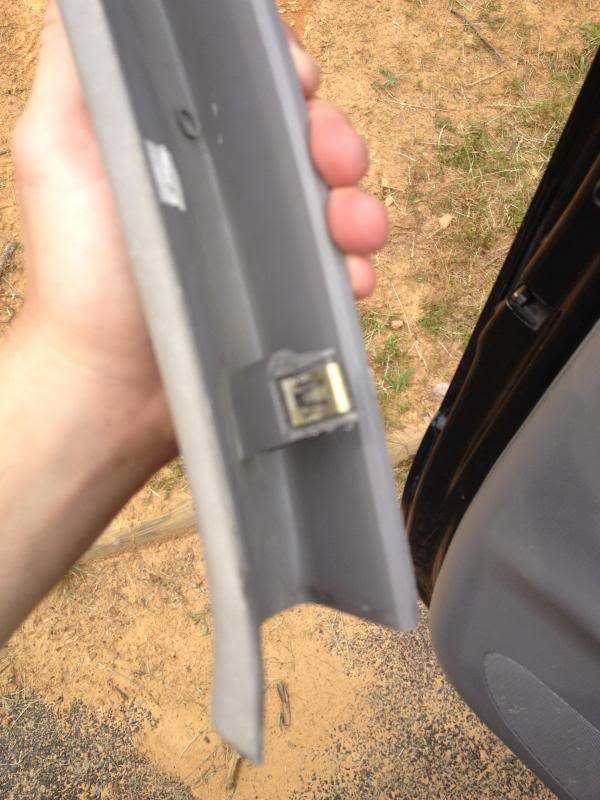
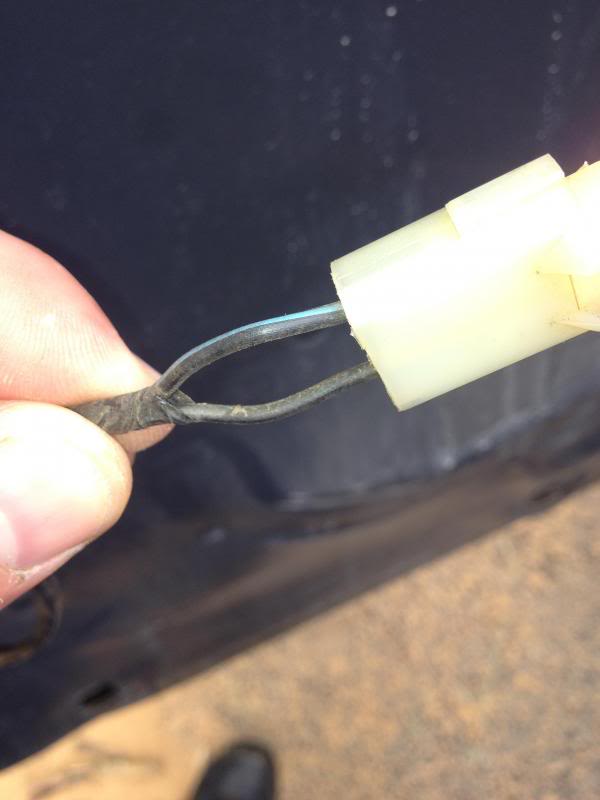
With everything out of the way, we need to look inside the door and find the rubber grommet on the right of the door handle.

Drilling hole in the grommet and bottom plastic piece of door handle: Tools- 1/8" drill bit and drill.
Now use a drill with a 1/8" bit to drill through the grommet. If the grommet pops out, notworries, it can go back in. I chose to remove the grommet so my wires wouldnt catch and place a small rubber washer where the old grommet was. I used a 5/16" rubber washer. (optional)

Once you drill through the grommet, put your hand outside on the door handle to hold it in so that you can drill a 1/8" hole in the bottom piece of the handle. Make sure to only drill through the first piece of plastice. The hole will be near the top of the handle so leaking will not be an issue and visibilty of wires won't be a concern.

Running Wires from LED's to the interior of the door panel. Materials - 3-1/2" LED strip attached to 24-28 gauge wire.
**Make sure your wire is 3-4ft long to give you lots of room to work with **
Feed your wire from the outside of the door handle through the door & grommet into the interior of the door.

Now tie a small knot (where the led is on the outside of the door). This makes sure the Led's dont get pulled off when pulling the handle. The knot wont allow the wire to go through the 1/8" hole.

Now clean off from under your door handle and apply the 3-1/2" LED strip. Mine had 3M back, so after a good cleaning it stuck under the door handle perfectly.

Once you have the knot in the wire, use a small zip tie and tighten it down where the wire goes into the door handle, this keeps all slack out of the wire. (not show).
 06-05-2013, 10:09 PM
#3
Making mechanism so the wires can extend and contract witht he movement of the door handle. Materials - 2 - 3/16" washers, a 1" spring , tape & zip ties.
*If you can't find a 1" spring use one out of an old flash light and strech it if needed**
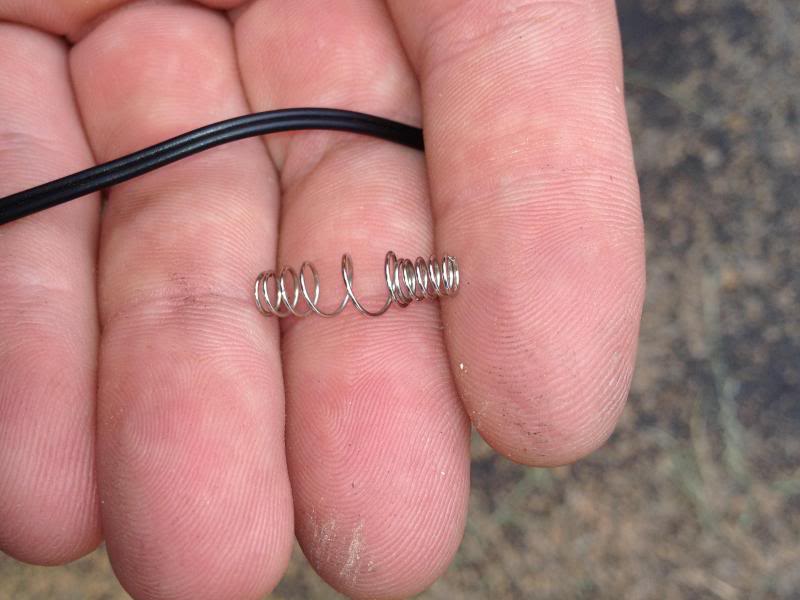
From the inside of the door panel, slide one of the 3/16" washers on the wire. Then slide on the spring, and the other washer. (The washers prevent the spring from going through the grommet and help for a smooth contraction.
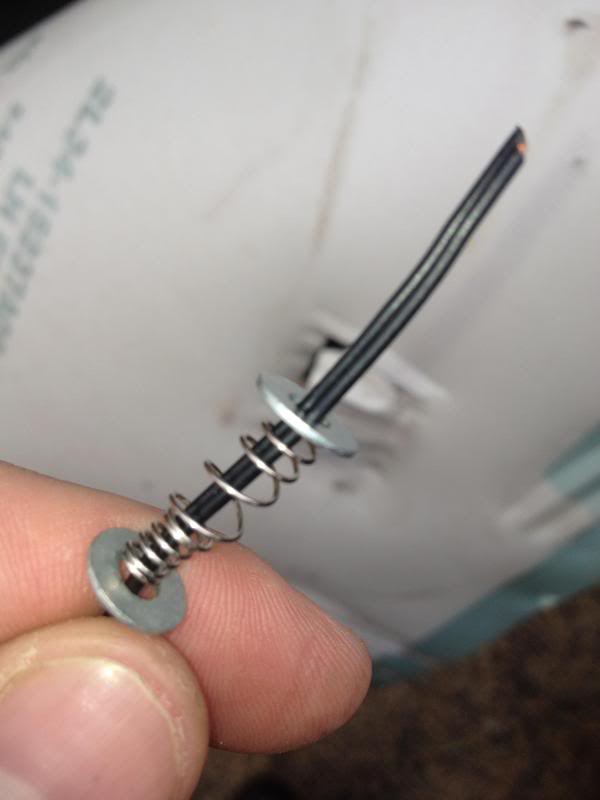
Now slide the washers and springs up to the edge of the grommet.
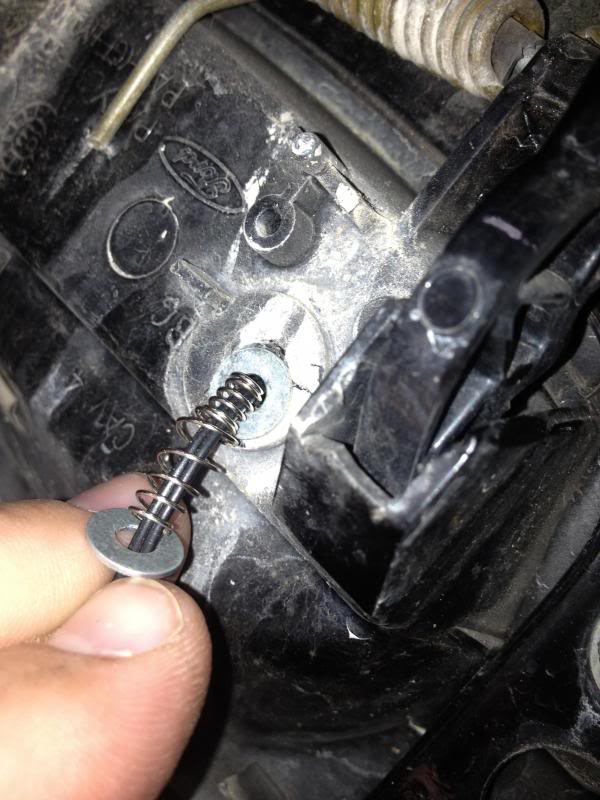
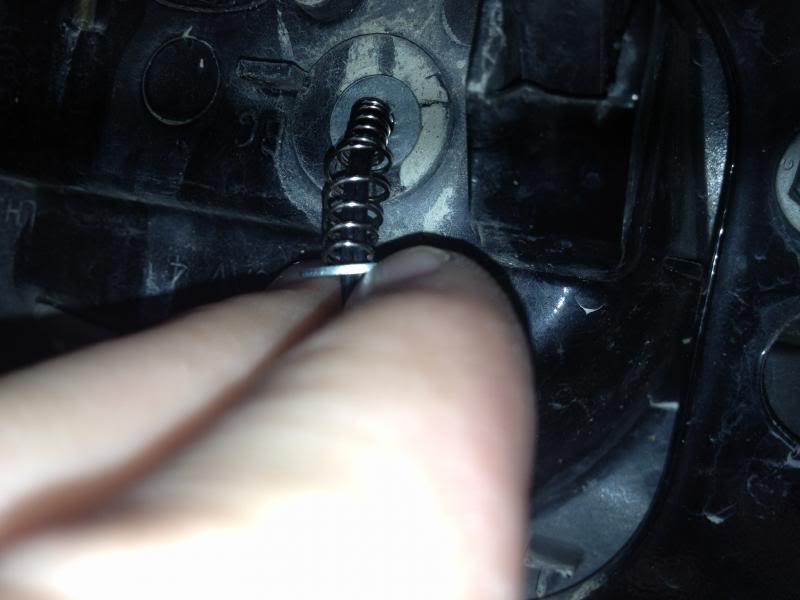
Now we need to secure the springs in place such that the wire doesn't pull through. This will only allow the spring to move and thus not letting the wire in the door jam up the door handle. We will do this by making sure the spring is all the way against the grommet (But not compressed) and attach a zip tie around the wire end so the wire cannot move through the spring/washer.
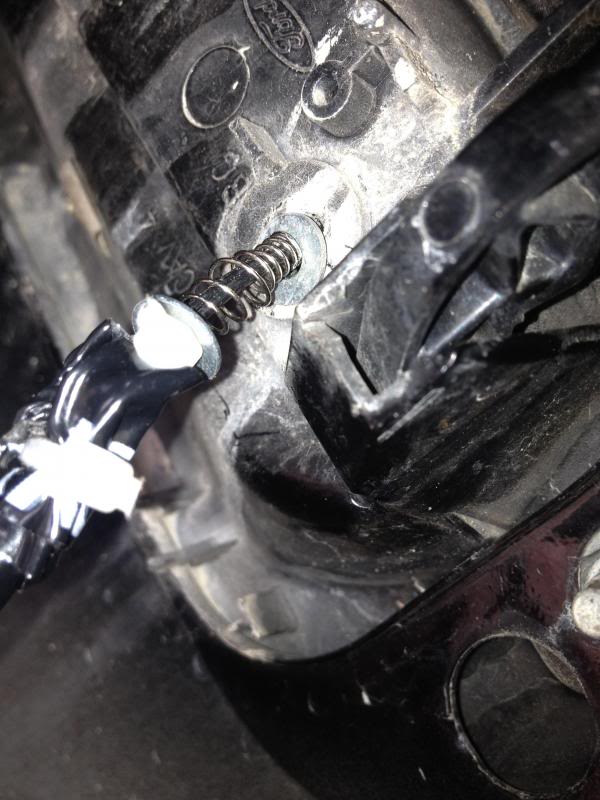
I used some mining tape and another zip tie to make sure the wire is secure.
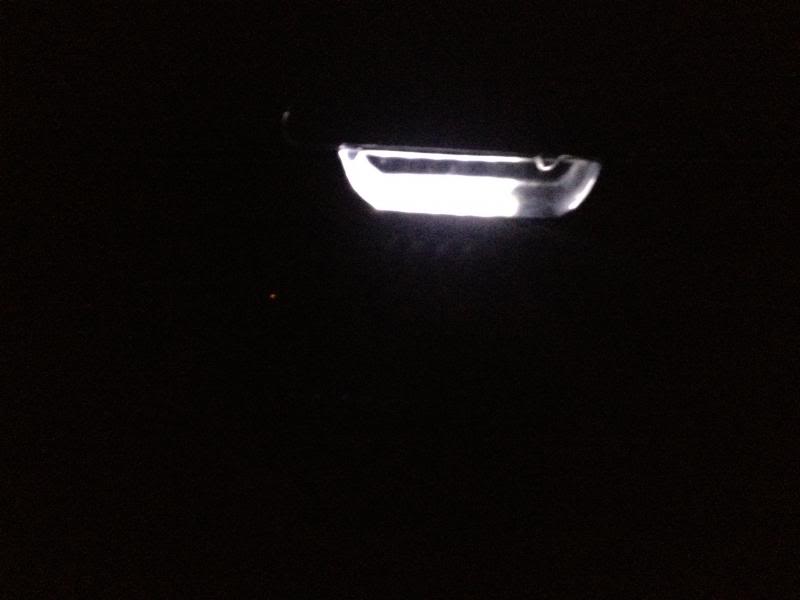
Here is what the spring should do.
Running the wire inside the door to the courtesy lamps. Materials - (Zip ties, tape, knife)
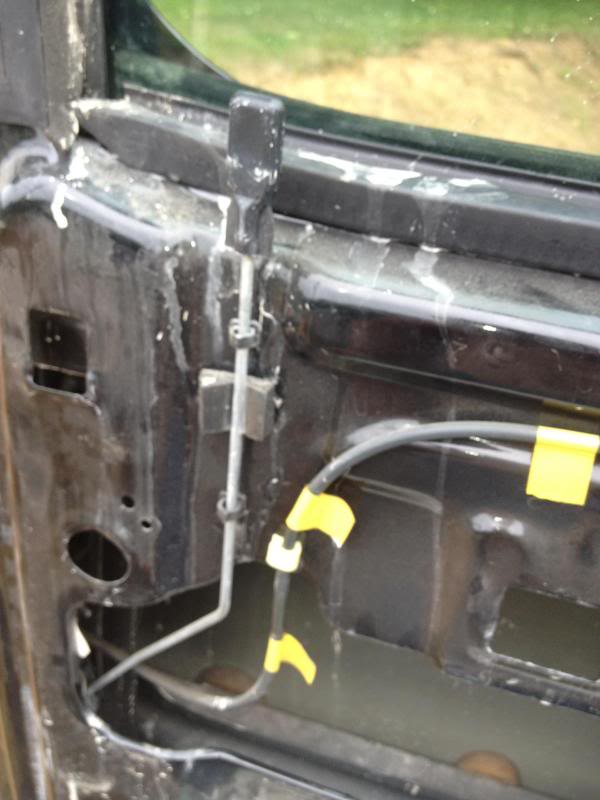
Now for the easy part! Make sure you rurn the wires to the very left of the door, BESIDE THE POWER WINDOW TRACK! Once you run it to the left of the track, make sure to not get it caught in the lock actuator arm. Run it under the arm and out of the door frame. * Make sure to not run the wire out of the one of the square holes(This is where the door panel slides back on).
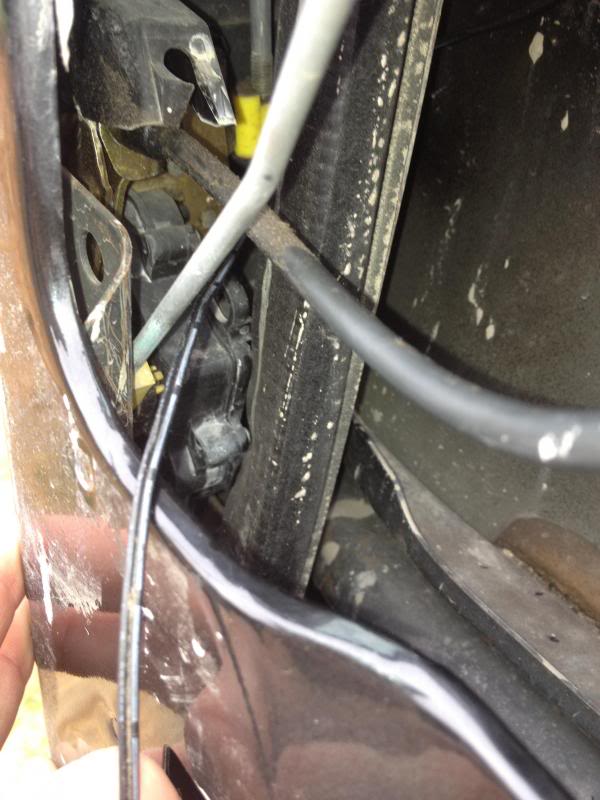
Once you have the wire outside the door, cut a small hole in the dampening material and run the wire to the courteously wire's. Put the dampening material back in place now. I chose to run a small capacity to help with the fading of the lamps, so now is when I installed the small capacity on the power wire.
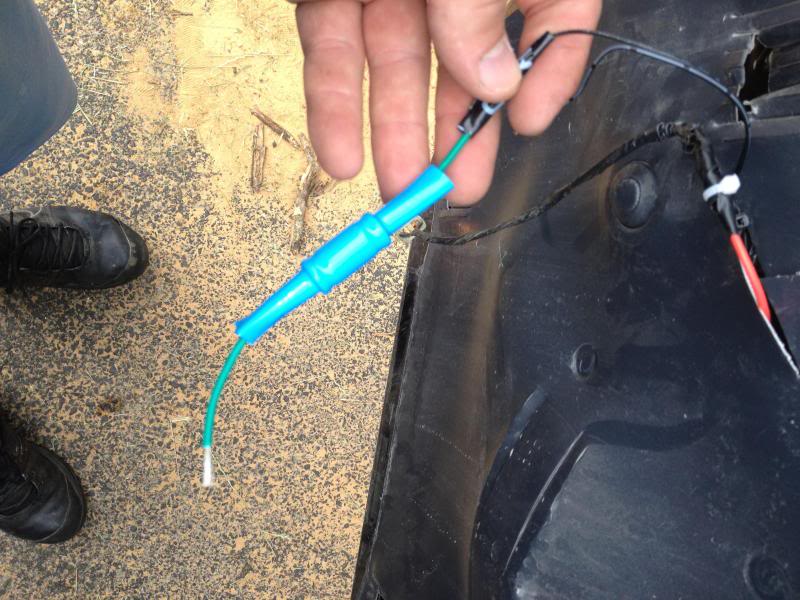
Splice the + wire from the led's into the the black/blue wire on the courtesy lamps and the - wire to the black one on the courtesy lamps. Make sure to leave enough wire to attach the courtesy bulb back into the door panel.
Tape up/Heat shrink the connections and use zip ties to secure them.
Here are the wires you are splicing into.

Note: You can tinker with some small 10k uF caps and 300 ohm resisters to get the LEDS to the lighting you prefer. You can also use a 555 timer to set up increments of how long the lights stay on and dim. I wont include all that info, but LED's are hard to dim correctly without a pulse system (555 timer setup).
Finally re install the courtesy bulb, door panel and window switches in reverse order. Put the trim piece back on and reconnect your negative battery terminal to try them out.
Now is the time to add some glue or anything u want to fill the small hole in the handle. Its not really necessary as that part of the handle rarely sees water unless your in a mud hole. So I will leave that optional.
What you just accomplished.
*If you can't find a 1" spring use one out of an old flash light and strech it if needed**

From the inside of the door panel, slide one of the 3/16" washers on the wire. Then slide on the spring, and the other washer. (The washers prevent the spring from going through the grommet and help for a smooth contraction.

Now slide the washers and springs up to the edge of the grommet.


Now we need to secure the springs in place such that the wire doesn't pull through. This will only allow the spring to move and thus not letting the wire in the door jam up the door handle. We will do this by making sure the spring is all the way against the grommet (But not compressed) and attach a zip tie around the wire end so the wire cannot move through the spring/washer.

I used some mining tape and another zip tie to make sure the wire is secure.
Here is what the spring should do.
Running the wire inside the door to the courtesy lamps. Materials - (Zip ties, tape, knife)
Now for the easy part! Make sure you rurn the wires to the very left of the door, BESIDE THE POWER WINDOW TRACK! Once you run it to the left of the track, make sure to not get it caught in the lock actuator arm. Run it under the arm and out of the door frame. * Make sure to not run the wire out of the one of the square holes(This is where the door panel slides back on).

Once you have the wire outside the door, cut a small hole in the dampening material and run the wire to the courteously wire's. Put the dampening material back in place now. I chose to run a small capacity to help with the fading of the lamps, so now is when I installed the small capacity on the power wire.

Splice the + wire from the led's into the the black/blue wire on the courtesy lamps and the - wire to the black one on the courtesy lamps. Make sure to leave enough wire to attach the courtesy bulb back into the door panel.
Tape up/Heat shrink the connections and use zip ties to secure them.
Here are the wires you are splicing into.
Note: You can tinker with some small 10k uF caps and 300 ohm resisters to get the LEDS to the lighting you prefer. You can also use a 555 timer to set up increments of how long the lights stay on and dim. I wont include all that info, but LED's are hard to dim correctly without a pulse system (555 timer setup).
Finally re install the courtesy bulb, door panel and window switches in reverse order. Put the trim piece back on and reconnect your negative battery terminal to try them out.

Now is the time to add some glue or anything u want to fill the small hole in the handle. Its not really necessary as that part of the handle rarely sees water unless your in a mud hole. So I will leave that optional.
What you just accomplished.
Last edited by ibd2328; 06-06-2013 at 12:09 AM.
The following 4 users liked this post by ibd2328:
06-05-2013, 10:10 PM
#4
Senior Member
Door Handle Led's for entering & puddle lamps
This difficulty of this mod on a scale to 5 is probably around a 1, it is super easy so don't get frustrated.
Tools and Materials.
Note: not all materials are show in the following two pictures.
2-Led Strips (I used ones with 3m tape on the back)
Very thin gauge wire (approx 24-28 gauge) Led's pull mA's not amps.
Soldering iron and solder (optional)
Electrical Tape/Heat Shrink Tubing
Zip ties
1/8" drill bit
Drill
2- 3/16" washers (inner diameter) 1/8" will work
2- 1" springs
Something to clean door handles with.
Utility Knife
Phillips screw driver
Before you start make sure your windows are rolled up and remove the negative battery terminal.
Taking door trim off: Tools- Phillips screw driver
Remove the top left pillar on the door (it just pops off ).
After the top left pillar is removed you should see a #2pt screw.
Leave that screw in, and remove the trim piece around the door handle(it also just pops loose).
Now you should see two #2-point brass screws that you need to remove.
After removing the screws, pop up the power window assembly out of the door panel and un-clip the wiring harness's.
Once the screws are out and the harness's are unplugged pull up on the door panel and it will come off easily. The only thing left to up-plug is the courtesy reflector lights. This plug simply unscrews and pops out of the door panel.
Now lay the panel aside.
Gaining access to the door handle assembly and locating the rubber grommet in the handle.
With the panel off and your window rolled up, pull back the sound dampening material from the door on the left side to gain access to the door handle assembly.
06-05-2013, 10:13 PM
#5
Too Loud? Too Bad!
Two things. One, you're my hero. Two... it took me about 15 seconds to realize that in the first picture of your door, the alignment of the brick chimney and tree in the background was in fact just that, and not a horrendous amount of mutant rust on your door.
06-05-2013, 11:13 PM
#7
Senior Member
Trending Topics
06-05-2013, 11:18 PM
#8
Too Loud? Too Bad!
The following users liked this post:
03BrowningSport (06-05-2013)