Seat Heater Installation - 2007 Lariat. 12.2.2013. Pic Heavy.
 12-02-2013, 11:16 PM
#1
Member
Thread Starter


Greetings,
I purchased my new to me 2007 F150 Super Crew in September 2013. I have loved this style truck since they came out. I upgraded from a 1997 GMC SLE Extended Cab, but I digress.
This truck had almost everything on it that I wanted. One of the items it did not have were the heated seats.
I purchased a seat heater kit from eBay shortly after bringing the truck home. I choose a little different style than what I have seen here and different from what I installed in the Corvette a few years ago.
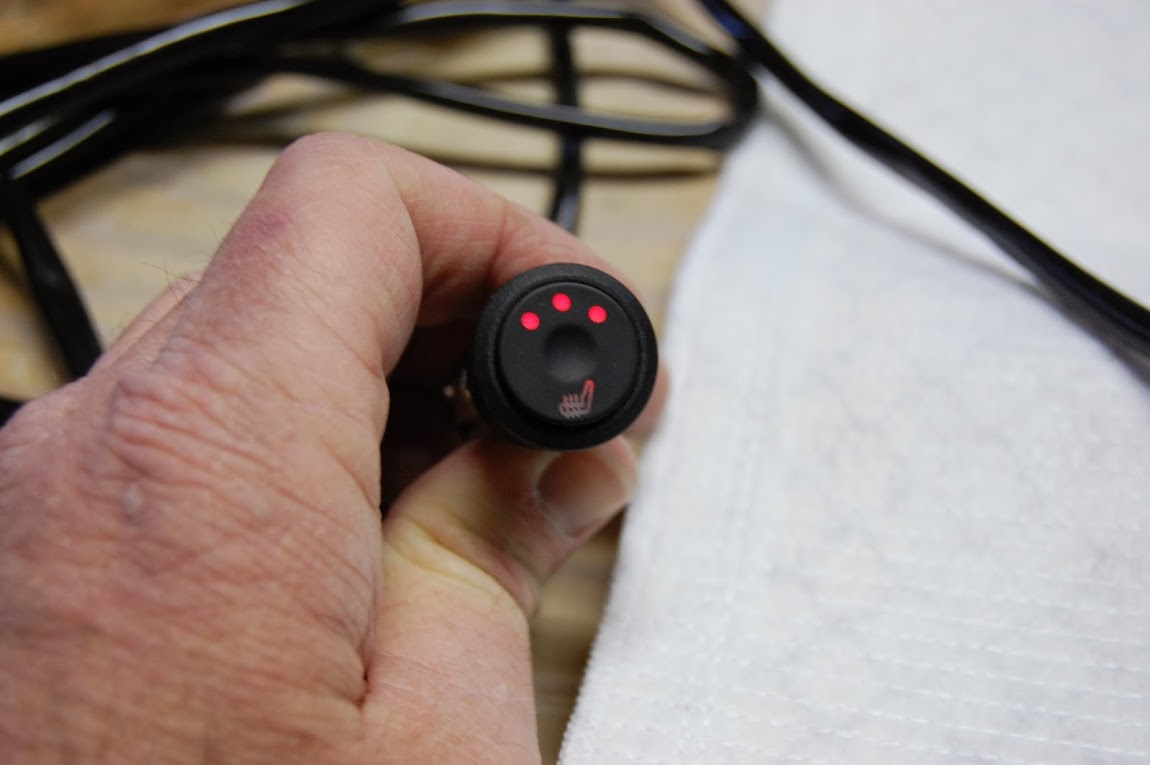
This kit has a push button type switch with three heat settings - HIGH, MED, and LOW. The push button switch also has a small illuminated universal diagram of the seat. This kit also has the carbon fiber type heater pads. These are thinner than the set I installed in the Vette and, can be trimmed or cut if needed.
I believe I paid about $90 for the kit.
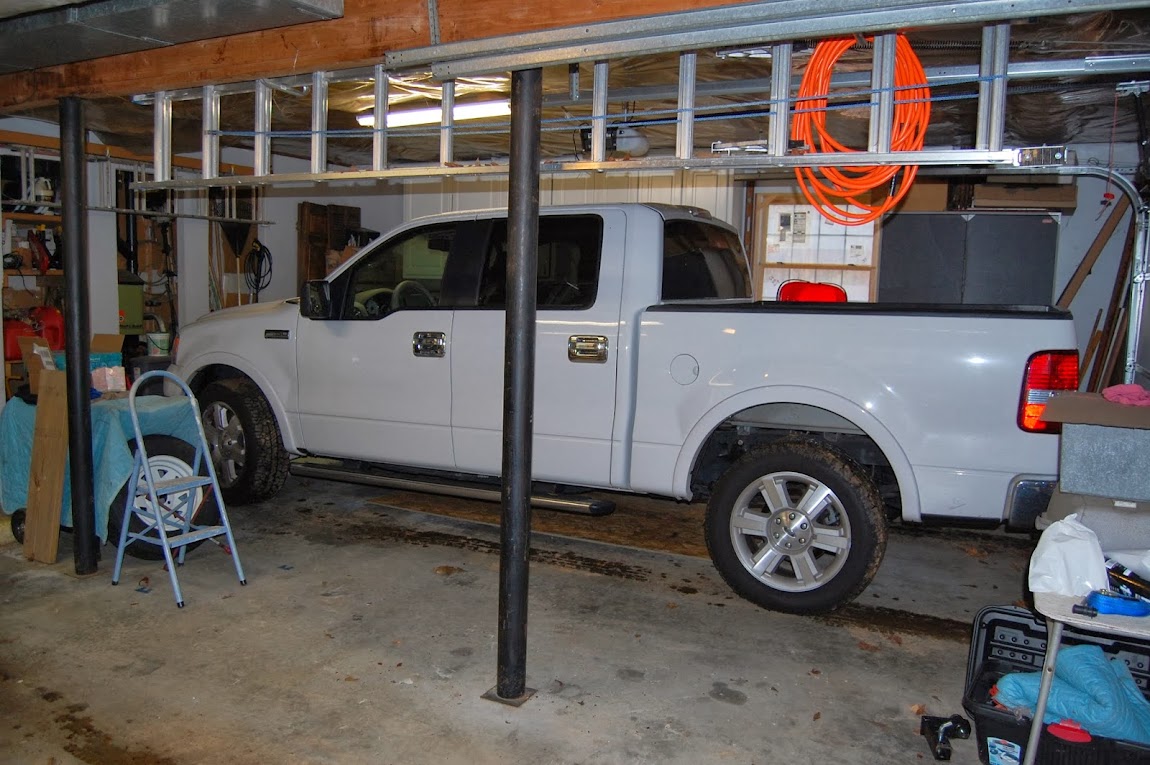
First was to get the truck in the garage. It was chilly with drizzle today so it was better to try to fit it in the garage. I had to move a few things around but in the end she fit.
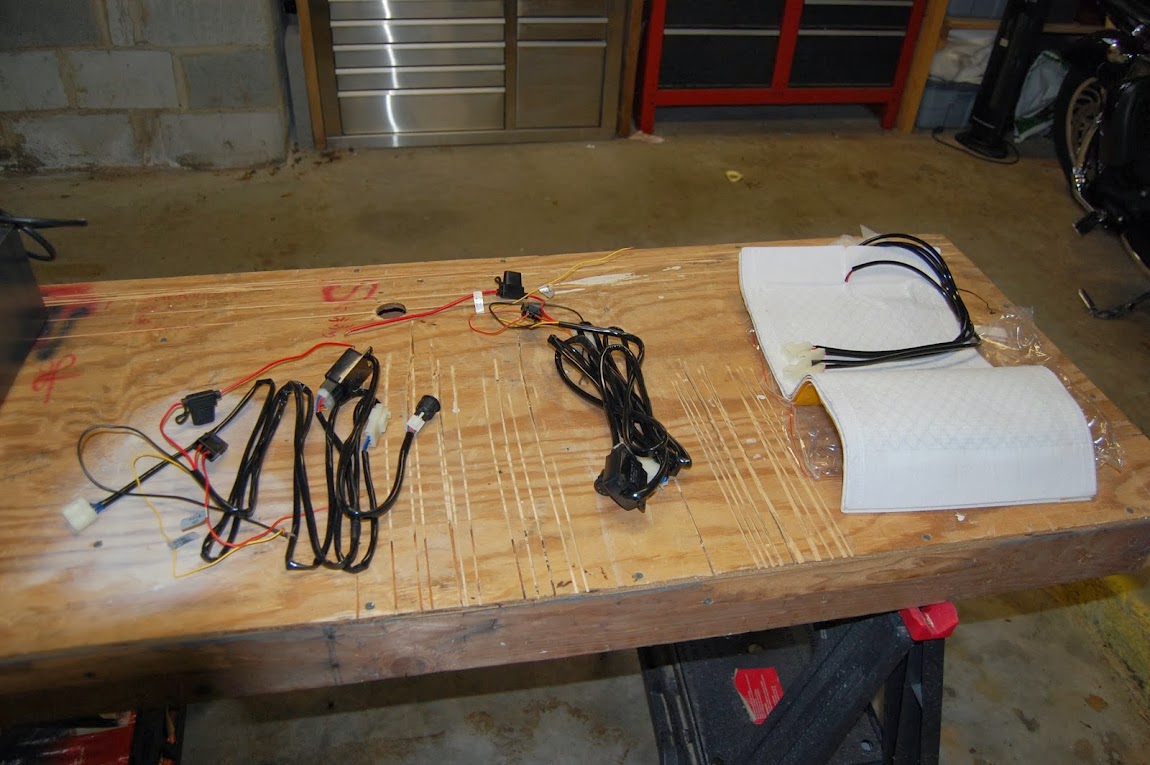
Next was to lay out the parts and bench check everything before installation.


Prepare to remove the seat by removing the four mount bolts.
This took a "T50" which I had in 3/8" Drive.
Disconnect the two electrical connectors.
These are fairly simple push tab types.
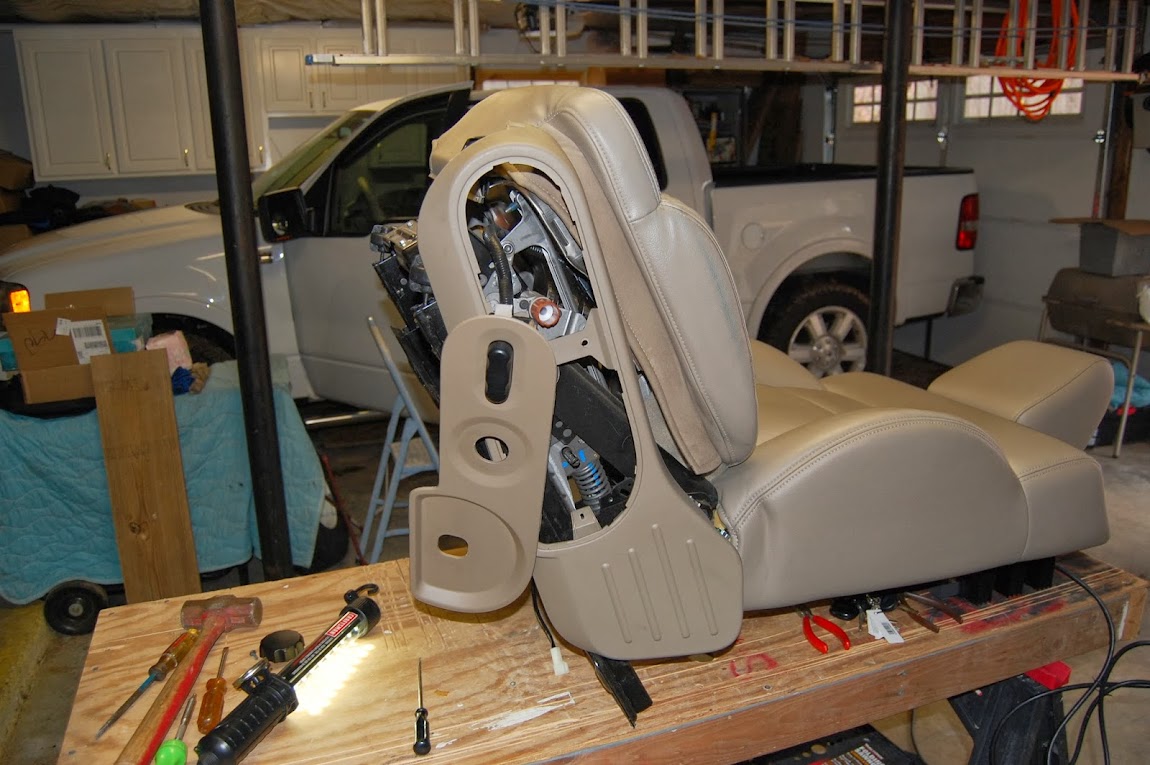
The last time I did this project it worked out pretty well putting the seat on a work bench.

Looking at the bottom of the seat, I started to loosen the bottom seat cover by "unsnapping" the plastic keepers.

I purchased my new to me 2007 F150 Super Crew in September 2013. I have loved this style truck since they came out. I upgraded from a 1997 GMC SLE Extended Cab, but I digress.
This truck had almost everything on it that I wanted. One of the items it did not have were the heated seats.
I purchased a seat heater kit from eBay shortly after bringing the truck home. I choose a little different style than what I have seen here and different from what I installed in the Corvette a few years ago.
This kit has a push button type switch with three heat settings - HIGH, MED, and LOW. The push button switch also has a small illuminated universal diagram of the seat. This kit also has the carbon fiber type heater pads. These are thinner than the set I installed in the Vette and, can be trimmed or cut if needed.
I believe I paid about $90 for the kit.
First was to get the truck in the garage. It was chilly with drizzle today so it was better to try to fit it in the garage. I had to move a few things around but in the end she fit.
Next was to lay out the parts and bench check everything before installation.
Prepare to remove the seat by removing the four mount bolts.
This took a "T50" which I had in 3/8" Drive.
Disconnect the two electrical connectors.
These are fairly simple push tab types.
The last time I did this project it worked out pretty well putting the seat on a work bench.
Looking at the bottom of the seat, I started to loosen the bottom seat cover by "unsnapping" the plastic keepers.
 12-02-2013, 11:18 PM
#2
Member
Thread Starter
Continued -
Working from the forward edge of the bottom seat cushion, I slowly peeled back the cover until I found the three Hog Rings. I removed the Hog Rings, not worrying about their condition as I was not going to reuse them.


I ended up removing the side trim panel to help gain access to the seat covering.
The recline handle has a small clip that keeps the handle in place. This clip can be accessed from the outside of the trim using a small screwdriver to lift up on the clip and slide the handle off.
The Lumbar support adjustment wheel was removed by using a small drift on the handle shaft behind the trim. It came off fairly easily with a couple of taps.
The seat adjustment **** was removed by removing the two screws on the backside of the trim.
There were a couple of screws holding the rest of the trim on as well as a clip towards the rear that simply snaps out.
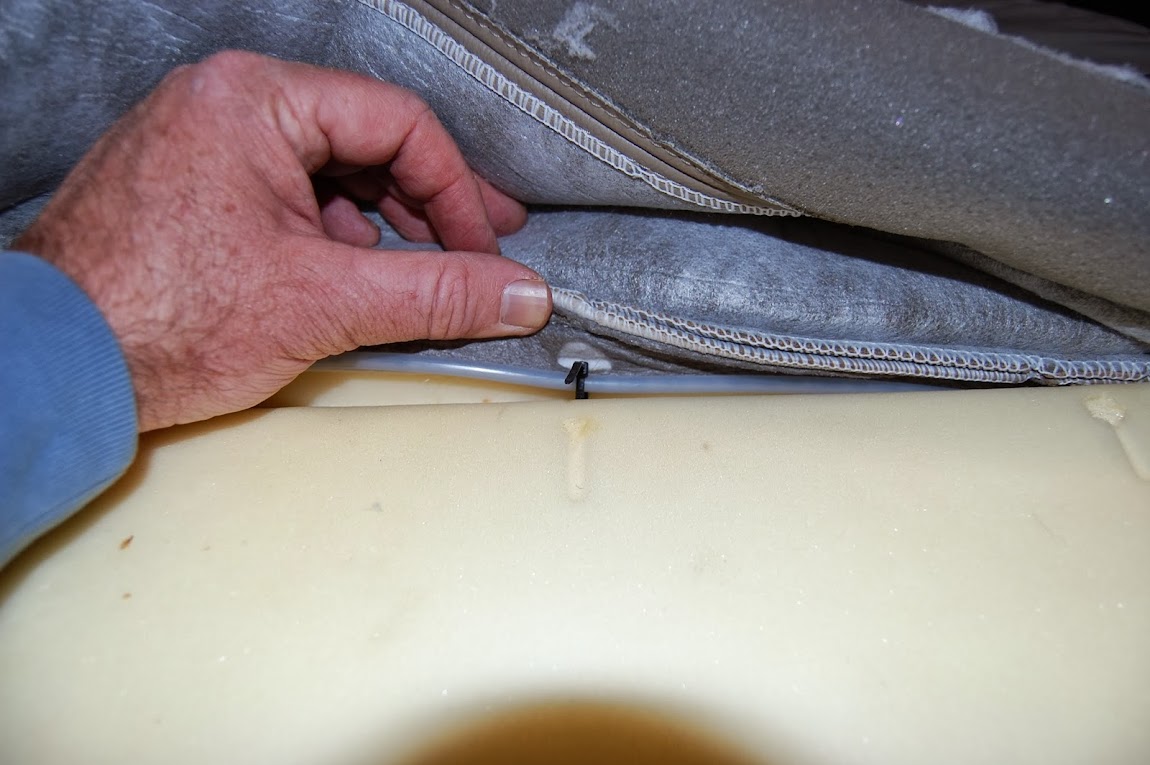
After loosening the seat cover, I was able to slide the heating pad under the cover. I only trimmed the non heated edge for a nice fit up to the point where the Hog Rings held the cover down.
In the picture below I am preparing the back portion of the seat for the heating pad. The cover has some velcro-like attachment holding the cover at the seams. It is easy to loosen to allow the heating pad to slide into position.

When putting the bottom seat cover back together, I used tye-wraps instead of Hog Rings.
It is just much easier in my opinion.
Working from the forward edge of the bottom seat cushion, I slowly peeled back the cover until I found the three Hog Rings. I removed the Hog Rings, not worrying about their condition as I was not going to reuse them.
I ended up removing the side trim panel to help gain access to the seat covering.
The recline handle has a small clip that keeps the handle in place. This clip can be accessed from the outside of the trim using a small screwdriver to lift up on the clip and slide the handle off.
The Lumbar support adjustment wheel was removed by using a small drift on the handle shaft behind the trim. It came off fairly easily with a couple of taps.
The seat adjustment **** was removed by removing the two screws on the backside of the trim.
There were a couple of screws holding the rest of the trim on as well as a clip towards the rear that simply snaps out.
After loosening the seat cover, I was able to slide the heating pad under the cover. I only trimmed the non heated edge for a nice fit up to the point where the Hog Rings held the cover down.
In the picture below I am preparing the back portion of the seat for the heating pad. The cover has some velcro-like attachment holding the cover at the seams. It is easy to loosen to allow the heating pad to slide into position.
When putting the bottom seat cover back together, I used tye-wraps instead of Hog Rings.
It is just much easier in my opinion.
Last edited by Stickman81; 12-03-2013 at 12:11 AM.
12-02-2013, 11:33 PM
#3
Member
Thread Starter
Continued -
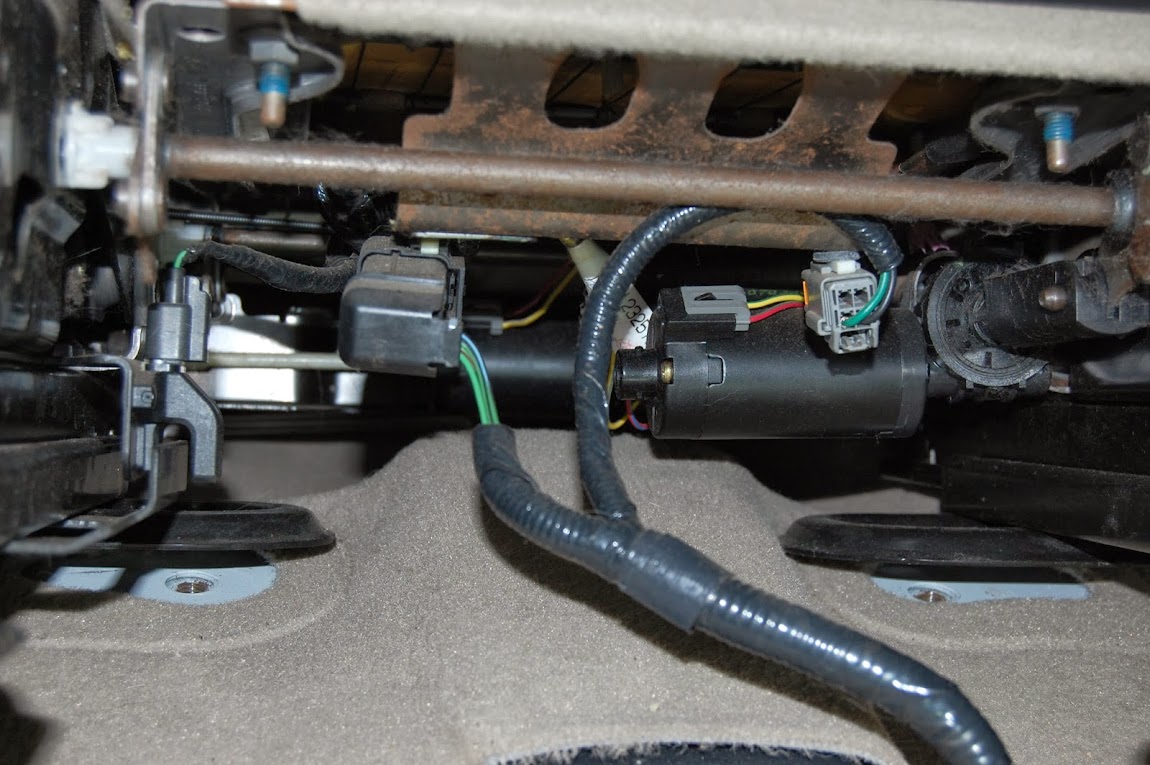
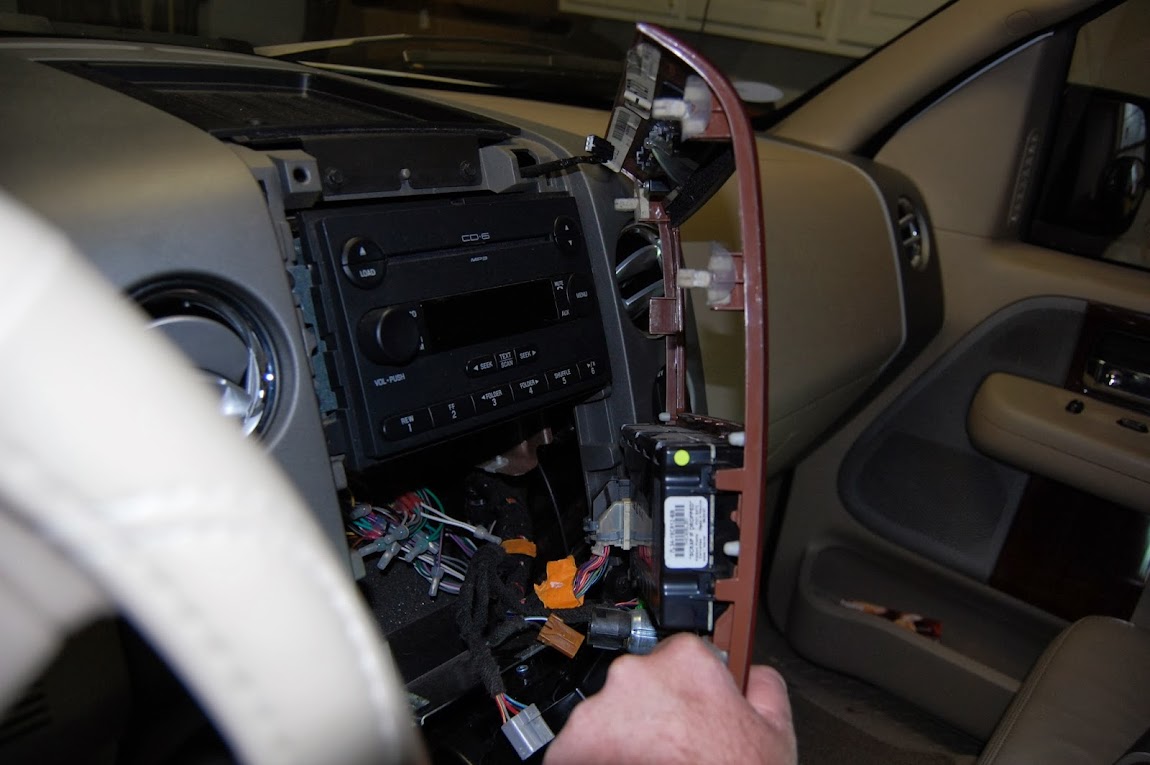
I secured the two heating pad connectors under the seat in the vicinity of the factory electrical connectors.

Bonus -
I knew my truck's stereo sounded pretty good and had seen evidence of amplifier installation. Finding these two Apline amps was confirmation.

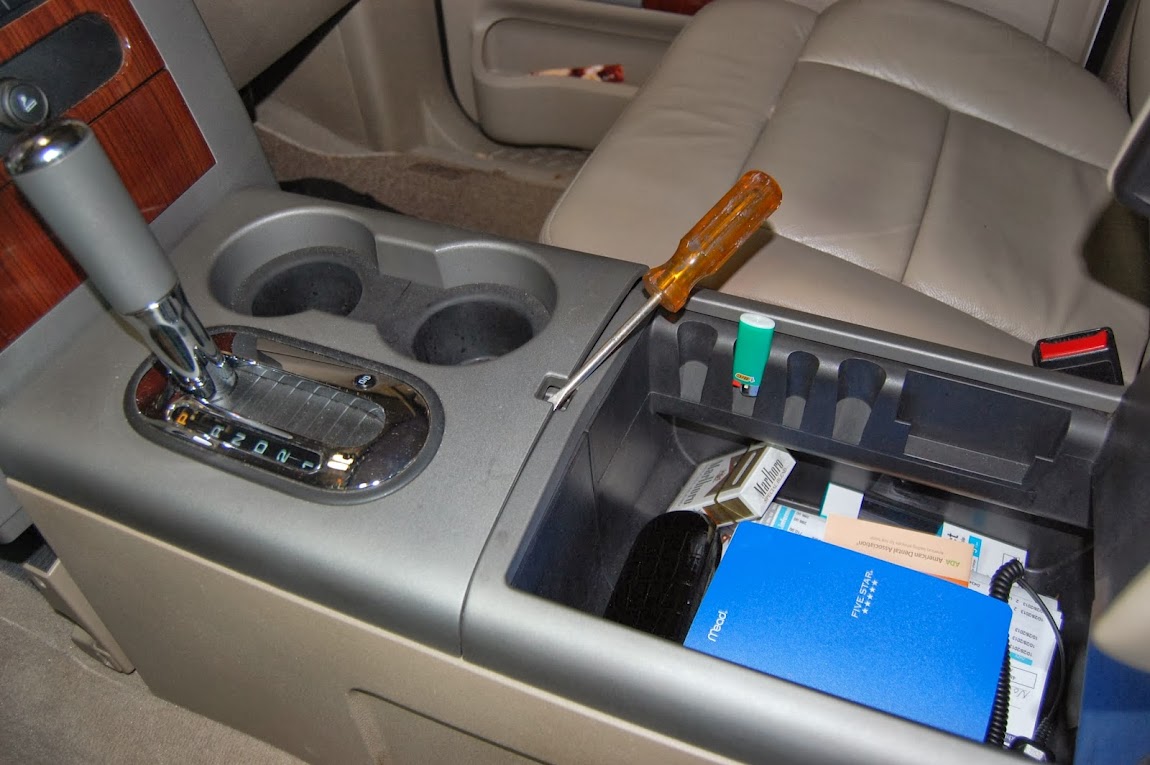
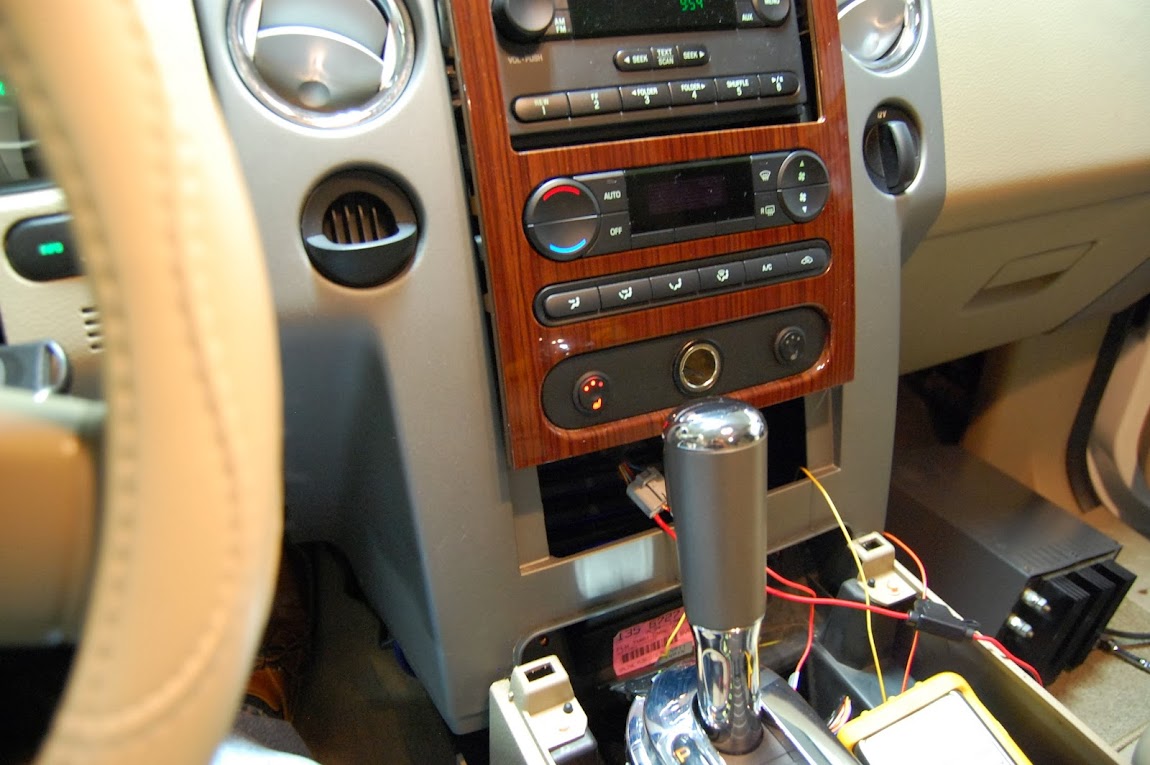
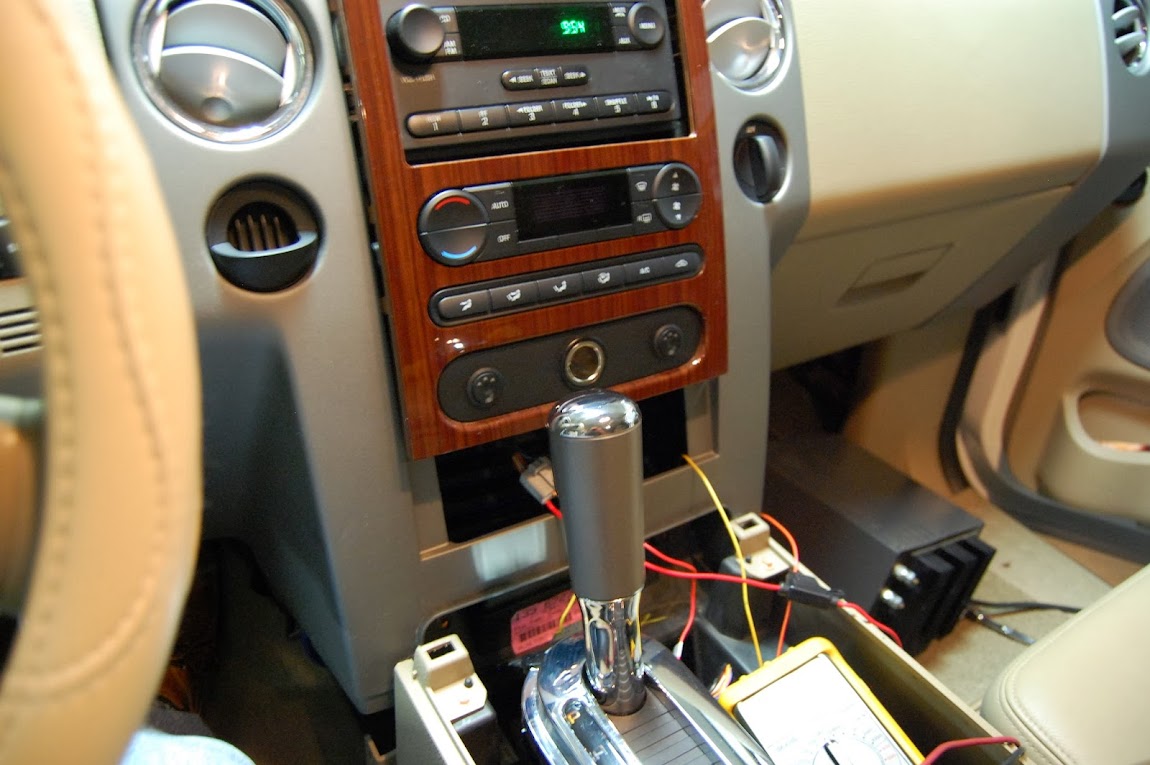
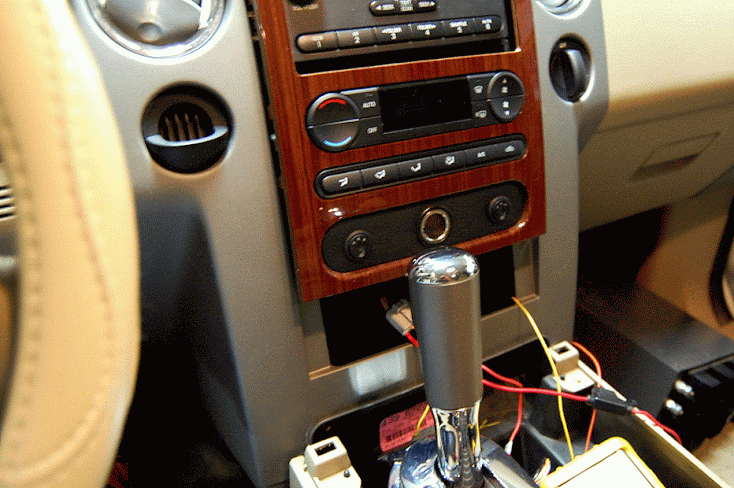
I started to remove the flow-through console.
I had already removed the two bolts at the aft end of the console as well as the two bolts at the forward end of the console under the kick panel.
Here I am removing the trim around the gear shift. It simply pops up and off.
There are two more bolts that help hold the console in place.
there is one on each side of the console facing forward.
You should be able to see it in the upper right hand corner of the inside section of the console to the right of the pink identification tag.

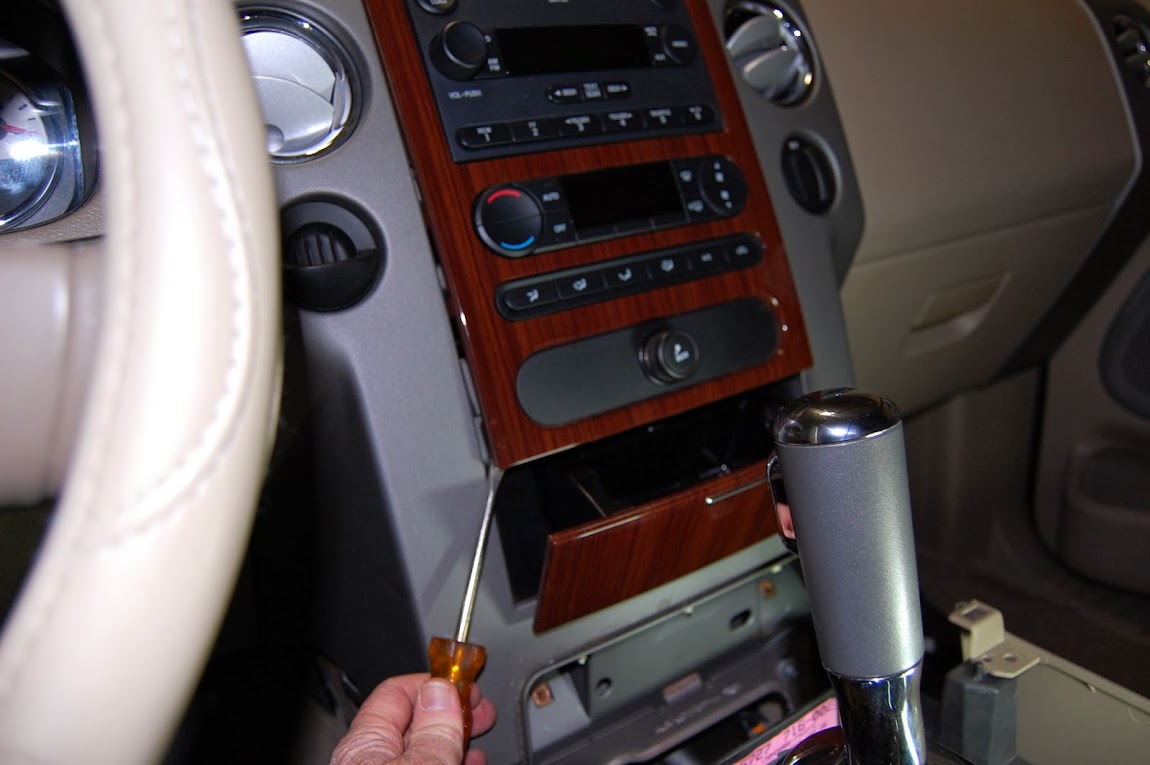
To remove the radio bezel, simply (gently) pry starting at the bottom.
You need to open the ashtray first.
I worked my way up alternating sides.
I secured the two heating pad connectors under the seat in the vicinity of the factory electrical connectors.
Bonus -
I knew my truck's stereo sounded pretty good and had seen evidence of amplifier installation. Finding these two Apline amps was confirmation.
I started to remove the flow-through console.
I had already removed the two bolts at the aft end of the console as well as the two bolts at the forward end of the console under the kick panel.
Here I am removing the trim around the gear shift. It simply pops up and off.
There are two more bolts that help hold the console in place.
there is one on each side of the console facing forward.
You should be able to see it in the upper right hand corner of the inside section of the console to the right of the pink identification tag.
To remove the radio bezel, simply (gently) pry starting at the bottom.
You need to open the ashtray first.
I worked my way up alternating sides.
12-02-2013, 11:44 PM
#4
Member
Thread Starter
Continued -
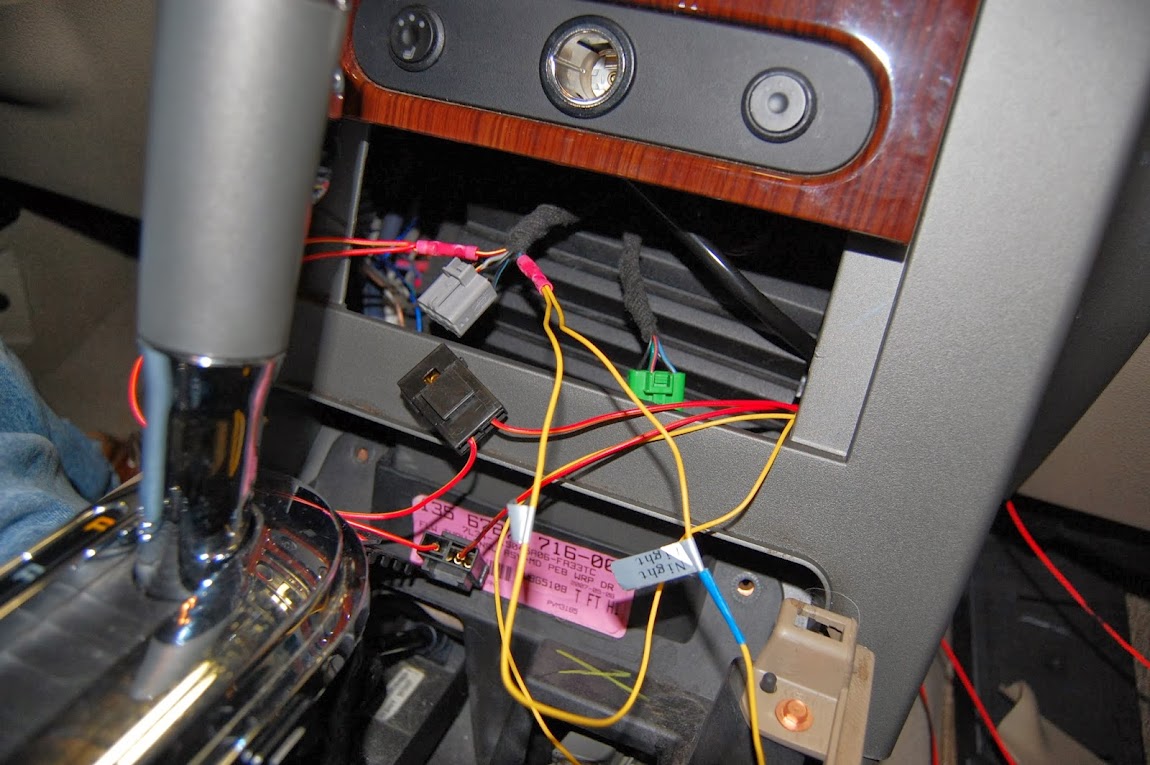
The connectors for the Electronic AC Control were unusual - to me anyway.
They have a rocker type of action to connect / disconnect them.
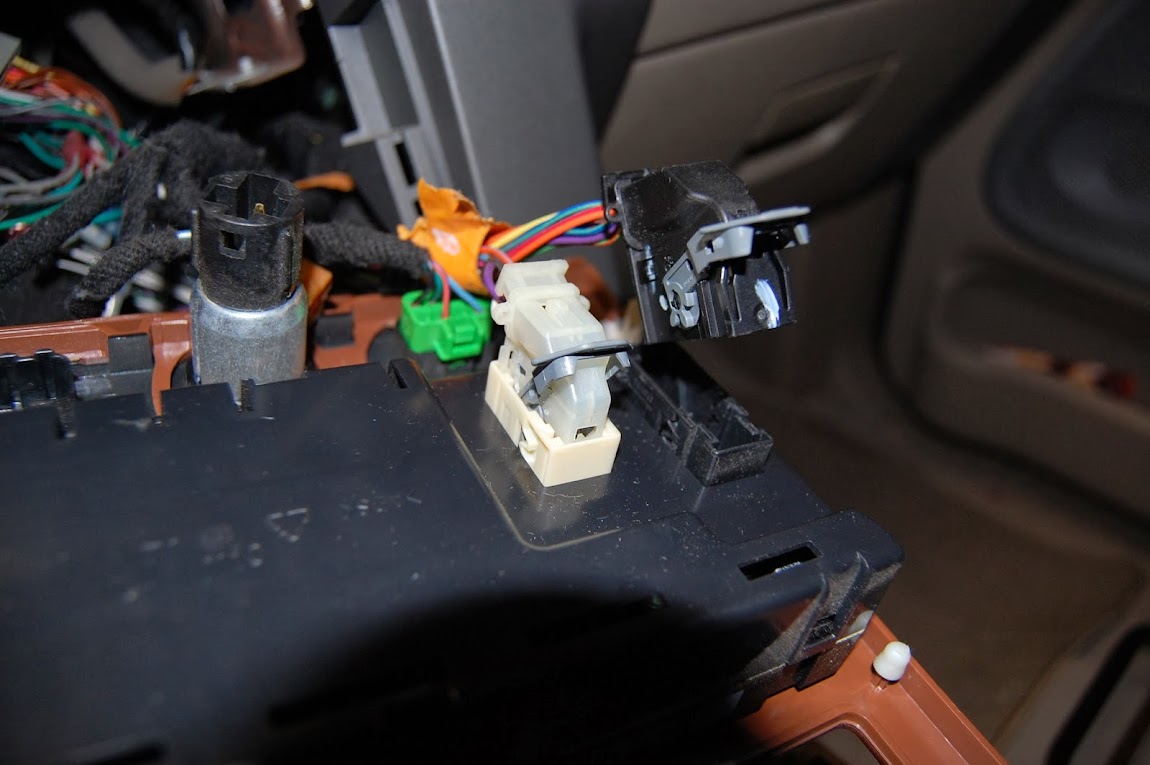
Here I have removed the trim piece that houses the cigarette lighter.
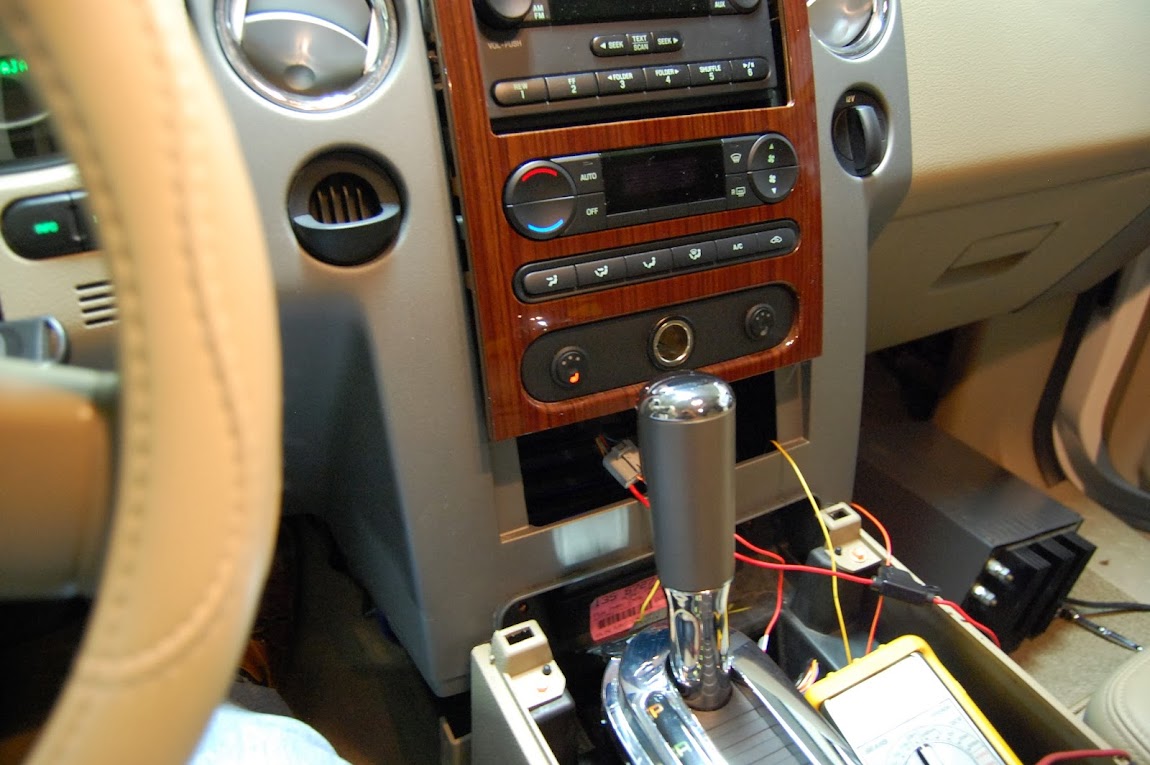
I took a few minutes to figure where I wanted my switches.
I put them off-center in case I decide to add a couple switches later.
I used a small pilot drill to start the hole.
I then used a 5/8 spade bit.
I then used a Dremel tool to finish the hole to size.


Here I ran the wire harness under the carpet using the existing cutout where the factory wire loom comes out.
I ran the seat heater wire harness forward along side of the air duct. This was to help prevent the wire harness from being pinched by the foot of the seat when it is reinstalled.

I brought the other end of the harness out here where it will be behind the kick plate.

The connectors for the Electronic AC Control were unusual - to me anyway.
They have a rocker type of action to connect / disconnect them.
Here I have removed the trim piece that houses the cigarette lighter.
I took a few minutes to figure where I wanted my switches.
I put them off-center in case I decide to add a couple switches later.
I used a small pilot drill to start the hole.
I then used a 5/8 spade bit.
I then used a Dremel tool to finish the hole to size.
Here I ran the wire harness under the carpet using the existing cutout where the factory wire loom comes out.
I ran the seat heater wire harness forward along side of the air duct. This was to help prevent the wire harness from being pinched by the foot of the seat when it is reinstalled.
I brought the other end of the harness out here where it will be behind the kick plate.
12-02-2013, 11:55 PM
#5
Member
Thread Starter
Continued -
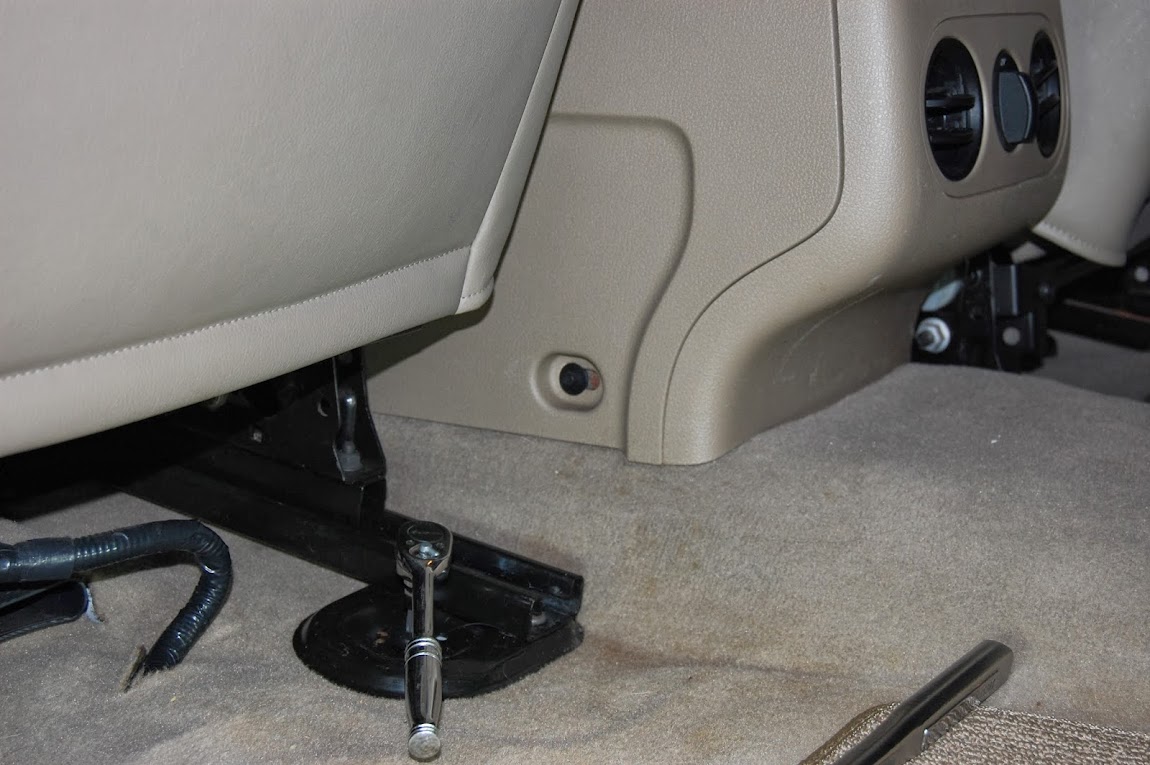
Here I am using one of the Unused plugs that was found to be fitted into the back of the trim panel in a dummy connector slot.
This seat heater kit has a Power wire, Ground wire, Control wire and, what is labeled as a "Night Light". The Night Light wire is the yellow wire and it is for the universal seat heater symbol on the front of the switch.
I have the wires plugged in temporarily to this plug. Both red wires are plugged into a switched circuit.
The yellow wire is plugged into a circuit that is controlled by the headlights. This contact is also controlled by the dimmer switch for the instrument lighting.

I hope the plug on the right side (Parking Sensor perhaps?) has the same characteristics as the grey plug on the left.

Here, the seat heaters are OFF.
The Parking / Headlights are ON.
Notice the universal seat heater on the switch light up.
Seat heater set to HIGH.
Seat Heater - OFF.
Parking / Headlights - OFF.
Here I am using one of the Unused plugs that was found to be fitted into the back of the trim panel in a dummy connector slot.
This seat heater kit has a Power wire, Ground wire, Control wire and, what is labeled as a "Night Light". The Night Light wire is the yellow wire and it is for the universal seat heater symbol on the front of the switch.
I have the wires plugged in temporarily to this plug. Both red wires are plugged into a switched circuit.
The yellow wire is plugged into a circuit that is controlled by the headlights. This contact is also controlled by the dimmer switch for the instrument lighting.
I hope the plug on the right side (Parking Sensor perhaps?) has the same characteristics as the grey plug on the left.
Here, the seat heaters are OFF.
The Parking / Headlights are ON.
Notice the universal seat heater on the switch light up.
Seat heater set to HIGH.
Seat Heater - OFF.
Parking / Headlights - OFF.
12-03-2013, 12:03 AM
#6
Member
Thread Starter
Conclusion -
I have not had too much of a chance to run the seat heaters. What little I have run them, they seem a bit slow to heat up. Perhaps its just my impatient side kicking in. The 2010 Fusion seems to heat up pretty quick but maybe that is because I am busy doing something (driving) instead of just sitting there, waiting for a seat to heat up.
I hope you have found this informative and / or helpful.
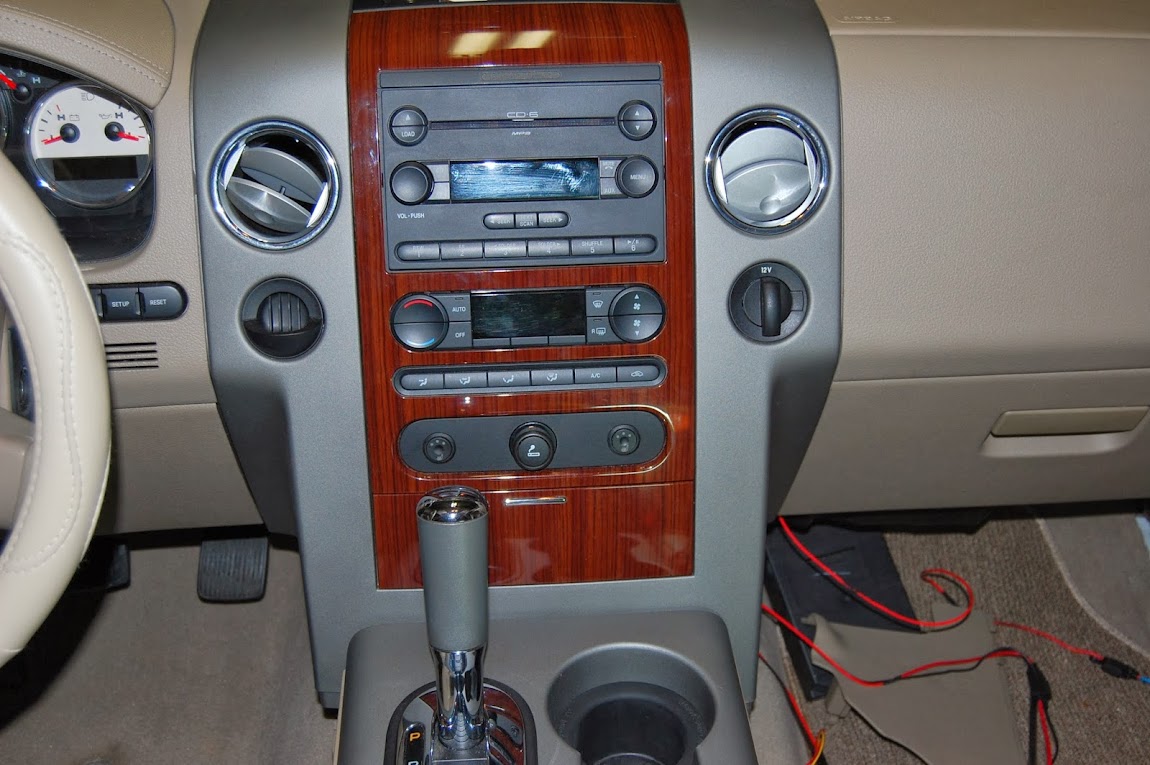
This task took me entirely too long in my opinion.
While there are several threads on the subject, I had a hard time with the console. I attempted to remove the entire console but got stopped by the shifter cable. I wasted a lot of time with this step and as it turns out, in my opinion, is not necessary.
I had wanted / thought the console should be removed to help feed the wire harnesses to the seats. As it turns out, running them near the air duct and forward was much easier and more direct.
I also spent a lot of time looking for where / how to connect the seat heaters for power. In the end I temporarily tied into the connector that I have shown. I intend to tie into the connector permanently tomorrow.
Tomorrow I will install the pads in the front passenger seat, run the wires and close everything up.
This getting old stuff is hell, but, it beats the alternative.
I have not had too much of a chance to run the seat heaters. What little I have run them, they seem a bit slow to heat up. Perhaps its just my impatient side kicking in. The 2010 Fusion seems to heat up pretty quick but maybe that is because I am busy doing something (driving) instead of just sitting there, waiting for a seat to heat up.
I hope you have found this informative and / or helpful.
This task took me entirely too long in my opinion.
While there are several threads on the subject, I had a hard time with the console. I attempted to remove the entire console but got stopped by the shifter cable. I wasted a lot of time with this step and as it turns out, in my opinion, is not necessary.
I had wanted / thought the console should be removed to help feed the wire harnesses to the seats. As it turns out, running them near the air duct and forward was much easier and more direct.
I also spent a lot of time looking for where / how to connect the seat heaters for power. In the end I temporarily tied into the connector that I have shown. I intend to tie into the connector permanently tomorrow.
Tomorrow I will install the pads in the front passenger seat, run the wires and close everything up.
This getting old stuff is hell, but, it beats the alternative.
Last edited by Stickman81; 12-03-2013 at 12:05 AM.
12-03-2013, 06:53 PM
#7
Member
Thread Starter
12-3-2013.
Project Completed.
Today I finished connecting the control wires and the "Night Light" wire which provides power to illuminate the universal seat heater icon on the switch.
I installed the passenger side heating pads and ran the harness from the pads to the controller.
I took the truck to my local Best Buy and had them connect the Power wires to a switched source. They charged me $45.00 and, IMO, worth the money and the thirty minutes of time.
The seat heaters work well. It does take a bit of time to get warmed up. So far I have not gone far enough to turn them down from the HIGH setting to something lower.
Below are the pictures from today.
In the picture below I have connected the yellow wires to a power source for instrument lighting. The yellow wires are the "Night Light" wires to illuminate the universal seat icon on the switch.
UPDATE - 2055 // 12-4-13: Interesting tidbit - The seat icon lights do dim using the instrumentation dimmer. I noticed tonight they illuminate with the courtesy lighting. If this continues to bother me, I'll find another power source that can be dimmed.
The red wires are also connected to a switched power. These are the "ON" Control wires (not the main or feed power wires for the heating pads).
For the passenger seat, I left the seat in the truck. This worked out okay for me. I'm still relatively small and did not have much trouble. Main reason to leave it in the truck was accessibility. The passenger side of the truck, while in the garage was kind of tight. I could not have safely removed and reinstalled the seat without the risk of scratching something.
For the seat bottom, I have loosened the cover much like I did for the drivers seat. I removed the Hog Rings for the bolster. I trimmed the end of the heating pad in the non-heated area. I used tye-wraps to reattach the bolster instead of using Hog Rings.
For the seat back, I used the same process as the driver's side seat.

I then unbolted the seat from the floor to allow easy access to run and secure the heating pad connectors. This also allowed easy access to run the wire harness under the carpet much like I did on the driver's side. I ran the wire harness near the air duct to avoid having the seat foot sit on top of and damage the wire harness.

The picture below shows the seat heaters OFF.
The parking / headlights are ON to illuminate the seat icon on the switch.

The picture below shows both Driver and Passenger seat heaters selected to HIGH with the parking / headlights ON.

Here is an overview of the switch installation.
Here is a .gif file that Google so kindly made for me (no clue as to why this happened).
At any rate this shows the different settings pretty well.
OFF
Parking / Headlights - ON.
HIGH
MED
LOW
(repeat)
Project Completed.
Today I finished connecting the control wires and the "Night Light" wire which provides power to illuminate the universal seat heater icon on the switch.
I installed the passenger side heating pads and ran the harness from the pads to the controller.
I took the truck to my local Best Buy and had them connect the Power wires to a switched source. They charged me $45.00 and, IMO, worth the money and the thirty minutes of time.
The seat heaters work well. It does take a bit of time to get warmed up. So far I have not gone far enough to turn them down from the HIGH setting to something lower.
Below are the pictures from today.
In the picture below I have connected the yellow wires to a power source for instrument lighting. The yellow wires are the "Night Light" wires to illuminate the universal seat icon on the switch.
UPDATE - 2055 // 12-4-13: Interesting tidbit - The seat icon lights do dim using the instrumentation dimmer. I noticed tonight they illuminate with the courtesy lighting. If this continues to bother me, I'll find another power source that can be dimmed.
The red wires are also connected to a switched power. These are the "ON" Control wires (not the main or feed power wires for the heating pads).
For the passenger seat, I left the seat in the truck. This worked out okay for me. I'm still relatively small and did not have much trouble. Main reason to leave it in the truck was accessibility. The passenger side of the truck, while in the garage was kind of tight. I could not have safely removed and reinstalled the seat without the risk of scratching something.
For the seat bottom, I have loosened the cover much like I did for the drivers seat. I removed the Hog Rings for the bolster. I trimmed the end of the heating pad in the non-heated area. I used tye-wraps to reattach the bolster instead of using Hog Rings.
For the seat back, I used the same process as the driver's side seat.
I then unbolted the seat from the floor to allow easy access to run and secure the heating pad connectors. This also allowed easy access to run the wire harness under the carpet much like I did on the driver's side. I ran the wire harness near the air duct to avoid having the seat foot sit on top of and damage the wire harness.
The picture below shows the seat heaters OFF.
The parking / headlights are ON to illuminate the seat icon on the switch.
The picture below shows both Driver and Passenger seat heaters selected to HIGH with the parking / headlights ON.
Here is an overview of the switch installation.
Here is a .gif file that Google so kindly made for me (no clue as to why this happened).
At any rate this shows the different settings pretty well.
OFF
Parking / Headlights - ON.
HIGH
MED
LOW
(repeat)
Last edited by Stickman81; 12-04-2013 at 08:54 PM.
Trending Topics
12-08-2013, 05:58 PM
#8

Amazing!
12-08-2013, 07:26 PM
#9
Member
Thread Starter
Thanks for the move to this section.
I have had the chance to run the seat heaters and am very pleased with them. I start to feel them within about a mile or so. It seems the start-up improved with a few cycles of the system, if that is even possible. It could have been initially I expected something quicker.
HIGH gets pretty warm on the buns and back. I don't notice too much difference in MEDIUM, but probably need to give it longer at that setting. LOW is noticeably different and has a nice warming effect.
Here is a link to the seat heaters I bought.
http://www.ebay.com/itm/160952753792...84.m1423.l2649
12-12-2013, 08:25 PM
#10
Member
Thread Starter
Update on instrument dimmer lighting.
As it turns out, the power source that I tapped into for the seat icons on the switch were not truly for instrument lights. Although it was controlled by the dimmer, the icons would light up with the courtesy lights.
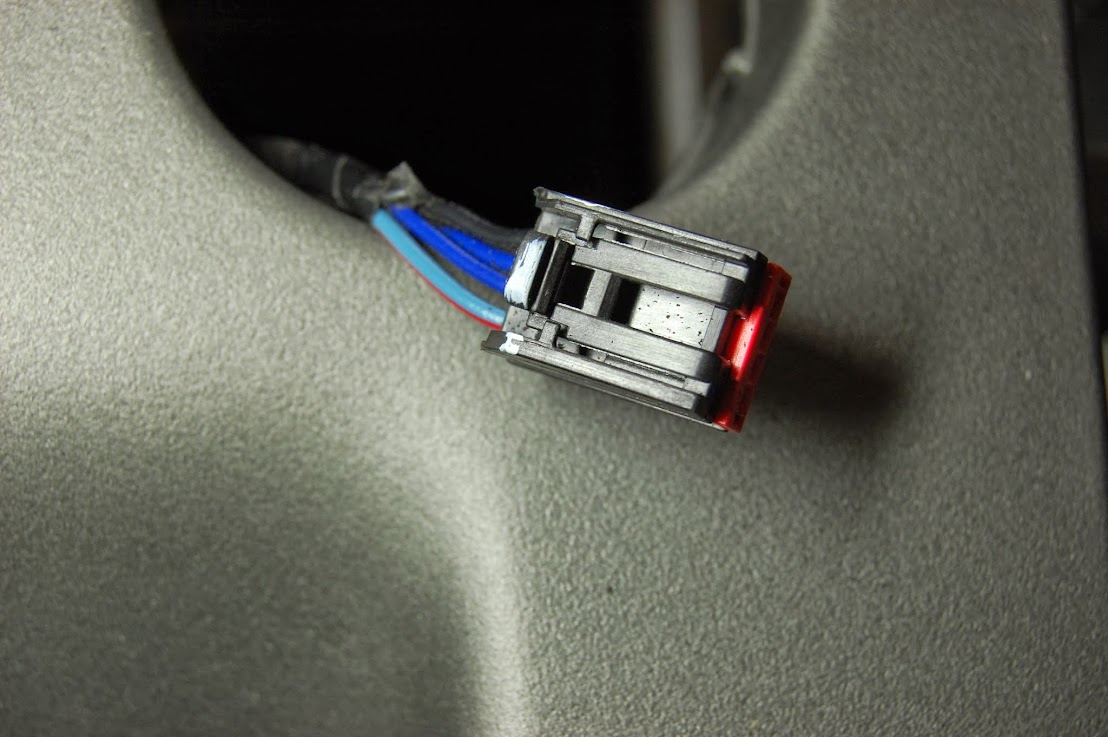
During my Autometer clock installation (removing coin holder), I found that the four wheel drive connector has an appropriate power source that is for instrument lights controlled by the dimmer.
In the picture below you will see the four wheel drive connector that attaches to the selector switch (not used in my truck).
The light blue wire with the red stripe is the wire to use to power instrument lights that require dimming.
As it turns out, the power source that I tapped into for the seat icons on the switch were not truly for instrument lights. Although it was controlled by the dimmer, the icons would light up with the courtesy lights.
During my Autometer clock installation (removing coin holder), I found that the four wheel drive connector has an appropriate power source that is for instrument lights controlled by the dimmer.
In the picture below you will see the four wheel drive connector that attaches to the selector switch (not used in my truck).
The light blue wire with the red stripe is the wire to use to power instrument lights that require dimming.

