97-03 V8 F150 spark plug change
#1
Senior Member
Thread Starter
Changing the spark plugs on a 97-03 may be daunting at first. With the proper tools and a little knowledge, it is not the horrible experience it may seem. I hope that this will allow most with tools and mechanical ability to feel confident about performing the job. The recommendations in this article are not set in stone and any additions/omission suggestions are welcomed. The most accurate information is wanted to help as many as possible. The truck in this article is a 1999 F150 2V 5.4L. Some slight differences from year to year may be apparent; the general concept is the same though for all 97-03 V8ís (ie 97-98 5.4L and 97-99 4.6ís motors use a wire system instead of COPs).
Tools needed: 10 mm socket, 8 mm socket, ľ inch drive ratchet, 3/8 drive ratchet, ľ and 3/8 extensions, 3/8 drive torque wrench, 5/16Ē socket, dielectric grease.
1. Start with the truck on a flat surface. I like to put the rear of the truck up on ramps to gain better access to the engine bay. If you do put the rear on ramps, be sure to block the front wheels and set the parking brake to prevent any rolling issues. I also use a 1-foot tall wooden step to stand on while working to help with the height issue.
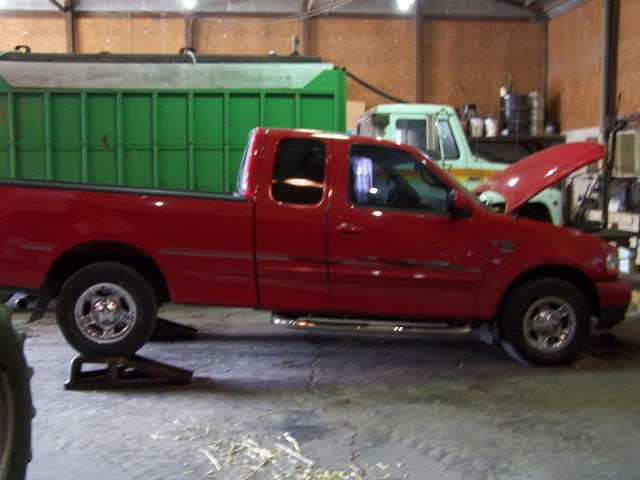
2. Open the hood and disconnect the negative battery cable. This will prevent most electrical safety concerns while working. It also resets the ECU so fuel trims can be adjusted if the old plugs were out of spec and the ECU compensated.
3. Start by removing the throttle body cover. There are three 10 mm bolts, one on the passenger side two on the driverís, that hold it on.
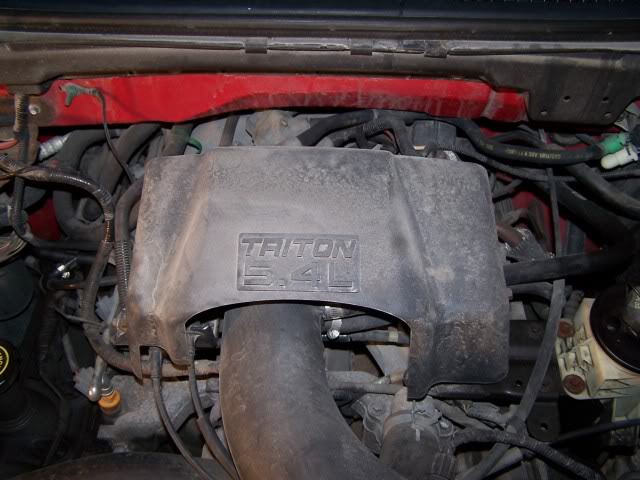

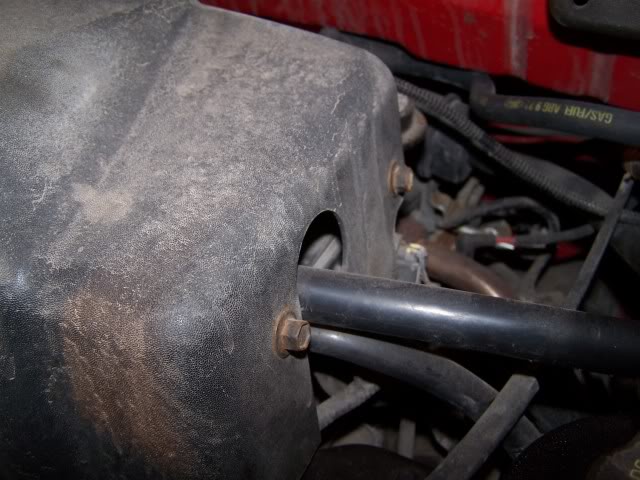
4. Disconnect the IAT, MAF sensor, and all vacuum hoses from the intake tube and remove the intake from the engine bay.
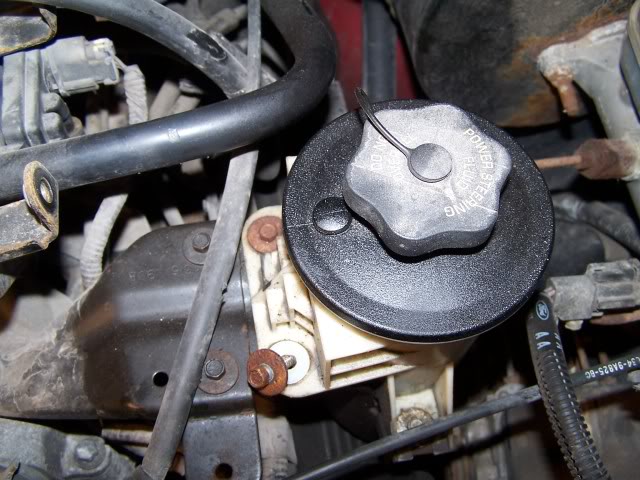
5. Take out the three 5/16Ē bolts that hold the power steering reservoir on and the three that hold the bracket on. I take both off to add a little more room to maneuver. Place the reservoir out of the way. The hoses will hold it while it is off.
6. I like to start with #4 and #5 as they are easy to get to and donít require too much working around the fuel rail. Cylinders 2,3,4,7, and 8 I find it easier to remove the fuel rail. (For fuel rail removal refer step 14) Eye your first target. First, undo the clip that provides power to the COP. It is a small push tab on the underside of the connector. Push on the tab and pull out the connector from the COP.
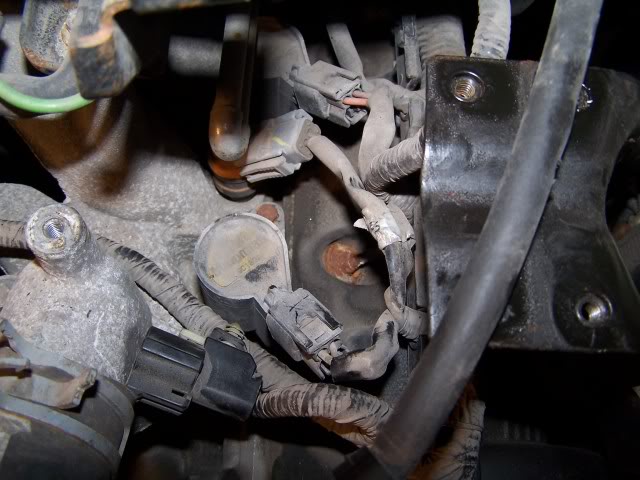
7. There is a 7 mm bolt that holds the COP in place. Take this bolt out and the COP will be free to come out. It is very helpful to have magnetic sockets or a long pen magnet for the rear COP bolts. If it drops it can be very hard to retrieve them without assistance.
8. Pull the COP out. Some slight twisting may be needed to help get the boot off the spark plug. Take compressed air and blow out the spark plug well and the area around before attempting to remove the plug. This prevents any debris falling into the cylinder while the plug is out. I attach a length of hose to the end of a small blowgun to get down into the well and around the plug.
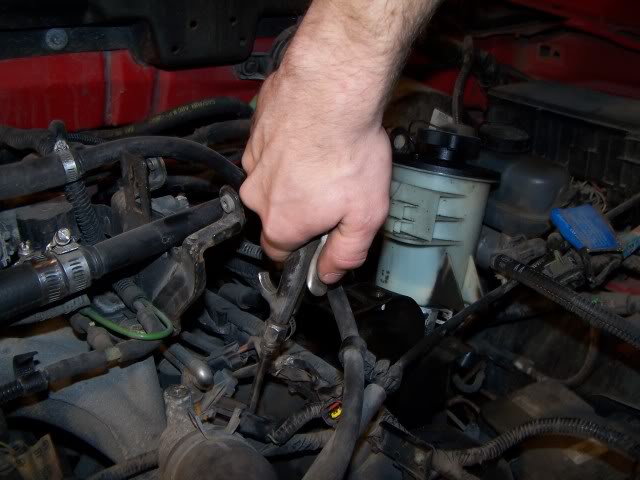
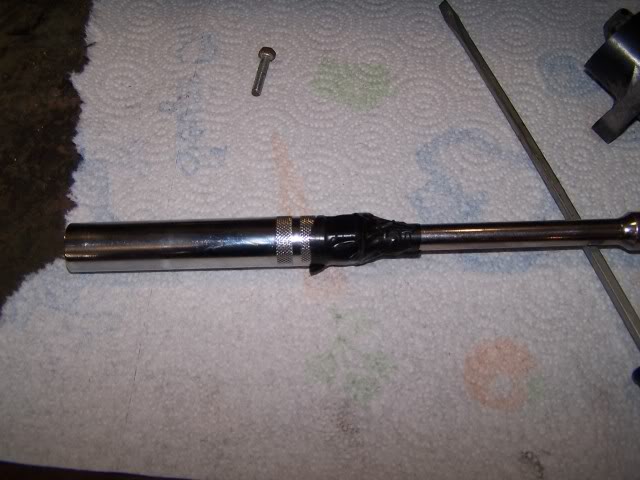
9. To remove the spark plug, use a 5/8Ē spark plug socket. Only remove and install the spark plugs with a fully cool engine. I use a Performance Tool Extended Spark Plug Socket 5/8Ē, 3/8in drive (Model# W80533), which is 5 inches in length and can get into the sparkplug well with ease. Extensions and swivels used will vary by sparkplug #. I like to tape the socket to the extension/swivel to keep them from coming apart, although will a long socket it isnít hard to retrieve it if it comes off. If using a short socket I strongly suggest doing this.
Here is what the socket on #4 looks like. Loosen and remove the sparkplug.
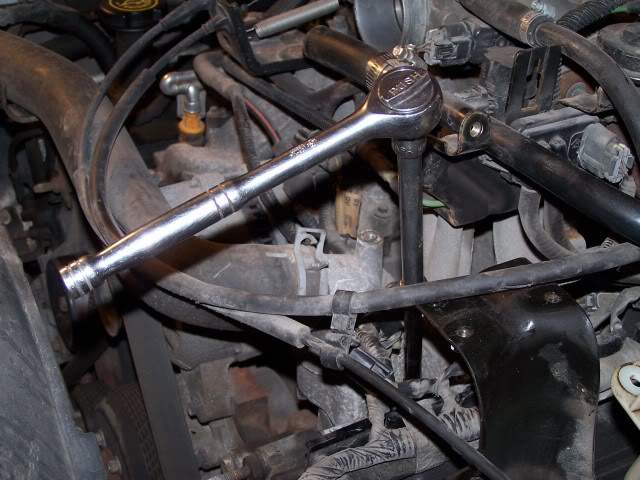
10. Motorcraft are recommended for the reinstall. You can use the sparkplug you choose, but these Triton motors are VERY picky on which plugs they like. The correct heat range is a must. I used Motorcraft SP-479 for the new plugs. Motorcraft plugs have a nickel coating on the threads. Gap all plugs to factory specified .054.
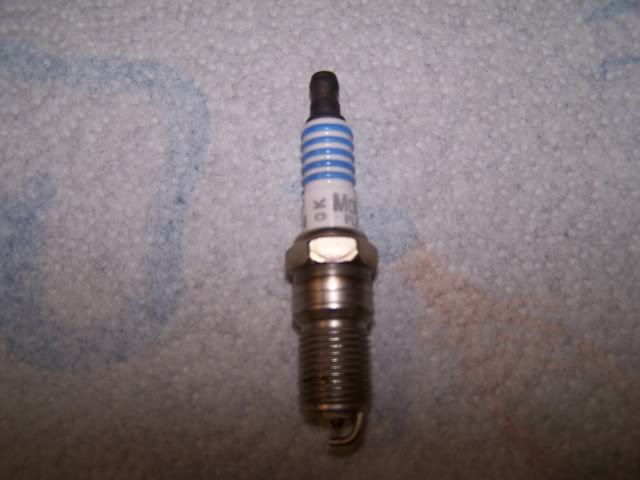
11. Start the spark plug back into the head by hand. A piece of vacuum hose or the socket can be used. Feel the plug thread in by hand to prevent cross threading and damaging the head. For all 97-03 V8ís 28-32 lb/ft of torque is the new recommended to prevent the common blowout issue. Using a properly calibrated torque wrench is the most accurate for this. The 2 valve motors until during 2003 only have 4 threads in the head. The factory recommended torque is too low and causes the plugs to back out and blow out of the head. Anti seize is also not recommended as it skews the torque reading and can act as a lubricant. Using nickel coated plugs and the aluminum heads eliminates corrosion issues. The 97-03ís do not have the breaking issue the 04-08ís have.
Tools needed: 10 mm socket, 8 mm socket, ľ inch drive ratchet, 3/8 drive ratchet, ľ and 3/8 extensions, 3/8 drive torque wrench, 5/16Ē socket, dielectric grease.
1. Start with the truck on a flat surface. I like to put the rear of the truck up on ramps to gain better access to the engine bay. If you do put the rear on ramps, be sure to block the front wheels and set the parking brake to prevent any rolling issues. I also use a 1-foot tall wooden step to stand on while working to help with the height issue.

2. Open the hood and disconnect the negative battery cable. This will prevent most electrical safety concerns while working. It also resets the ECU so fuel trims can be adjusted if the old plugs were out of spec and the ECU compensated.
3. Start by removing the throttle body cover. There are three 10 mm bolts, one on the passenger side two on the driverís, that hold it on.


4. Disconnect the IAT, MAF sensor, and all vacuum hoses from the intake tube and remove the intake from the engine bay.
5. Take out the three 5/16Ē bolts that hold the power steering reservoir on and the three that hold the bracket on. I take both off to add a little more room to maneuver. Place the reservoir out of the way. The hoses will hold it while it is off.

6. I like to start with #4 and #5 as they are easy to get to and donít require too much working around the fuel rail. Cylinders 2,3,4,7, and 8 I find it easier to remove the fuel rail. (For fuel rail removal refer step 14) Eye your first target. First, undo the clip that provides power to the COP. It is a small push tab on the underside of the connector. Push on the tab and pull out the connector from the COP.

7. There is a 7 mm bolt that holds the COP in place. Take this bolt out and the COP will be free to come out. It is very helpful to have magnetic sockets or a long pen magnet for the rear COP bolts. If it drops it can be very hard to retrieve them without assistance.
8. Pull the COP out. Some slight twisting may be needed to help get the boot off the spark plug. Take compressed air and blow out the spark plug well and the area around before attempting to remove the plug. This prevents any debris falling into the cylinder while the plug is out. I attach a length of hose to the end of a small blowgun to get down into the well and around the plug.

9. To remove the spark plug, use a 5/8Ē spark plug socket. Only remove and install the spark plugs with a fully cool engine. I use a Performance Tool Extended Spark Plug Socket 5/8Ē, 3/8in drive (Model# W80533), which is 5 inches in length and can get into the sparkplug well with ease. Extensions and swivels used will vary by sparkplug #. I like to tape the socket to the extension/swivel to keep them from coming apart, although will a long socket it isnít hard to retrieve it if it comes off. If using a short socket I strongly suggest doing this.

Here is what the socket on #4 looks like. Loosen and remove the sparkplug.

10. Motorcraft are recommended for the reinstall. You can use the sparkplug you choose, but these Triton motors are VERY picky on which plugs they like. The correct heat range is a must. I used Motorcraft SP-479 for the new plugs. Motorcraft plugs have a nickel coating on the threads. Gap all plugs to factory specified .054.

11. Start the spark plug back into the head by hand. A piece of vacuum hose or the socket can be used. Feel the plug thread in by hand to prevent cross threading and damaging the head. For all 97-03 V8ís 28-32 lb/ft of torque is the new recommended to prevent the common blowout issue. Using a properly calibrated torque wrench is the most accurate for this. The 2 valve motors until during 2003 only have 4 threads in the head. The factory recommended torque is too low and causes the plugs to back out and blow out of the head. Anti seize is also not recommended as it skews the torque reading and can act as a lubricant. Using nickel coated plugs and the aluminum heads eliminates corrosion issues. The 97-03ís do not have the breaking issue the 04-08ís have.
The following 11 users liked this post by otto457:
48windsor (01-30-2014),
Art.F96 (07-14-2013),
brow&proud (08-08-2014),
cApTaInGoOfY (06-17-2014),
curtisking316 (02-14-2016),
and 6 others liked this post.

Popular Reply
05-02-2011, 05:28 PM
Senior Member


Thread Starter
12. Whether reusing COPs or installing new, dielectric grease on the COPs is recommended to prevent corrosion on the coil and subsequent misfires. Remove the boot from the COP and using a long screwdriver, lightly coat the inside of the boot with dielectric grease. A bead of grease around the top of the COP where the boot contacts can also be used. Reinstall the boot and clean any dielectric grease from the inside/end of the coil wire with a small pipe cleaner.
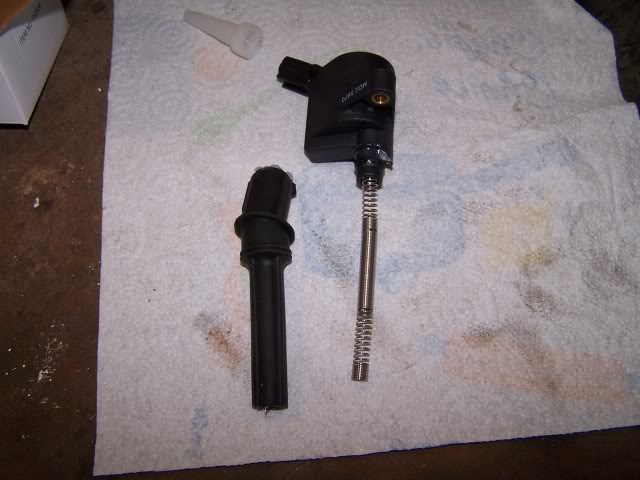
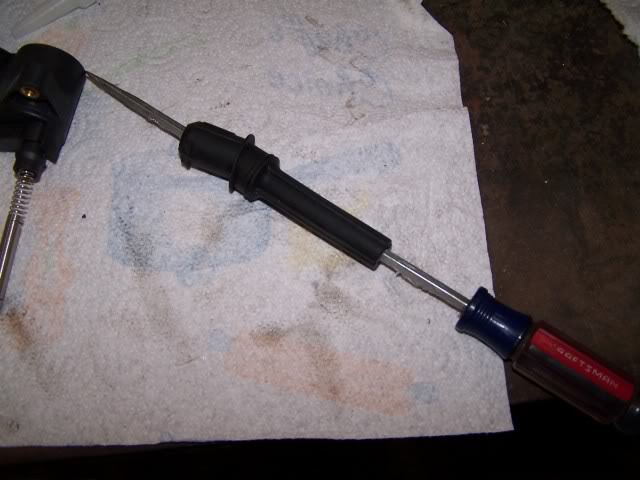
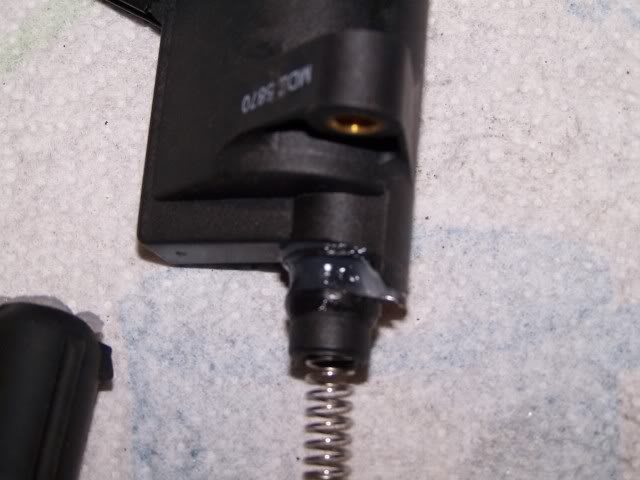
13. Reinstall the COP onto the new plug, and reinstall the bolt. Hook back up the electrical connector to the COP.
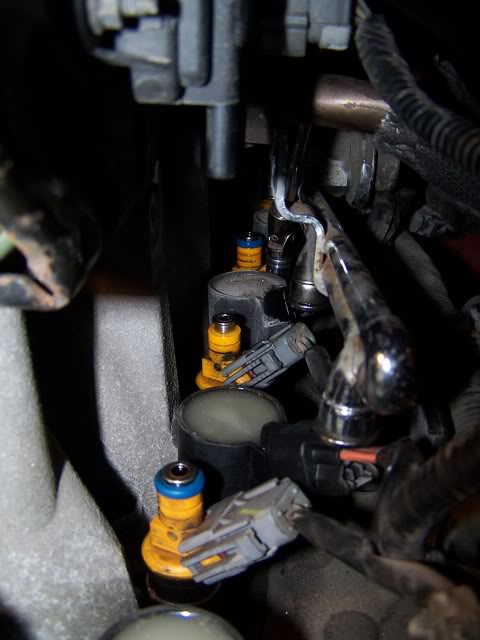
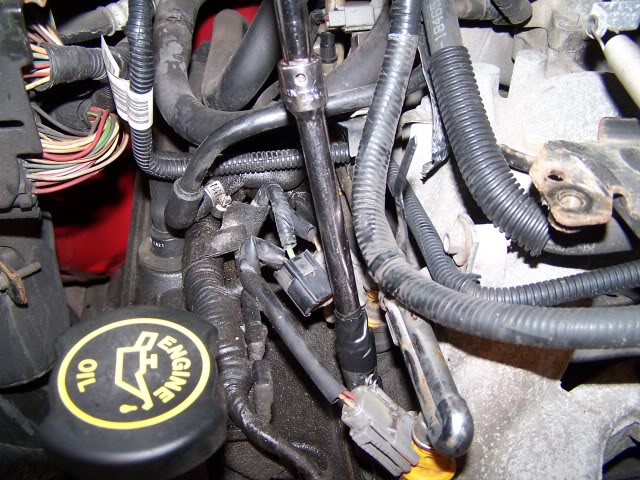
14. Removing the fuel rail can make spark plug removal much more straightforward for some cylinders. First, release the fuel pressure by pressing down on the rail’s Schrader valve. It is located under a black cap on the passenger side rail. Remove the two 5/16” bolts that hold the fuel rail on. Carefully pry the fuel rail off the injectors. Some fuel will spill out, do not do this around open flame or heat. The fuel rail will have some movement now to work around. Do not bend too far out of the way and break the line. Use caution to not damage the O-rings on top of the injectors when pulling the rail off. To reinstall, put new motor oil on the O-rings and press the rail back onto the injectors.
That’s all there is to it. Reinstall all connectors and intake and start to ensure there are no problems. When changing the plugs it is also a good time to clean the throttle, MAF, and check for any cracked or damaged hoses causing vacuum leaks. I have more pictures of the angles taken by the socket for each plug, if it would be beneficial I will be glad to post them up.


13. Reinstall the COP onto the new plug, and reinstall the bolt. Hook back up the electrical connector to the COP.
14. Removing the fuel rail can make spark plug removal much more straightforward for some cylinders. First, release the fuel pressure by pressing down on the rail’s Schrader valve. It is located under a black cap on the passenger side rail. Remove the two 5/16” bolts that hold the fuel rail on. Carefully pry the fuel rail off the injectors. Some fuel will spill out, do not do this around open flame or heat. The fuel rail will have some movement now to work around. Do not bend too far out of the way and break the line. Use caution to not damage the O-rings on top of the injectors when pulling the rail off. To reinstall, put new motor oil on the O-rings and press the rail back onto the injectors.


That’s all there is to it. Reinstall all connectors and intake and start to ensure there are no problems. When changing the plugs it is also a good time to clean the throttle, MAF, and check for any cracked or damaged hoses causing vacuum leaks. I have more pictures of the angles taken by the socket for each plug, if it would be beneficial I will be glad to post them up.
#2
Senior Member
Thread Starter
12. Whether reusing COPs or installing new, dielectric grease on the COPs is recommended to prevent corrosion on the coil and subsequent misfires. Remove the boot from the COP and using a long screwdriver, lightly coat the inside of the boot with dielectric grease. A bead of grease around the top of the COP where the boot contacts can also be used. Reinstall the boot and clean any dielectric grease from the inside/end of the coil wire with a small pipe cleaner.
Attachment 505655
Attachment 505656
Attachment 505657
13. Reinstall the COP onto the new plug, and reinstall the bolt. Hook back up the electrical connector to the COP.
14. Removing the fuel rail can make spark plug removal much more straightforward for some cylinders. First, release the fuel pressure by pressing down on the rail’s Schrader valve. It is located under a black cap on the passenger side rail. Remove the two 5/16” bolts that hold the fuel rail on. Carefully pry the fuel rail off the injectors. Some fuel will spill out, do not do this around open flame or heat. The fuel rail will have some movement now to work around. Do not bend too far out of the way and break the line. Use caution to not damage the O-rings on top of the injectors when pulling the rail off. To reinstall, put new motor oil on the O-rings and press the rail back onto the injectors.
Attachment 505658
Attachment 505659
That’s all there is to it. Reinstall all connectors and intake and start to ensure there are no problems. When changing the plugs it is also a good time to clean the throttle, MAF, and check for any cracked or damaged hoses causing vacuum leaks. I have more pictures of the angles taken by the socket for each plug, if it would be beneficial I will be glad to post them up.
Last edited by otto457; 05-02-2011 at 05:31 PM.
The following 11 users liked this post by otto457:
Art.F96 (07-14-2013),
Boom Bostic (10-04-2019),
cApTaInGoOfY (06-17-2014),
DanCampbell (12-06-2018),
iFord (09-01-2014),
and 6 others liked this post.
#5
Otto, thanks for the tutorial, very nice job. I'm sure it will be helpful for the 'first timers'.
Pimp, save the $250 and buy a few new tools, you can do this, it isn't rocket science. Just follow Otto's steps.
Pimp, save the $250 and buy a few new tools, you can do this, it isn't rocket science. Just follow Otto's steps.
#7
Nice. My only recommendation is to get locking extensions, craftsman makes them now I think. They can really save some trouble. I guess if you don't think you'll ever use them again tape is a much cheaper approach though. Also a 7mm chrome 1/4" swivel or flex socket, not a universal but the socket with the swivel built right in, makes it so there's no need to take the fuel rail off, which is more risk than it's worth in my opinion. Losing an o-ring will ground your truck until you can get a set. The injectors can be rotated around to get the connector out of your way and the coils can all be removed without pulling the fuel rail.
Trending Topics
#8
Senior Member
Thread Starter
A built in swivel would be nice as the 7 mm plus the swivel is usually too tall to clear the swivel. I added removing the fuel rail as optional because I know many do it without touching it. For the five minutes it takes for me, it makes sense and helps me get a plug change done in under a couple hours. The only real risk is damaging the line or the O rings. Don't bend it too far out of the way and O rings are cheap and can had on hand if nervous about the reinstall.
Good old Bill: Not gonna lie, it was tough remembering to take pictures of a lot of things I just take for granted doing. Having the camera next to the different sockets helped, each time I reached for a new socket I'd grab the camera first.
Good old Bill: Not gonna lie, it was tough remembering to take pictures of a lot of things I just take for granted doing. Having the camera next to the different sockets helped, each time I reached for a new socket I'd grab the camera first.
#10
Yeah you're right, it's not too bad. I kinda started thinking the price of the swivel sockets and locking extensions might not be justified for people just doing their own tune ups. I use mine all the time at work, they've paid for themselves many times over but if you're just gonna do one tune up ever it's probably not worth it.
The following users liked this post:
jpace (01-13-2014)


