
Undercover Flex Install and Review.
 08-29-2012, 12:33 AM
#1
Love Turbo V6 & Coyote V8
Thread Starter


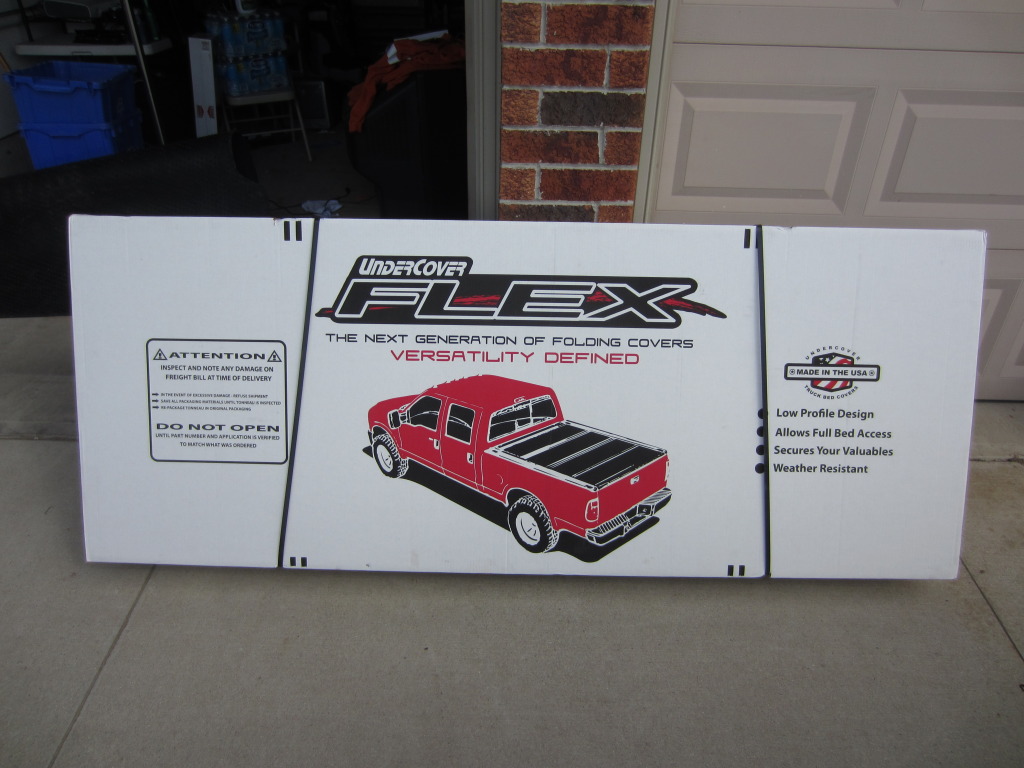
Hello all fellow F150 owners. I thought I would share with you all the install and review of the Undercover Flex tonneau cover. Reason I went with Undercover versus Bakflip is that here in Canada, the price for the F1 was ~$1200 while this cover with the same features as the f1 was $825.
On a couple of steps for some reason I did not take pictures. So I want to apologize in advance for not have pics at every step.
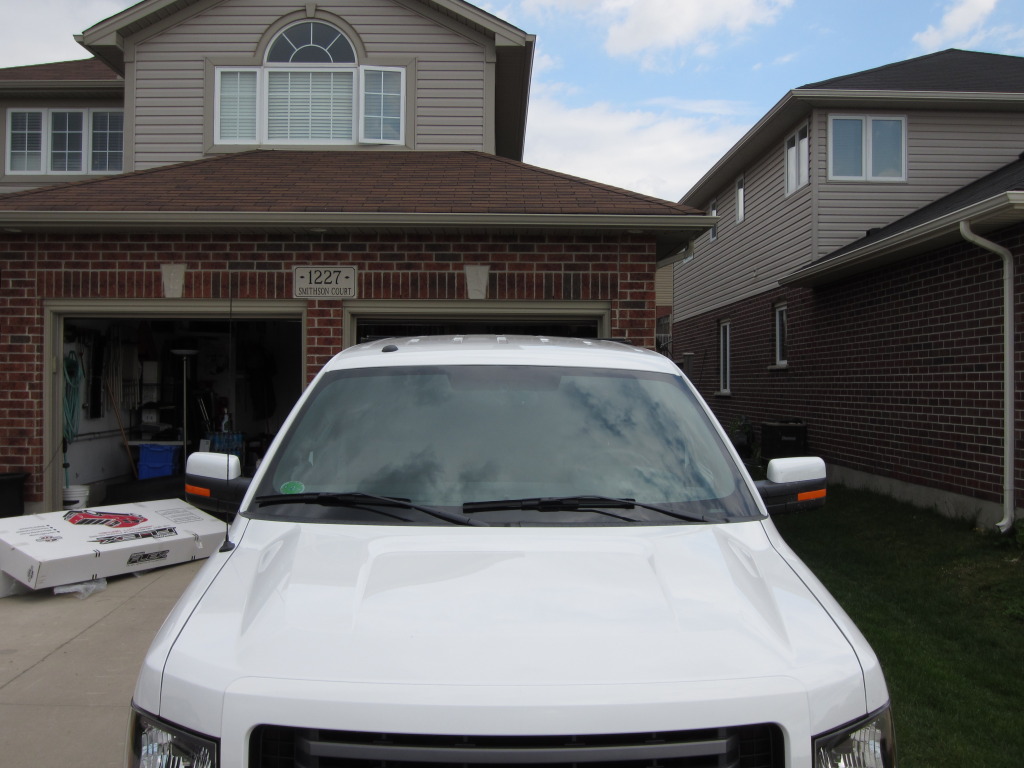
This install was done to a 2012 F150 with 5.5' box. Model# FX21002
If you plan to do the install yourself, the box is a good size and has some weight in it. It is packaged very well.
Once you pull all the parts out of the box and verify that everything is present you can start with the install.
Place the rubber gasket seal with goes at the front of the box. This gasket is required as the sides of the box are slightly higher then the front panel. Make sure the surface is clean and free from any grease or wax as you want good adhesion. In my case line-x was just applied the previous day so it stuck on perfectly.
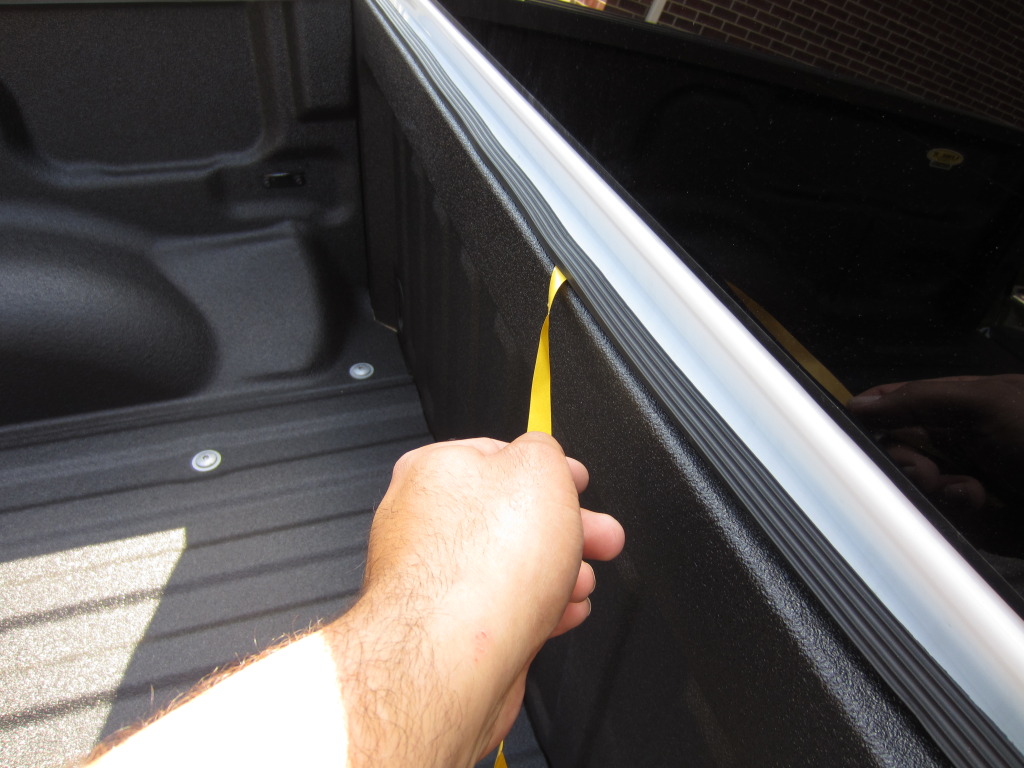
Here it is with strip installed.

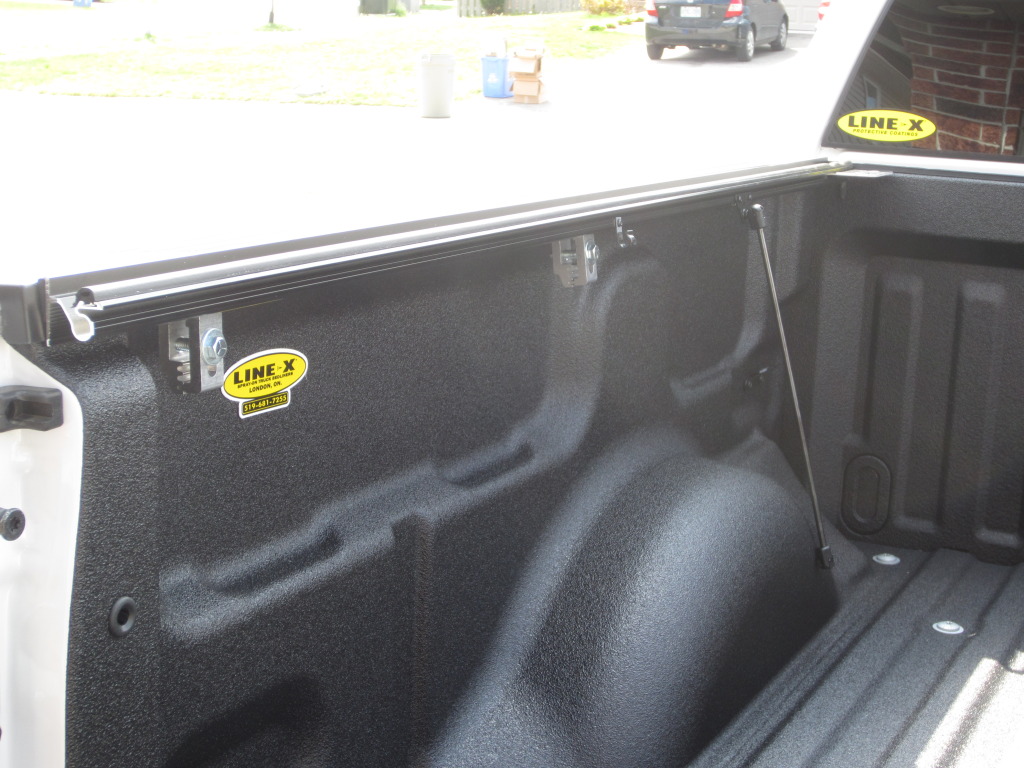
Now you have the 2 rails. I started with the passenger side. Make sure you have the correct rail by looking for the drain tube fitting at one end. Not really hard to figure out.
You have to assemble the clamps which will hold the rails in place.
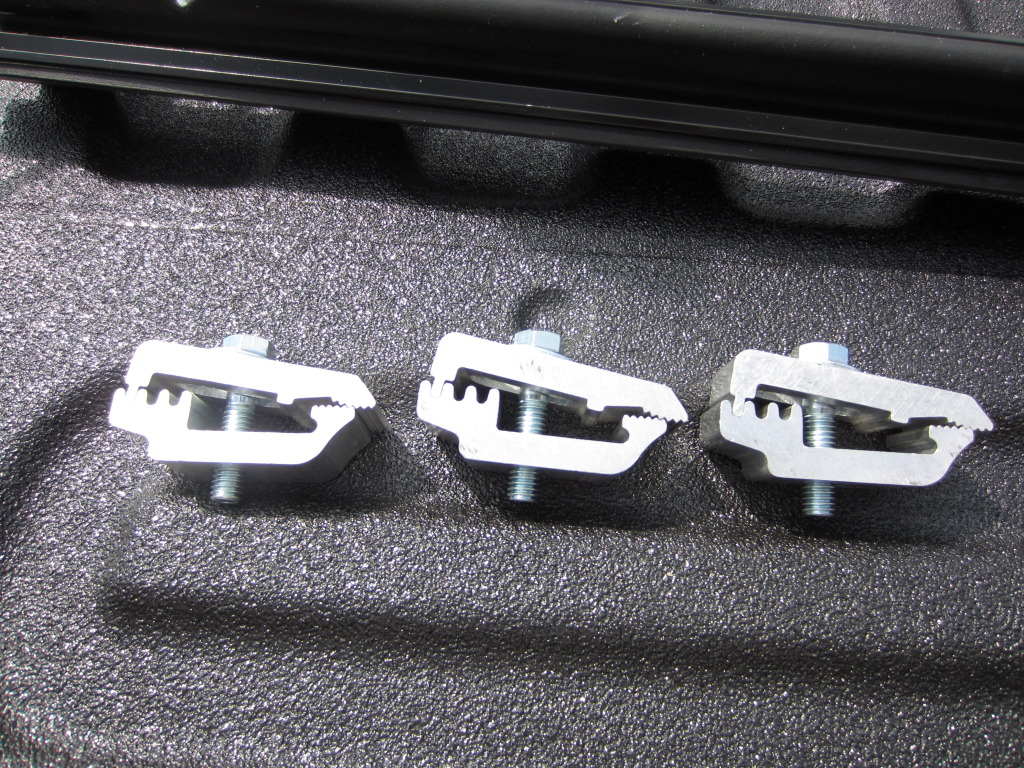
Now I set the rail to be just slightly higher then the box side. Use a 9/16 wrench or socket and tighten down. I started with the middle and adjusted from there making sure it was high above the box throughout the whole length. Also make sure the clamps are properly meshing when tightning. If you can have a 2nd pair of hands it would make this step easier.
Repeat for other side
Now we are nearly ready to place the tonneau onto the truck. All you have to do is place the large bolts into the sliding mounting strips. Once in place put cover onto truck and getting them to go through the mounting plate. This step would be easier with a 2nd pair of hands but not impossible to be done by yourself.
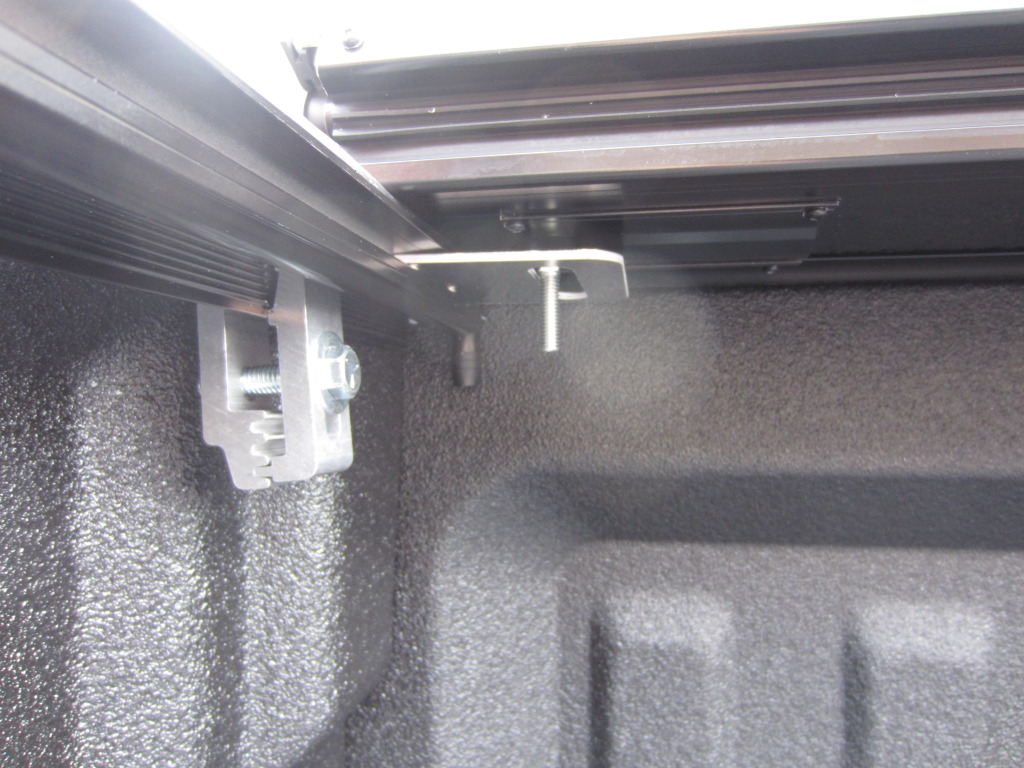
Place the ***** onto the bolts. But don't tighten them down yet.
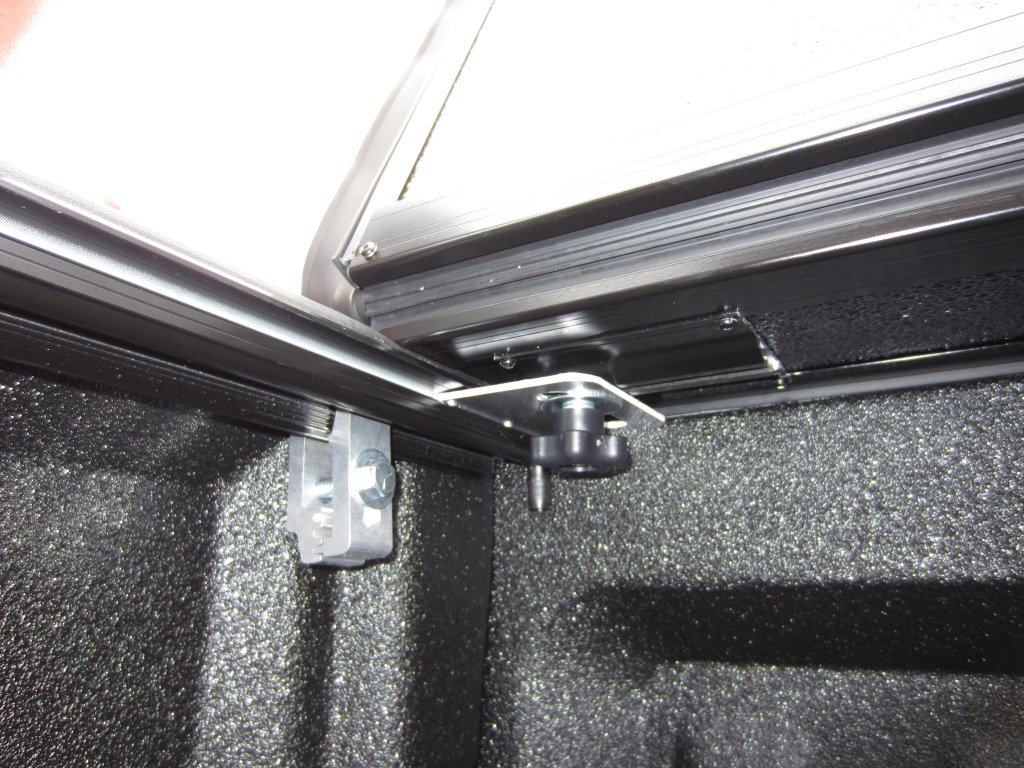
Now unfold the cover and make sure the cover is even side to side and front to back. Once you are satisfied with its location, gently fold the cover enough so that you can tighten down those ***** at the front of the box. Now test the cover to make sure it closes and opens perfectly fine. If it still needs adjustment, just loosen the *****, adjust and retighten.
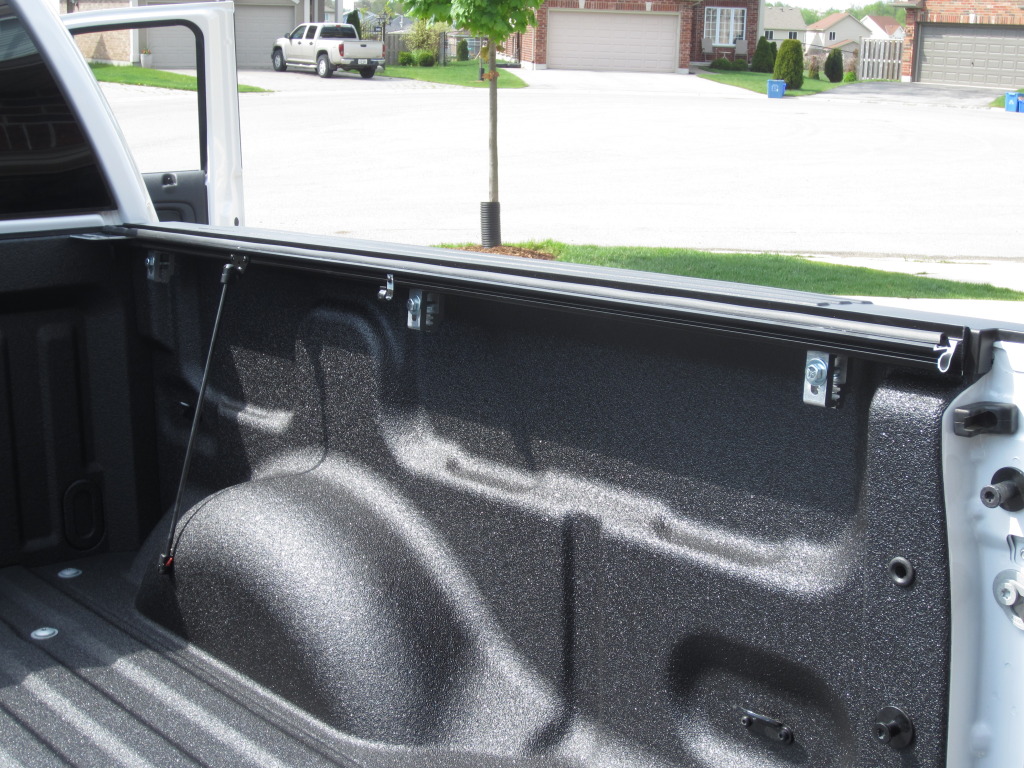
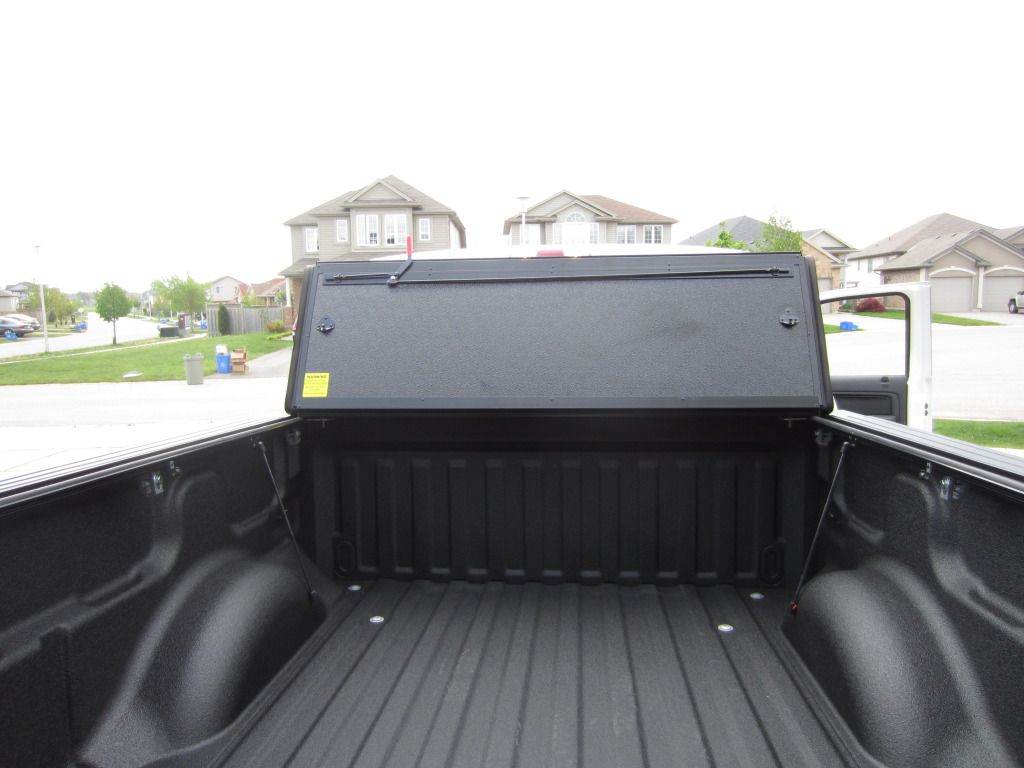
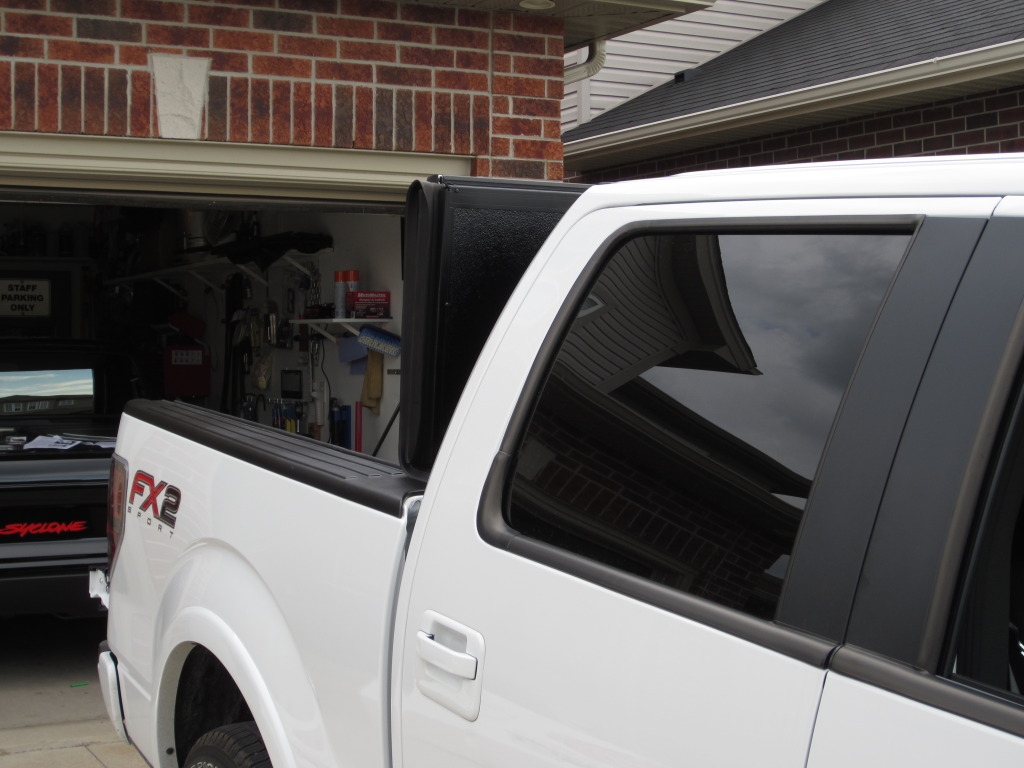
Here is the cover fully open.
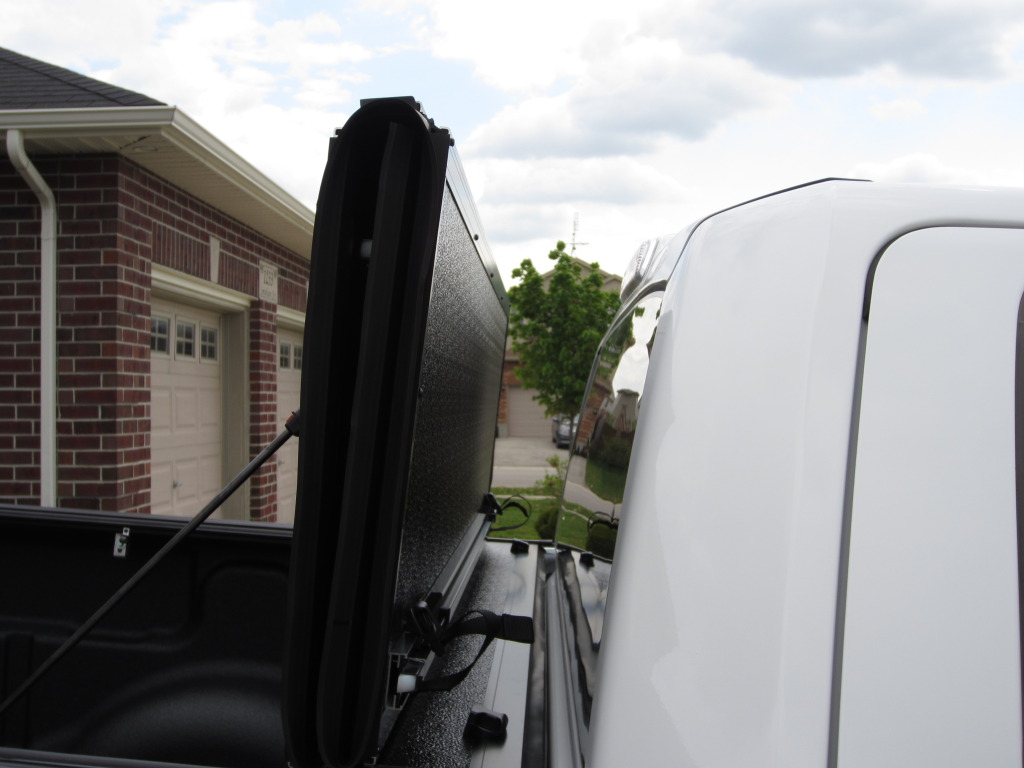
Space between the cab and cover.
On a couple of steps for some reason I did not take pictures. So I want to apologize in advance for not have pics at every step.
This install was done to a 2012 F150 with 5.5' box. Model# FX21002
If you plan to do the install yourself, the box is a good size and has some weight in it. It is packaged very well.
Once you pull all the parts out of the box and verify that everything is present you can start with the install.
Place the rubber gasket seal with goes at the front of the box. This gasket is required as the sides of the box are slightly higher then the front panel. Make sure the surface is clean and free from any grease or wax as you want good adhesion. In my case line-x was just applied the previous day so it stuck on perfectly.
Here it is with strip installed.
Now you have the 2 rails. I started with the passenger side. Make sure you have the correct rail by looking for the drain tube fitting at one end. Not really hard to figure out.
You have to assemble the clamps which will hold the rails in place.
Now I set the rail to be just slightly higher then the box side. Use a 9/16 wrench or socket and tighten down. I started with the middle and adjusted from there making sure it was high above the box throughout the whole length. Also make sure the clamps are properly meshing when tightning. If you can have a 2nd pair of hands it would make this step easier.
Repeat for other side
Now we are nearly ready to place the tonneau onto the truck. All you have to do is place the large bolts into the sliding mounting strips. Once in place put cover onto truck and getting them to go through the mounting plate. This step would be easier with a 2nd pair of hands but not impossible to be done by yourself.
Place the ***** onto the bolts. But don't tighten them down yet.
Now unfold the cover and make sure the cover is even side to side and front to back. Once you are satisfied with its location, gently fold the cover enough so that you can tighten down those ***** at the front of the box. Now test the cover to make sure it closes and opens perfectly fine. If it still needs adjustment, just loosen the *****, adjust and retighten.
Here is the cover fully open.
Space between the cab and cover.
 08-29-2012, 12:46 AM
#2
Love Turbo V6 & Coyote V8
Thread Starter
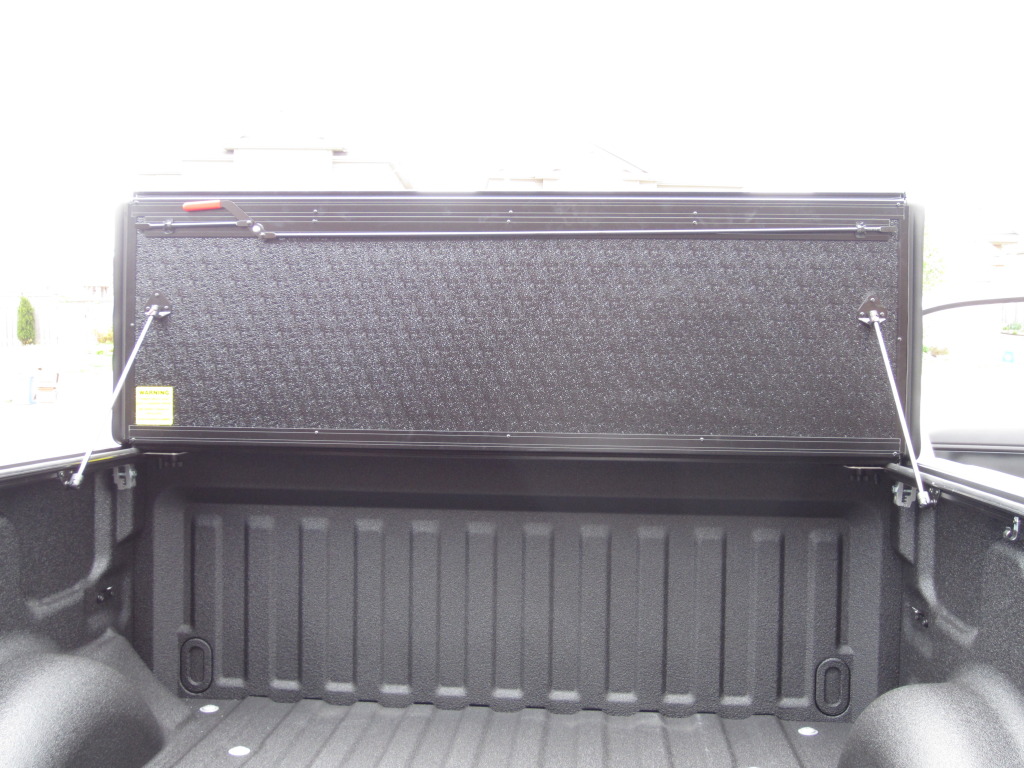
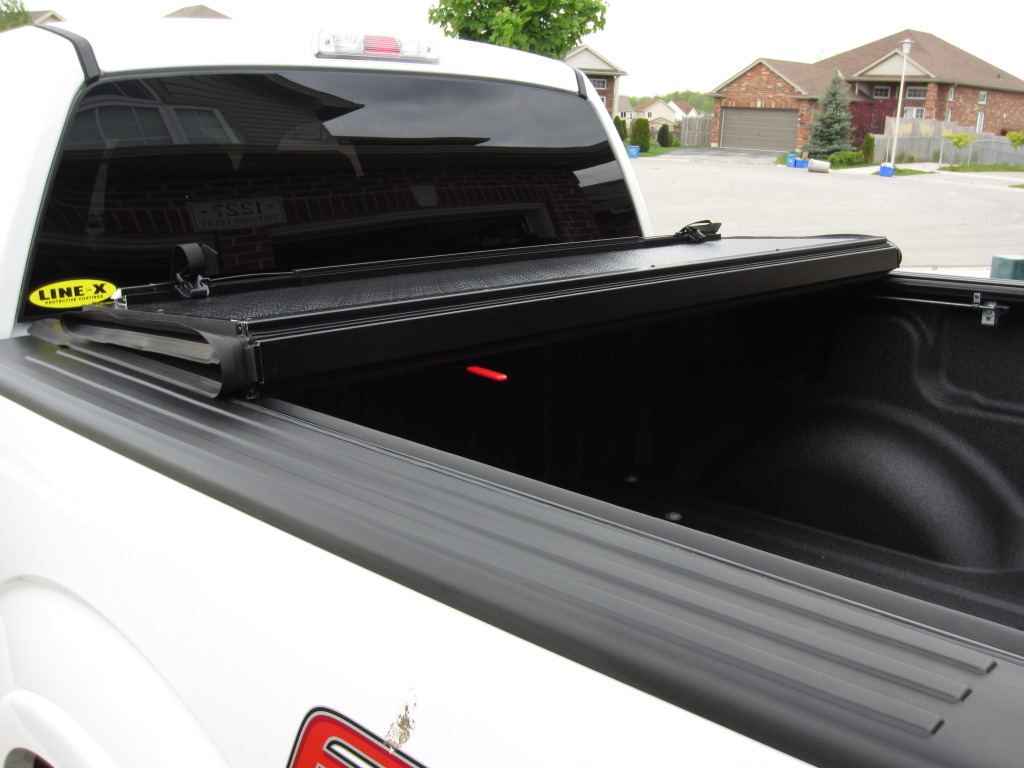
1 section down.
(TIP: Go to your local auto supply store and get some rubber foam weather seal. Place a strip along the top edge of this panel. Reason I recommend this is that twice already is that when I was holding the panel upright while I was grabbing the rod to clip on, I let the panels hit the back of the cab. Once I placed that rubber foam strip, I let it rest against the cab without worrying of damaging the cab while I grab the holding rods.)

You can kinda see in this pic that the panels are resting against the cab.
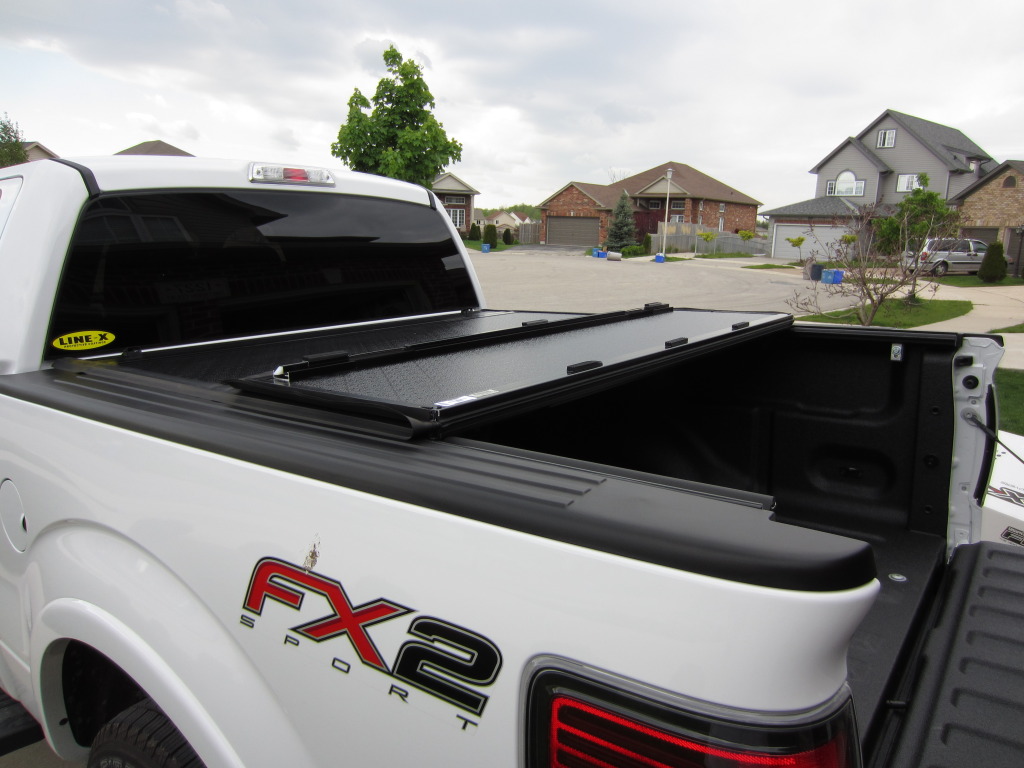
2 panels down.
Picture with the panel closed and the hardware in place except for the drain tubes.

Another view to show how much of the cover is exposed in the fully open position.
Now I forgot to get a picture of the drain tubes installed. I am going to grab some pictures of them soon and will post once I have them.
What I did was drill a hole for the drain tube through the large rubber grommets on the front panel of the box. I left enough length of tubing so that it drains towards the ground. You will need a 5/8" hole saw to make the proper size hole. TIP: to prevent any damage to the cab when drilling the hole that I took some cardboard, folded it over several times so that it would hold itself up between the box and cab. This way once you punch through the rubber you hit the cardboard not the cab. Now you are complete.
Here is a good video on youtube which will also help with install.
Now, after having this cover on for several months. I am on my 2nd cover. Reason for this was that at the first rainfall which I had stuff in the box, the whole box was wet inside. I took it back to the point of purchase and they tested it and found the seal in the panels were not done correctly. They quickly contacted Undercover to get the approval and they swapped it out and tested it before they gave the truck back to me. Now I can say barely ANY water gets into the box and where there was a couple drops was near the tailgate. Now I am really statisfied!!!!! My local truck accesory store and Undercover took care of their customers. I would recommend this product and especially for us Canadians where bakflip F1 is way higher in price then the undercover.
(TIP: Go to your local auto supply store and get some rubber foam weather seal. Place a strip along the top edge of this panel. Reason I recommend this is that twice already is that when I was holding the panel upright while I was grabbing the rod to clip on, I let the panels hit the back of the cab. Once I placed that rubber foam strip, I let it rest against the cab without worrying of damaging the cab while I grab the holding rods.)
You can kinda see in this pic that the panels are resting against the cab.
2 panels down.
Picture with the panel closed and the hardware in place except for the drain tubes.
Another view to show how much of the cover is exposed in the fully open position.
Now I forgot to get a picture of the drain tubes installed. I am going to grab some pictures of them soon and will post once I have them.
What I did was drill a hole for the drain tube through the large rubber grommets on the front panel of the box. I left enough length of tubing so that it drains towards the ground. You will need a 5/8" hole saw to make the proper size hole. TIP: to prevent any damage to the cab when drilling the hole that I took some cardboard, folded it over several times so that it would hold itself up between the box and cab. This way once you punch through the rubber you hit the cardboard not the cab. Now you are complete.
Here is a good video on youtube which will also help with install.
Now, after having this cover on for several months. I am on my 2nd cover. Reason for this was that at the first rainfall which I had stuff in the box, the whole box was wet inside. I took it back to the point of purchase and they tested it and found the seal in the panels were not done correctly. They quickly contacted Undercover to get the approval and they swapped it out and tested it before they gave the truck back to me. Now I can say barely ANY water gets into the box and where there was a couple drops was near the tailgate. Now I am really statisfied!!!!! My local truck accesory store and Undercover took care of their customers. I would recommend this product and especially for us Canadians where bakflip F1 is way higher in price then the undercover.
09-17-2012, 01:19 PM
#3

I just purchased an undercover flex and it leaked bad. Went back to the place that installed it and advised it has a manufactures defect and needs to be replaced. Not happy. They have ordered me a new one. Will let u know how the second one is
09-19-2012, 04:52 PM
#4
quick question, I just recently purchased the cover and I guess mine seems to be slightly different than yours. Is it me or are the clamps that hold the rails supposed to be on a very slight slant when tightened??
I have not yet put my drain tubes in yet as Im trying to locate a good hole too put it through. However, there was a ton of water in the bed after a full day of rain, lol more than i expected. But then again, I havent installed the weather seal that goes on the front of the box....
I have not yet put my drain tubes in yet as Im trying to locate a good hole too put it through. However, there was a ton of water in the bed after a full day of rain, lol more than i expected. But then again, I havent installed the weather seal that goes on the front of the box....
09-20-2012, 08:57 AM
#5
My clamps are on a slight angle as well. In my f150 I have the drain hoses at the top of my bed just under the rails by the cab. I get my new cover today and will let you know how dry the bed of the box is. My cover was leaking in 3 spots at the hinges and it shouldn't. Let you know how it goes in a few days.
 09-21-2012, 09:12 AM
#7
Good idea, there seems to be a hole that I can see when I open the stake pocket on top of the bed. It looks like that hole should fit and the tubes will be out of the way.
As for the clamps, I never really took notice to the rails being at an angle. I will check that out and see later tonight. Looks light a possibility, thanks.
As for the clamps, I never really took notice to the rails being at an angle. I will check that out and see later tonight. Looks light a possibility, thanks.
Trending Topics
09-23-2012, 04:37 PM
#8
Junior Member

Join Date: Jul 2012
Posts: 5
Likes: 0
Received 0 Likes
on
0 Posts
I am on my second one of these covers, the second one leaks as bad as the first just in different places. My dealership is awaiting approval from the maker to give me a full refund (they say). This has been dragging on for over two months and everytime it rains the bed get full of water. Not at all happy with the cover or the responses of the maker. Not sure what I am going to replace it with but for sure it will not be another one of these covers.
09-24-2012, 08:42 AM
#9
I am on my second cover and it also leaks. They are now going to lift the rails up 1/8 inch so the cover has more down force in the rails to see if that stops the leak. They are also going to put a little silicone at the front rail as water over flows the drain hole and leaks into the bed of the truck. I was told this cover would leak a little but it pours into the bed. Will let you know how this works. If not I will also be looking for my money back. I would not recommend this cover to anyone.