

 Jan 23, 2015, 05:44 PM
Last edit by: IB Advertising
Issue: How to test a Coil Pack
The following are useful tips to properly test your coil pack.
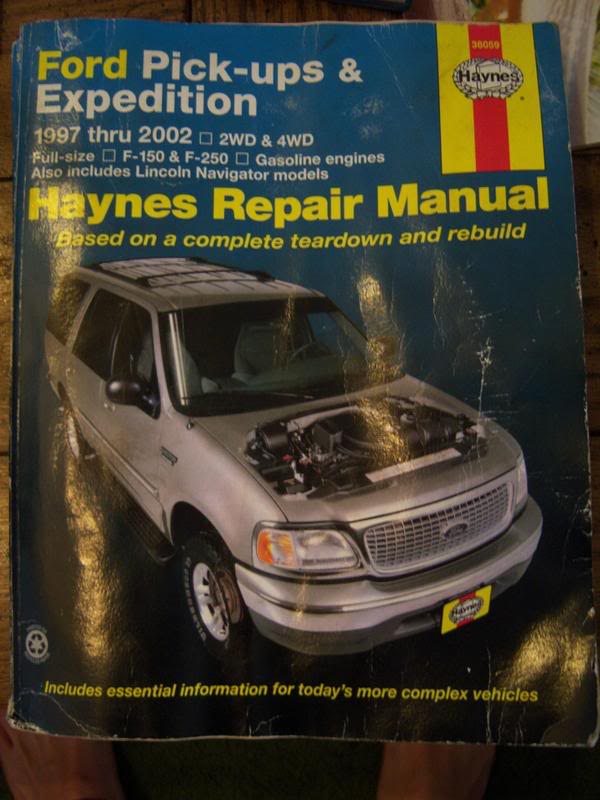
� Step-by-Step with Haynes Repair Manual: Click Here
� Primary and Secondary resistance readings: Click here
� Can your rubber boot be causing a misreading
Please read the full discussion below
The following are useful tips to properly test your coil pack.
� Step-by-Step with Haynes Repair Manual: Click Here
� Primary and Secondary resistance readings: Click here
� Can your rubber boot be causing a misreading
Please read the full discussion below

How to test a Coil Pack

Thread Starter
Senior Member

Joined: Dec 2008
Posts: 242
Likes: 6
From: Iowa
Anyone??? I've used the search and I see to check primary and secondary but I've found different reports of what they should read. I'm also still unclear as to how I test it.
Last edited by IA_F150; Feb 6, 2009 at 05:24 PM. Reason: typo
Senior Member
Joined: Feb 2009
Posts: 166
Likes: 2
From: Bossier City La
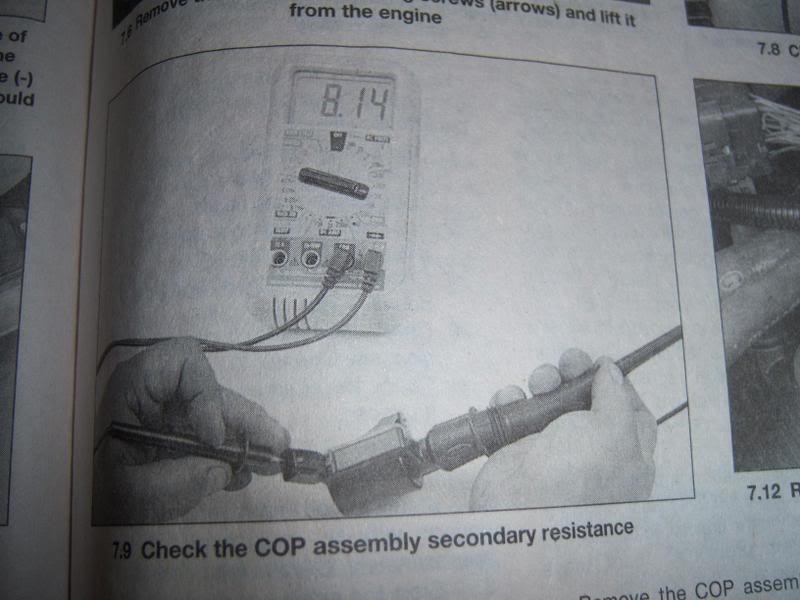
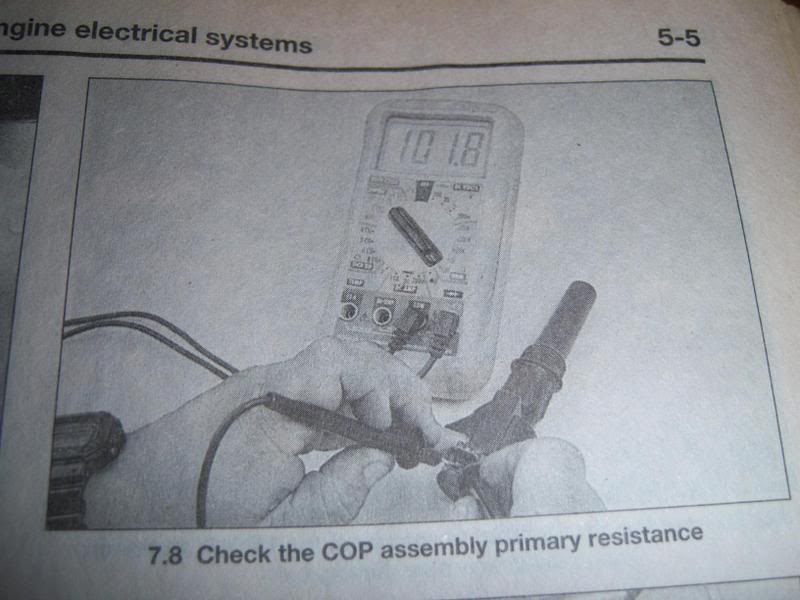
The haines manual says for the Coil over plug that the Primary resistance should be 0.55 ohms and the secondary resistance should be 5,500 ohms. To test it disconnect the electrical connector from the coil assembly and connect an ohmmeter across the primary (+) terminal and the negative terminal. The resistance should be as listed above. Then remove the COP from the engine. Connect an ohmmeter between the secondary terminals (the one that fits over the spark plug). The resistance shouls be as stated above.
Here are the pics that go with it.
Here are the pics that go with it.
Senior Member
Joined: Feb 2009
Posts: 166
Likes: 2
From: Bossier City La
Opps just saw you were askin about the Coil Pack
Here is the stuff for that.
Primary resistance 0.3 - 1.0 ohms
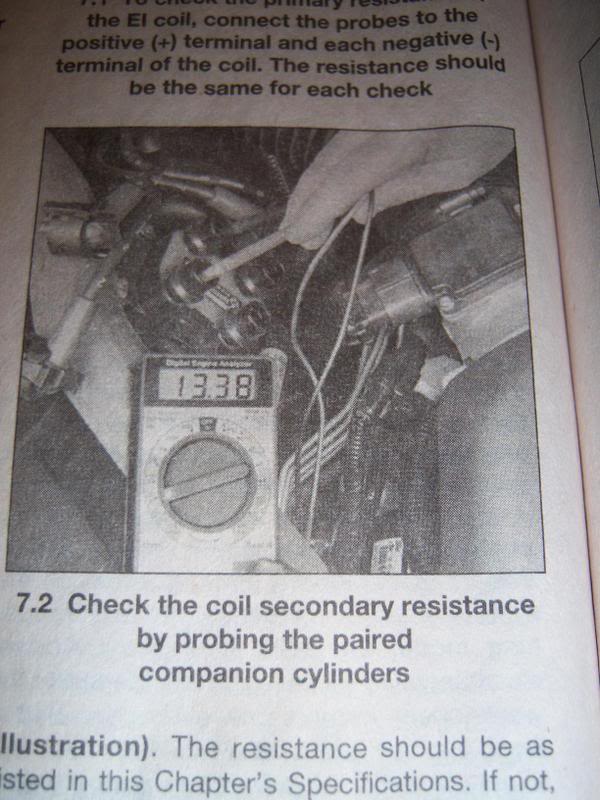
Secondary resistance 6.5 - 11.5 kohms.
Disconnect the electrical connector from the coil. Connect an ohmmeter across the coil positive terminal and each negative terminal. The resistance should be as stated above.
Note: Each coil pack is paired according to the campanion cylinders. Be sure to check resistance with these designated terminals only.
4.2L V6 ..........1/5, 2/6, 3/4
4.6L engines .....7/4, 8/2, 1/6, and 3/5.
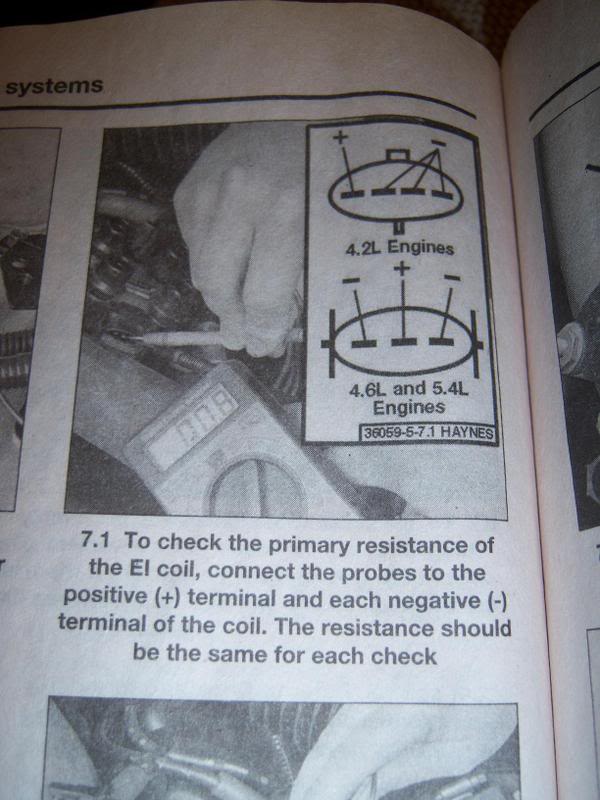
Connect an ohmmeter between the secondary terminals (the one that the spark plug wires connect to) of each coil pack. The resistance should be as stated above.
Here is the stuff for that.
Primary resistance 0.3 - 1.0 ohms
Secondary resistance 6.5 - 11.5 kohms.
Disconnect the electrical connector from the coil. Connect an ohmmeter across the coil positive terminal and each negative terminal. The resistance should be as stated above.
Note: Each coil pack is paired according to the campanion cylinders. Be sure to check resistance with these designated terminals only.
4.2L V6 ..........1/5, 2/6, 3/4
4.6L engines .....7/4, 8/2, 1/6, and 3/5.
Connect an ohmmeter between the secondary terminals (the one that the spark plug wires connect to) of each coil pack. The resistance should be as stated above.
Last edited by cletusjermal; Feb 6, 2009 at 06:53 PM.
Thread Starter
Senior Member
Joined: Dec 2008
Posts: 242
Likes: 6
From: Iowa
Trending Topics

Junior Member
Joined: Jan 2010
Posts: 3
Likes: 0
From: A house in IA
Another area to look at is the rubber boot checking to see if it is cracked. I threw a code, checked the primary and secondary tests were within specs. I looked at the end of the coil (rubber boot end) and there was a small crack. It was enough to cause the misfire and throw a code. Code was P0303, replaced the coil and no problems.

Junior Member
Joined: Feb 2008
Posts: 4
Likes: 0
Another area to look at is the rubber boot checking to see if it is cracked. I threw a code, checked the primary and secondary tests were within specs. I looked at the end of the coil (rubber boot end) and there was a small crack. It was enough to cause the misfire and throw a code. Code was P0303, replaced the coil and no problems.
If you do have a crack in the boot, you don't have to replace the whole COP. Both advance and autozone sell just the replacement boots. Whole lot cheaper than replacing the whole COP. I have had a couple of boots crack causing problems.

Junior Member
Joined: Mar 2010
Posts: 2
Likes: 1
Sorry for my English - I am from Russia, Ph.D., have 1998 F150 with coil problem.
I tested all my coils with Ohmmeter and LCR meter - everything was fine. Problem happens only with high voltage - the coil breaks down, and you can't see it with small-signal measurements (Ohmmeter and LCR meter).
I used oscilloscope and small pick-up coil. You position pick-up coil on the top of the coil pack with engine running. 7 coils gave me fast decaying signal (signal looked pretty dirty, by the way). One coil gave much longer decay - meaning break down voltage was low and coil energy didn't decay .
I replaced (switched) two coils - long decay follows the coil, so it is the coil problem.
Pretty simple if you have oscilloscope. What do you think?