When you click on links to various merchants on this site and make a purchase, this can result in this site earning a commission. Affiliate programs and affiliations include, but are not limited to, the eBay Partner Network.
Nice, got any info on how you wired it and the type/where you got the leds and hood switch. I always wanted to add under hood lighting, just haven't really looked into it yet.
If you used a hood-pin switch I am assuming you ran positive wire from the battery to the switch with an inline fuse, ground to chassis, then from hood pin to the positive and negative of the strips?
Yeah, the hood pin switch is my ground. I tapped into a 12V I ran a few months ago for my auto release tailgate project.
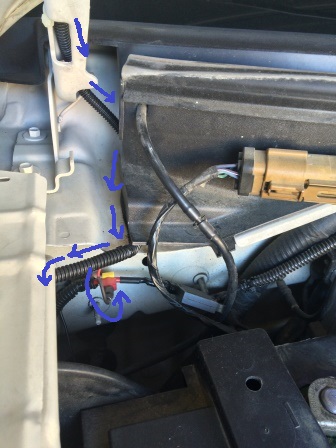
In this picture, in the left corner where there's a yellow T-tap connector and the 18-20 gauge red wire is my positive splice. And it feeds up to the LED Strip thru the wire loom zip-tied to the hood.
I'll do my best to be as detailed as possible, so don't judge
All the pictures i took during this project are uploaded in my albums HERE
Parts used:
- 2 x 90cm waterproof black LED Strips from Ebay
- 1 x Adjustable hood pin switch (Grabbed mine from ebay at about $0.98)
- 1 x 3-ft 1/4" wire loom (leftover supplies)
- About 15 x small zip ties (leftover supplies)
- Heat shrink tubing
- 1 x 16-18ga female connector (to connect the ground wire to hood pin switch)
- 1 x ring terminal (to connect your 12V wire to the Battery, in my case I
T-tapped into an existing 14 gauge wire I ran a few months back)
Diagram:
Installation:
1 - Remove the Hood Heat Shield; It's held by retaining clip (Super easy)
2 - After you choose where on the heat shield you'd like to install your LED
strips the tedious part begins. I used a light tester (anything sharp)
to poke holes thru the shield to run my zip ties. Then went for the
overkill with gel instant glue.
3 - These LED Strips come pre-wired on both ends. I flipped the shield over
to extend and connect the strips together on one end (with some
leftover wires & heatshrink tubing I had) then cap'd off the top LED
strip on the other end (passenger side)
4 - On the other end of the bottom LED strip (passenger side) I
extended the wires using supplies I already had on hand. (16-18ga
wires, heatshrink tubing & 1/4" wire loom)
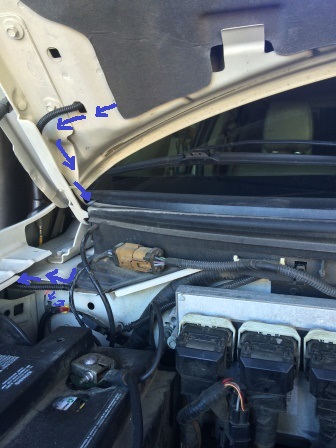
5 - Ran the wires through the wire loom; tucked it away nice and neat
alongside the Hood arm bracket as pictured below. Then alongside the
passenger side fender under the "lip" to the hood pin switch.
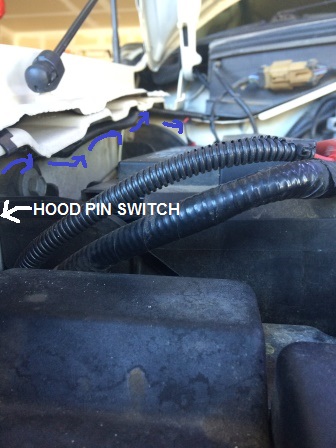
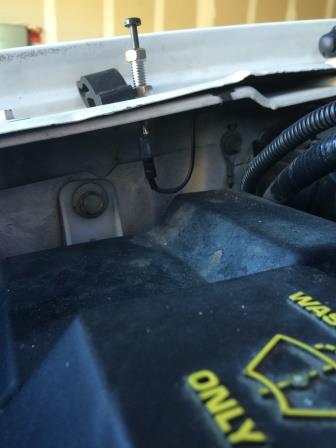
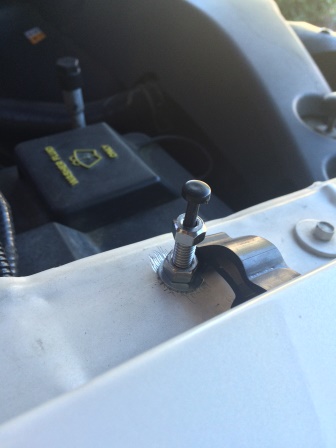
6 - Install the hood pin switch. I used the existing hole that's next to the
rubber cushion piece. Took an appropriate size washer and cut 1/8" off
of it to make a flush fit next to the rubber piece. Scratched the paint a little
bit to ensure good ground to the chassis.
Last edited by TXFRDOwner; 01-17-2016 at 09:27 PM.
Nicely done and thanks for the write up. I've been thinking of doing this too. I've already got a LED strip lying around as well as all the electrical bits. The only thing I'm debating now is whether to use a pin switch or a conventional switch. I think I'll use both like I did with the bed light. Unfortunately, it's winter so I'll probably wait until it gets warmer to do this.
 01-17-2016, 01:11 PM