When you click on links to various merchants on this site and make a purchase, this can result in this site earning a commission. Affiliate programs and affiliations include, but are not limited to, the eBay Partner Network.
Perhaps it is out there already but I did not see it. Most people claim about 16 hours of repair time for stuck vents due to fallen or damaged foam. However I had seen a few posts where people said they made the repair simply by removing the centre section of their dash and completing the work in a couple of hours. What I didn't see was a guide on how to make this time saving repair. No one discussed how they saved this valuable time.
So I went on a quest (as the cold weather starts to move in up here) to repair my functioning and stuck vents.
As many of you, especially if you are reading this, have discovered is that your vents are stuck in the front dash position. At this point when you turn the dial on your vent position switch it will not change to defrost or floor. You have one of two issues, or both, happening. Either the motor that moves the vent doors has quit or some foam has come off the vent doors inside and jammed doors from moving.
The diagnosis is fairly easy, simply look under your dash on the drivers side up high and you will see the actuator for the vent doors. When you switch from vents to floor or defrost, the actuator should attempt to move, even if jammed.
If this occurs the foam has likely fallen and jammed the doors. If it makes no attempt to move it is likely dead and in need of replacement. This second possibility does not mean you do not have foam jamming things up though. The foam may have jammed and eventually burned out the actuator. So replace the actuator and test again.
Now if you find the unit jammed, you will do some research and see post related to $1000 dealer repairs and/or two days of work to remove the entire dash back to the firewall to access the vent doors.
There is another way!
First, remove the dash trim around the stereo and HVAC controls by gently prying it out. It has snap in connections that simply pop out. Then carefully remove all the electrical connections so you can completely remove the trim piece and HVAC controls. Then remove the 4 screws that hold the stereo in place. Pull the stereo out and remove the electrical connections.
It should look something like this now.
Notice the screw I have partially removed on the right hand side in the above image. You need to take this out to start the process.
Next remove the screw on the opposite side
By removing these screws you have some wiggle room to move the tubes attached by these screws.
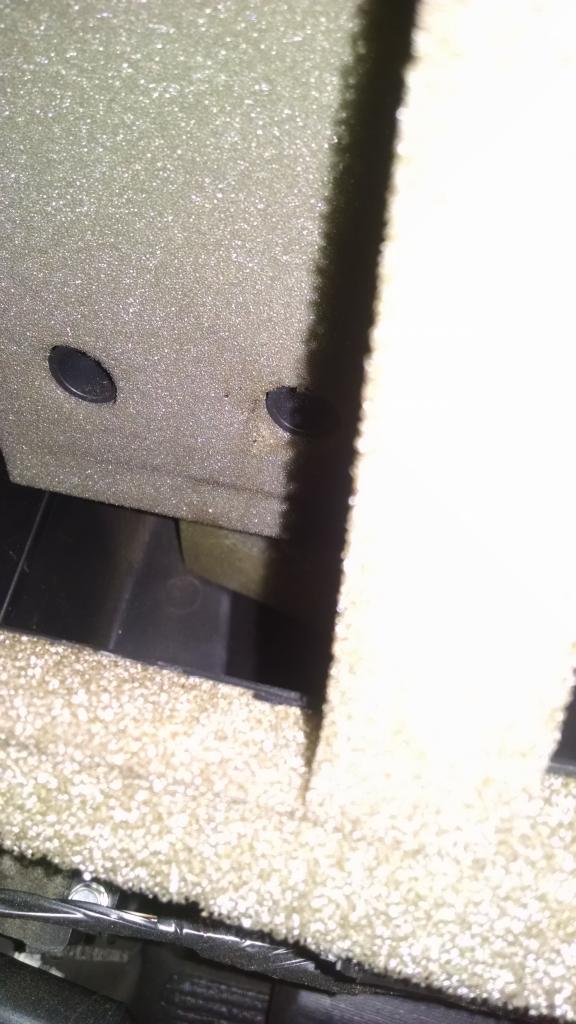
Now you have to pry out a couple of push style connectors. Do yourself a favour and get two of them from the dealer. They are cheap and may break when trying to remove them, due to their location. I will post a picture at the end to give you an idea of what to look for.
Here is the first one to remove with a large white head. It is on the right side of the opening and below the horizontal steel tubing you see in front of you. It is tough to see and this picture was taking with a phone camera under the location and facing up! Pry this plug down and out.
The second plug like this is found under the dash on the drivers side. Get down on the floor (ya I know its tough to do) and look up to see another large white plastic head like so.
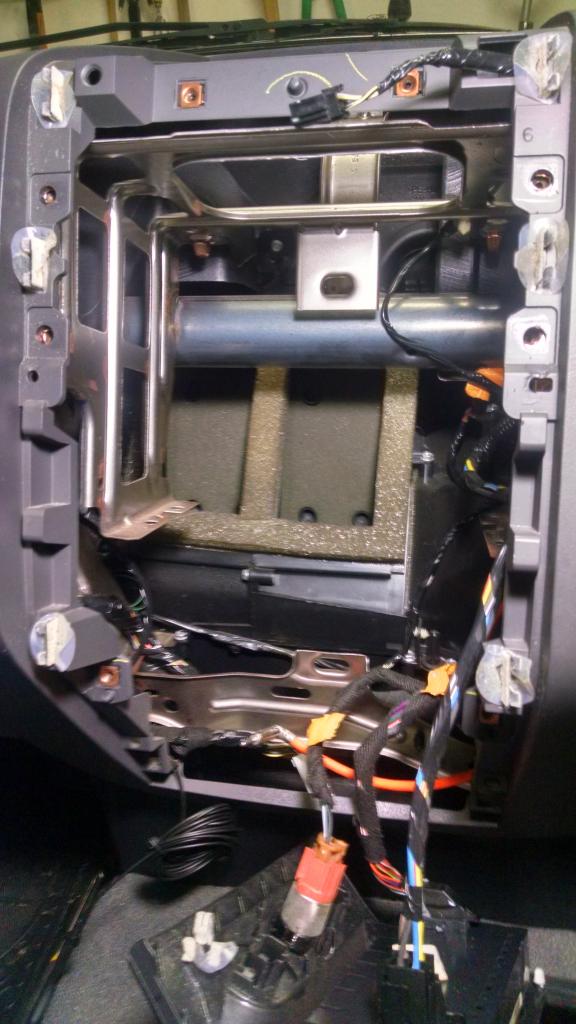
You can now remove the entire front of the HVAC vent system by pull out on the right and then down on the left. It is tight but it can not only be moved out of the way but taken completely out.
You should now have something looking like this
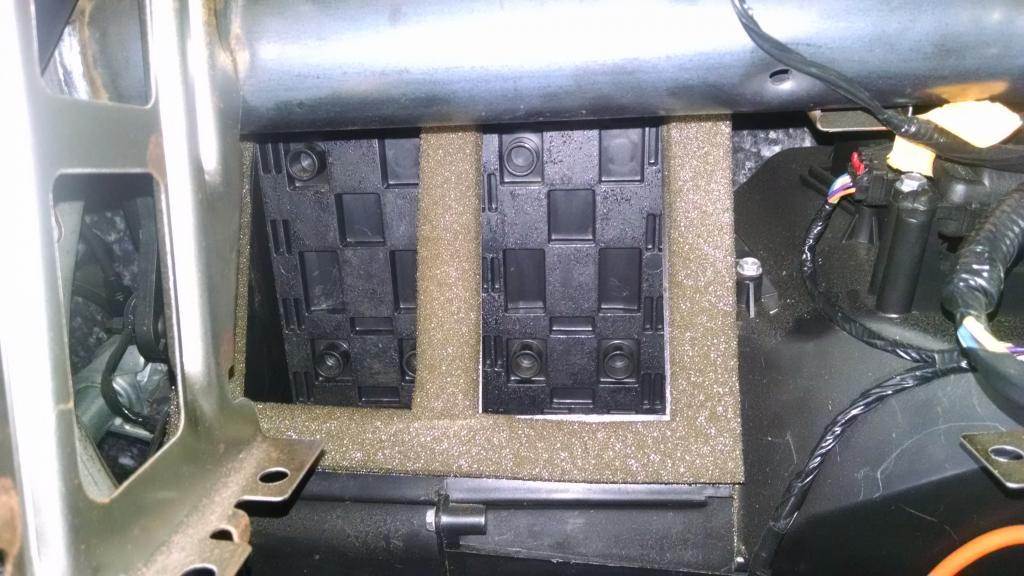
Have a look at what I found! Look at the left hand vent door toward the bottom. You will see a chunk of foam sticking down, compare to the right vent door.
I reached in, it was not easy as I have big hands, and I finally managed to get a grip on that piece and pull it down and out. Now you can really see the issue.
There's your problem! That piece of foam bent over is stopping the vent doors from opening and closing properly.
Check to ensure you have solved the issue by plugging the vent controls back in, turning the key to ignition, not started, and try changing the controls and the doors should fully open and close. When this occurs your should have air blowing through the correct location now. You may find you have foam issues on the opposite door, or possibly both!
Reassemble in reverse order. You can see from the following picture that I may be in need of doing this job again sometime as the foam on the front left is in bad shape. I left in place for the time being as it is functioning.
Finally here is what those push in plugs look like, after you break them!
Good luck and I hope this helps out some people that find themselves in my situation.
Excellent write up. Thanks for doing that. I have this problem and need to get it fixed. One thing I'm not clear on is how you fixed the foam. did you reuse the old and glue it into position or replace with a new piece? Can you provide a little more detail on that? Thanks again.
Chucked it in the trash never to be used again. There is no way to replace it using this method. I would be reluctant to put any foam back in for fear it would happen again.
The lack of foam on that door had no noticeable effect on air movement when I tested and changed the HVAC from defrost to vents to floor.
Your choice but I did not put any foam back in place.
Dirttracker,
I decided to do this after work tonight. My foam situation looked exactly like yours. What a huge PITA to get the foam off though. The foam that was lodged in there was on the front side of the door. I could reach very little of my hand in there to peel it off. It's odd that it ever came loose because it was stuck in the wrong spot really good. The foam on the front of my doors looked pretty good as shown in the pic.
I only want to do this once so I took them off too. Here's what it looks like without.
You can see the loose piece peeking out from under the door in this picture. It was extremely hard to get your hand in there to pull it off. I also found it difficult to get the piece of duct work back into position. Really had to bend it, but fortunately it was pretty flexible and I eventually got it.
Once I got the foam removed, the door did move freely and directed the air correctly. YES!
Thanks Dirttracker for the write up. I've wanted to fix this for awhile but really didn't know how before your write up. Thanks again.
 10-26-2014, 09:10 PM