No more rusty upper control arms for me
 10-05-2014, 09:05 PM
#21

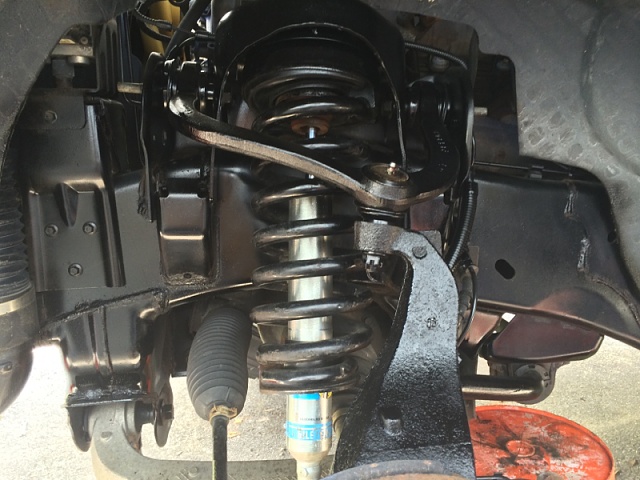
No-go. The spring is compressed and there is a dust shield over the rod, so there is no way to get to it. I tried channel locks on the little bit of the rod that is still sticking above the nut and it just spins through them no matter how hard I try to lock them down. I should mention that I got the nut almost all the way off and then it froze to the rod, even after applying penetrating oil. There's not enough of the rod between the nut and upper mount to get anything on either. I suppose I could try to compress the spring more to get into this space, but I'm a bit leery of that. I have 4 spring compressors on the spring now- those are some tough SOBs....
I did this to mine with the struts compressed with spring compressors too.. Lay the strut in some grass if you are nervous of the compressors coming off when the nut is removed.. Put your foot on the springs, grab the rod with the channies and impact the nut off..
Last edited by Especial86; 10-05-2014 at 09:07 PM.
 10-06-2014, 01:29 AM
#23
Cutting the plastic will go really quick, and a few attempts on the rod with channel locks should embed the teeth of the pliers well enough to stop that rod from spinning. Vice grips worked good on the first strut I did, but the channies were needed on the second.
I was very surprised at how well the coil spring compressors worked. I first tried an elaborate setup with my shop press, but I gave up on it because it honestly seemed more dangerous..
10-06-2014, 01:44 AM
#25
I set mine to zero lift and ran a 2.5" spacer, I didn't want to chance it with the 2" lift they provide not clearing my 35" tires sufficiently.... They ride great, both front and rear..
I sprayed my front end with a top coat of ford u1000 black after the front end overhaul.. I wash and re-coat it once a year.. I used all grease able moog suspension components and hub assembly's..

I sprayed my front end with a top coat of ford u1000 black after the front end overhaul.. I wash and re-coat it once a year.. I used all grease able moog suspension components and hub assembly's..
10-06-2014, 10:18 AM
#26
Well, I figured out the problem and got the other shock apart with no damage.
It's the nylon lock nut material that is jamming things up. I started cutting the dust boot this morning. After getting it cut about half way around, I actually pried it down and off the upper mount. Then I locked vice grips as tight as I could get on the shock rod. I went to put a deep well impact on the nut and found it finger tight. It turns out that while heating it to try to cut it off yesterday, it obviously burned all the nylon from the lock nut out. I was able to spin it off by hand.... too late to save the dust boot
 The upper mount is toast too because all the heat destroyed the upper mount rubber.
So, I went to the other shock and put the spring compressors on. I left a good amount of tension on the upper nut and worked it back and forth with my impact. The nylon lock nut was jamming up the works, just like before. This time, I cleaned the threads with a wire brush after I zipped it on every time. I did this about 10X and then took all tension off the nut with the spring compressors. I ran the nut back and forth about 3 more times and zipped it right off.
It's the nylon lock nut material that is jamming things up. I started cutting the dust boot this morning. After getting it cut about half way around, I actually pried it down and off the upper mount. Then I locked vice grips as tight as I could get on the shock rod. I went to put a deep well impact on the nut and found it finger tight. It turns out that while heating it to try to cut it off yesterday, it obviously burned all the nylon from the lock nut out. I was able to spin it off by hand.... too late to save the dust boot
The upper mount is toast too because all the heat destroyed the upper mount rubber.So, I went to the other shock and put the spring compressors on. I left a good amount of tension on the upper nut and worked it back and forth with my impact. The nylon lock nut was jamming up the works, just like before. This time, I cleaned the threads with a wire brush after I zipped it on every time. I did this about 10X and then took all tension off the nut with the spring compressors. I ran the nut back and forth about 3 more times and zipped it right off.
10-06-2014, 04:42 PM
#27
Well, I figured out the problem and got the other shock apart with no damage. It's the nylon lock nut material that is jamming things up. I started cutting the dust boot this morning. After getting it cut about half way around, I actually pried it down and off the upper mount. Then I locked vice grips as tight as I could get on the shock rod. I went to put a deep well impact on the nut and found it finger tight. It turns out that while heating it to try to cut it off yesterday, it obviously burned all the nylon from the lock nut out. I was able to spin it off by hand.... too late to save the dust boot The upper mount is toast too because all the heat destroyed the upper mount rubber. So, I went to the other shock and put the spring compressors on. I left a good amount of tension on the upper nut and worked it back and forth with my impact. The nylon lock nut was jamming up the works, just like before. This time, I cleaned the threads with a wire brush after I zipped it on every time. I did this about 10X and then took all tension off the nut with the spring compressors. I ran the nut back and forth about 3 more times and zipped it right off.
The upper mount is toast too because all the heat destroyed the upper mount rubber. So, I went to the other shock and put the spring compressors on. I left a good amount of tension on the upper nut and worked it back and forth with my impact. The nylon lock nut was jamming up the works, just like before. This time, I cleaned the threads with a wire brush after I zipped it on every time. I did this about 10X and then took all tension off the nut with the spring compressors. I ran the nut back and forth about 3 more times and zipped it right off. There's no doubt that the impact makes removing those nuts much easier.. The whole project should fly together quickly from this point on.
10-06-2014, 07:15 PM
#28
Well, tomorrow is frame painting day. The new upper mount and dust boot will be in on Wednesday. I have an alignment scheduled for Thursday morning.
10-08-2014, 09:31 PM
#30
All done. Ride is SO much better. I didn't get around to replacing the tie rods, so the dealer will have to do that tomorrow for the alignment. Been going for over 24 hours here, I'll post a picture later.