HomeLink In The Visor Mod!
 02-19-2011, 04:57 PM
#1
Senior Member
Thread Starter

Join Date: Oct 2010
Location: Virginia Beach, VA
Posts: 145
Likes: 0
Received 0 Likes
on
0 Posts
I decided I wanted to get rid of my garage door opener off my visor and added HomeLink to my visor. I could have just bought a visor from Ford that came with the HomeLink installed, but they wanted $386 for the visor. There was ONE on eBay, but they wanted almost $250.
I then went an audio shop and they wanted $169 for the HomeLink module, but would not install it in the visor, but instead offered the headliner. I didn't want to cut into my headliner, so decided to tackle the job myself.
If you didn't already know, all the visor-mounted HomeLink modules are the same no matter the car manufacturer. I went to Pick & Pull and found two HL visors (one from a Chrysler Sebring, and one from a Chrysler Cirrus I believe). Come to find out, the Cirrus / Stratus visor is identical to the F150's with the exception of the molded plastic section for the screws, but the screw spacing is correct; so if the color had been correct, I could have just used the visor out of the Chrysler. If you're wondering, the visors cost $8 ea.
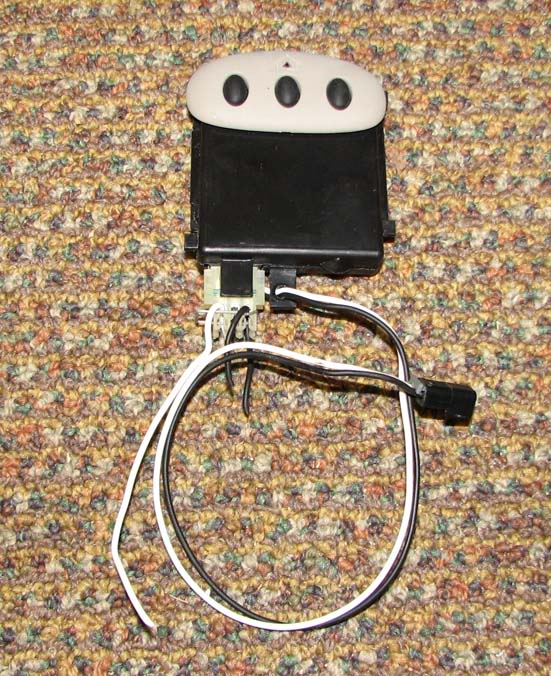
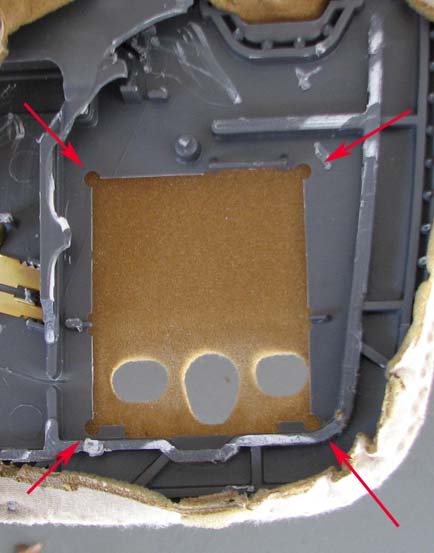
Anyways, after feeling around the section of the visor where the HL goes, it felt like the area was already set-up the accept the module. I opened up the sacrificial visor to "extract" the HL module and to see what was going on in there. I then CAREFULLY opened my visor to find the mounting areas present, but the opening where the module sits not removed. There are no visible cut lines, but there are holes in the corners that make up the cut-out area. If you cut straight lines from hole to hole, you will end up with the required cut-out. I used a dremel to cut mine. The pic below shows the corner holes. I didn't take a pic of mine after it was cut.
Before I installed the module, I ran the wires (2) through the visor tube / rod and then pushed the connector onto the module. I then installed the module into the visor and closed it up. I used a combination of hot glue and cyanoacrylate to do this. Working through the mirror opening you can systematically work from the outside in once you get the extreme outside together. The mirror will be last the thing you install and it just "pops" in.
No pic, sorry!
Now you just solder the connector that was exiting the visor rod, that was cut off from the sacrificial visor, back on and your visor is done. Now all that is left is running power and ground in the truck to power the module. When I took the visors out at the junkyard, I also cut the wires on the pillar side to keep the connector intact. I took the pillar side connector and soldered on a short ground wire and eyelet for the ground side and much longer wire for the power to run down the pillar to under the dash. I secured the ground wire with the top bolt that secures the pillar trim through the eyelet. This kept things neat and easy. The power wire was tapped into constant battery power and will be on an individual basis.
No pic, sorry!
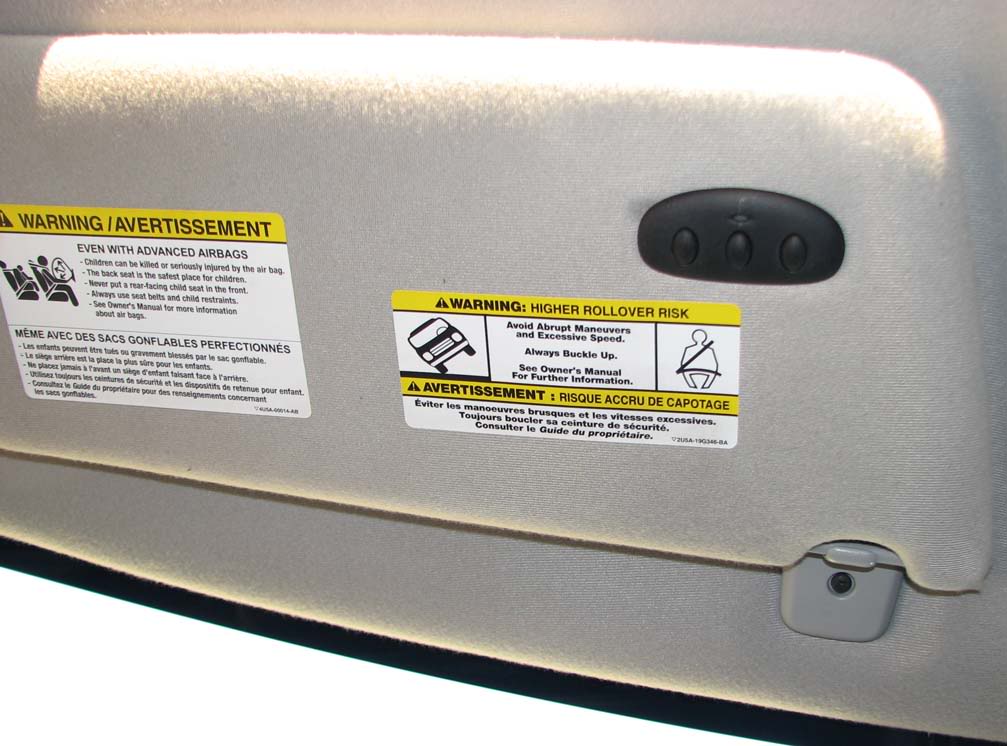
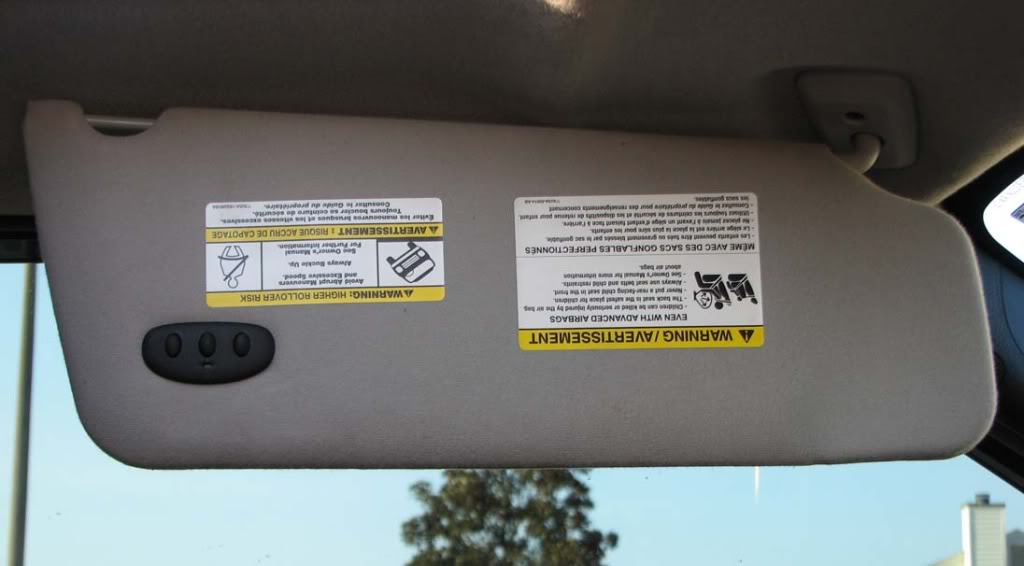
After simple programming (they all program the same too), it was DONE!!
This is not for the faint-hearted. Also, it may be a good idea to have a "spare" visor available or ready just in case something goes wrong or you change your mind after you have begun the process. Sorry for the lack of pics, but I didn't intend on doing a write-up, it just turned into one once I started writing.
Hope it inspires you!
There was ONE on eBay, but they wanted almost $250.I then went an audio shop and they wanted $169 for the HomeLink module, but would not install it in the visor, but instead offered the headliner. I didn't want to cut into my headliner, so decided to tackle the job myself.
If you didn't already know, all the visor-mounted HomeLink modules are the same no matter the car manufacturer. I went to Pick & Pull and found two HL visors (one from a Chrysler Sebring, and one from a Chrysler Cirrus I believe). Come to find out, the Cirrus / Stratus visor is identical to the F150's with the exception of the molded plastic section for the screws, but the screw spacing is correct; so if the color had been correct, I could have just used the visor out of the Chrysler. If you're wondering, the visors cost $8 ea.
Anyways, after feeling around the section of the visor where the HL goes, it felt like the area was already set-up the accept the module. I opened up the sacrificial visor to "extract" the HL module and to see what was going on in there. I then CAREFULLY opened my visor to find the mounting areas present, but the opening where the module sits not removed. There are no visible cut lines, but there are holes in the corners that make up the cut-out area. If you cut straight lines from hole to hole, you will end up with the required cut-out. I used a dremel to cut mine. The pic below shows the corner holes. I didn't take a pic of mine after it was cut.
Before I installed the module, I ran the wires (2) through the visor tube / rod and then pushed the connector onto the module. I then installed the module into the visor and closed it up. I used a combination of hot glue and cyanoacrylate to do this. Working through the mirror opening you can systematically work from the outside in once you get the extreme outside together. The mirror will be last the thing you install and it just "pops" in.
No pic, sorry!
Now you just solder the connector that was exiting the visor rod, that was cut off from the sacrificial visor, back on and your visor is done. Now all that is left is running power and ground in the truck to power the module. When I took the visors out at the junkyard, I also cut the wires on the pillar side to keep the connector intact. I took the pillar side connector and soldered on a short ground wire and eyelet for the ground side and much longer wire for the power to run down the pillar to under the dash. I secured the ground wire with the top bolt that secures the pillar trim through the eyelet. This kept things neat and easy. The power wire was tapped into constant battery power and will be on an individual basis.
No pic, sorry!
After simple programming (they all program the same too), it was DONE!!
This is not for the faint-hearted. Also, it may be a good idea to have a "spare" visor available or ready just in case something goes wrong or you change your mind after you have begun the process. Sorry for the lack of pics, but I didn't intend on doing a write-up, it just turned into one once I started writing.
Hope it inspires you!


 02-20-2011, 09:11 AM
#4

Look great, this is probably the first time iv'e seen this done. i love the homelink, i have it in my f150 because its a lariat, and we have one in our edge. They are great and i have all my garage doors programmed into it. Awesome job!
02-20-2011, 04:05 PM
#5
Senior Member
Thread Starter
Join Date: Oct 2010
Location: Virginia Beach, VA
Posts: 145
Likes: 0
Received 0 Likes
on
0 Posts
Thanks!
Like I mentioned, it isn't for the faint-hearted and is not an easy mod even though it is a "simple" Homelink addition.
And yeah, you're lucky having it in the Lariat. I don't why it isn't standard on anything past a base model. Mine is an FX2 with leather interior, sunroof, power sliding rear window etc., and they couldn't put in a homelink visor?! C'mon!!
Also, the Flint (grey) homelink visors appear rare since it seems most Lariats and KRs are tan/beige.
02-20-2011, 07:46 PM
#7
Senior Member
Thread Starter
Join Date: Oct 2010
Location: Virginia Beach, VA
Posts: 145
Likes: 0
Received 0 Likes
on
0 Posts
Most likely you have a rolling code. Once you get the button you want programmed with your remote, you have to go and push the "learn" button on the opener, then come back and push the HomeLink button you just programmed (you have about 30 sec.), then push it one more time, for a total of two, and that should do it.
Trending Topics
02-20-2011, 07:51 PM
#8
Most likely you have a rolling code. Once you get the button you want programmed with your remote, you have to go and push the "learn" button on the opener, then come back and push the HomeLink button you just programmed (you have about 30 sec.), then push it one more time, for a total of two, and that should do it.
 02-20-2011, 08:46 PM
#9
Senior Member
Most likely you have a rolling code. Once you get the button you want programmed with your remote, you have to go and push the "learn" button on the opener, then come back and push the HomeLink button you just programmed (you have about 30 sec.), then push it one more time, for a total of two, and that should do it.
02-20-2011, 09:01 PM
#10