Headache Rack Project
 03-17-2012, 10:14 AM
#11
Thanks for the concern. I've been MIG and arc welding for some time now. I was just hoping to be able to get those nice pretty TIG beads by now. I've got about 8 hrs of practice time in so far and I'm still struggling to get a clean, even, non-cratered bead without the filler rod. New respect for good TIG welders.
 03-17-2012, 10:33 AM
#12
Senior Member

Originally Posted by clw
Thanks for the concern. I've been MIG and arc welding for some time now. I was just hoping to be able to get those nice pretty TIG beads by now. I've got about 8 hrs of practice time in so far and I'm still struggling to get a clean, even, non-cratered bead without the filler rod. New respect for good TIG welders.
03-18-2012, 02:25 AM
#14
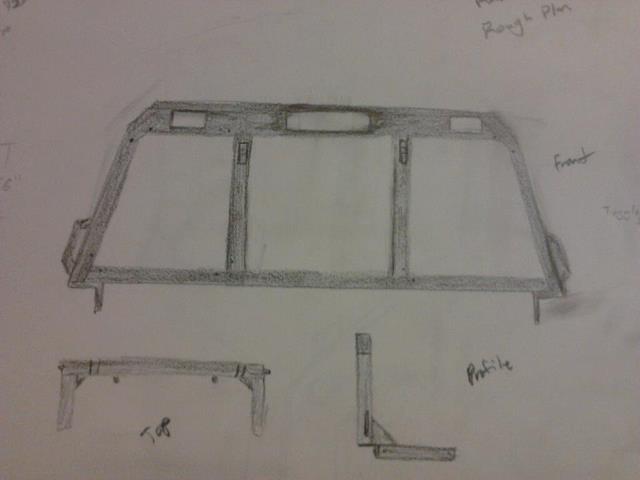
So I got the basic design down. It's going to cost me about 150 bucks in steel, hardware, and accessories. There will be two lights pointed on the bed with an exterior switch on the side of the rack and another on the switch panel I have in my truck. I'm debating between 1" x 2" rectangular tubing and 1.5" square tubing for the frame. I've decided I'm not going to have horns on it. I just think it looks cleaner without and I can easily secure a ladder through the upper set of tie downs.
Please keep in mind this isn't to scale. I sketched this up on my flight to Houston and didn't have a ruler.
Please keep in mind this isn't to scale. I sketched this up on my flight to Houston and didn't have a ruler.
03-18-2012, 03:17 AM
#15
Resident Metalhead
Join Date: May 2010
Location: Minnesota
Posts: 402
Likes: 0
Received 0 Likes
on
0 Posts

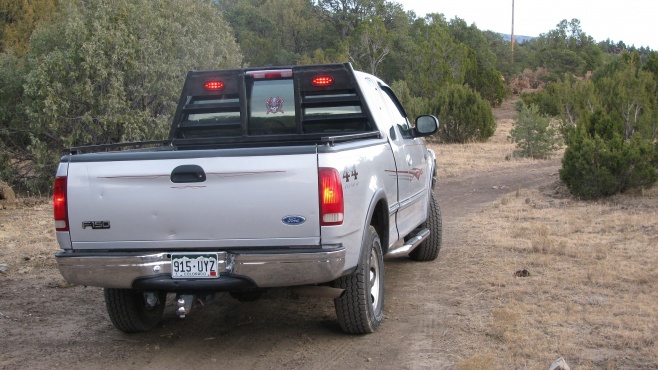
Just to help throw some ideas out there for ya, here's the one I made for my 97. The frame is 12 gauge 2"x2" square tubing, and the bedrails are 1"x2" rectangular tubing (Can't remember the gauge, I'm thinking 12). I wanted a tougher look, so I ditched my original plan to use 1.5"x1.5" square tubing.

 03-18-2012, 01:03 PM
#16
Make sure if you're going to use MIG and want to grind the welds smooth make sure you have lots of penetration on the welds! Use a grinder to prep the joints so you get a groove to lay a weld in so you don't grind all the strength out of it. It's gotta be strong to keep stuff out of the cab an to use it to tie things down with
 03-18-2012, 10:45 PM
#19
03-19-2012, 11:57 AM
#20
Resident Metalhead
Join Date: May 2010
Location: Minnesota
Posts: 402
Likes: 0
Received 0 Likes
on
0 Posts
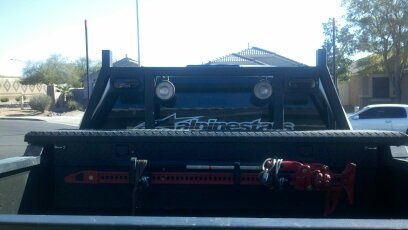
I went a little overkill and used 14 gauge sheet metal around the lights, and I added some small square tubing (can't remember size or gauge) that was lying around behind the sheet metal at the bottom to make sure it had some bracing and wouldn't shake, as I'm on a lot of washboarded roads.