Dash LCD Light Burnt Out: Please help!
 05-21-2016, 01:27 PM
#1
Member
Thread Starter

Good day all! My '04 F150 had the backlight behind the LCD (where the miles, direction, etc is displayed), and I'm curious how easy/difficult is it to replace it? Are the dash lights little bulbs? I imagine LED bulbs didn't come out until the 2009+ model years? Any direction would be greatly appreciated! Thank you in advance!
 05-21-2016, 02:58 PM
#2
Senior Member

They are little bulbs I want to say is a #74 but in not sure on that. There is a video on YouTube that shows exactly how to do it
05-23-2016, 06:08 AM
#5
Moderator (Ret.)
The bulb that lights up the "Information Display" (I.E. trip mileage, door ajar, etc) uses a different bulb then the rest of the cluster bulbs, as it is required to be brighter when the parking lights are off. The bulb is slightly longer then those that light the gauges.
05-23-2016, 10:28 AM
#7
Senior Member
They have led replacement bulbs for all of them
Trending Topics
06-08-2016, 01:26 PM
#9
Senior Member
I did a write up on this a couple years ago on another f150 site. Here's what I did.
This tells you how to replace all the bulbs, but you can see how to do just the LCD as well.
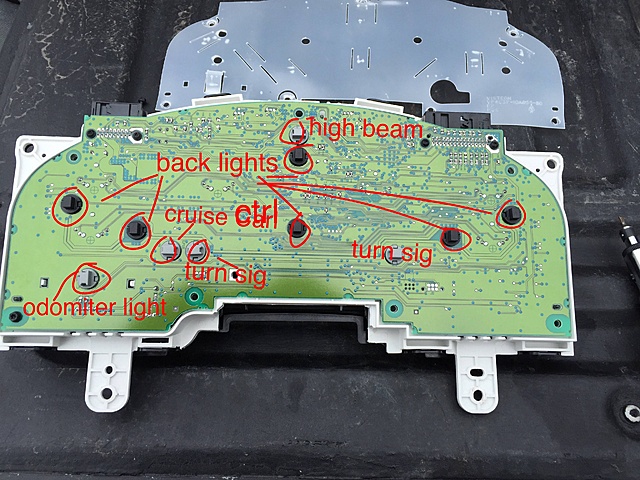
First off, no matter what the ford dealer has told you, the odomiter lamp and all other backlights (warning lamps are led from the factory) are replaceable. They are #37 or #74 bulbs. Either work and I've heard #74 are brighter. You can also replace with LEDs. I'd recommend something at least 10+ lumen with 3smd LEDs per lamp.
Tools:
9/32nd socket
T-15
Key
Butter knife (only if removing needles).
Step 1.
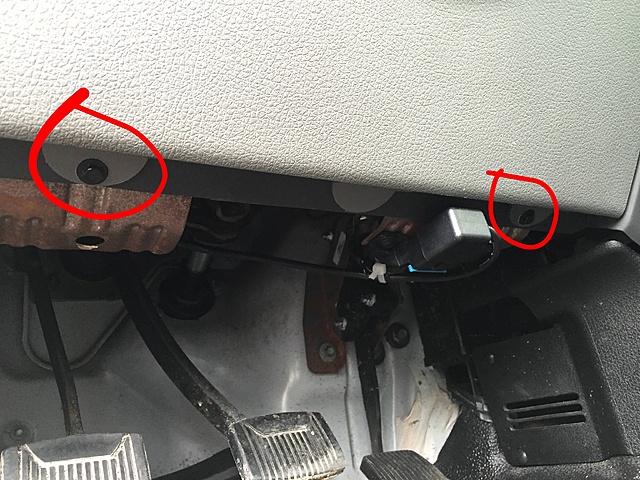
Locate both screws at bottom of dash. Use your 9/32nd and remove them.
Step 2.
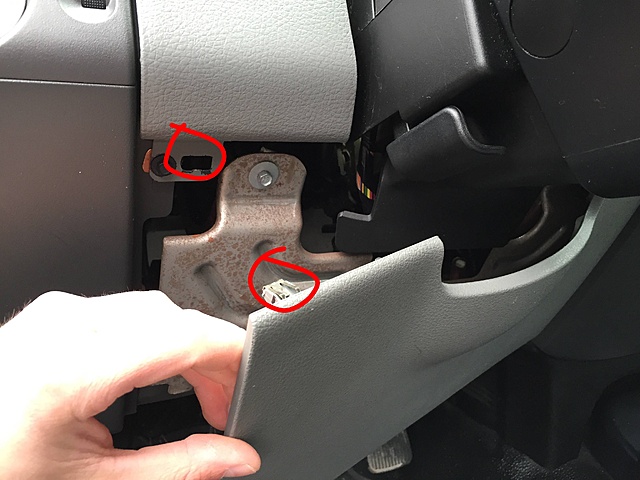
Remove both clips from the top of the same panel. Pull out, toward yourself.
Step 3.
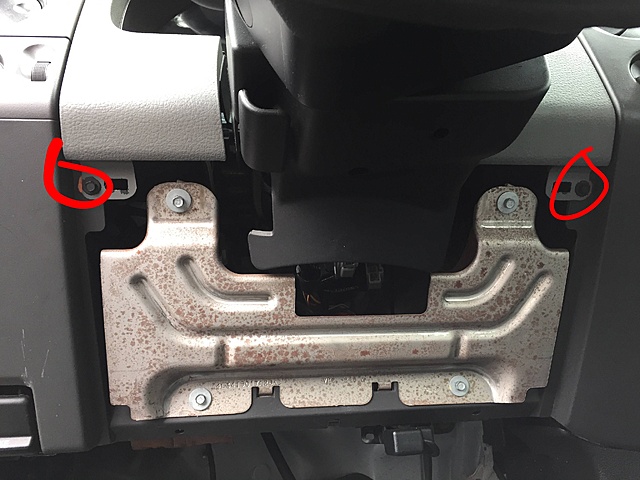
Locate the two screws for the panel directly above the one you just removed. Remove both.
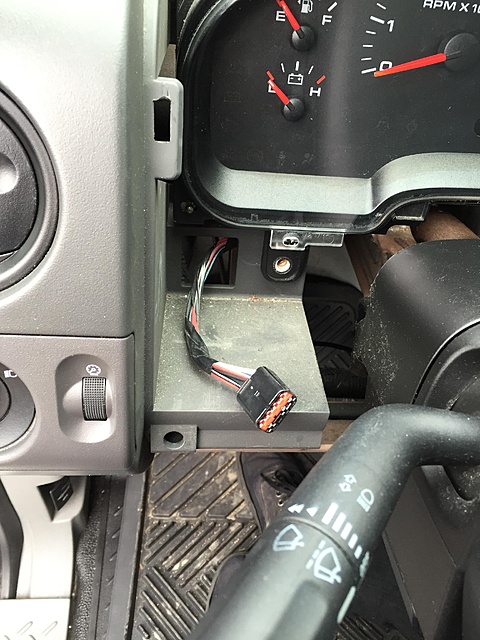
You may notice this harness behind your dash that's not connected to anything. If so, you do not have power adjustable pedals. If you do, you'll need to unclip that harness.
Step 4.
Gently pry upward to remove top panel. Start on the side next to the radio, and pull out and up. You'll feel the clips start to unhook.
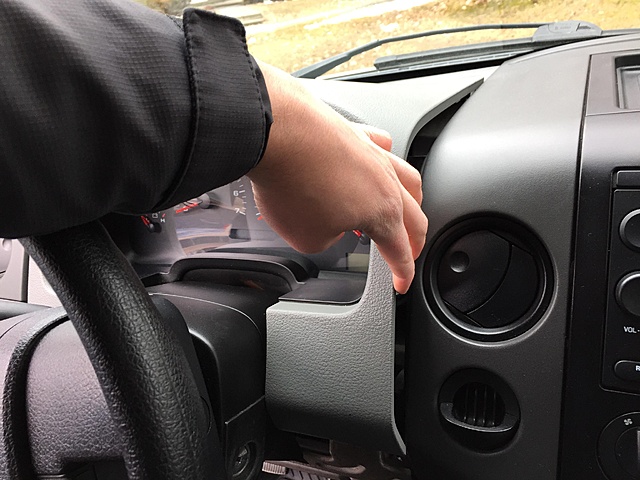
Start doing the same thing on the other side until the panel pops off.

Step 5.
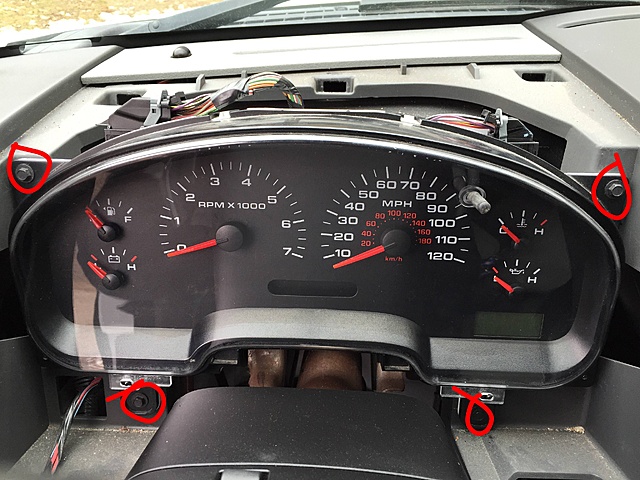
Locate the 4 screws (again 9/32nd) holding the cluster in place and remove.
Step 6.
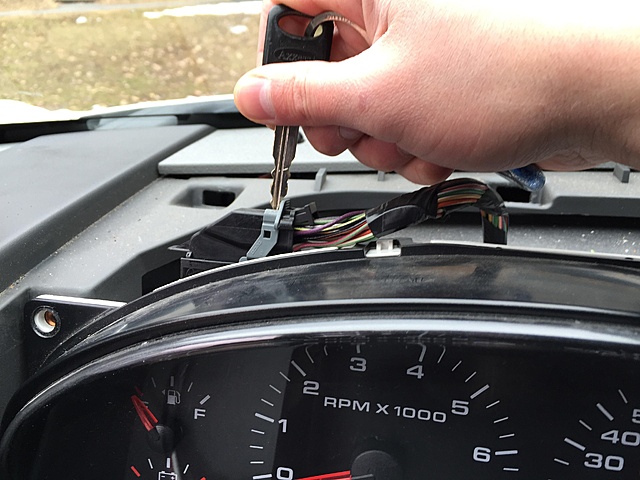
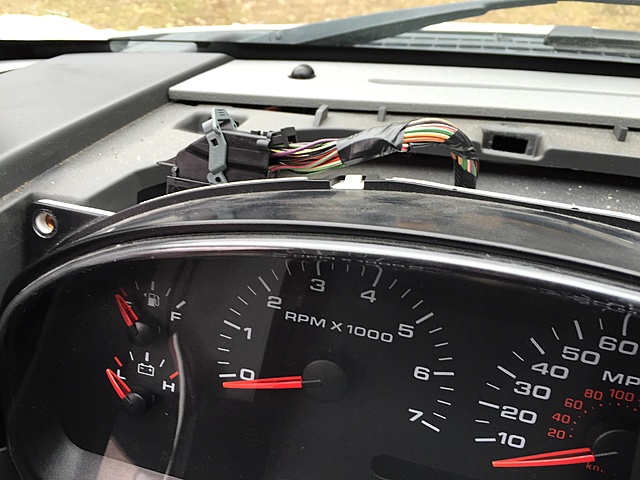
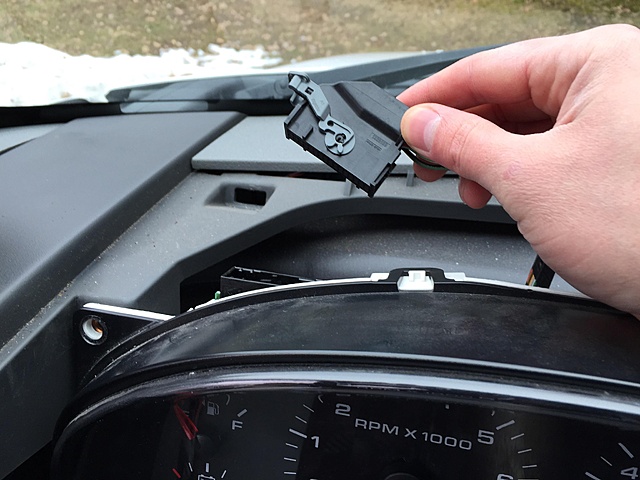
Use a key or small screwdriver, and press the pins to unlock the gray clips for the cluster harnesses. Then you will slide the gray lock to the left for the left side harness and to the right for the right side harness.
This tells you how to replace all the bulbs, but you can see how to do just the LCD as well.
First off, no matter what the ford dealer has told you, the odomiter lamp and all other backlights (warning lamps are led from the factory) are replaceable. They are #37 or #74 bulbs. Either work and I've heard #74 are brighter. You can also replace with LEDs. I'd recommend something at least 10+ lumen with 3smd LEDs per lamp.
Tools:
9/32nd socket
T-15
Key
Butter knife (only if removing needles).
Step 1.
Locate both screws at bottom of dash. Use your 9/32nd and remove them.

Step 2.
Remove both clips from the top of the same panel. Pull out, toward yourself.

Step 3.
Locate the two screws for the panel directly above the one you just removed. Remove both.

You may notice this harness behind your dash that's not connected to anything. If so, you do not have power adjustable pedals. If you do, you'll need to unclip that harness.

Step 4.
Gently pry upward to remove top panel. Start on the side next to the radio, and pull out and up. You'll feel the clips start to unhook.

Start doing the same thing on the other side until the panel pops off.

Step 5.
Locate the 4 screws (again 9/32nd) holding the cluster in place and remove.

Step 6.
Use a key or small screwdriver, and press the pins to unlock the gray clips for the cluster harnesses. Then you will slide the gray lock to the left for the left side harness and to the right for the right side harness.


 06-08-2016, 01:27 PM
#10
Senior Member
My truck is manual, if yours is auto, you will also need to remove the shift indicator, or you can keep it connected and replace the bulbs where it is, however, you will have less room to work.
Cluster removed

Step 7.
Remove all 7 T-15 screws to remove clear plastic access cover.
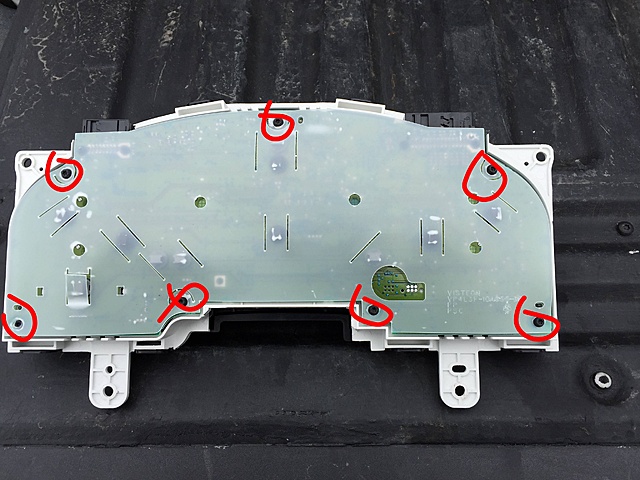
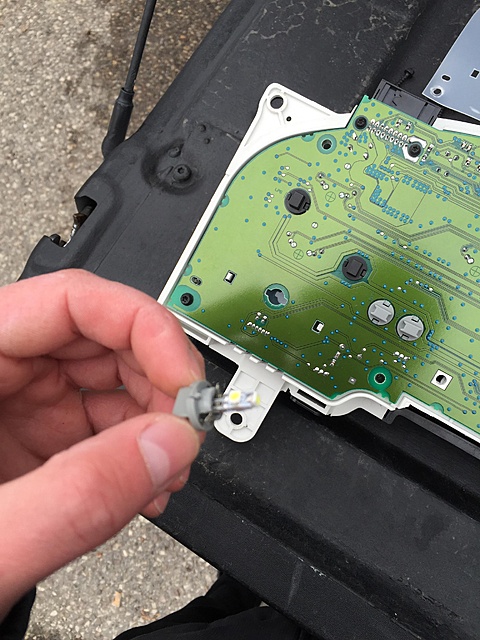
Now locate the bulb(s) you want to replace. The black and gray "buttons" are the bulb sockets. They twist counter clockwise to remove. You may need pliers to make removal easier.
If you want to remove the needles to access the inside of the panel for any reason, here's how. However, I wouldn't recommend doing this because all of your needles will be off and in the wrong position. It took me many tries plugging them in, taking them off and so forth to get them back to their original possition. So, do not do this unless you have to or want to remove the green film to change colors.
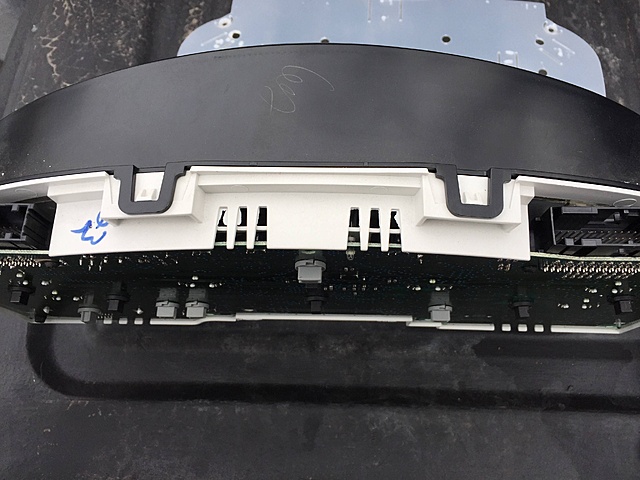
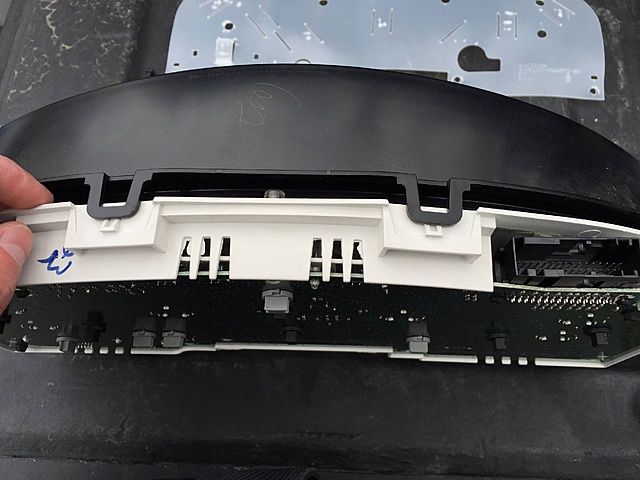
There are 2 clips on top, and 4 on the bottom of the cluster. Lightly pull up and they'll pop out.


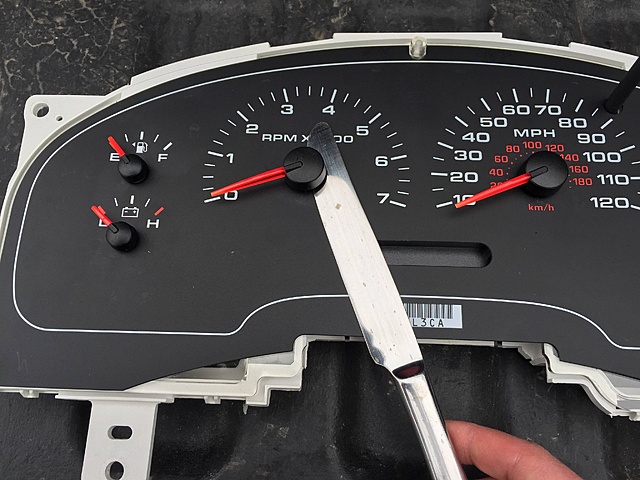
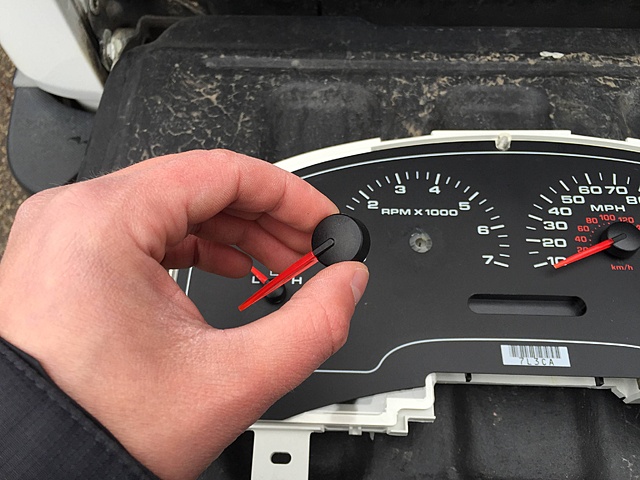
Use a butter knife to pry the needs up. Be very gentle as the needles can easily break.
Cluster removed

Step 7.
Remove all 7 T-15 screws to remove clear plastic access cover.

Now locate the bulb(s) you want to replace. The black and gray "buttons" are the bulb sockets. They twist counter clockwise to remove. You may need pliers to make removal easier.


If you want to remove the needles to access the inside of the panel for any reason, here's how. However, I wouldn't recommend doing this because all of your needles will be off and in the wrong position. It took me many tries plugging them in, taking them off and so forth to get them back to their original possition. So, do not do this unless you have to or want to remove the green film to change colors.
There are 2 clips on top, and 4 on the bottom of the cluster. Lightly pull up and they'll pop out.


Use a butter knife to pry the needs up. Be very gentle as the needles can easily break.

