When you click on links to various merchants on this site and make a purchase, this can result in this site earning a commission. Affiliate programs and affiliations include, but are not limited to, the eBay Partner Network.
After several months with the dash brake light indicator ‘ON’ I thought I’d track this thing down once and for all.
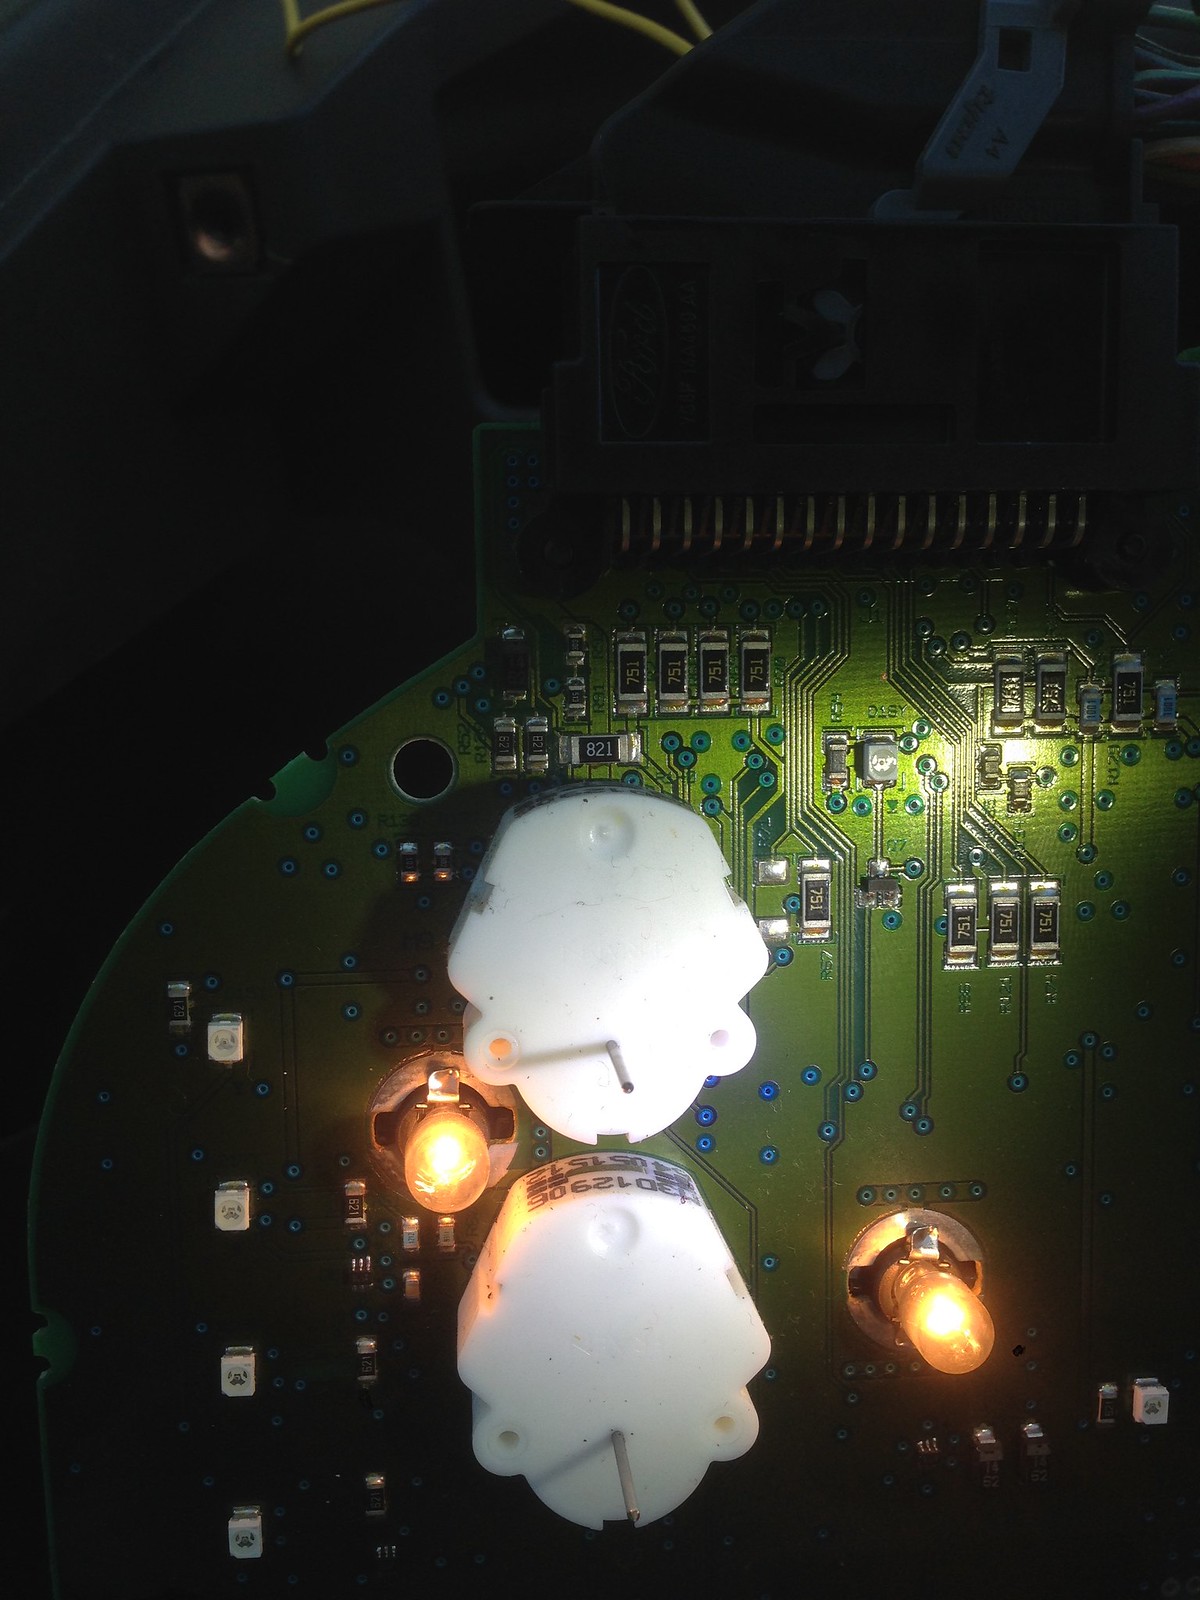
I had to remove the dash gauge panel, remove the front glass and remove the needles from the gauges. I decided I would do this with a hot engine and take pictures of all the needles in their normal operating position before I disassembled the gauge unit.
I found that by wiggling the top left connector I could get the brake light to go out so I knew it was close to that connector. I re-soldered the connectors on the rear (forward if sitting in the seat) for the main connector at the top left several months ago. This did not fix the problem.
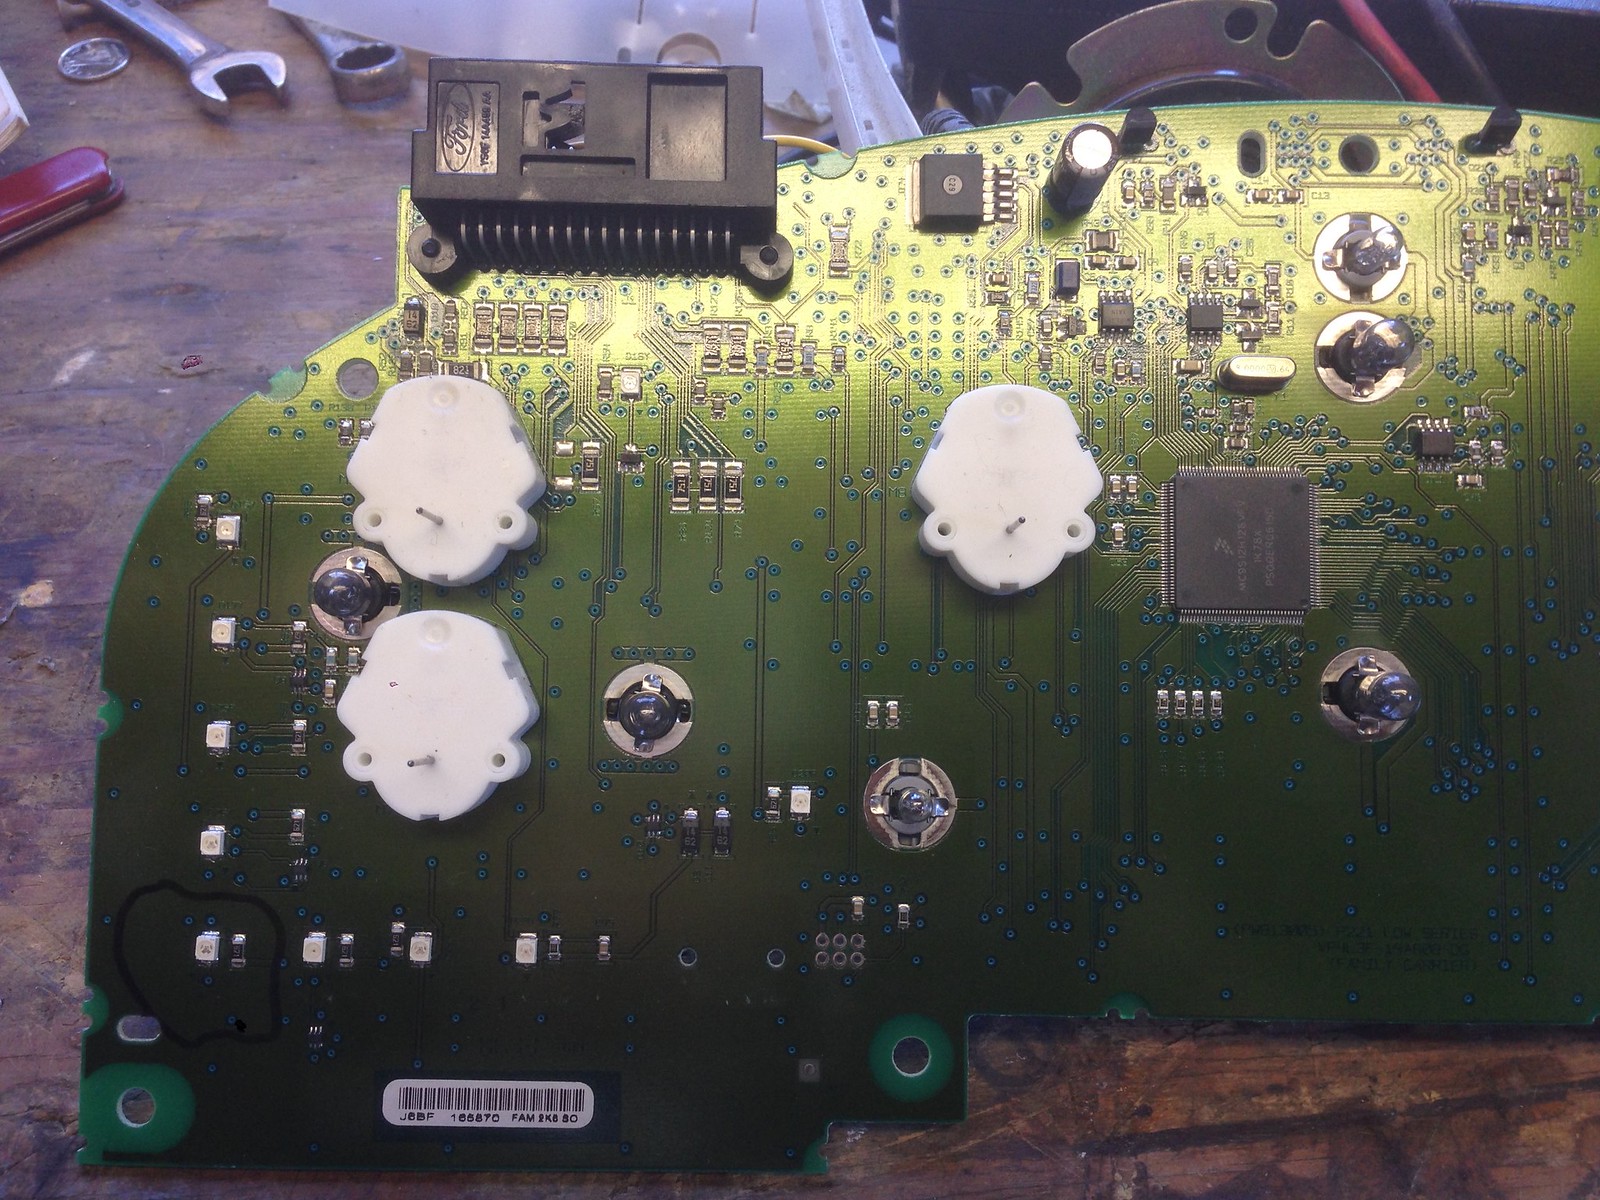
After removing the needles I reattached the printed circuit to the wire connectors and tested things until I found the problem.
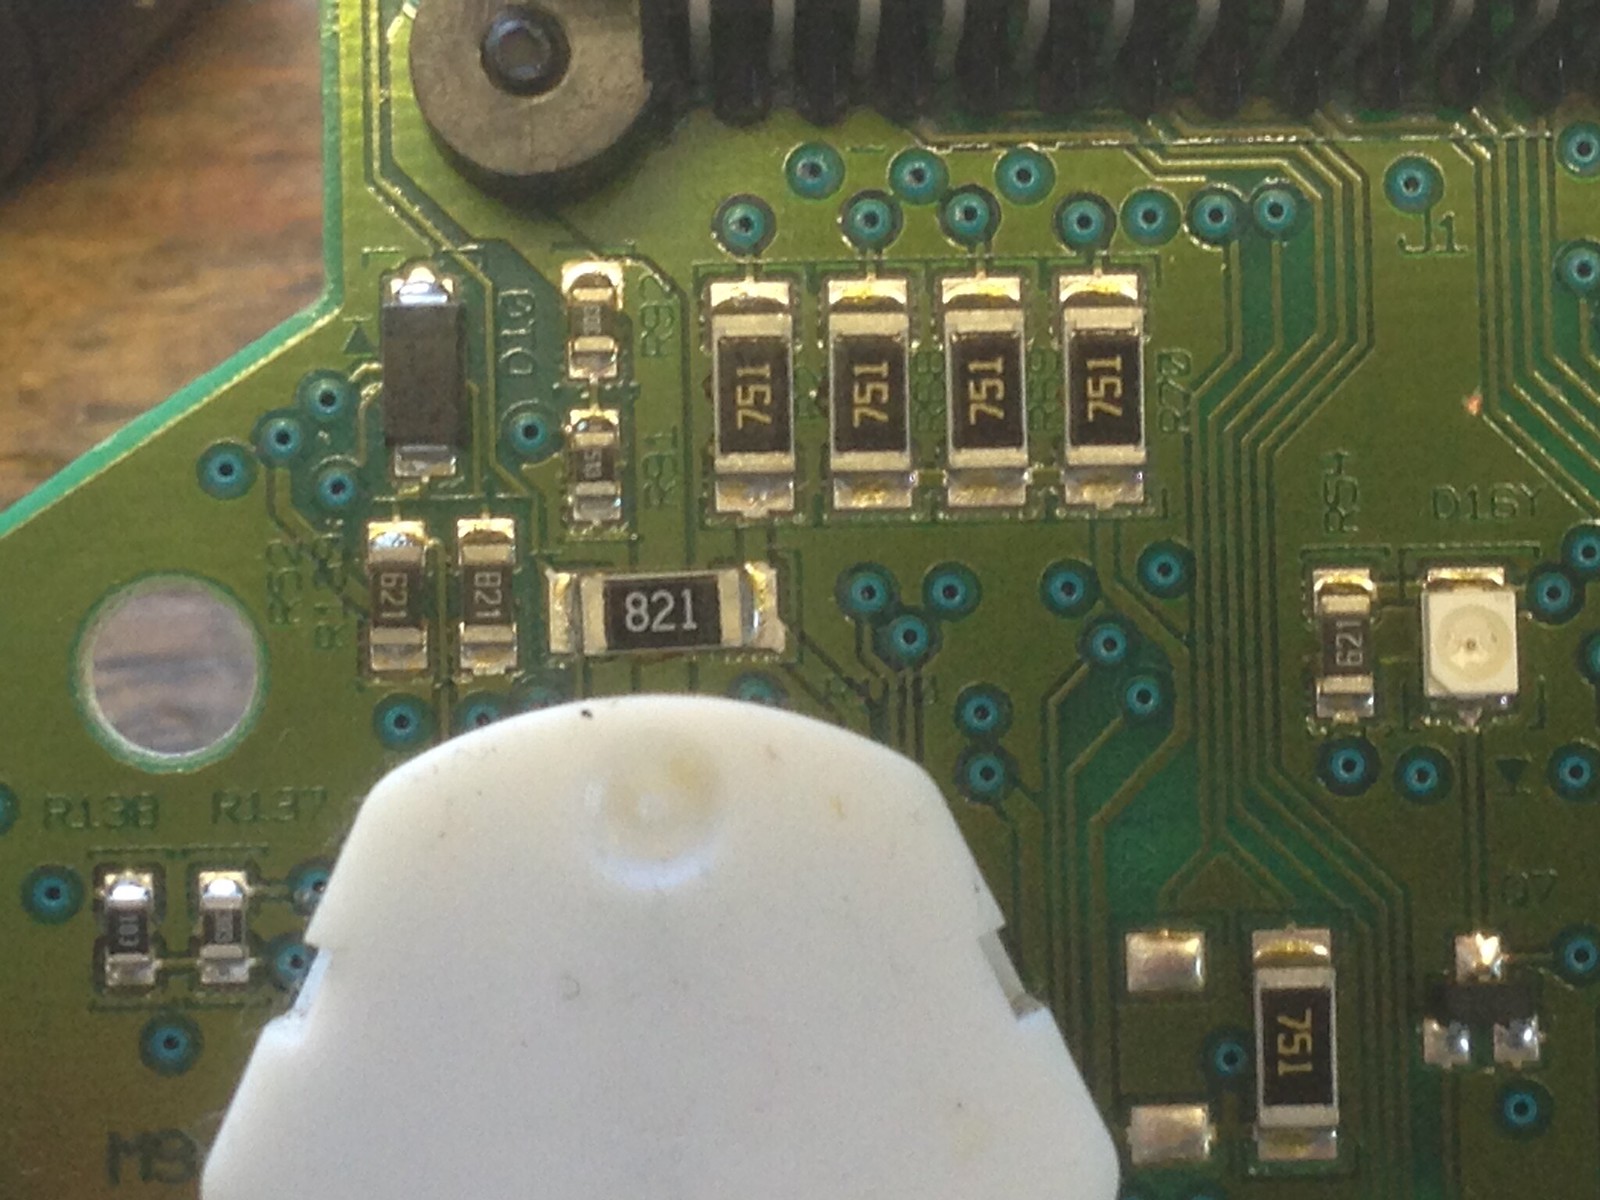
Looking at the circuit board from the needle side I found that the surface mount resistor (#821) (820 ohm resistor) was not connected on the left side. In fact, under a magnifying glass it still looked like it was connected. I poked at it with an mini knife to find that it was not soldered at all.
This resistor is located directly above the fuel gauge.
I just touched it with a hot solder iron and the problem was solved.
If I have any other issues with this thing I will report them here.
All of these photos are prior to me soldering it. As you can see, it looks like there is no problem.
This helped a lot. When I got into the cluster I found the resistor that you were talking about was connected good. However there was one that was just to the left of it labeled 621 was unsold red on the bottom edge
This same issue occurs with the window switch lights ... What I've found happens is the resistor creates enough heat to actually melt the factory solder and fall off. Not a good thing but something to know... It's not just Ford, I've seen it with a brake light on a motorcycle not long ago as well.
Thank you for posting this thread and possible fix. I have been having intermittent problems with the Emergency Brake light on the instrument cluster since buying this used a few months ago. I followed your thread and tried initially to re-solder the connector. That worked for a short time, but the light came back on (same day). I then completely disassembled the instrument cluster -- no cold solder, just NO SOLDER at all. I was surprised when I re-heated the 821 labelled chip (on the side facing the blue dots in your picture) that the entire microchip moved. It looked soldered, but that was the silver coloring of the connection point. Added a bit of solder, and problem solved.
Thanks again, your post is extremely helpful.
Bump for a great read. My first original cluster had this issue and I fixed it, but then buggered up the odometer screen not too long after. I got a replacement cluster only to have it fail a couple of years later. I just did the repair for a second time and all went well. I'm sure it's not a coincidence that I've had two clusters fail on me from the same issue.
brake warning light, failed cruise control and intermittent map and dome light activation were all fixed when I forked over the money to Ford Dealer to have my cluster solder runs repaired. I fixed a bad solder/run in my 2001 F150 SCREW years ago to get the odo to stay on, but I wasn't sure I could tackle this on my '08 SCREW. Thanks for the post with the information, though.
I'm in the beginning of this repair. I have the cluster out and the lens off and the plastic backing and all the screws of the back. I can't get the gauge needles to come off with any kind of reasonable force.
I'm ready to use more force but wanted to ask if there is something that I'm unaware of.
I drove around for several months with the upper dash trim off and when the light came on I simply tweaked the left wire connector and the light went off. Now, even with tweaking the light stays on.
My instrument cluster is apart as far as I can get it and is currently sitting on my dining room table.
Any suggestions on how to get the gauge needles off is greatly appreciated.
I found another thread called "04-08 Odometer Blackout Fix" that told me how to get the needles off.
Simply lift up on one corner of the clear plastic under the black face sheet and the needles will pop off.
I was unconvinced until I actually tried to do so. Yep, sure enough, the needles popped right off.
When this brake light issue first started, I could bang on the dash and the light would go out and the cruise control would work again. Sometimes for weeks and sometimes for just days. It got progressively worse until I couldn't get the light to go off at all.
I pulled my cluster and disassembled it and found the 621 chip was loose. I soldered it and checked all the other chips in that location (by picking at them with a dental pic) and they seemed good.
When I popped the clear plastic lens with the black facing off, the gizmo that drives the ammeter needle popped apart. I put it back together, but now my ammeter doesn't work. I've taken it back apart and reassembled it several times and I'm sure it's assembled correctly, but it still doesn't work.
That, and the brake light comes on from time to time and if I touch the left plug and give a slight push, the light goes back out. (Just like when it first started).
I think the best course of action for me is to find a used instrument cluster. The problem I'm finding is there is a part number break at 02/03/04. My date of manufacture (DOM) is 09/03 and I've been unable to find a replacement locally.
My question is:
1- Does anyone know if the early and late 2004 speedo clusters are interchangeable (XLT, column shift)? and
2- Where is the information for the mileage stored in the cluster? Is it stored in the LCD display or somewhere else. The LCD display is easy enough to change, but somehow, I don't think it's that simple.
Earlier in this thread, one poster asked how to get the needles so that they read properly.
What I did, was I left the lens off the cluster and reinstalled the cluster in my dash. Then I started the truck, let it run for a while and shut it off. I figured that this would reset the shafts that hold the needles back to their original key off position. Then, I installed the needles back where they pointed in the key off pic that I took prior to disassembly. I might have been just lucky, but they seem to be functioning correctly (except for the ammeter). Since the lens simply snaps on, all I have to do is remove the screws that hold the cluster in the dash and snap the lens back on without even having to unplug the wires.
Hopefully someone has an answer for questions 1&2.
Pic shows ammeter drive module on circuit board and gears & module lid off to the side.
 08-09-2015, 05:53 PM