When you click on links to various merchants on this site and make a purchase, this can result in this site earning a commission. Affiliate programs and affiliations include, but are not limited to, the eBay Partner Network.
Had a rattle in the driver side cat. Pulled off the heat shield, diagnosed bad cat with a rubber mallet. No codes. Runs fine. 05 Lariat. RWD. 146k on the odo.
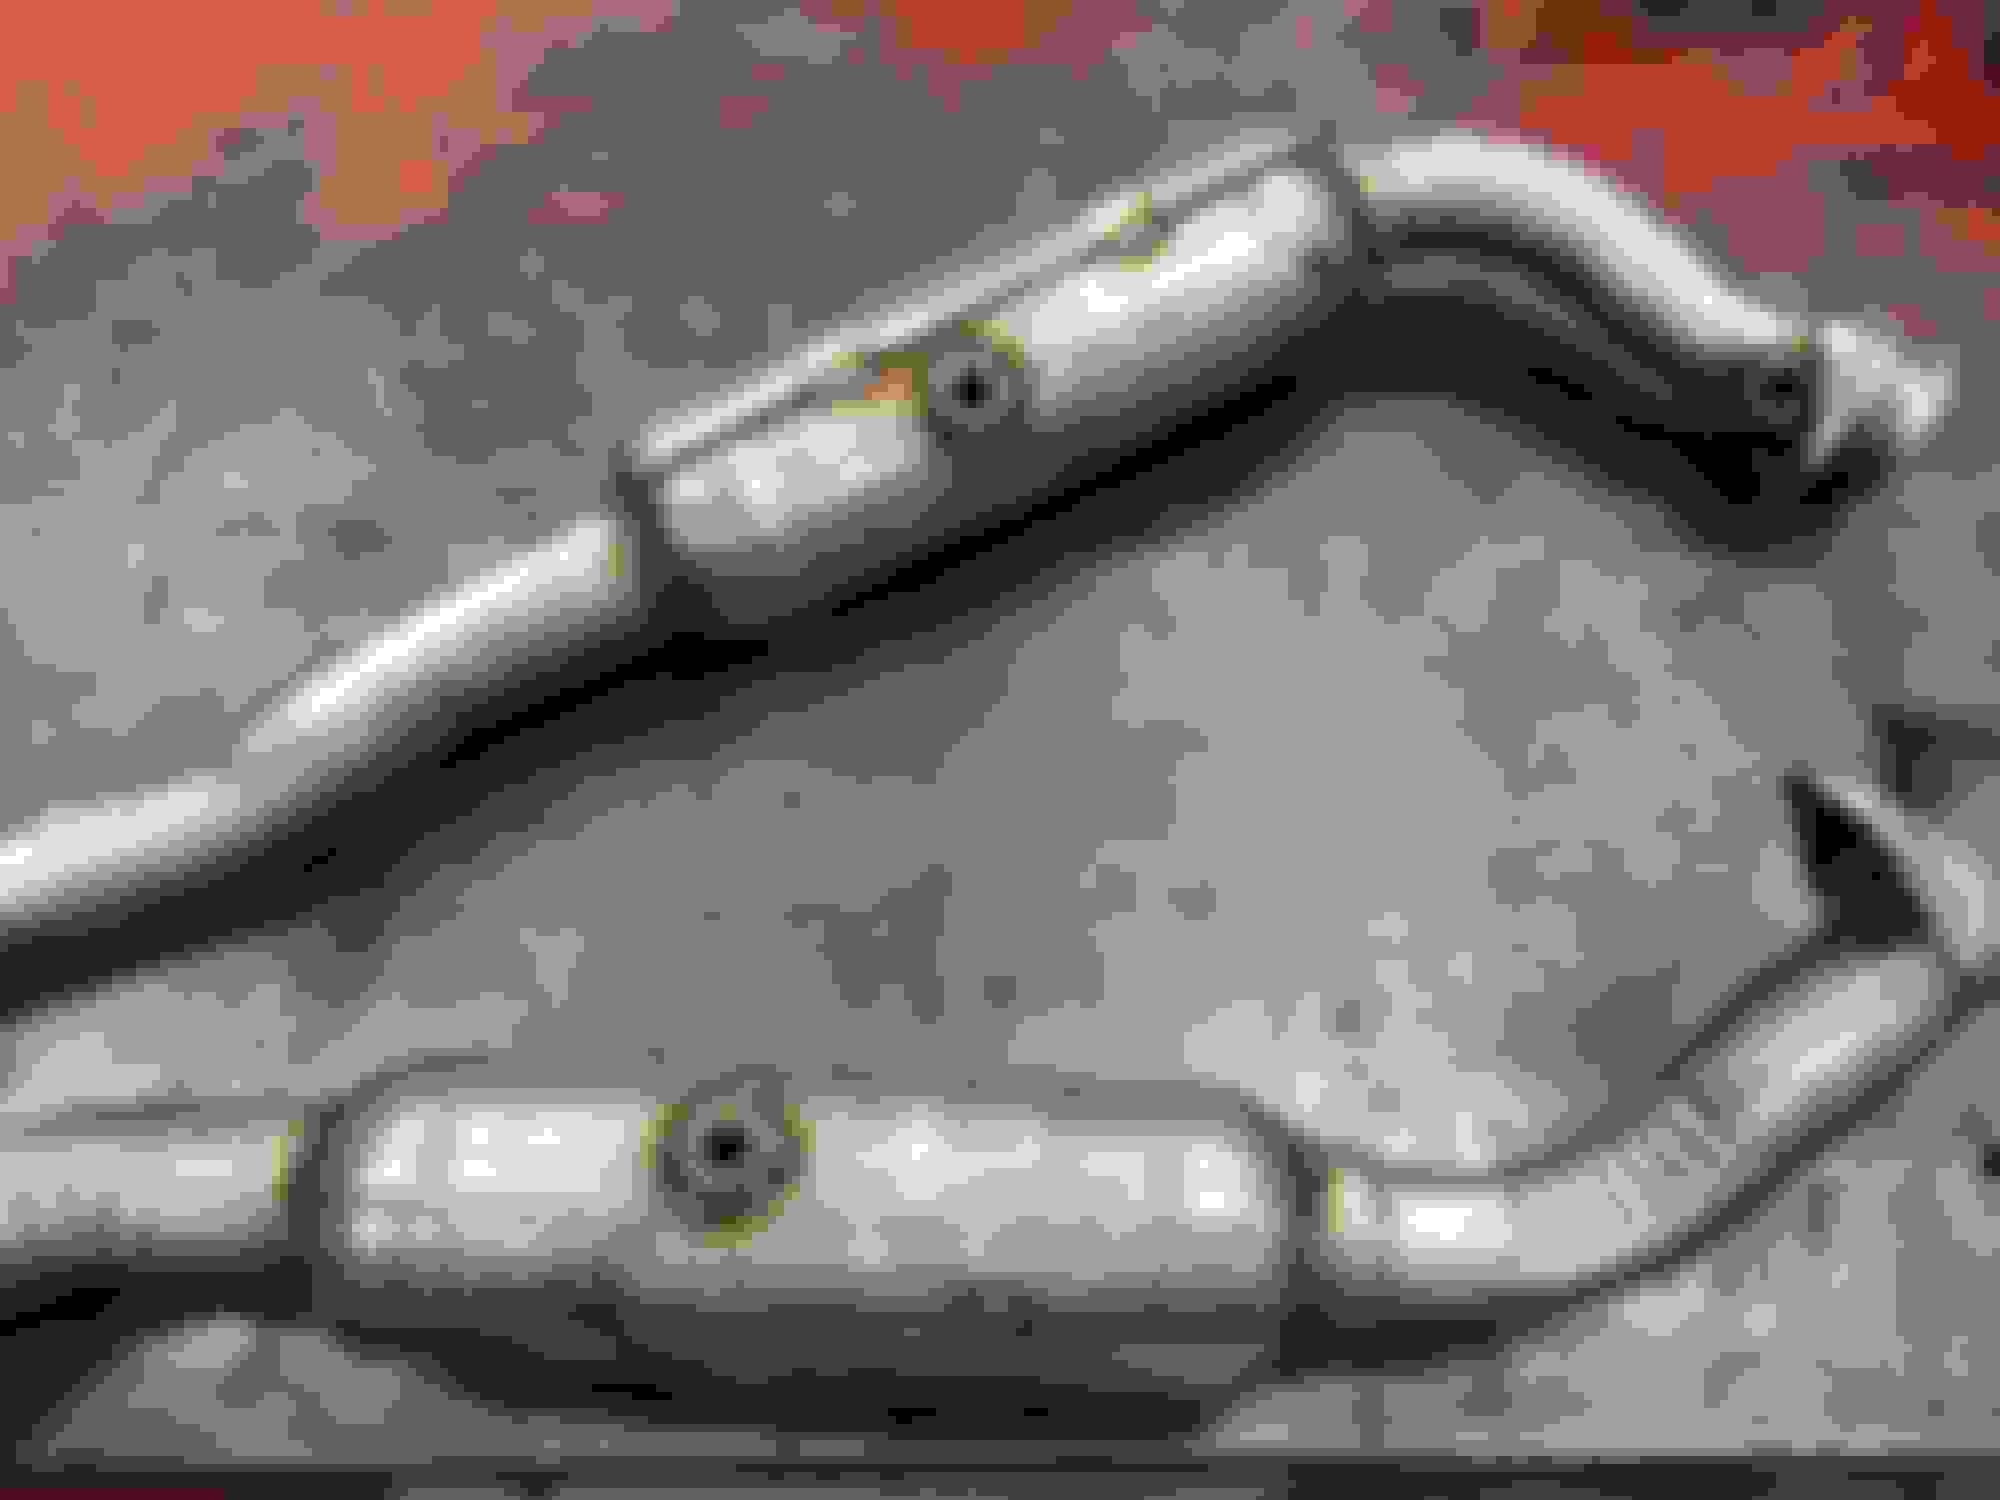
Ordered Walker catalytic converters from Rock Auto:
Walker 53651 for $204
Walker 50543 for $274 (they've gone up recently)
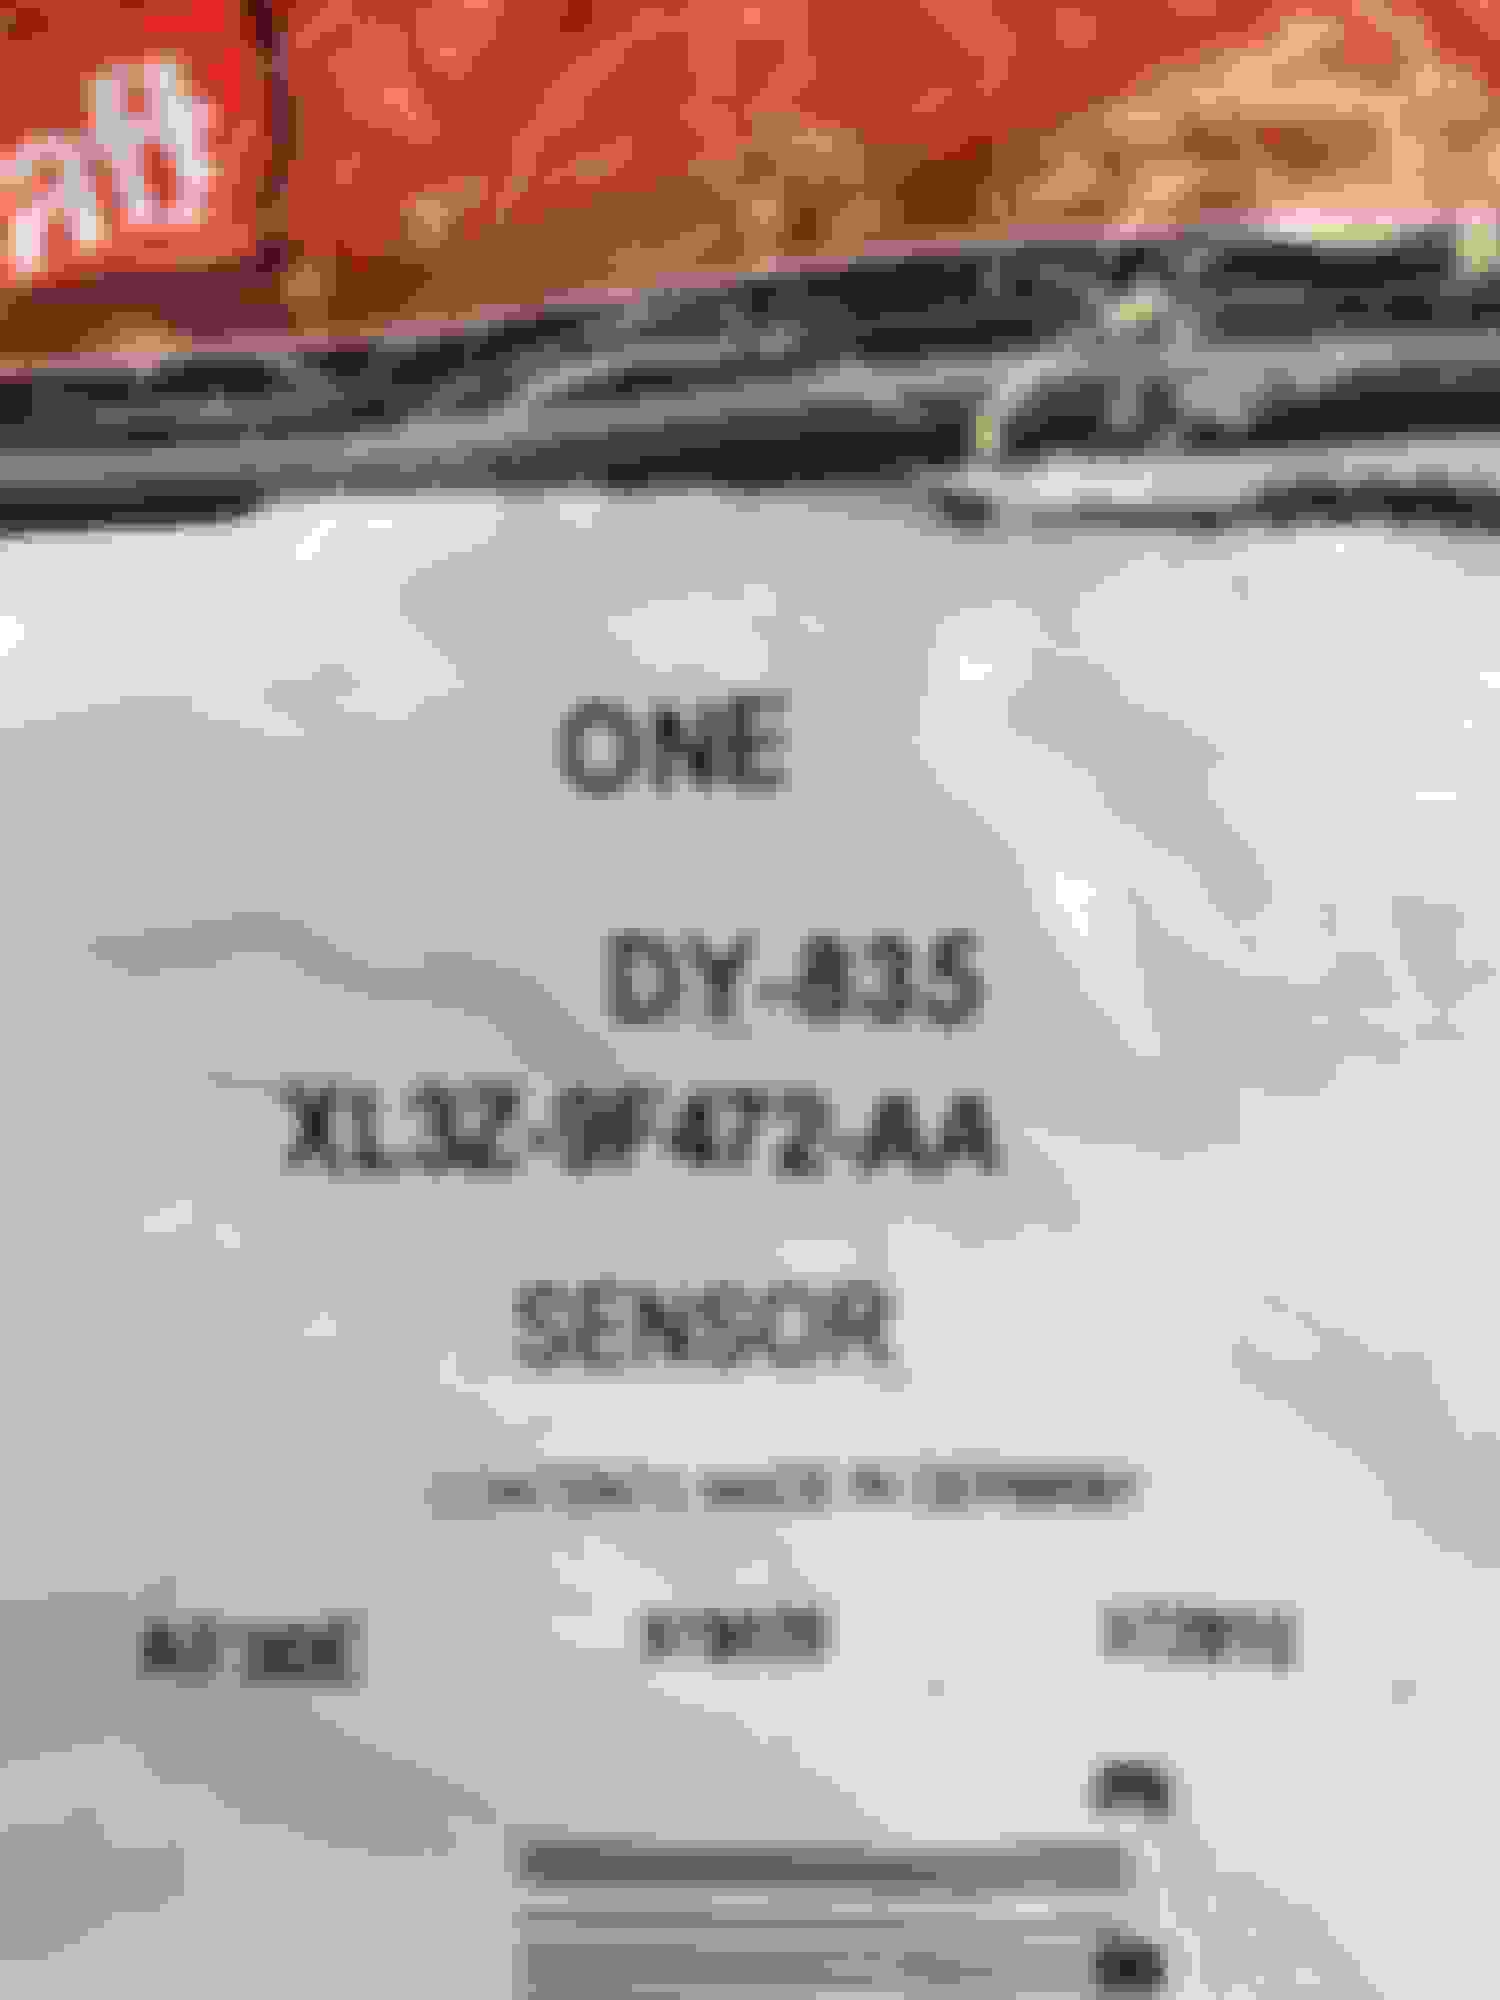
Decided to do the O2 sensors as well. From Amazon:
Motorcraft DY835 for $44 each
Motorcraft DY992 for $40 each
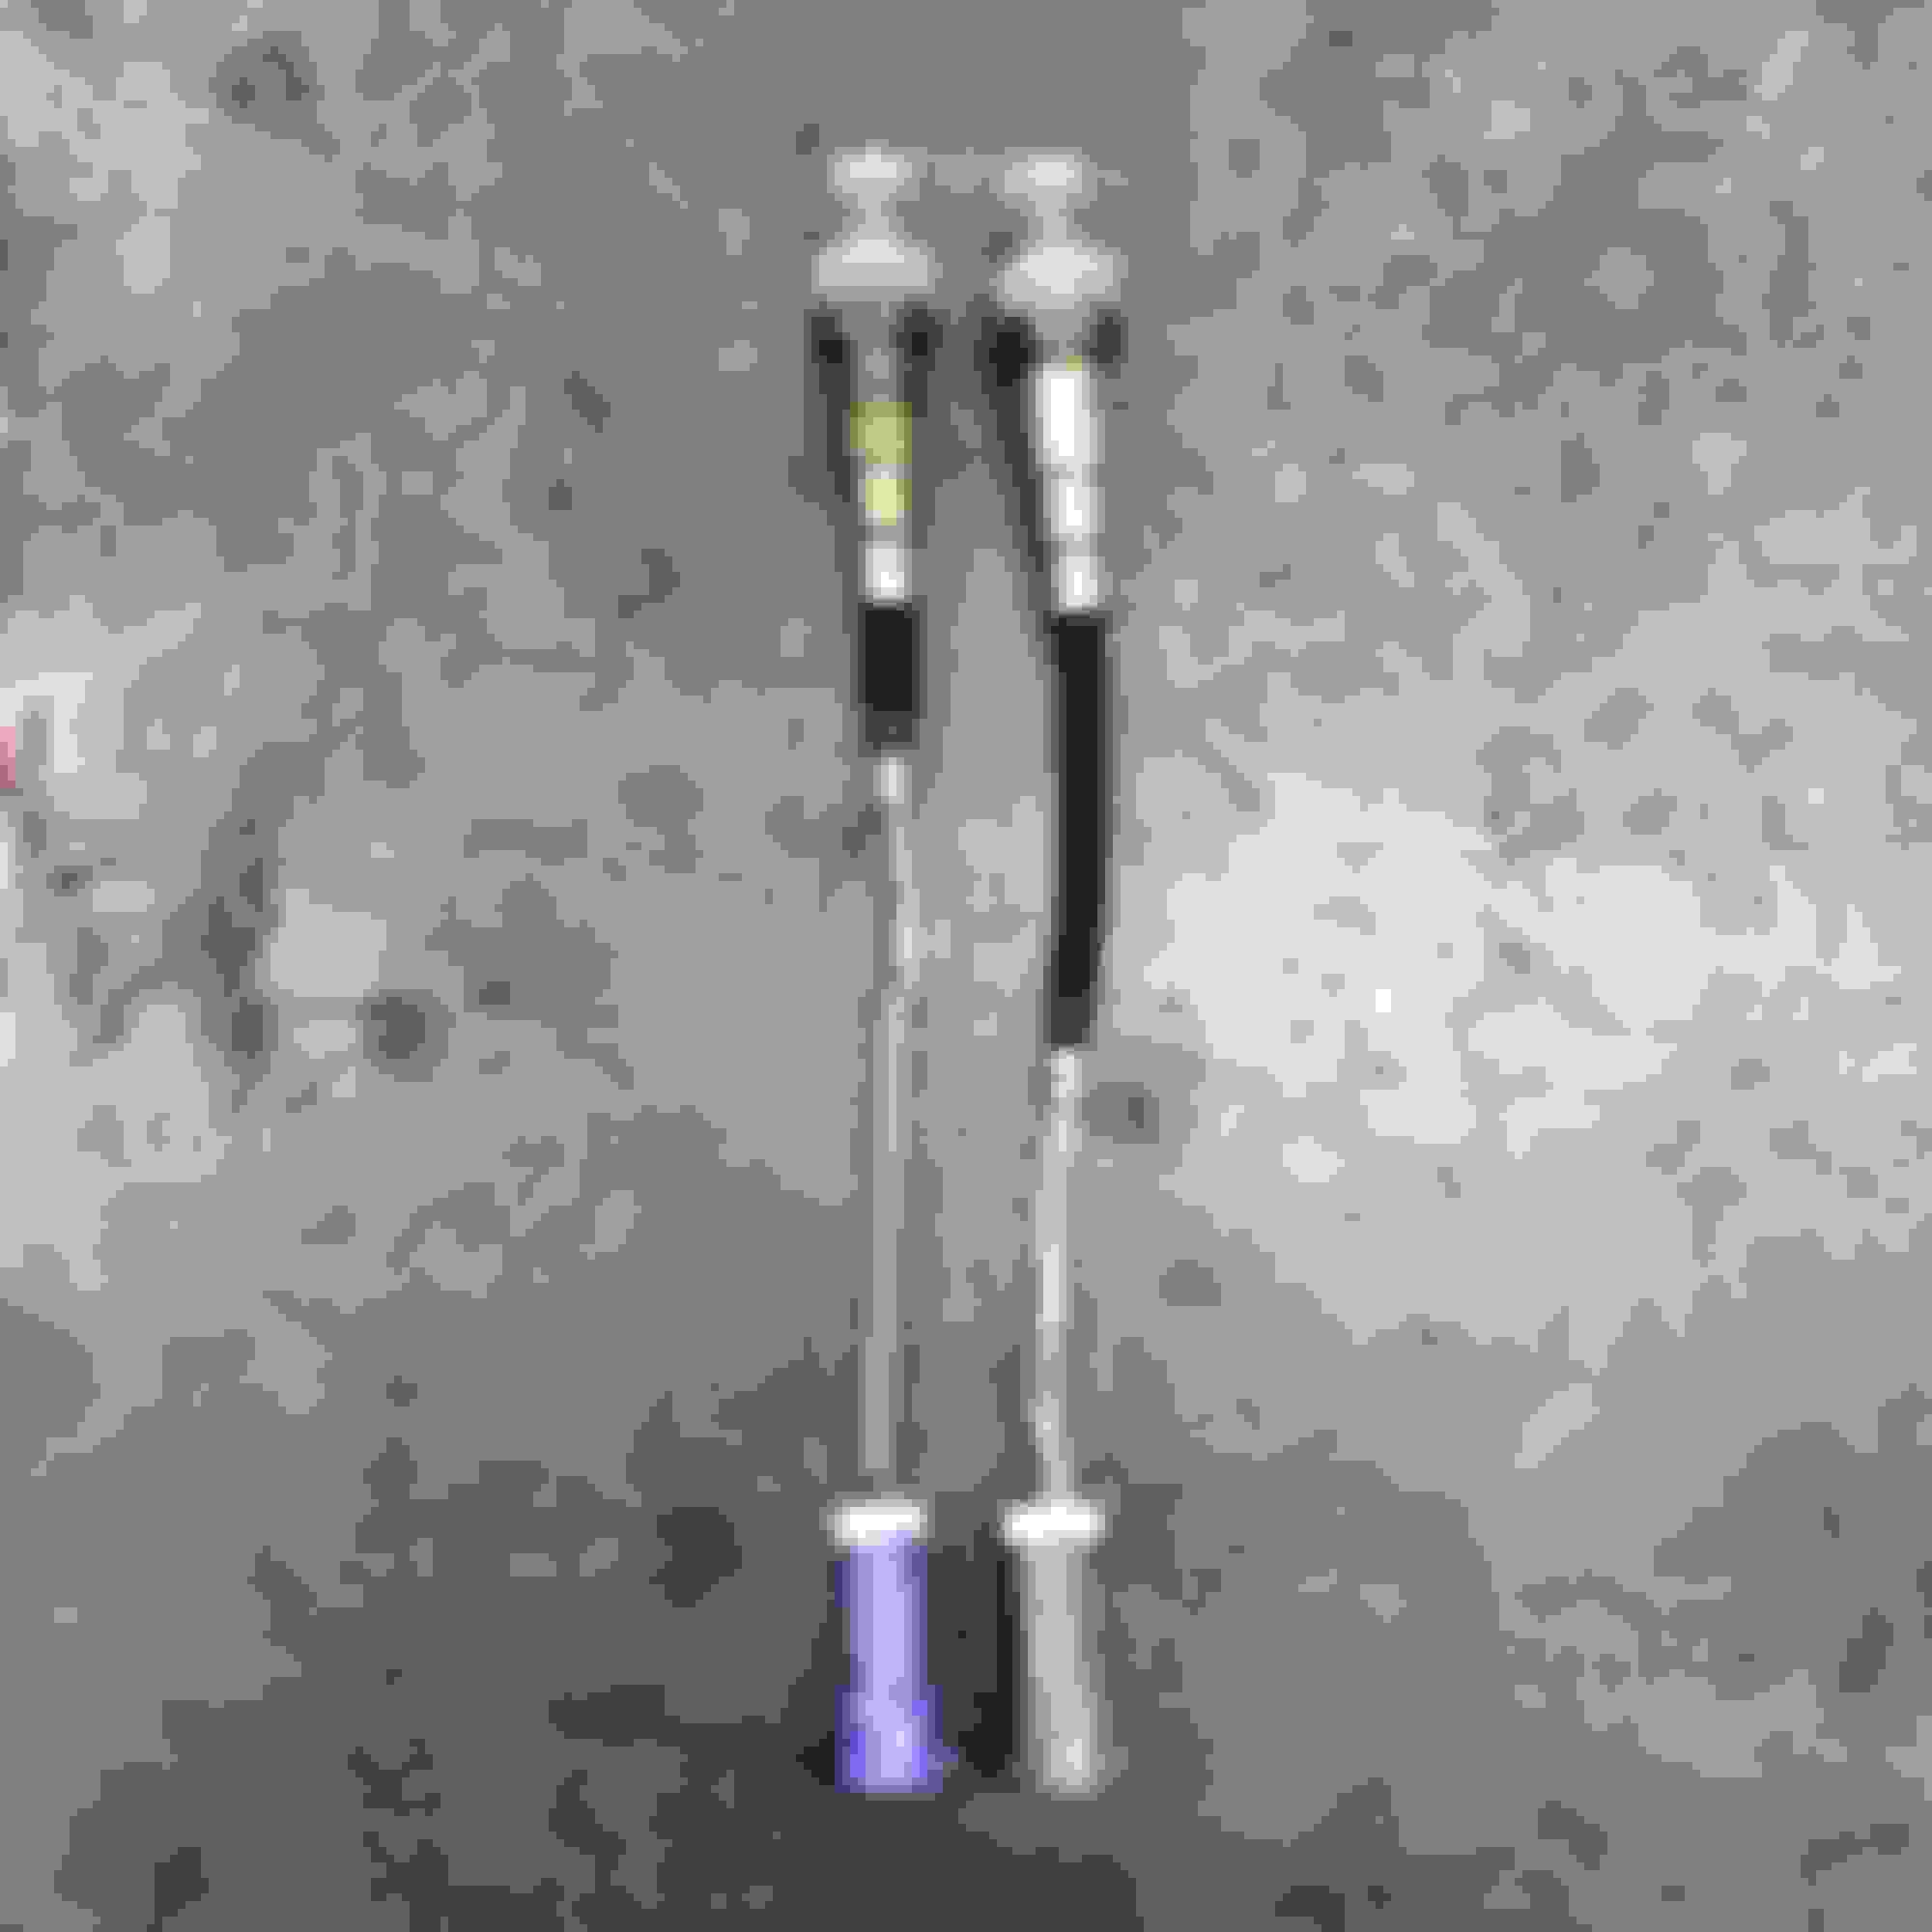
The DY835 sensors are made in Germany, the DY992 sensors are assembled in the USA, and the Walker cats are made in the USA. Although the upstream and downstream sensors appear to be the same length, some of the finishing is different along the wire length. The connector ends have idiot-proof slots on them. Fortunately, for folks like me, they are also color-coded to match the receiving connections on the truck.
This is a plain old stock cat and O2 sensor replacement. If something begins to rattle or fail, I like to service or replace that system as a preventative approach......it's one reason this 05 has never, ever stranded me. So we get two new cats and four O2 sensors.
I began by following some advice I learned here, I let the truck warm up for a couple of minutes. I then went through and loosened everything, didn't remove it just yet, merely loosened. I removed the O2 sensors.......I did valiant battle with the forward passenger side sensor (what a PIA ). I'm blessed with a Florida truck and no major rust issues, so all my fasteners came off easily. I used a my air wrench and a 15mm socket to loosen the clamp bolts toward the rear and the one connecting the two cats:
Loosen the two bolts holding this brace in. I ended up removing it with the pipes, then just moved over to the new one......note which side says "top" on the bushing:
I used two long extensions with my air wrench and a 15mm socket to remove the flange nuts:
Remove these two nuts. Use a hammer to tap and work it to the rear....should begin to rotate by hand before too long. Slide it all the way to the rear, which will separate the cats from the muffler end:
This is the clamp for the cross pipe that connects the two cats. Remove the bolt and tap/work/pry it free. You'll find that you can tap the pipe toward the driver's side by resting a chisel against that raised nub:
Observe this slit in the pipe. I used the chisel to open it up a bit and as a pry point. It eventually was worked toward the driver's side and came loose:
More to come.
Last edited by jtb; 11-26-2015 at 08:44 PM.
Reason: Add detail
Note the passenger side heat shield lying on the ground. I removed this to aid removal of the passenger side cat. Three bolts hold it in: One near the front fenderwell, one midway back atop a frame rail, and a third toward the back end of the shield. I had the truck on jackstands.....perhaps being on a lift might make it easier, nonetheless, I fought with it for bit before deciding that removing that heat shield would make life easier:
This clamp is spot welded on, if you don't have a new one, just chisel it off and use the old cat pipe as a form to reshape it around:
Well, they say installation is the reverse of removal......at least all the manuals do. It was more or less that. But, I made some observations that may help some.
When you review the FSM on this, a major theme is don't tighten anything until everything is in and aligned. I also took note of the torque values they refer to in the FSM: 35ft lbs for the clamps holding the pipes together, 30ft lbs for the sensors, and a tightening sequence for the flange nuts (cat to manifold), which was 15ft lbs on one, 30 on the the other, then 30 on the one you just did 15 on.
All went well. No codes.
But it sounds a tad different. Not bad, but a shade more aggressive. I'm trying to figure out if there's a small leak where the cats mount to the manifold with the flange bolts, or is it just the sound of this system now. I find it hard to believe that 30ft lbs is all that is supposed to compress and seal that up. Maybe I'm hearing things. The wife says it sounds fine..... I've got no exhaust odor in the cabin, just a bit of a whoosh sound on acceleration.....that may or may not have been there before
I'm wondering if these flange nuts should be retightened as heat and time settles the connection. Any input is welcome......I'm new to exhaust work.
Overall, I'm glad I didn't pay Ford $1800 apiece for new cats......with the sensors and labor, what's that, over $4000? This will work just fine for me.
Slept on it.....dwelled on it......sounds like a leak. I was haunted by these words, don't tighten anything until everything is in and aligned. I had followed the rules, but not entirely in the correct order.
Got up under it this morning to have a look. Went through and loosened everything. Started with the rear pipe clamp. Loosened it and slid it to the rear. The pipe immediately dropped down about 1.5" and toward the passenger side about 1.5". The system was out of alignment:
I loosened the remaining bolts and the flange nuts. I noted that when I rotated the cat pipe to bring it into alignment with the rear pipe, of course the flange position changed a bit. I lined it up. Snugged the flange bolts, then tightened the remaining bolts as I worked my way back toward the rear of the truck. Proper alignment, side and top:
I added something else. I put anti-seize on the flange nuts and clamp bolts. I also put some on the surfaces where nut faces and washers meet the clamp surfaces. Ideally, I would've used new hardware, at least flange nuts. Are you going to remove the flange studs and replace them? Perhaps not. At the minimum, use anti-seize on them to ease the friction and reduce the chance of a broken stud. Also, I think torque values are more accurate when you're not fighting corrosion as you tighten the fastener.
I followed the torque sequence for the flange nuts. 15ft lbs on the left lower, 30 on the left upper, and 30 on the left lower. Repeat for the right side. I then kissed each one an extra 1/8 turn to allow for the lubricating effect of all that anti-seize. I'll recheck these nuts in a week or so to allow for the expansion, contraction, and movement of the metal. I learned something new. I surprised at how just a few degrees of movement on that flange could have such an impact.
Great write up and follow up! I'll be doing this on my truck very soon! So did the realignment solve your leak?
It did. But I'm going to re-torque them a coupla times over next week to account for settling and expansion. Have you decided which cats you're gonna use?
It did. But I'm going to re-torque them a coupla times over next week to account for settling and expansion. Have you decided which cats you're gonna use?
I was going to use the Magnaflow cats but your setup looks good, I have a supercharger so I'll have to weld in the AFR gauge bung but that's no biggie.
Excellent write up. Very helpful.
I know its a pain stopping work to take pictures especially when you get on a roll with the repair.
Thanks for taking the time and doing such a great job with it.
Danny
 11-26-2015, 08:00 PM


 ). I'm blessed with a Florida truck and no major rust issues, so all my fasteners came off easily. I used a my air wrench and a 15mm socket to loosen the clamp bolts toward the rear and the one connecting the two cats:


 This will work just fine for me.


