Camo'd back emblem mini project
 04-05-2015, 11:14 PM
#1

I'll go ahead and welcome myself to the forum with a little project I pulled today on my 06 Lariat. The rear emblem was looking a little too weathered for me and the blue paint started to smear, so I got back there and decided to change the color scheme.
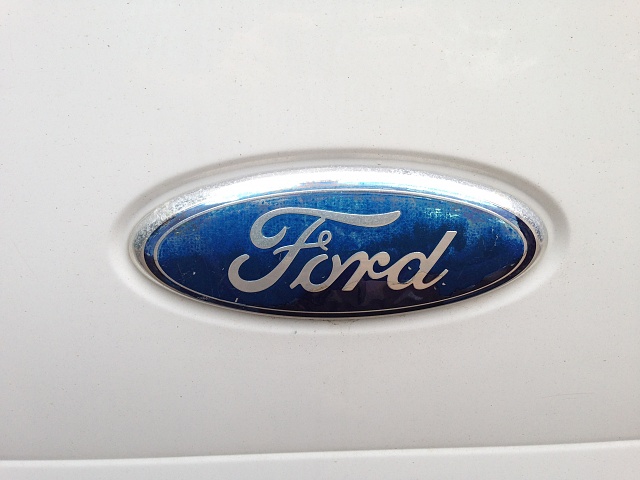
Original Emblem-
Used a screw driver to clear off the rest of the clear coat, then rubbed down with brake cleaner on a paper towel to remove the old paint and leave it shiny. Be sure to apply generous amounts of painters tape before you begin removing the old paint, otherwise you run the risk of whatever remover you use running down and ruining your car's paint job.
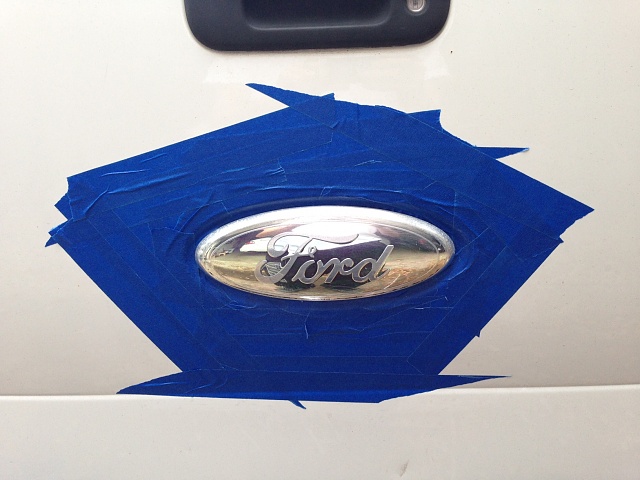
Then I buffed it out with steel wool to serve as a primer, and cleaned again with brake cleaner to remove any contaminants that might prevent proper bonding between the paint and the emblem metal.
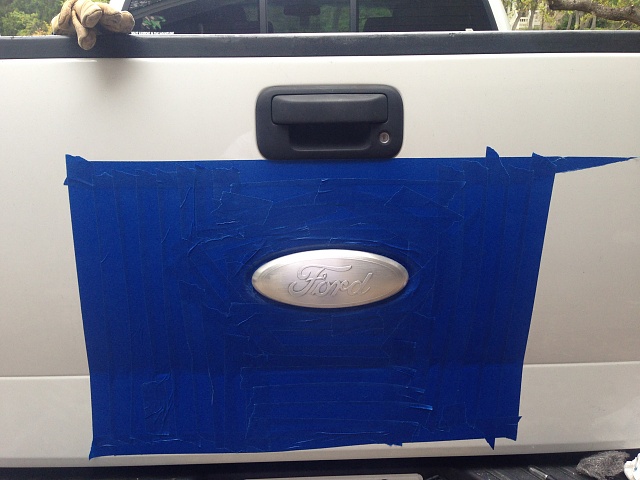
The paint I used was Rust-Oleum Matte camouflage paint, and you can pick it up at any hardware store or place that sells spray paint. Before painting be sure to protect the bulk of the back of your truck with painters tape, and if you desire you can use a hollow square box as a paint shield to keep the airborne particles from sticking anywhere. I began with 2 coats of tan paint, with a 45 minute waiting period between each coat to allow the paint to settle a little. I have found that the paint I am using does not take that long to set, but it is still good to let it have time to really bond to the surface before starting to work with it.
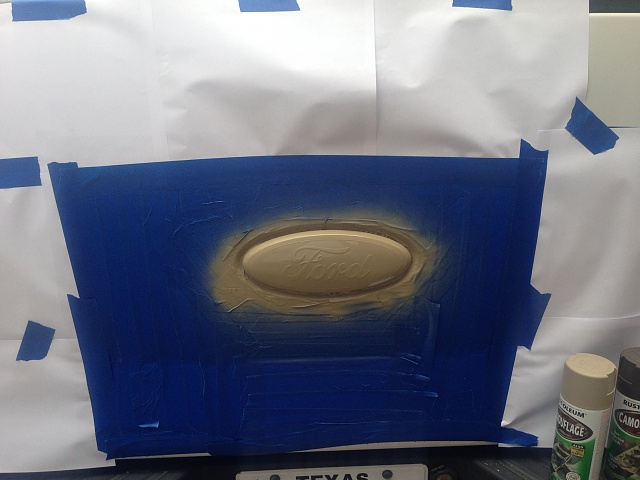
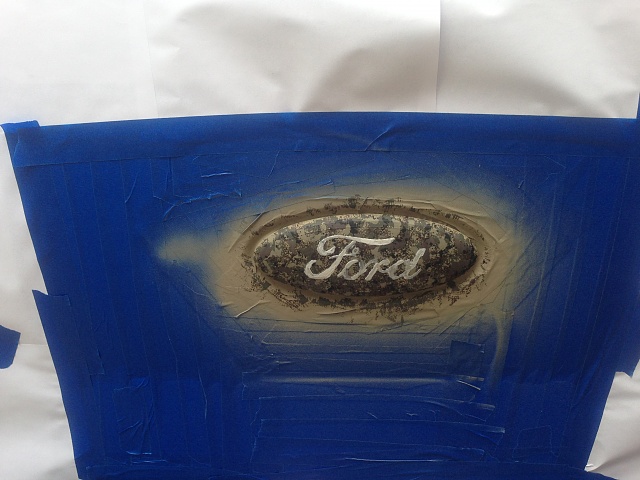
The next step is a series of steps in order to achieve the desired camo effect. I used wadded up paper towels and sponge brushes with the tips cut into random shapes (literally take scissors and cut the tops up) as the brush. You first want to (wearing some kind of mask and gloves) spray the first color of paint into a disposable cup for about 10-20 seconds, or until you can notice a small puddle forming at the bottom of the cup. (note- if you are going to use the paint in the cup for more than a few minutes, it is best to put the cup with paint in it into a second cup, as the paint has a habit of melting plastic cups over time). You then want to get whatever you are using for your brush and lightly dab the brush all around the emblem, but not entirely covering it. Here is what my first layer looks like-

My personal preference is to go lightest to darkest (green, brown, then black), and also decrease the amount of each color as you go on. If you want to change the order or amount, that is up to you. This is just my personal preference and I think it turns out looking the best.
This next step took the longest, because I am by no means gifted in the skills of free hand painting. I used a bottle of touch up paint I had that was the same color as my truck, oxford white, and roughly traced a base layer of the ford emblem writing onto the emblem. Note; it is ok to mess up, you can trace the outside with green or brown or black later, as you see I do.
Original Emblem-

Used a screw driver to clear off the rest of the clear coat, then rubbed down with brake cleaner on a paper towel to remove the old paint and leave it shiny. Be sure to apply generous amounts of painters tape before you begin removing the old paint, otherwise you run the risk of whatever remover you use running down and ruining your car's paint job.

Then I buffed it out with steel wool to serve as a primer, and cleaned again with brake cleaner to remove any contaminants that might prevent proper bonding between the paint and the emblem metal.

The paint I used was Rust-Oleum Matte camouflage paint, and you can pick it up at any hardware store or place that sells spray paint. Before painting be sure to protect the bulk of the back of your truck with painters tape, and if you desire you can use a hollow square box as a paint shield to keep the airborne particles from sticking anywhere. I began with 2 coats of tan paint, with a 45 minute waiting period between each coat to allow the paint to settle a little. I have found that the paint I am using does not take that long to set, but it is still good to let it have time to really bond to the surface before starting to work with it.

The next step is a series of steps in order to achieve the desired camo effect. I used wadded up paper towels and sponge brushes with the tips cut into random shapes (literally take scissors and cut the tops up) as the brush. You first want to (wearing some kind of mask and gloves) spray the first color of paint into a disposable cup for about 10-20 seconds, or until you can notice a small puddle forming at the bottom of the cup. (note- if you are going to use the paint in the cup for more than a few minutes, it is best to put the cup with paint in it into a second cup, as the paint has a habit of melting plastic cups over time). You then want to get whatever you are using for your brush and lightly dab the brush all around the emblem, but not entirely covering it. Here is what my first layer looks like-

My personal preference is to go lightest to darkest (green, brown, then black), and also decrease the amount of each color as you go on. If you want to change the order or amount, that is up to you. This is just my personal preference and I think it turns out looking the best.
This next step took the longest, because I am by no means gifted in the skills of free hand painting. I used a bottle of touch up paint I had that was the same color as my truck, oxford white, and roughly traced a base layer of the ford emblem writing onto the emblem. Note; it is ok to mess up, you can trace the outside with green or brown or black later, as you see I do.

Last edited by TexasMayhem; 04-05-2015 at 11:17 PM.
 04-05-2015, 11:19 PM
#2
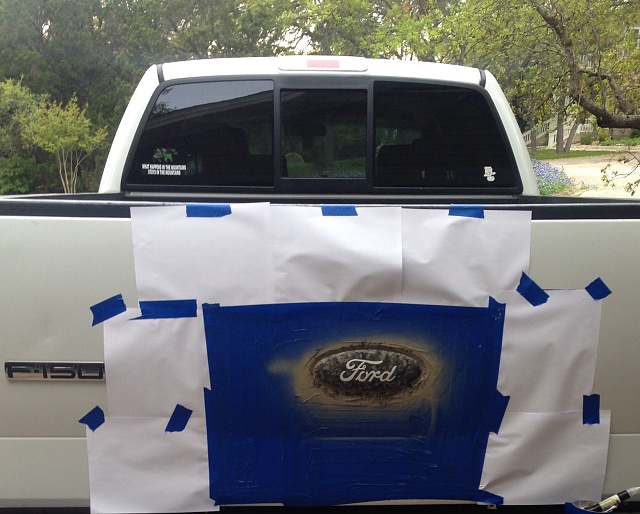
Here is the third coat of white, along with the middle stage of the green outline to hide most of my goofs. I am sure there is a better and more time efficient way to do this, I just used what I had at hand.

The last step is to apply the clear coat, for mine I used three coats of Krylon matte finish, with about an hour between each coat. With this just make sure to cover all angles of the emblem to ensure complete coverage.
Here is the final product-
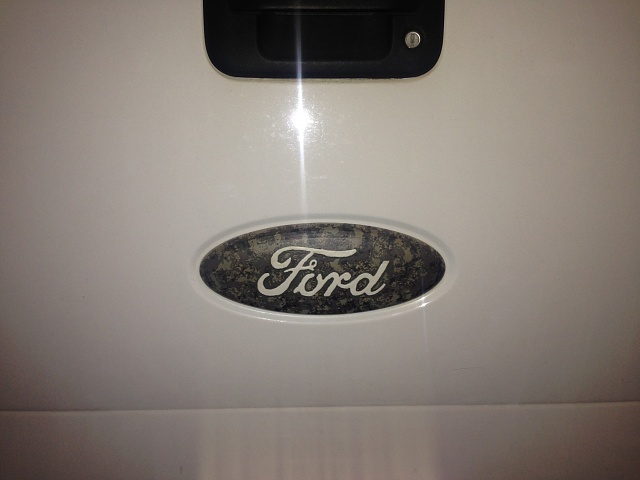
I am really pleased with how this came out, and will probably end up doing the same to the front emblem when I have the time. I hope this either helped or inspired the creativity in someone, because nothing looks better than a Ford with personal touch.

The last step is to apply the clear coat, for mine I used three coats of Krylon matte finish, with about an hour between each coat. With this just make sure to cover all angles of the emblem to ensure complete coverage.

Here is the final product-

I am really pleased with how this came out, and will probably end up doing the same to the front emblem when I have the time. I hope this either helped or inspired the creativity in someone, because nothing looks better than a Ford with personal touch.
04-06-2015, 06:22 AM
#3
Moderator (Ret.)

Nice job!
Another trick I've used for masking is to mask about 1 inch around the area I'm going to paint, then use paper to suround the remaining surface. In your picks, you used a lot of tape!
Another trick I've used for masking is to mask about 1 inch around the area I'm going to paint, then use paper to suround the remaining surface. In your picks, you used a lot of tape!
