
Truck Leather Seat Covers Review!
 05-24-2012, 01:46 PM
#1
Senior Member
Thread Starter

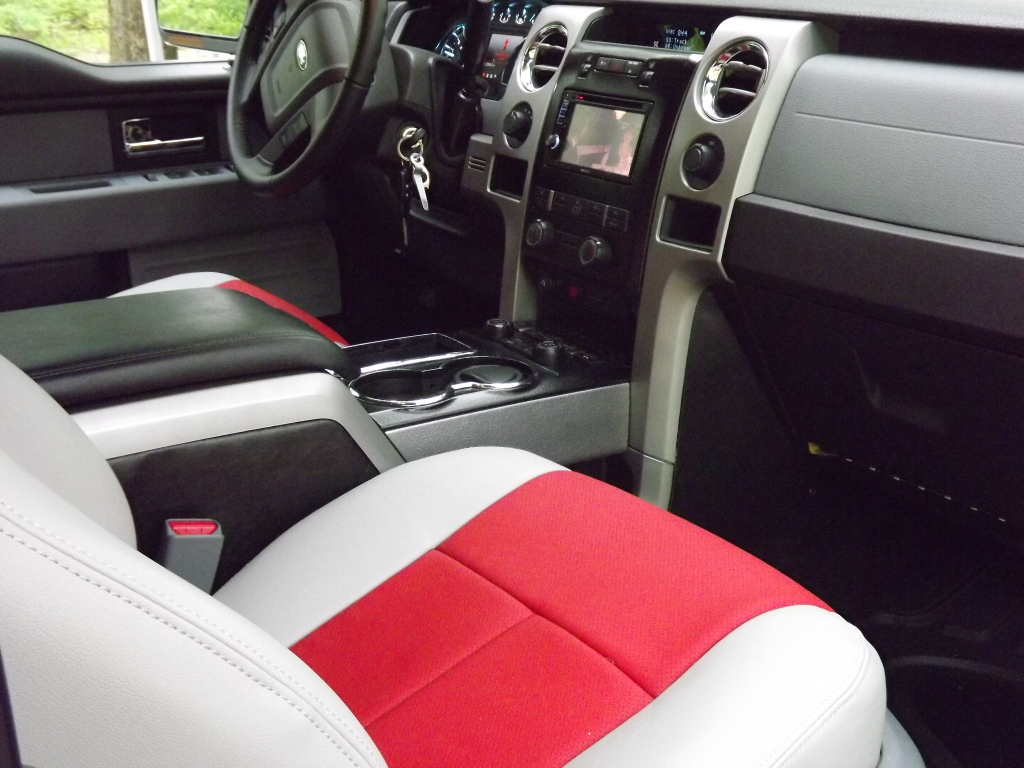
Last upgrade and Mod complete! Custom Leather seat covers and heated seats!
Heater seat switches
and now the seats!

Heater seat switches
and now the seats!
 05-24-2012, 01:48 PM
#2
Senior Member
Thread Starter
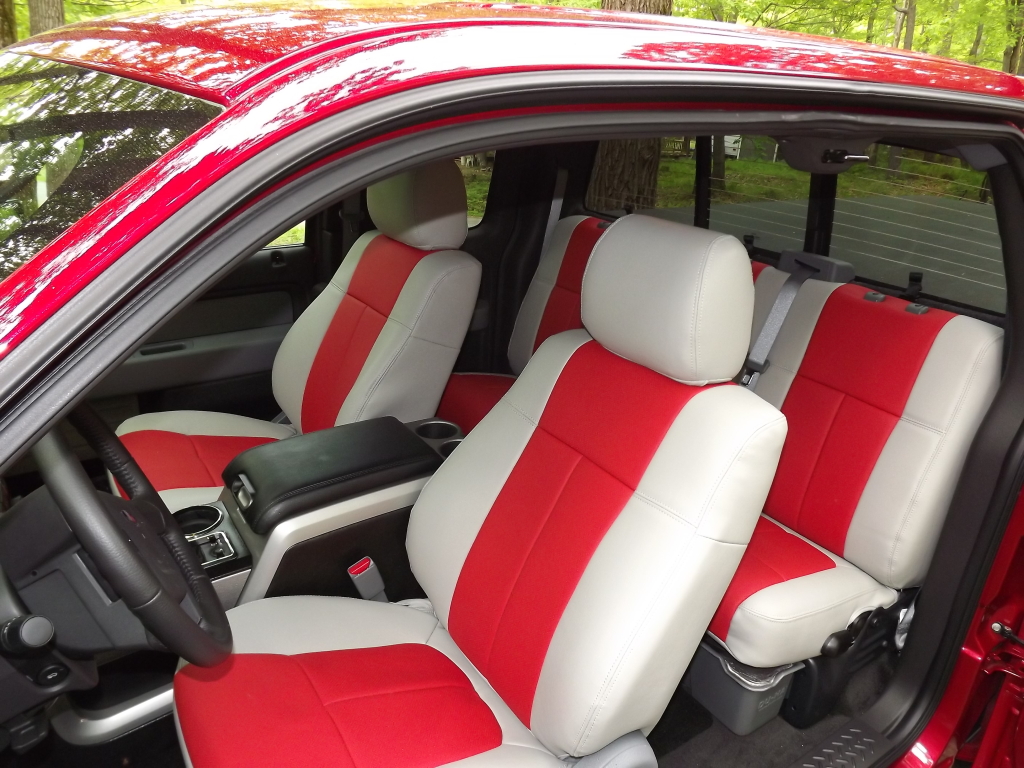
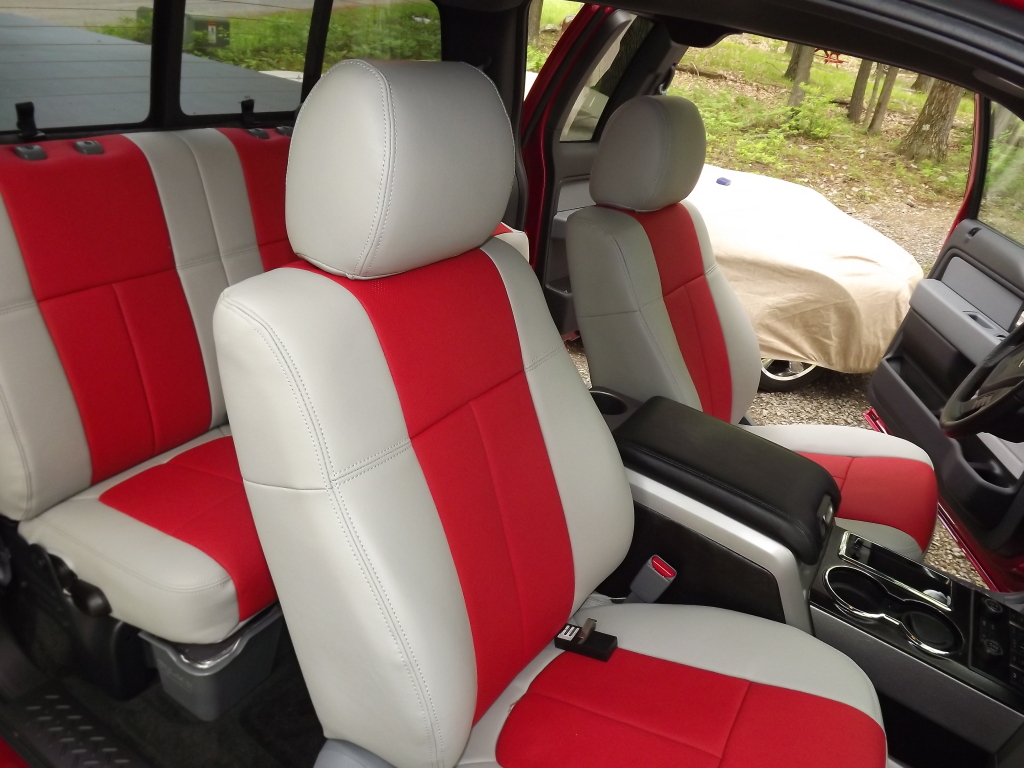
I ordered these custom covers which are also known as Clazzio Covers from http://www.truckleather.com. As with many of us that went with the XLT for whatever the reason, mine being the 8' bed, leather wasn't available as an option so I went searching for some quality seat covers. After finding several that were in the 200 to 300 dollar range for the front and backs I still wasn't very impressed with the look or fit. They were made of several materials but mostly a cloth type. I have always covered my seats when they are cloth but was never really happy as they didn't fit well and they looked like seat covers. In time they would move around and every time I would get in and out I had to adjust them. So when I placed my truck order I found this site mentioned above. I looked at the video and was pretty impressed with the way they looked. I called and spoke with Spencer and he was very helpful and informative. The seat covers are not fully leather but they are where it counts. The center section top and bottom are leather and the sides and backs are vinyl. You can get them in several colors which they stock and can be shipped that day or you can also order them custom as I did. What is great about this is you can have what you want for the same price! Most of the time you change anything in a product you pay for it! The only thing you pay for ordering the custom covers is time. They have to have them made and it will take some time to get them but in the end you have a great pair of seat covers they way you want them. I know the next thing you will ask is how much??? Well I feel the price is well worth it since as I said plain seat covers were going for about 300 buck. You can get these in any color combo or the stock ones for $450.00 to the door!
Ok let's look at what is important!
1. The quality of the covers!
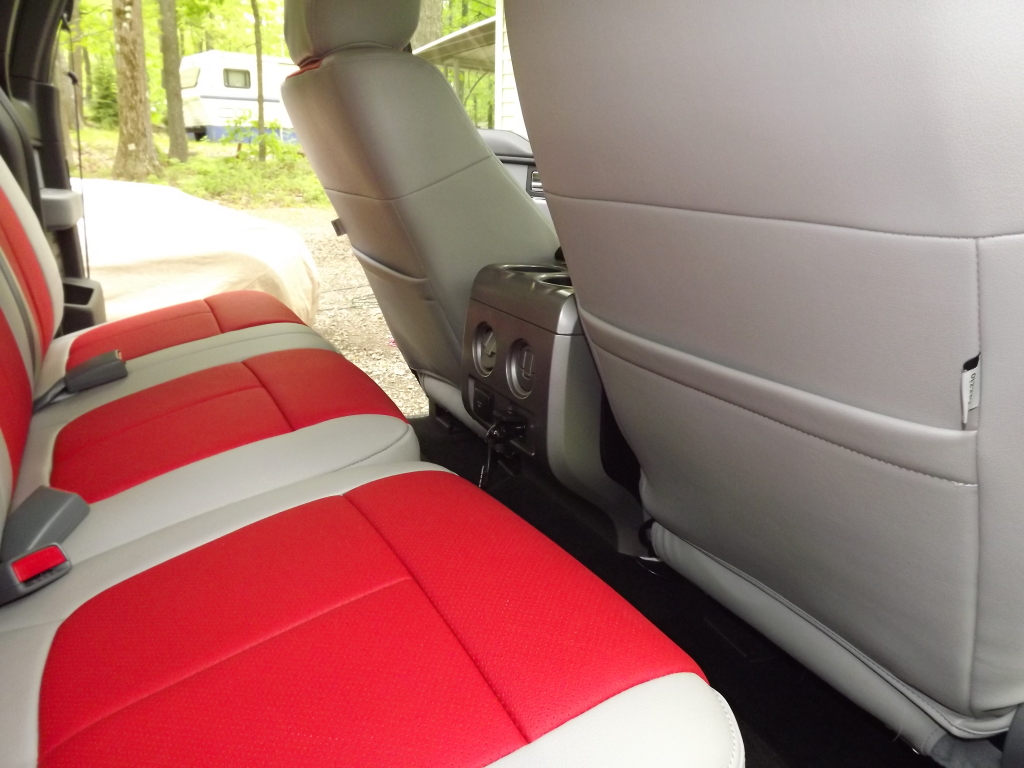
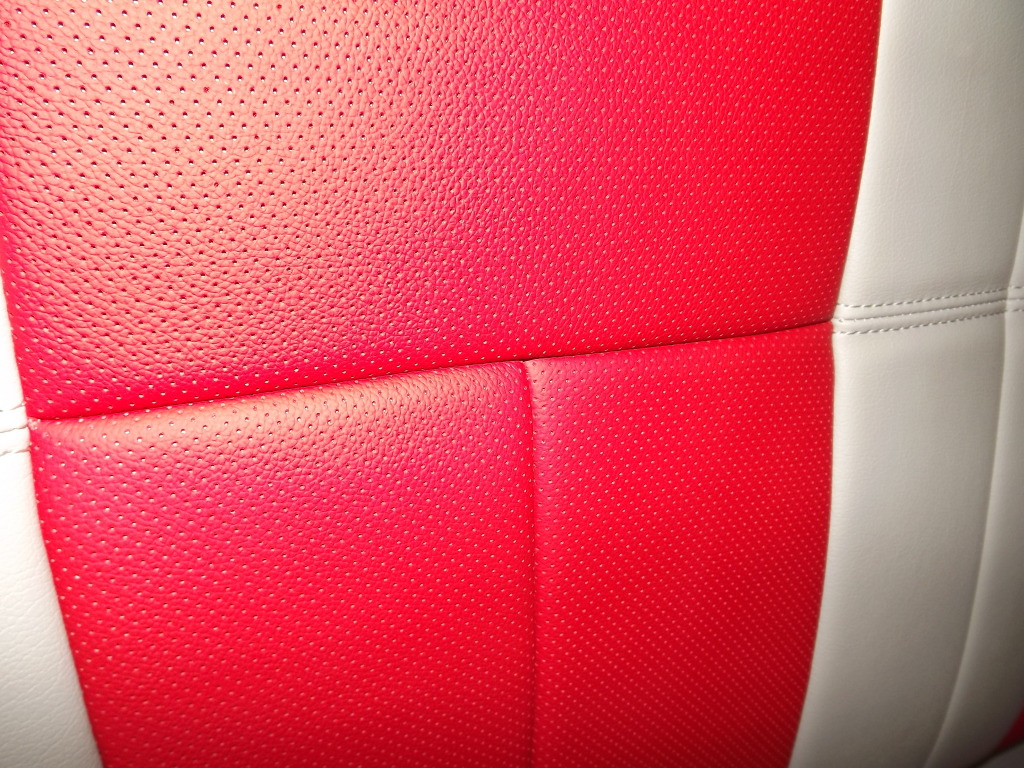
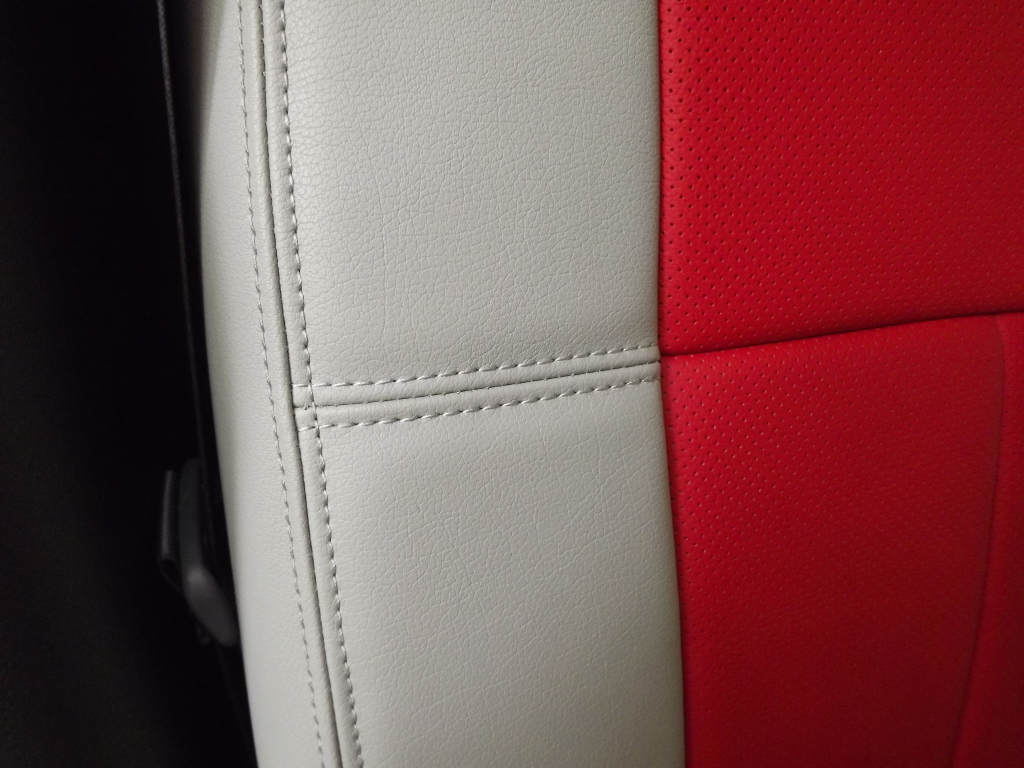
The quality is great, They are sown together with heaving stitching and have extra padding for comfort. They are soft and contour to your body very well but at the same time they provide great support. In addition to these not like other seat covers you have a separate bottom, top and headrest cover. So when looking at the quality add in the fact you are getting 6 headrest covers, both front bottoms and tops and in the back you get two bottom covers and either one top for the Scab or Two for the Screw!
2. Price!
When comparing these to others I have seen it is a no brainer! As a matter of fact it is comparing apples to oranges as these are more like a complete seat upholstery job than a seat cover. As you will see in the pictures these don't look like seat covers they look and feel like a new seats! Don't get me wrong they may have an occasional wrinkle here and there but you have to remember the pictures were taken right after I put them on. I am pretty sure once the heat of the sun and the cool of the morning act on the covers these will fade away! So looking at a difference of 150 bucks for leather inserts, heavy vinyl surrounds and the fact it costs nothing to have them custom made I consider it the best 150 bucks I spent.
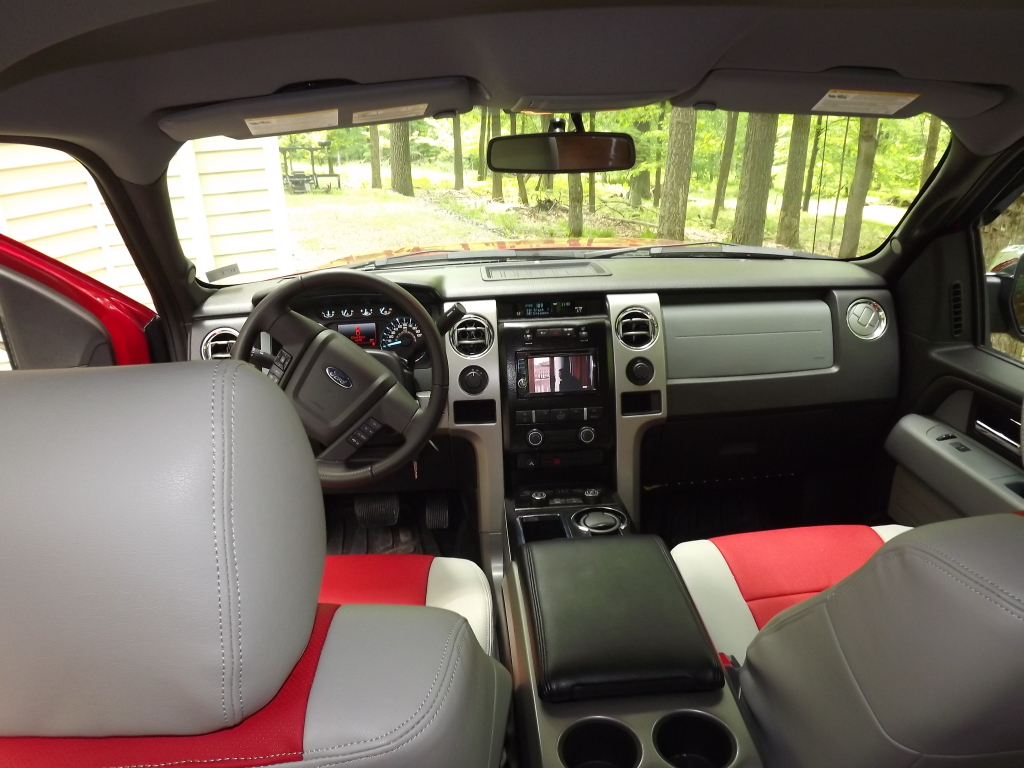
3. Fit!
The pictures tell the story here guys. They don't fit like seat covers, they fit almost perfectly as most upholstery jobs I have seen. TBS not everything is perfect in this world! So where do these covers have any sort of downfall?? Only one place and that downfall started from the Ford Factory, IMO! The center seat! You will notice I don't show the center seat as I hated it so badly I decided to replace it with a center console! I have seen posts of others that complained about the look and fit on the center seat. I am going to address this in a positive spin. First I will state "look at that damn thing"! It is the ugliest thing they could have put in our trucks. As I said, I hated mine so much that I replaced it with a console, that being said as far as the seat cover itself, it fits perfectly, but I give these guys credit just trying to make a cover to even fit the armrest part of this monstrosity! So if you get these covers and you have the center seat you will see just how great the covers look when the seat is flipped back, but when you flip the armrest down you will have to admit, it doesn't look good,,,,, BUT DID IT EVER? On that point at least if you spill something as you probably will since the cup holders are terrible at least you will be able to clean it easily!
4. Installation and directions!
Ok let's take a look at the directions! AS many times when you buy something the directions are worthless and you were better off not even looking at them and figure it out yourself. I would rate these as a 5 out of 10. The reason I say this is they are not as informative as they could (should) be. I checked out their video and that did help more so than the directions.
as for the install and time it took, well I always take my time on things and am never in a rush. I would say the video states about an hour and I am sure that would be the case if you did these a couple of times. I would give yourself about 2 to 3 hours unless you just attack your install.
The bottom front covers - This isn't to bad to install really, the hardest part is getting the back flap in-between the top and bottom of the seat. It is tight but I found tilting the seat back, back and forth helps. Also it has a Velcro strip on the bottom so after doing the first seat I folded the Velcro under the flap because it would grab on to the cloth seats. Once I did this it made things a lot better as to getting the flap through. Once that is done you simply fold over the sides and they include a tool to tuck the sides into the plastic seat base. Then you move the seat forward and from behind you tie the string (which really makes these covers fit tight) then pull the back flap as tight as you can and Velcro it to the bottom and you are done.
The top front covers - Again this isn't to bad at all,,, you invert (turn inside out) about half of the cover, slide it over the top and pull on one side at a time until you get it snug to the top. Then with the tool you lap over the headrest clips. They are also tight so take your time. They fit very well also. Then all you do is start unfolding the cover side to side and front and back until it is all the way on. Now comes the hard part as it was with the bottom, the back flap. Same issue as for being tight but now maybe a little more so since you have added to the thickness by putting the bottom flap through. NOTE! I did this on a humid day outside and as you know it seems to make things stick together,, that was the case with getting the top back flap tucked under the seat. Again I struggled with the first one and then took a cloth rag and put in over the bottom for the other side and this really helped with the sticking issue. after that you simply Velcro the flap to the back of the top cover.
The headrest - Ok now I will tell you this to me was the hardest part of the install!!! On the video I can tell you one thing the guy that is installing the headrest covers must have amazing strength! I swear I was going to rip the headrest covers and was almost worn out just getting the first one on. I thought there was no way this is going to go over the headrest but after 20 minutes or so I did get it on. I know they have to fit snug but I didn't think I was going to get them on without ripping them. TBS I am getting old and I do notice I don't have the strength I use to have in my hands. All I can tell you is they fit perfectly once you get them on and as I said you may think it is never going to go over without ripping them but for me that wasn't the case! I guess you can add this to the quality of the covers as if they didn't rip getting them over the headrest I doubt they will rip over time!
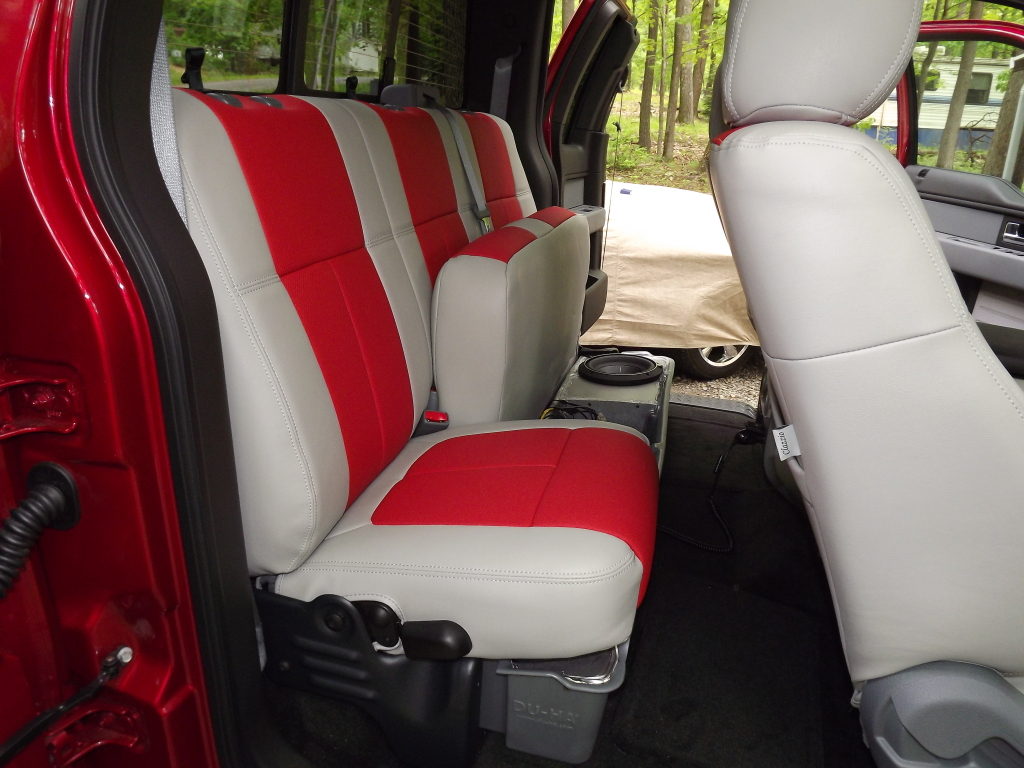
Back Seats *(SCAB only) - since I did this on a Scab I can't say how it will go on a Screw, I doubt you will have any issues as a matter of fact it may be easier. The directions here are very vague and here is what I did...
The top - the Scab has a one piece top and instead of fighting with it I decided to take the seat out. This did two things, 1st it make putting the top cover on really easy and 2nd it made doing the bottoms very easy. The top simply slips over the top and mostly is held in by the headrest clips. Of course you have six of them so I am sure the cover will never move. They also have four sections on the top they made tubular which will tuck behind the top and be wedged between the seat and the truck. I however put wire through these and attacked them to the back of the seat. This worked out great. Then all you do is simply pull the cover snug and attach the Velcro to the bottom.
05-24-2012, 01:49 PM
#3
Senior Member
Thread Starter
The bottom - these are easy, (with the top seat out) I think they would be just as hard as the front if you leave the top seat in as you have to slide the back flap between the top and bottom seat. Having the top seat out make this very easy, just pull the seat covers tights and Velcro them together!
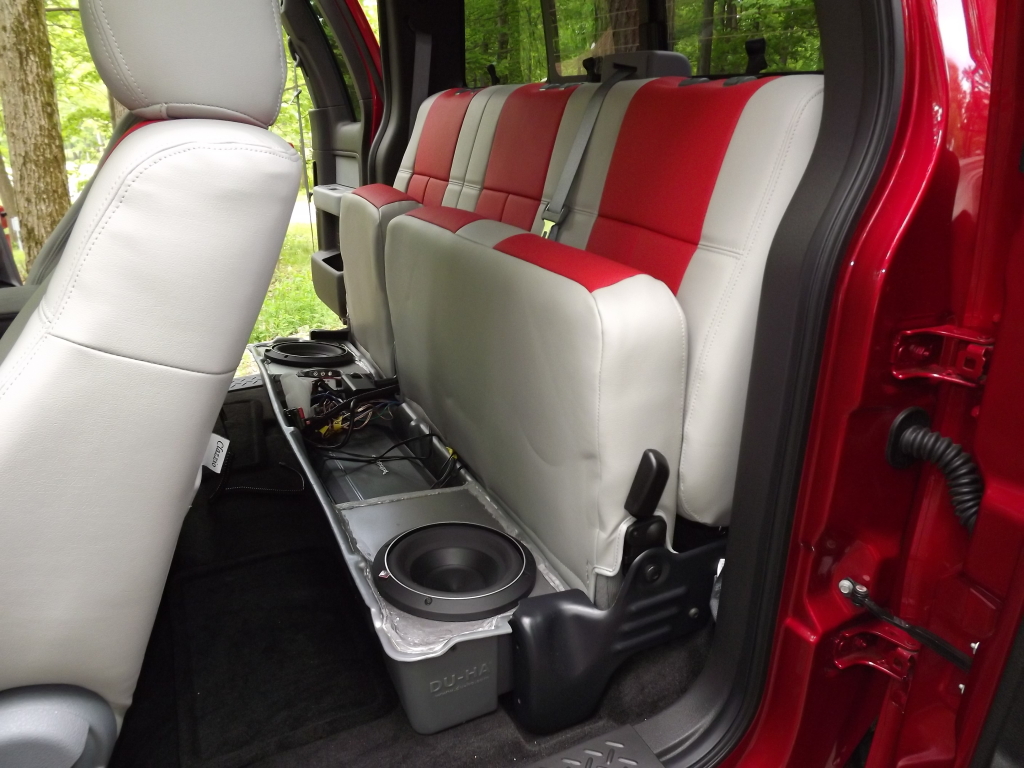
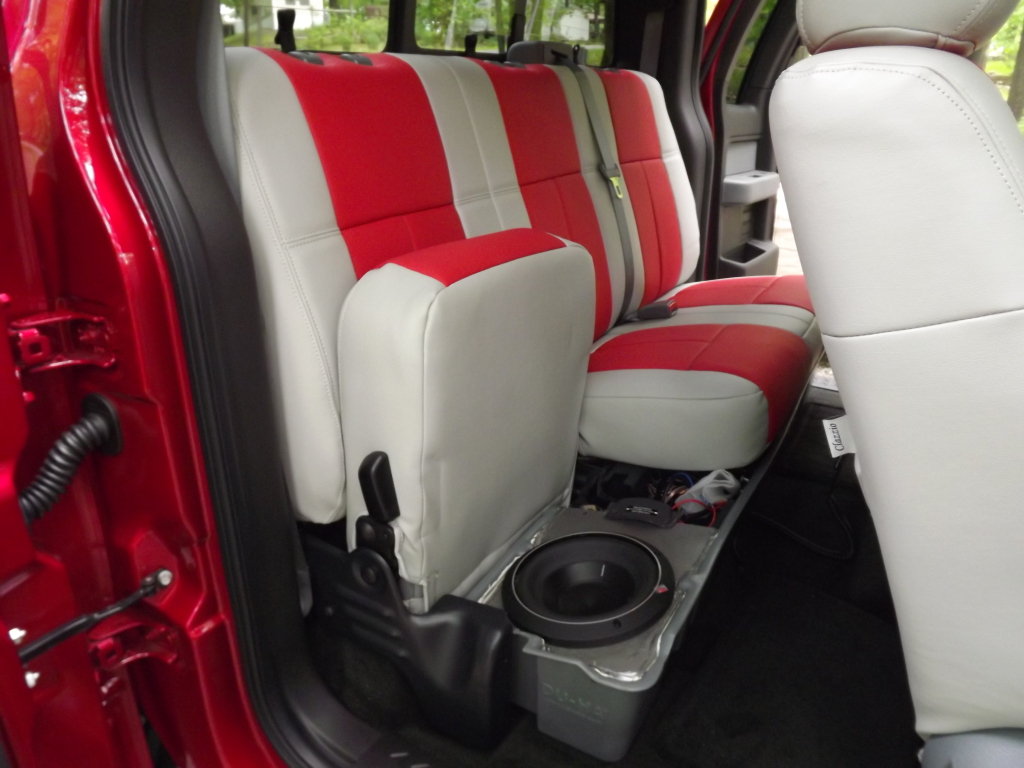
Back headrest - as in the pictures I took them out about a day or two after I got the truck! Could you make these headrests any bigger Ford?? Come on! They are huge and make seeing out the back a challenge to say the least so I removed them... If I have someone sitting back there I can simply put them in but the rest of the time, which is 99.99% of the time, I don't have them in. So will I cover them?? No,, as I said it is the hardest part of the install for me so why waste my time and make my hands feel worse than they already do for something that is mostly not going to be used!
Ok there you have it! And if you took the time to read this long review I have one more thing to offer... I have struck up a pretty good relationship with Spenser and was telling him to advertise on the forums. I said he should give some sort of discount for the guys in this forum and suggested if I like the covers and post pictures and a review would you be willing to offer a discount for those who took the time to read it? He was interested but didn't know how to offer a discount so we came to this agreement.... you can either call Spencer at 904-697-1557 and tell him mamonti from F150 forum told me to give you a call and get a discount off your order. Or use this code when placing an order online "F150FORUM".
I am not saying what the discount is but I am sure you will enjoy any savings off an already great price in my opinion!
Keep this in mind, I don't work for nor am I getting anything for this post! I think you will see from my review I am completely honest and think when we take the time to posts our Mod's and upgrades we are not only helping others here but also the company who's products the posts are about. That is why I asked Spencer to honor a special discount. Some have done the large order discounts but I think we should contact them to ask, as I did if they would honor an individual discount!
http://s1270.photobucket.com/albums/jj607/mamonti/seats/
Last edited by mamonti; 05-26-2012 at 08:23 AM. Reason: double post
The following users liked this post:
MarkNB (09-18-2016)
05-24-2012, 02:01 PM
#4
F150 Forum

Thanks for the great review, Mike! It was great doing business with you and please let me know if I can help with anything else in the future.
Your seat covers look amazing, I must say... The red insert really looks custom and great!
Your seat covers look amazing, I must say... The red insert really looks custom and great!
05-26-2012, 08:40 AM
#5
Senior Member
Thread Starter
Ok time for a little update! After using these for about a week now I can say they are very comfortable! Sliding in and out of the truck is even better and the covers haven't budged! As a matter of fact the wrinkles I spoke about in the review have faded away completely. I took it to the dealer yesterday and they thought I had it reupholstered! I am not kidding you! They couldn't believe they were only covers. So I highly recommend these if you are looking for a quality set of covers, don't like cloth seats and it is a breeze to add heater seats by just putting the heated pads on the existing seats and then install the covers over them. Just so you know if you are interested in the heated seats, the leather covers have extra padding in them which really adds to the comfort of the seats but it does take a couple of minutes for the heat to come through, but once it does they work perfectly. Also they hold the heat very well even after you turn the heat off. I also forgot to mention they come with a 3 year warranty!

Trending Topics
05-26-2012, 11:38 AM
#8
Proudly Canadian
Very impressed! I will be looking into a set of these for my FX4. Didn't think I would miss leather when I bought it, but I do. Hopefully they ship to Canada!!
05-26-2012, 12:31 PM
#9
Okay where did you get your bezel, it fits so nice! mine doesn't fit near as good as yours.
Also are you using the PAC module for the sync? my upper screen and sync don't work anymore and i have the sync module.
the Leather looks way custom and cool!! maybe my next upgrade once the lift is put in next month.
Also are you using the PAC module for the sync? my upper screen and sync don't work anymore and i have the sync module.
the Leather looks way custom and cool!! maybe my next upgrade once the lift is put in next month.
