
SCrew rear seat latch mod
 08-17-2012, 12:06 AM
#1
Member
Thread Starter

So I recently found out about the "hidden storage" space behind my new trucks rear seats, and after fumbling around for what seemed like an hour (probably 5 minutes) I finally managed to get one side down, after removing one of the headrests (I have large hands). After looking at the latch for a few minutes I came up with an idea. I did a search, and could only come up with the wire-tie mod, and it wouldn't work on mine as there is no "head" on the release. After about an hours worth of work, I came up with a pull release that allows me to access that space in just a few seconds.
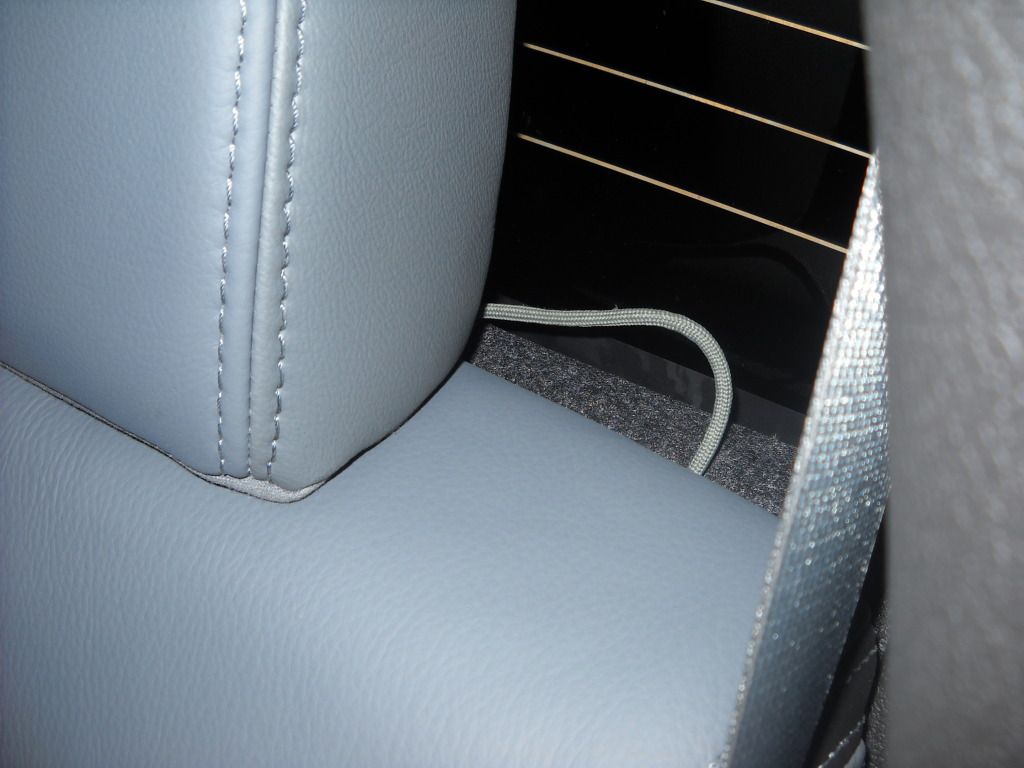
Best part is that I do NOT have to lift up the lower portion of the seat to unlatch it, and you can just raise it back up and it will latch into position, so long as you do not mess with the bar that slides in the bracket on the rear wall.
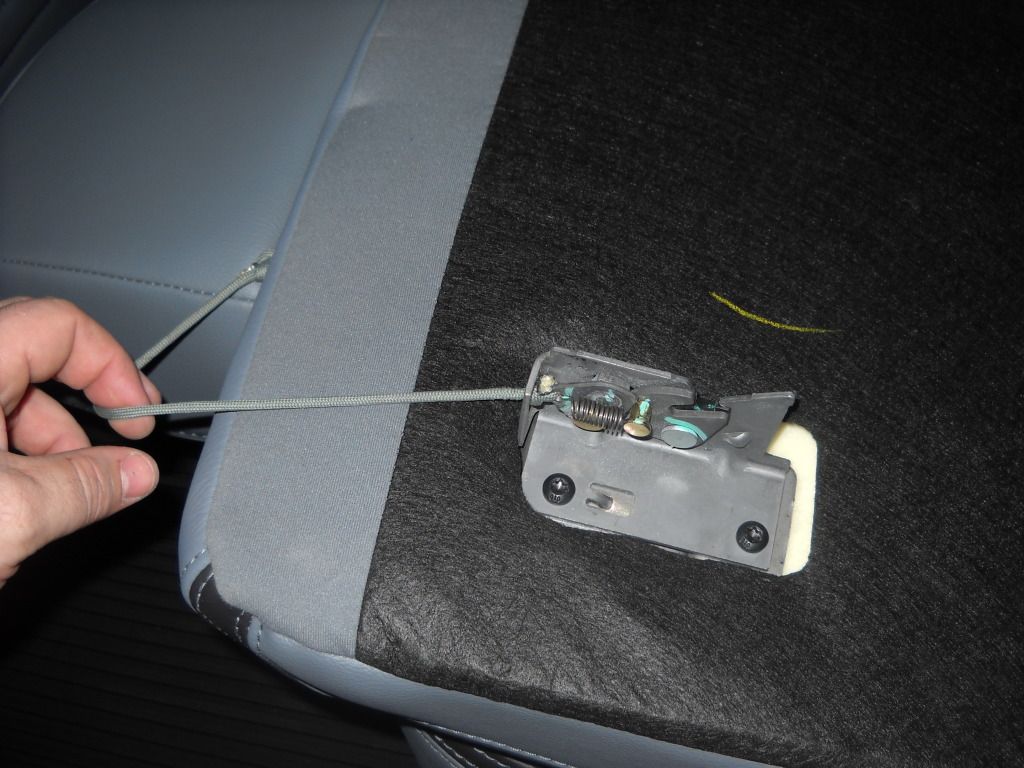
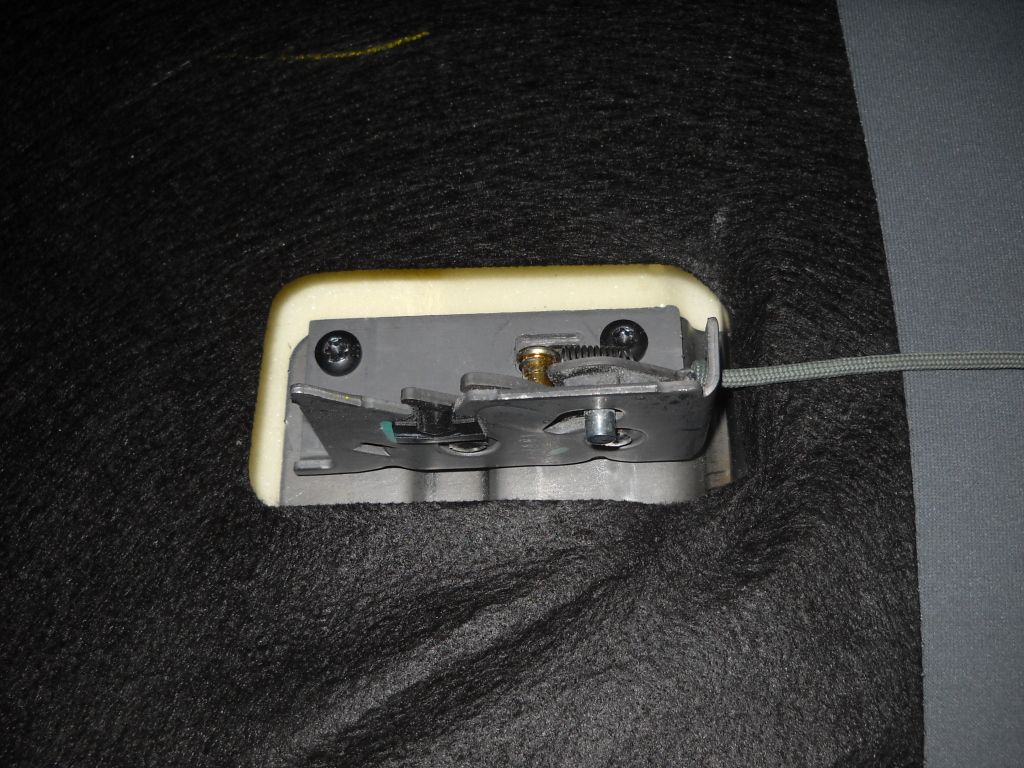
To accomplish this, I removed the bracket off of the seat back by taking out the 2 bolts with a T30 Torx bit.
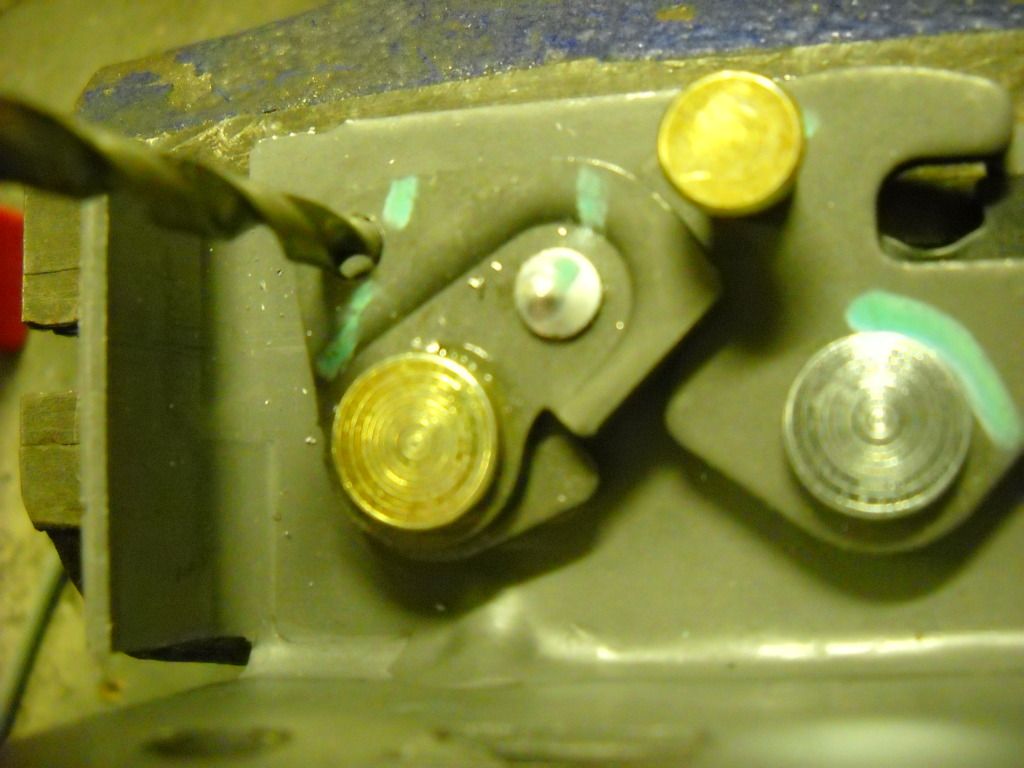
Next, I removed the spring that keeps tension on the 2 latches.
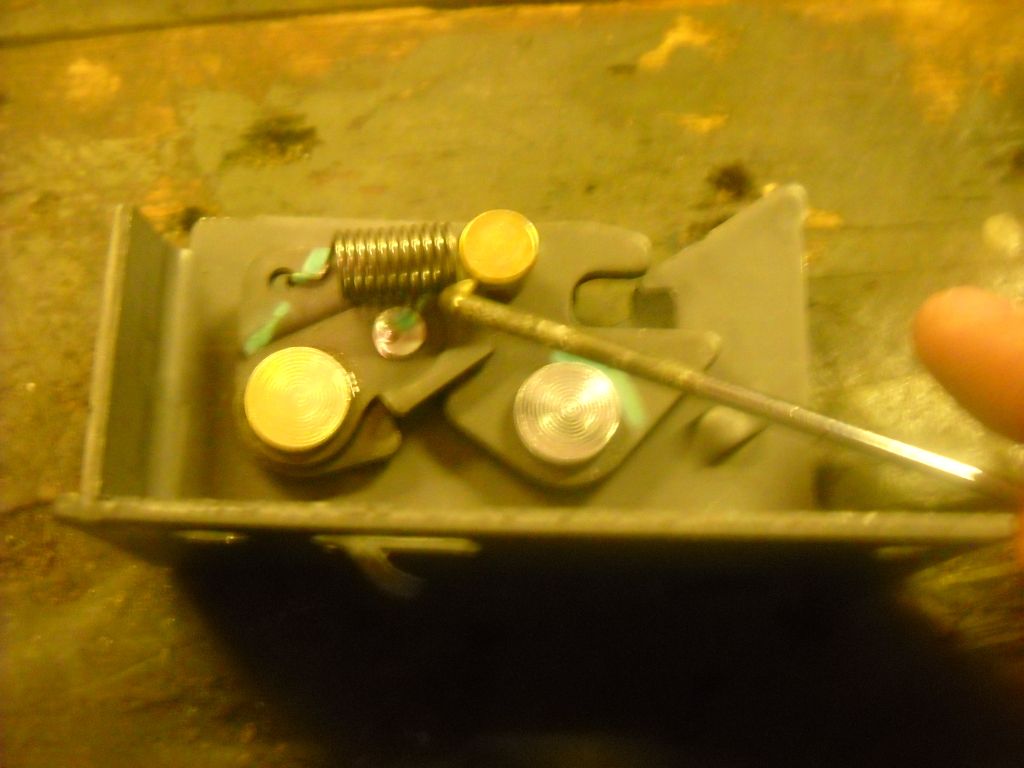
I then placed the whole bracket in the vise, clamping on the silver **** that you actually lift on to release the seat back. I then drilled out the hole that the spring clip goes into with a 3/16" drill bit.
Reposition the bracet in the vise, and drill 2 9/32" holes (one dead center, and the other just to the "back wall" side).
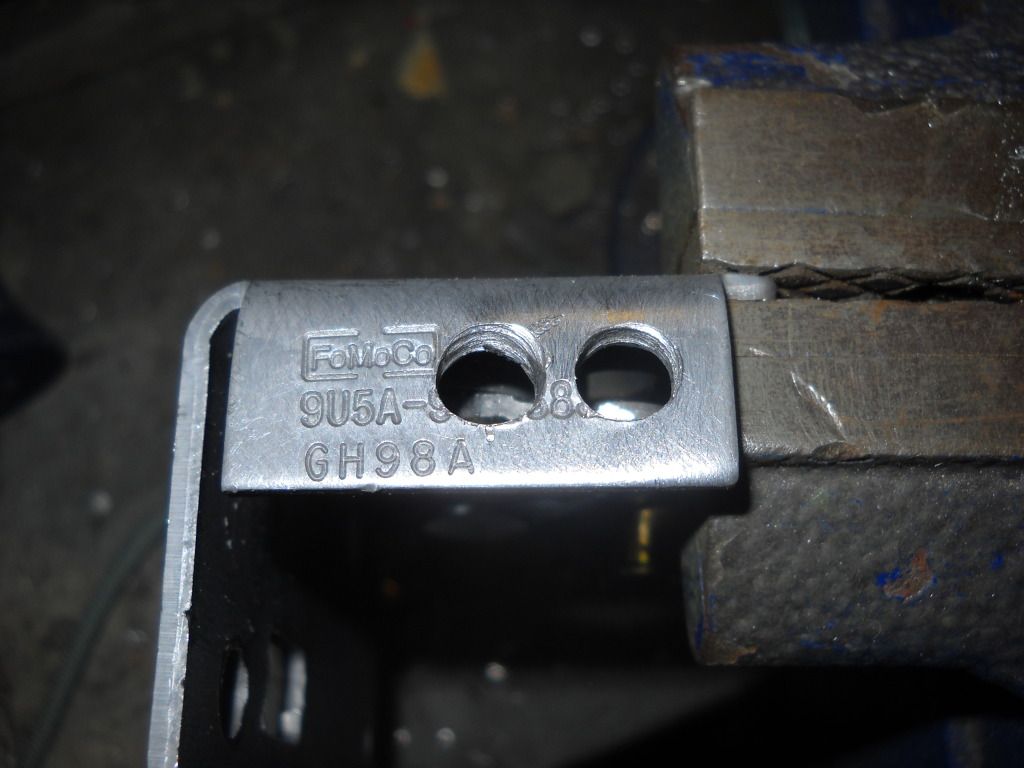
Using the trusty 'ole dremel tool and a thick cutoff wheel, remove the section between the 2 holes, making one oval shaped hole.
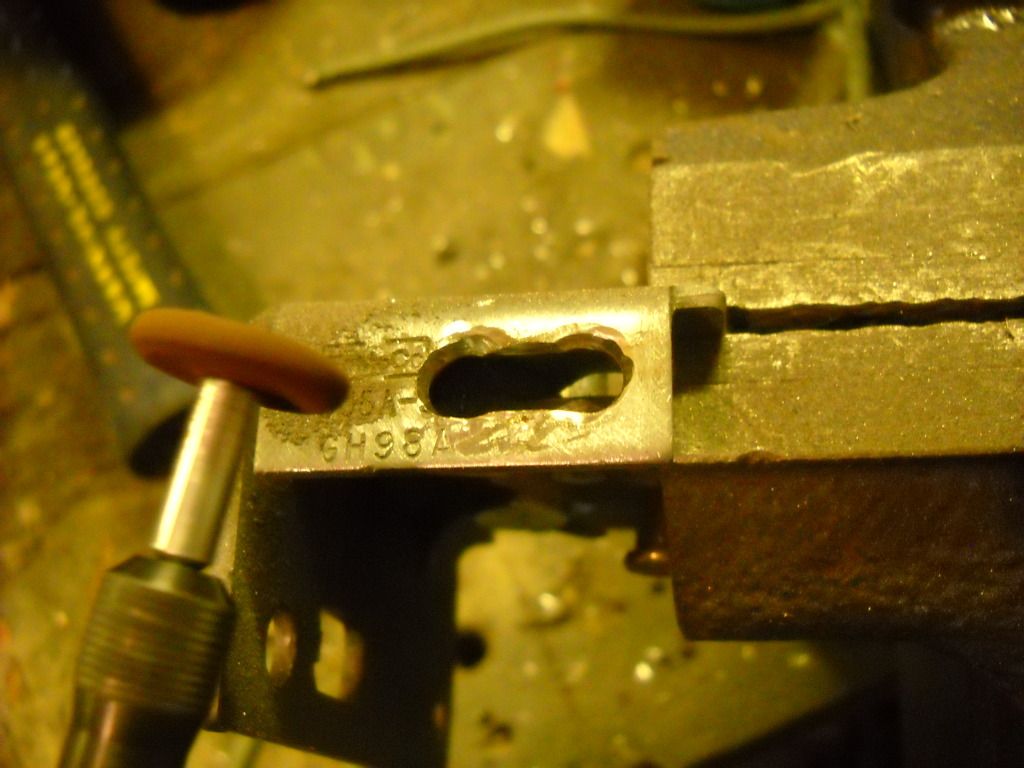
Swap the cutoff wheel for either a grey polishing wheel or one of the rounded orange stones and smooth/round out the edges on the top and bottom of the new elongated hole.
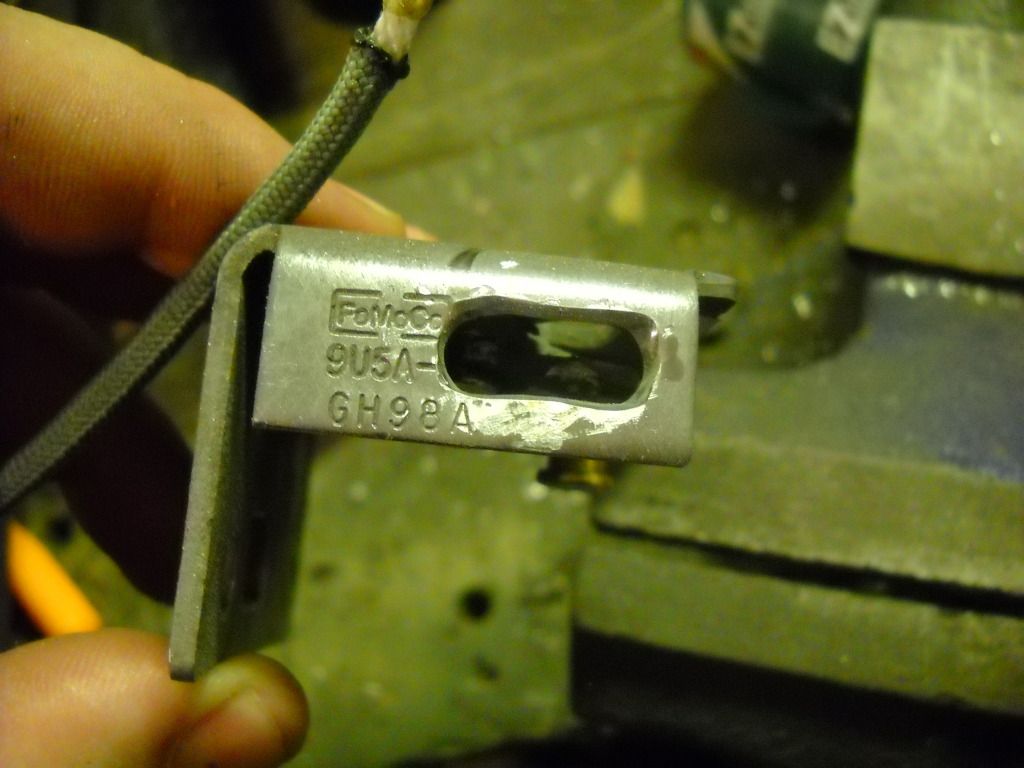
I then threaded about an 18" or so long piece of 550 Paracord through the new 3/16" hole and tied a knot. Make sure to melt and smash the end of the cord so it does not come loose and unravel.
.
Best part is that I do NOT have to lift up the lower portion of the seat to unlatch it, and you can just raise it back up and it will latch into position, so long as you do not mess with the bar that slides in the bracket on the rear wall.
To accomplish this, I removed the bracket off of the seat back by taking out the 2 bolts with a T30 Torx bit.
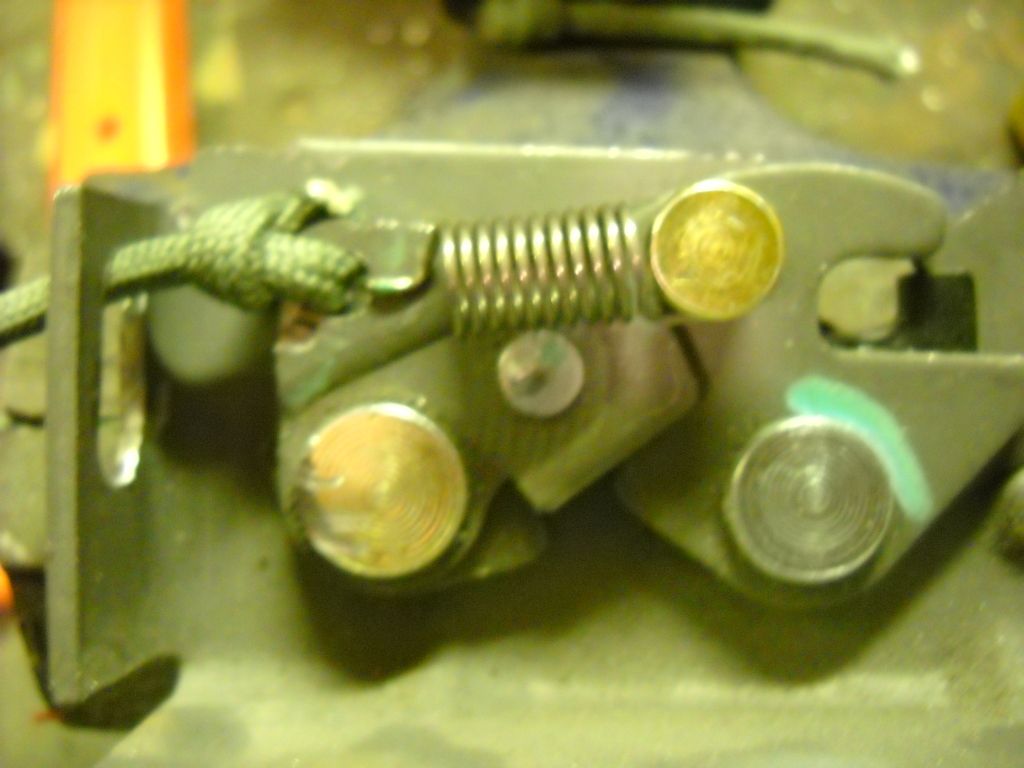
Next, I removed the spring that keeps tension on the 2 latches.
I then placed the whole bracket in the vise, clamping on the silver **** that you actually lift on to release the seat back. I then drilled out the hole that the spring clip goes into with a 3/16" drill bit.
Reposition the bracet in the vise, and drill 2 9/32" holes (one dead center, and the other just to the "back wall" side).
Using the trusty 'ole dremel tool and a thick cutoff wheel, remove the section between the 2 holes, making one oval shaped hole.
Swap the cutoff wheel for either a grey polishing wheel or one of the rounded orange stones and smooth/round out the edges on the top and bottom of the new elongated hole.
I then threaded about an 18" or so long piece of 550 Paracord through the new 3/16" hole and tied a knot. Make sure to melt and smash the end of the cord so it does not come loose and unravel.
.

The following 2 users liked this post by Richard in LA:
bulldogge (08-17-2012),
SHORTSTACK (08-18-2012)
08-17-2012, 12:07 AM
#2
Member
Thread Starter
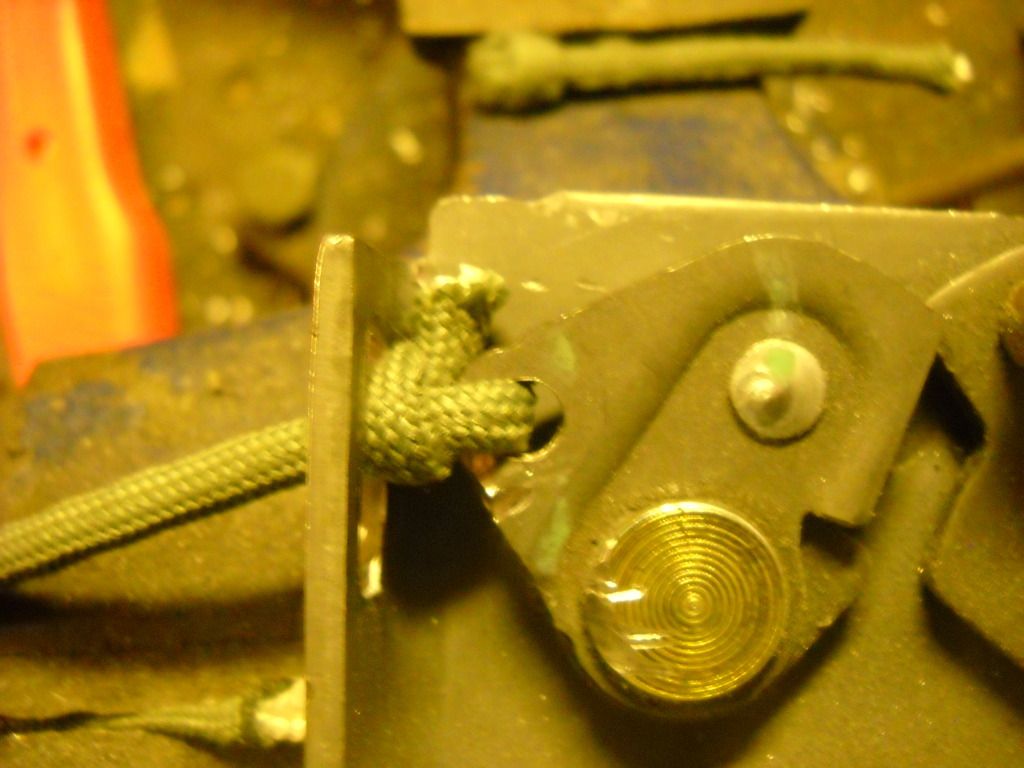
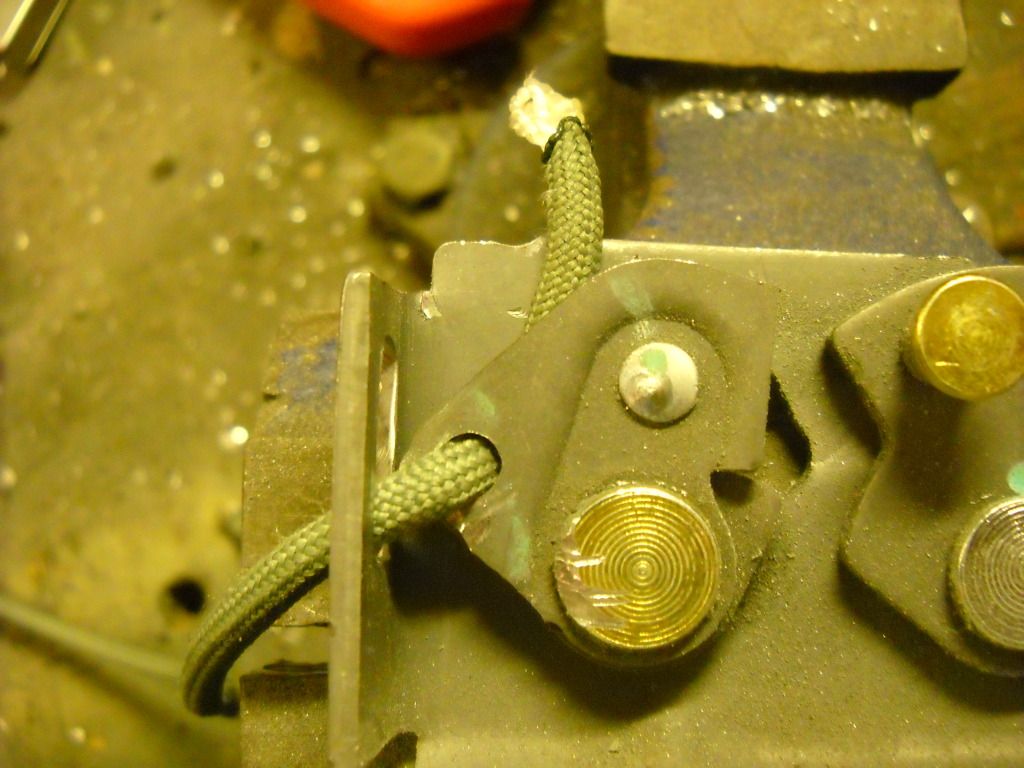
After tightening up on the knot pretty good, re-install the spring into the hole, and slip it back around the rod on the lower latch.
Re-install the bracket back onto the seatback with the T30 Torx bolts.
make a loop that is long enough to go around one of the rods of the headreast closest to the latch.
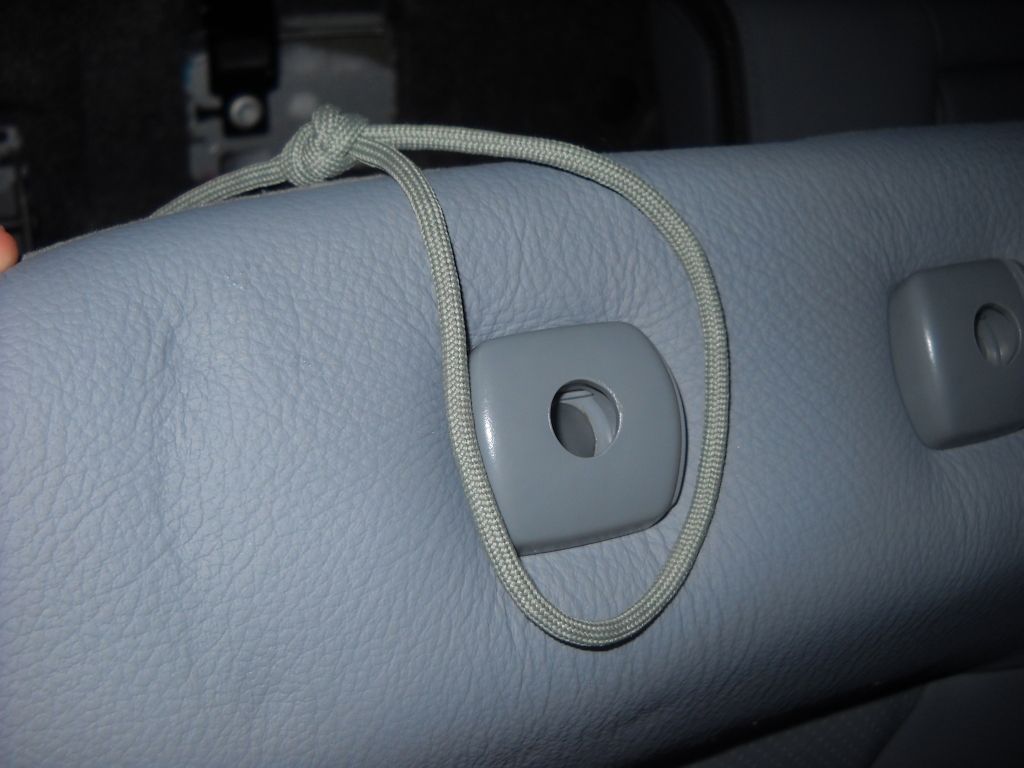
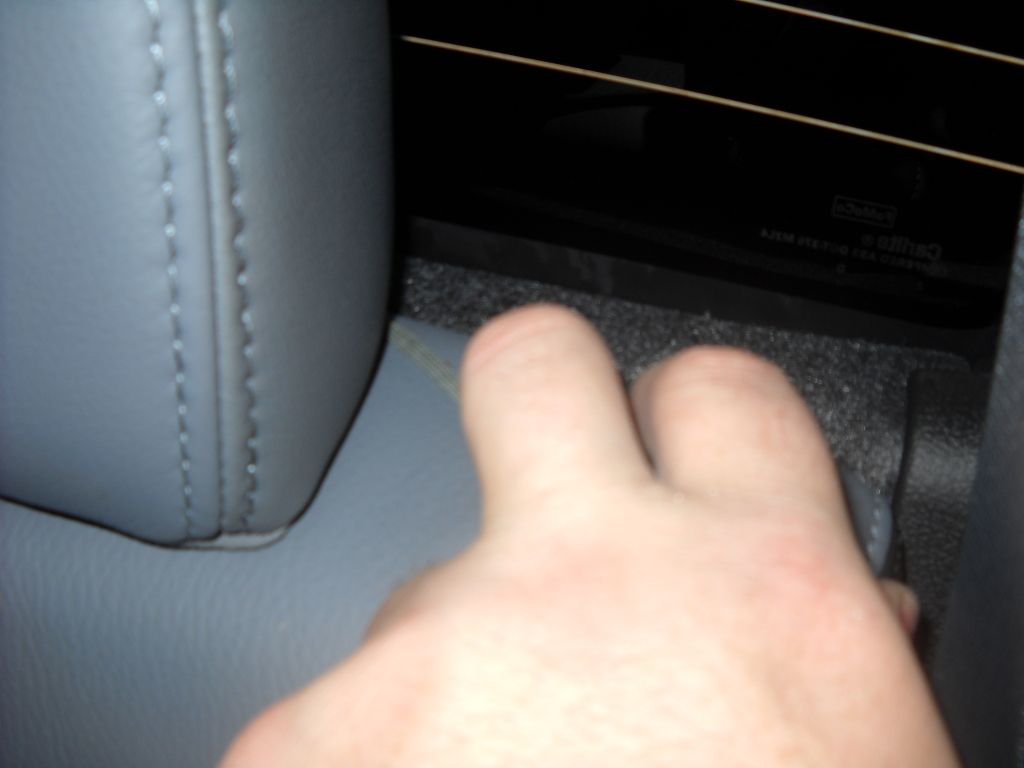
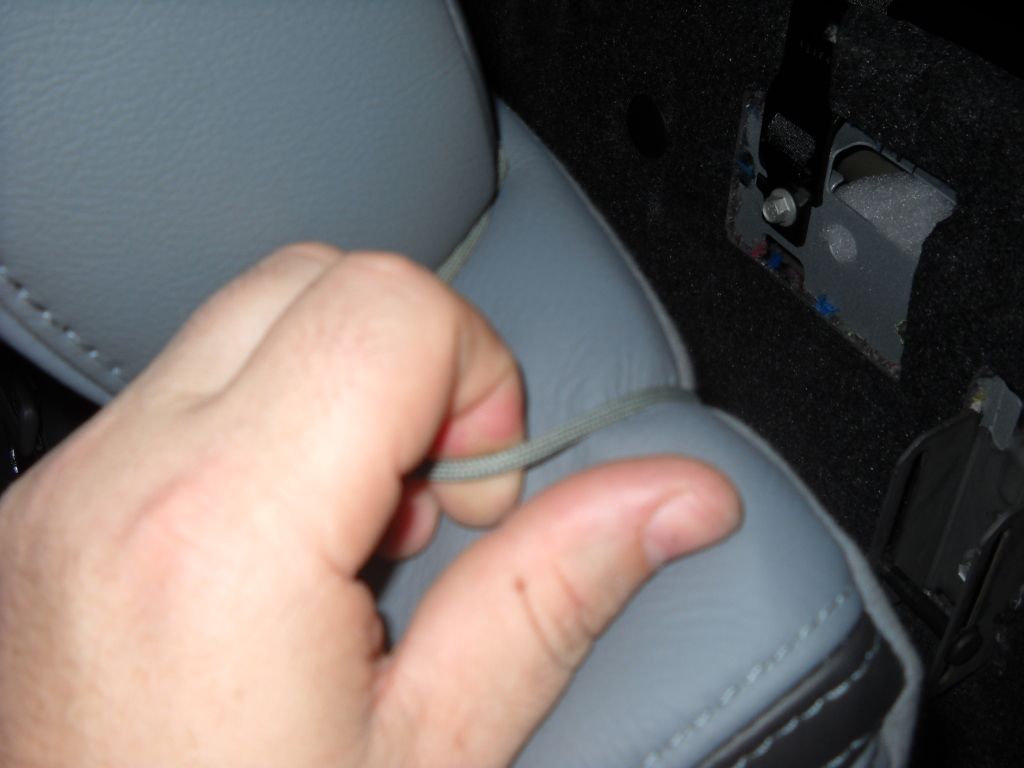
Reinstall the headrest, and check function of the latch. It may take some adjustment of the loop around the headrest to get it just right, but the cord can be tucked out of sight behind the seatback, and is quickly accessible by just running your finger behind the headrest, and with an upward tug, the seat comes forward easily.

All together, It took me maybe an hour to do both of them. I'm sure it will prove useful, as I'd rather keep jumper cables/tow straps/tools etc. back there, and have a nice place to stick my shotgun out of sight when I'm going to the clays range.
Short vid, I'll try and get a better one in the daylight when I get time.

Last edited by Richard in LA; 08-17-2012 at 12:45 AM. Reason: add video
08-17-2012, 12:16 AM
#3
Senior Member

Very nice. I've been using the closed end of a small (1/4" maybe) wrench to hook around the pin and pull straight up.
My issue is I want it to be more of a hidden place to store crap I don't want stolen if it ever gets broken into. I feel much more confident that a thief either wouldn't know about it at all, or be able to get it open in a hurry by me leaving it the way it is. Rifle, pistols are some things worth "hiding". You could even hide a spare key back there, and feel fairly confident they won't find it or even be able to get it open at all in a hurry.
My issue is I want it to be more of a hidden place to store crap I don't want stolen if it ever gets broken into. I feel much more confident that a thief either wouldn't know about it at all, or be able to get it open in a hurry by me leaving it the way it is. Rifle, pistols are some things worth "hiding". You could even hide a spare key back there, and feel fairly confident they won't find it or even be able to get it open at all in a hurry.
The following users liked this post:
SHORTSTACK (08-18-2012)
08-17-2012, 12:23 AM
#5
Member
Thread Starter
I agree. When the cord is tucked in and the headrests in the lowered position, it is not visible at all. I'd bet that in a smash/grab, that area would be overlooked. I actually did have to use a box end wrench to get them open the first time, and it was a PITA for me!
 08-17-2012, 12:34 AM
#7
Member
Thread Starter

Trending Topics
08-17-2012, 12:38 AM
#8
Senior Member

just use a bowline knot and have the tie portion outside of the plate opening that you drilled out so it doesn't get hung up in the bracket. my life depends on my knot tying abilities, so it's just something i critique often, no worries man. good mod!
Last edited by jcain; 08-17-2012 at 12:40 AM.
08-17-2012, 12:43 AM
#9
Member
Thread Starter
Makes perfect sense, And I'll probably do that in the near future. Thanks for the idea!

