
This is that retrofit thread we talked about!
 03-27-2013, 07:48 PM
#41
Huge Member
Thread Starter
You did good man! with the lights, not the girl.. ok both  but anyways i usually bake mine at 275 for 10 minutes.. so i guess there are different ways to skin this cat. brute force and a flat head is all it takes, u cant baby these lights and expect too get that lense off! im placing an order for my retros soon, so i'll be chiming in fo sho!
but anyways i usually bake mine at 275 for 10 minutes.. so i guess there are different ways to skin this cat. brute force and a flat head is all it takes, u cant baby these lights and expect too get that lense off! im placing an order for my retros soon, so i'll be chiming in fo sho!  03-27-2013, 09:37 PM
#43
Senior Member

I'm working on getting my first one opened up now. It's already been in the oven once and I got about 1/3 of the way around it before reheating. 6 more minutes and I'll be prying again!
03-27-2013, 10:00 PM
#44
Huge Member
Thread Starter
03-27-2013, 10:15 PM
#45
Senior Member
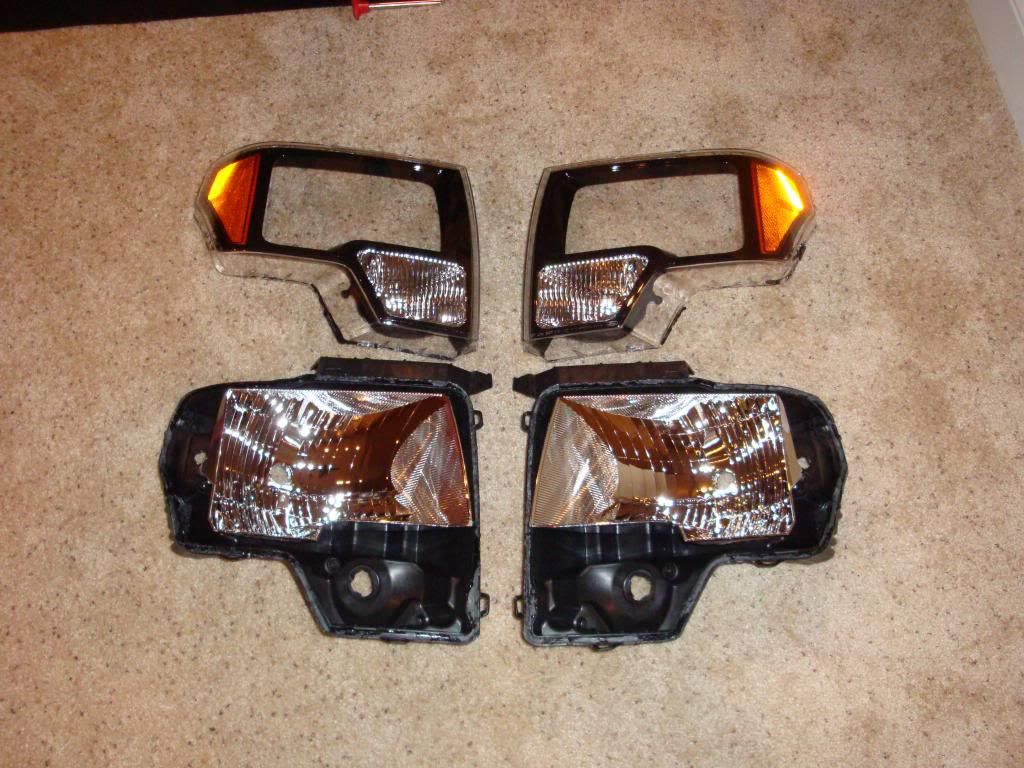
Got the first one opened up. Definitely don't be afraid to just rip it apart! Once the permaseal releases on the long edge you're in the home stretch! I did break two of the tabs trying to get a screwdriver under them but I think it'll be ok. When I finish I'm going to clamp them together for 24 hours anyways so I doubt the tabs will actually be holding anything. Now if I could just get the rest of the permaseal out of the channel and get the reflector out. I know hardcore said to drill a hole but it look like it would pop off the little pieces that are holding it on. Hmmmm.........
Second one has about 10 minutes left in the oven.
Second one has about 10 minutes left in the oven.
03-27-2013, 10:30 PM
#46
Huge Member
Thread Starter
Got the first one opened up. Definitely don't be afraid to just rip it apart! Once the permaseal releases on the long edge you're in the home stretch! I did break two of the tabs trying to get a screwdriver under them but I think it'll be ok. When I finish I'm going to clamp them together for 24 hours anyways so I doubt the tabs will actually be holding anything. Now if I could just get the rest of the permaseal out of the channel and get the reflector out. I know hardcore said to drill a hole but it look like it would pop off the little pieces that are holding it on. Hmmmm.........
Second one has about 10 minutes left in the oven.
Second one has about 10 minutes left in the oven.
03-27-2013, 11:33 PM
#49
Senior Member
Step #1 is just about finished up. I've got most of the permaseal out of the channel but I've still got a little more to get out. How much are you leaving in there? Some say get it all and some say don't even worry about it. That stuff is a PITA!
Can any of you actually track your packages and see progress? I still see that the label was created yesterday but no progress yet. I think I'll call TRS in the morning if I don't see anything.
Can any of you actually track your packages and see progress? I still see that the label was created yesterday but no progress yet. I think I'll call TRS in the morning if I don't see anything.
03-27-2013, 11:42 PM
#50
Confused Member
Looks good guys!! Subbed for progress!

