
Front brakes how to...09+
 10-31-2012, 04:54 PM
#1

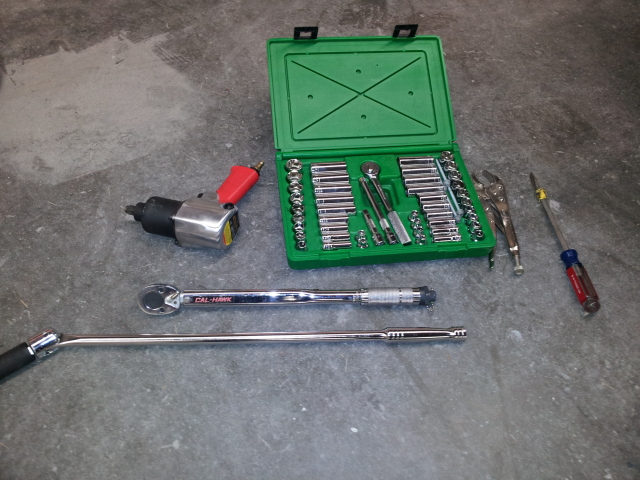
I found a couple of write ups on here before for doing brakes. but I decided to do my own seeing as how I took tons of pictures.* Tools you will need are:
-A floor jack
- Jack stands
-3/8" drive socket set
- Something to pop the hub cap off. In my case a large flat head screw driver
-1/2" drive breaker bar, if you don't have access to compressed air. If you do you can use a
-1/2" impact
-21mm socket 1/2" drive
- Torque wrench
-2 C clamps
- Rubber mallet
Pretty much like so
Jack up your truck, using the recommended lift points. I'm not going to detail this here, as this is a brake thread. There are threads for jacking up your truck, and proper placement of the jack stands. I'm not going to be responsible for some noodle brain that jacked up his truck on the oil pan. Make sure the truck is safe to work under, before you start zinging the wheel off.
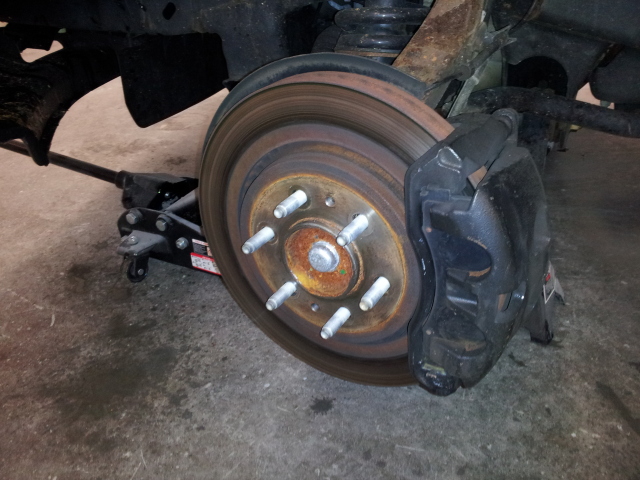
Remove the wheel (not pictured, sorry) In my case its a 21mm for the lugs. This may be different for you. Use the appropriate size for yours.
And you will be here
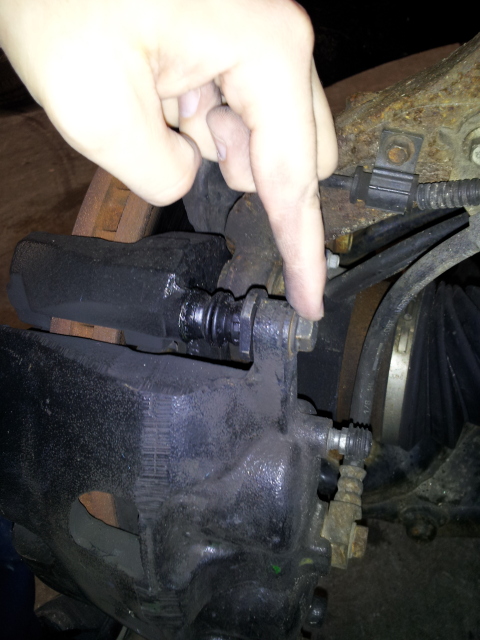
Now i turned the wheel to gain easier access to the bolts on the back of the caliper. BE EXTREMELY CAUTIOUS IF YOU DO THIS. ONLY DO SO IF YOU ARE POSITIVE IT IS SAFE TO DO! YOU CAN DO THIS WITHOUT TURNING THE WHEEL.
AGAIN I WILL NOT BE RESPONSIBLE FOR SOMEONE DROPPING THEIR TRUCK ON THEM, BECAUSE THEY TURNED THE WHEEL, BUT DIDN'T PROPERLY AND SAFELY JACK UP THEIR TRUCK.
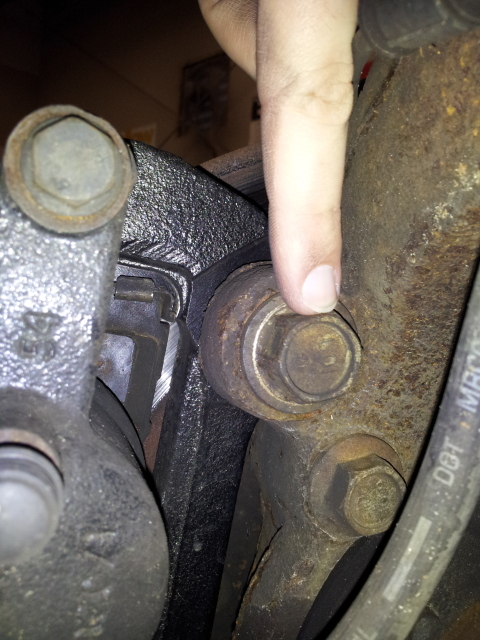
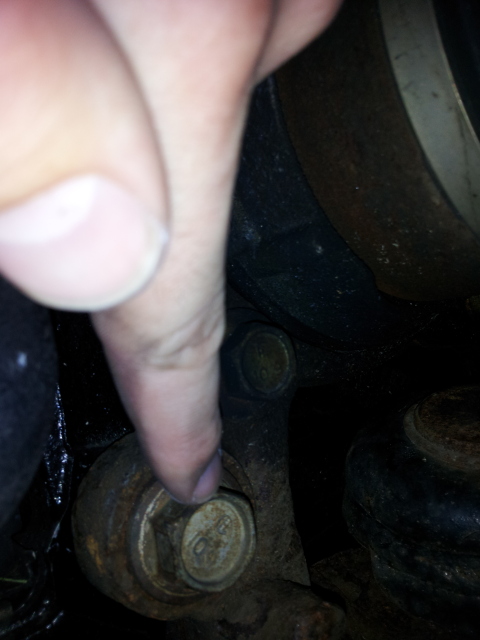
On the back of the caliper there are 2 bolts 13mm. The upper here
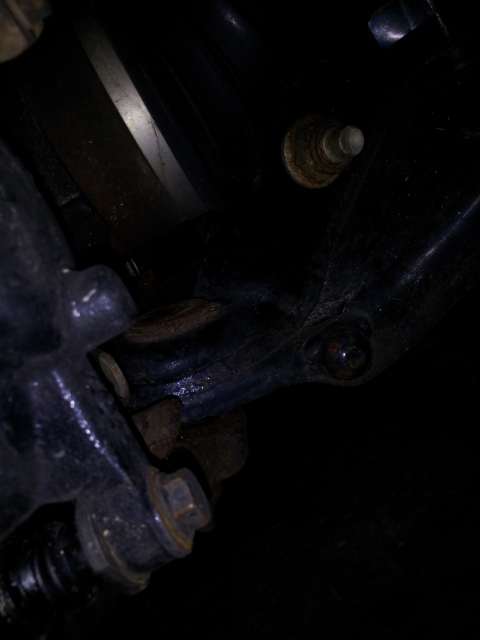
And the lower here (bad pic, sorry)
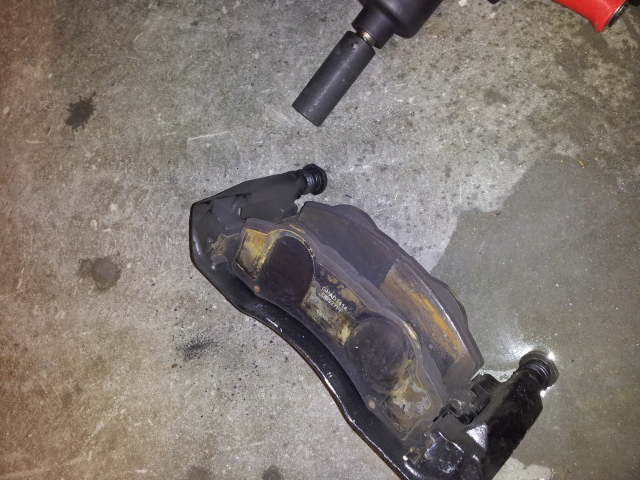
You may want to soak these with penetrating oil. As they may be tough to remove. Also the caliper may be tough to slide out also. Use a RUBBER MALLET to persuade it out...not a ball peen hammer...you may damage something on the caliper using a ball peen. Then use the wire or the wire ties to hang up the caliper, and not ruin the brake line. You should be here
Caliper off, pads still there
Caliper hanging safely out of the way

-A floor jack
- Jack stands
-3/8" drive socket set
- Something to pop the hub cap off. In my case a large flat head screw driver
-1/2" drive breaker bar, if you don't have access to compressed air. If you do you can use a
-1/2" impact
-21mm socket 1/2" drive
- Torque wrench
-2 C clamps
- Rubber mallet
Pretty much like so
Jack up your truck, using the recommended lift points. I'm not going to detail this here, as this is a brake thread. There are threads for jacking up your truck, and proper placement of the jack stands. I'm not going to be responsible for some noodle brain that jacked up his truck on the oil pan. Make sure the truck is safe to work under, before you start zinging the wheel off.
Remove the wheel (not pictured, sorry) In my case its a 21mm for the lugs. This may be different for you. Use the appropriate size for yours.
And you will be here
Now i turned the wheel to gain easier access to the bolts on the back of the caliper. BE EXTREMELY CAUTIOUS IF YOU DO THIS. ONLY DO SO IF YOU ARE POSITIVE IT IS SAFE TO DO! YOU CAN DO THIS WITHOUT TURNING THE WHEEL.
AGAIN I WILL NOT BE RESPONSIBLE FOR SOMEONE DROPPING THEIR TRUCK ON THEM, BECAUSE THEY TURNED THE WHEEL, BUT DIDN'T PROPERLY AND SAFELY JACK UP THEIR TRUCK.
On the back of the caliper there are 2 bolts 13mm. The upper here
And the lower here (bad pic, sorry)
You may want to soak these with penetrating oil. As they may be tough to remove. Also the caliper may be tough to slide out also. Use a RUBBER MALLET to persuade it out...not a ball peen hammer...you may damage something on the caliper using a ball peen. Then use the wire or the wire ties to hang up the caliper, and not ruin the brake line. You should be here
Caliper off, pads still there
Caliper hanging safely out of the way


Popular Reply
10-31-2012, 04:56 PM
Also, now is a good time to paint your calipers if you've been wanting to do that. I did mine awhile ago so I'm good here.
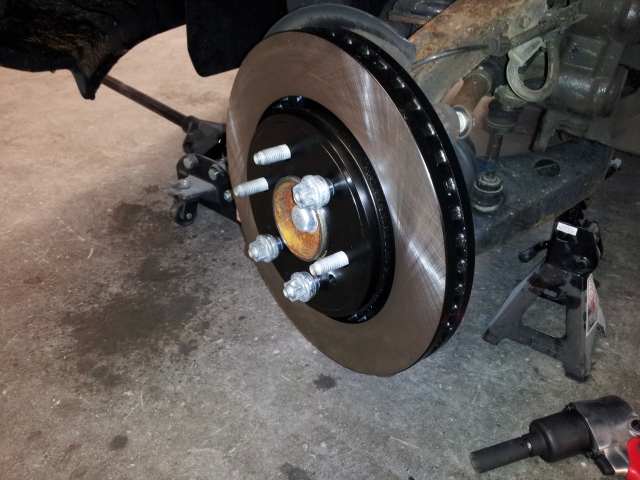
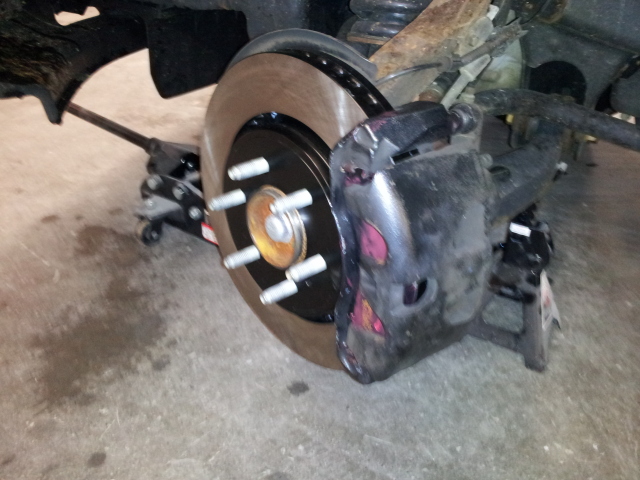
With the mount off the rotor should just slide off over the lug studs.
Slide the new rotor on. I put 3 lug nuts back on, to hold it in place flush with the hub.
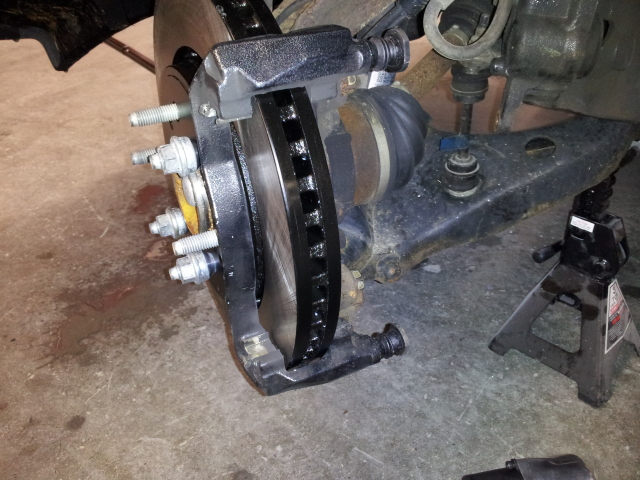
Reinstall the mount. I just tightened the bolts here...i didn't torque them. Wasn't sure of the spec.
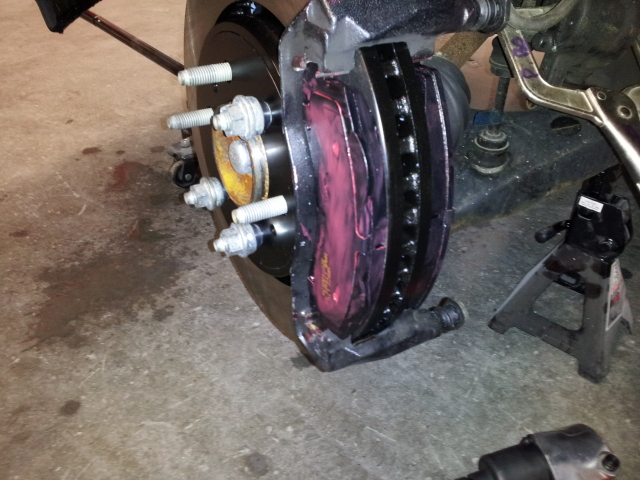
Install the pads, use the supplied brake grease!! That's the red stuff you see. Put it on the mount clips and on the back of the pads where the caliper contacts them. This will stop noise.
Compress the pistons back into the caliper using C clamps. DO BOTH EVENLY. If you do one at a time, the other will bulge out. Then remove the clamps before reinstalling ths caliper. The pistons will stay.
Reinstall the caliper.
I recommend bleeding the brakes here. I'm not going to write up how, there are tons of threads, and write ups on doing that. Just start with the wheel farthest away from the master cylinder.
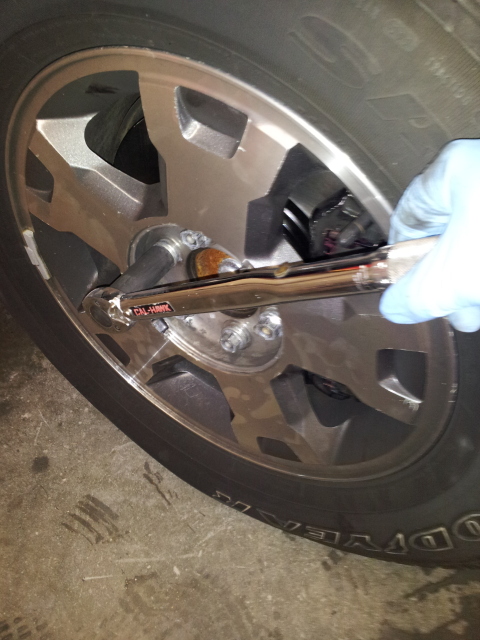
Reinstall the wheel and torque to 150 ft lbs. Per the owners manual.
Then do for the other side.
Do the bed in process for the pads you bought. This is important. Not doing this, or doing this incorrectly will give you brake jutter. Which is commonly misdiagnosed as "warped rotors"
A link to how/why
http://rivperformance.editboard.com/...-in-procedures
And your done!
With the mount off the rotor should just slide off over the lug studs.
Slide the new rotor on. I put 3 lug nuts back on, to hold it in place flush with the hub.
Reinstall the mount. I just tightened the bolts here...i didn't torque them. Wasn't sure of the spec.
Install the pads, use the supplied brake grease!! That's the red stuff you see. Put it on the mount clips and on the back of the pads where the caliper contacts them. This will stop noise.
Compress the pistons back into the caliper using C clamps. DO BOTH EVENLY. If you do one at a time, the other will bulge out. Then remove the clamps before reinstalling ths caliper. The pistons will stay.
Reinstall the caliper.
I recommend bleeding the brakes here. I'm not going to write up how, there are tons of threads, and write ups on doing that. Just start with the wheel farthest away from the master cylinder.
Reinstall the wheel and torque to 150 ft lbs. Per the owners manual.
Then do for the other side.
Do the bed in process for the pads you bought. This is important. Not doing this, or doing this incorrectly will give you brake jutter. Which is commonly misdiagnosed as "warped rotors"
A link to how/why
http://rivperformance.editboard.com/...-in-procedures
And your done!
10-31-2012, 04:55 PM
#2
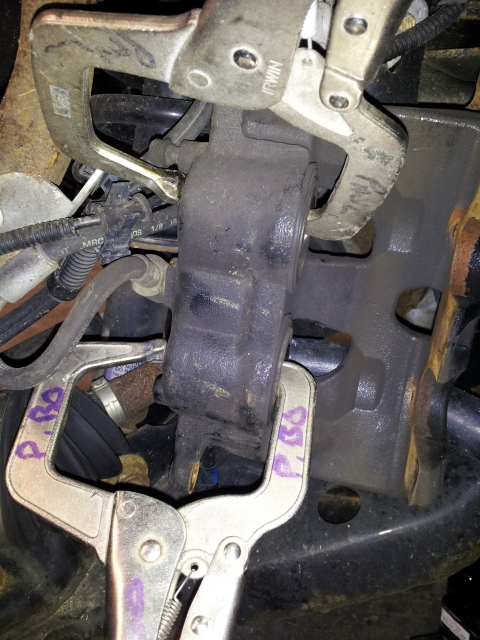
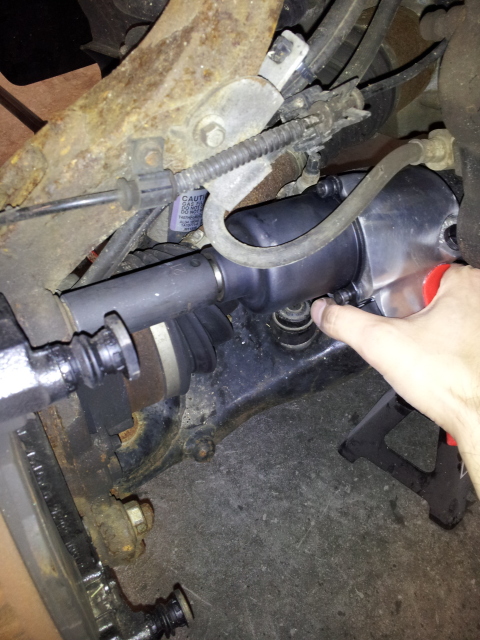
Now, look on the back of the caliper mount. There should be 2 bolts. An upper here
And a lower here(bad pic, sorry)
These are 21mm also. You'll need penetrating oil here. Also a good spot to use the breaker bar. I used an impact of course. I left the pads in. Easier to remove them with the mount off.
Pop the pads out, they should come right out.
Now you're ready for the new stuff.
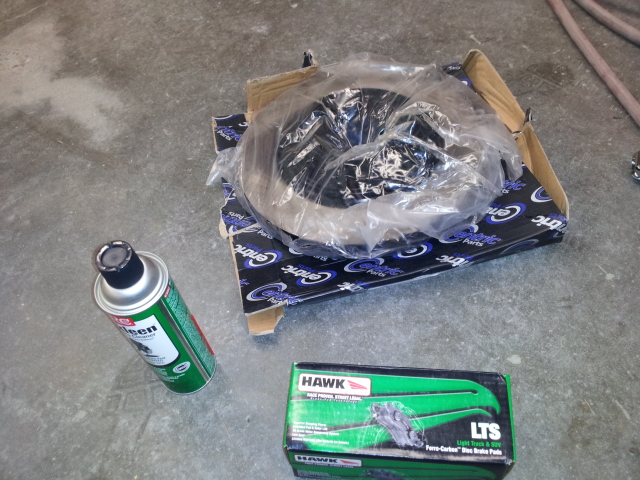
I replaced everything, i have a set of Hawk LTS brake pads, and new Centrix rotors. Also a can of brakleen.
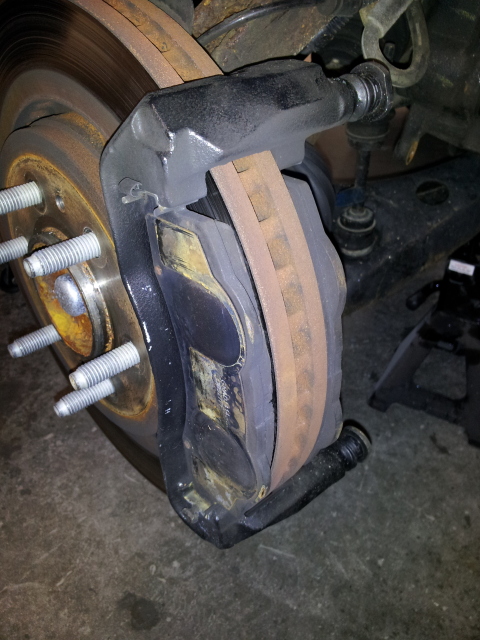
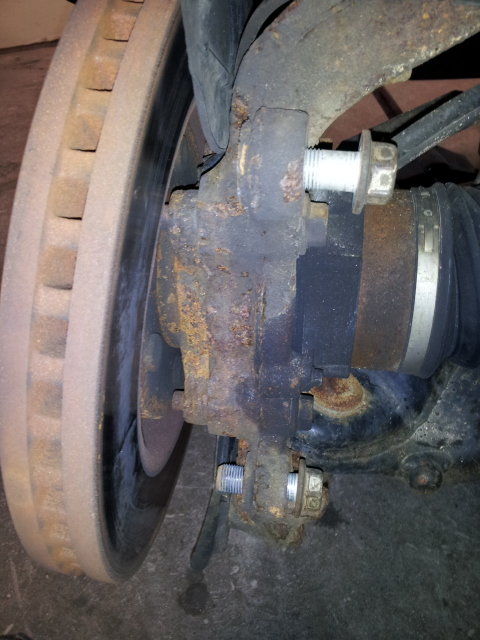
At this point check over everything, caliper, the mount, the clips the pads slide on, everything...you may need to replace more than i did.
And a lower here(bad pic, sorry)
These are 21mm also. You'll need penetrating oil here. Also a good spot to use the breaker bar. I used an impact of course. I left the pads in. Easier to remove them with the mount off.
Pop the pads out, they should come right out.
Now you're ready for the new stuff.
I replaced everything, i have a set of Hawk LTS brake pads, and new Centrix rotors. Also a can of brakleen.
At this point check over everything, caliper, the mount, the clips the pads slide on, everything...you may need to replace more than i did.
The following users liked this post:
BobbyC (06-28-2015)
10-31-2012, 04:56 PM
#3
Also, now is a good time to paint your calipers if you've been wanting to do that. I did mine awhile ago so I'm good here.
With the mount off the rotor should just slide off over the lug studs.
Slide the new rotor on. I put 3 lug nuts back on, to hold it in place flush with the hub.
Attachment 528822
Reinstall the mount. I just tightened the bolts here...i didn't torque them. Wasn't sure of the spec.
Attachment 528823
Install the pads, use the supplied brake grease!! That's the red stuff you see. Put it on the mount clips and on the back of the pads where the caliper contacts them. This will stop noise.
Attachment 528824
Compress the pistons back into the caliper using C clamps. DO BOTH EVENLY. If you do one at a time, the other will bulge out. Then remove the clamps before reinstalling ths caliper. The pistons will stay.
Attachment 528825
Reinstall the caliper.
Attachment 528826
I recommend bleeding the brakes here. I'm not going to write up how, there are tons of threads, and write ups on doing that. Just start with the wheel farthest away from the master cylinder.
Reinstall the wheel and torque to 150 ft lbs. Per the owners manual.
Attachment 528827
Then do for the other side.
Do the bed in process for the pads you bought. This is important. Not doing this, or doing this incorrectly will give you brake jutter. Which is commonly misdiagnosed as "warped rotors"
A link to how/why
http://rivperformance.editboard.com/...-in-procedures
And your done!
Last edited by 21RRF150; 10-31-2012 at 07:13 PM.
The following 13 users liked this post by 21RRF150:
1stfordf150 (01-01-2013),
2ndGearHero (04-29-2015),
BobbyC (06-28-2015),
boosted150 (11-24-2012),
Cowpig (04-20-2016),
and 8 others liked this post.
 10-31-2012, 05:15 PM
#5
Originally Posted by Corylax18
Nice write up. Thanks man. Do the C clamps hit the rotor or anything when you are sliding the caliper back on?

Trending Topics
10-31-2012, 05:31 PM
#8

Once the pistons are compressed back into the caliper, they stay put, so you remove the clamp after compression. You have to compress them or the new pads won't fit back into the caliper.
10-31-2012, 07:11 PM
#9
Originally Posted by jdog0411
Once the pistons are compressed back into the caliper, they stay put, so you remove the clamp after compression. You have to compress them or the new pads won't fit back into the caliper.
11-01-2012, 11:55 AM
#10
Girthy Member