
Center console light
 12-28-2011, 09:28 AM
#11
2013 Ruby Red FX4 SCrew

I got the mercury switch from an old Honeywell furnace thermostat... 0$ as well...

 01-02-2012, 12:07 AM
#13
F-ONE FIVE O
This weekend I had time to add the center console light with LED strips from ALPENA MAX LEDs. I borrowed this PIC from 2011FX2CRAZYS post cause I didnt take a pic of the LED before and this is exactly what I used.
Here is the thread that I started on what I have done so far
11 F150 XLT Center Console Enchancement
BACK TO TOPIC
Youll need:
-Drill
-1/4 drill bit
-electrical wire
-electrical tape
-LED strip
-Single Pole Single Throw switch (button) Operates Normally in the Closed postion (ON postions)
OPTIONAL
-Solerding Iron
-Flux
-Solder
I used the soldering iron to solder the cables to the switch and one end to the 12V lead of the LED strip
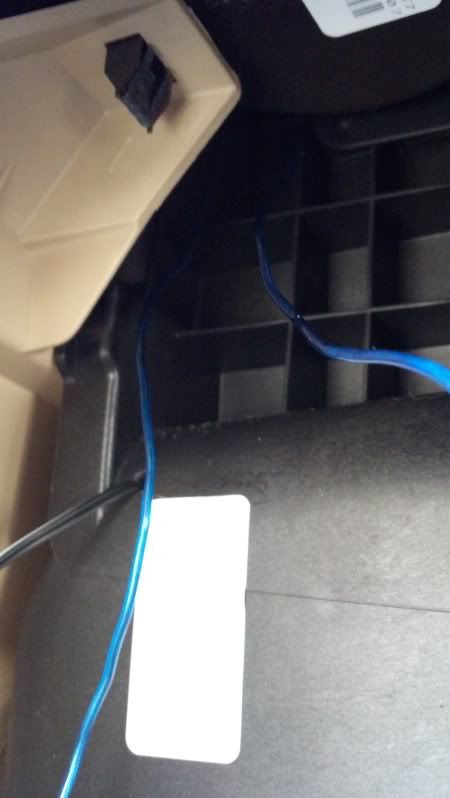
Pop the rear end of the console off just pull straight out not too hard where you will pull and break the wires out. The 12v cigarette outlet has two wires comign from it. The 12v source and the ground. I forgot what colors make the factory set up so use a multimeter and find out whatis what. The blue cable in my set up is the +12V going to the switch and the ground from the LED strip is tied to the ground on the 12V cigarette outlet
SIDE NOTE: In retrospect; Instead of running cables to the 12V outlet adapter (GREY PLUG) I would have used the the adpater that is close to the ground(GREY PLUG)
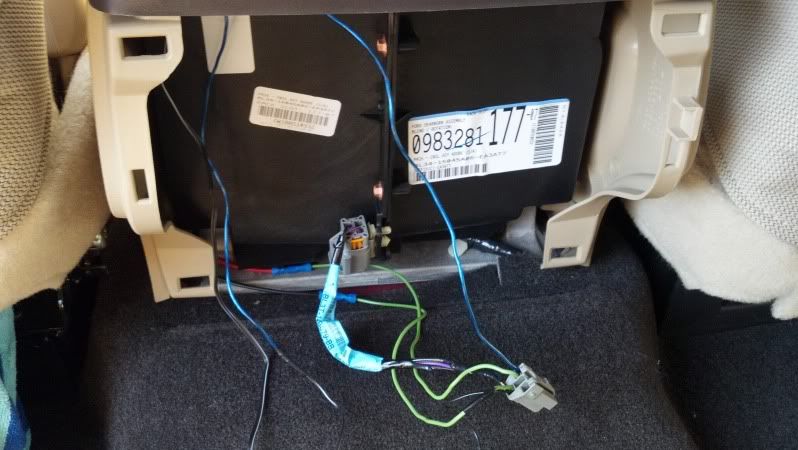
This pic shows the +12V going up to the switch The black part is the bottom of the rear cup holder
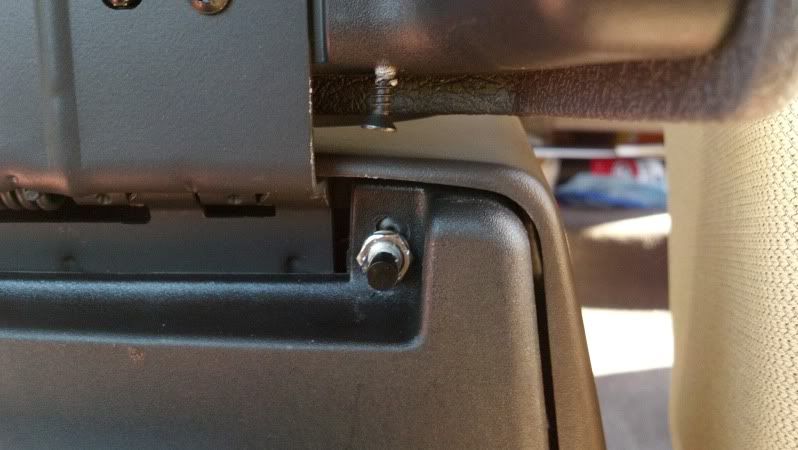
Here is the pic of the switch on the upper right hand coner of the console when lookin at the pic the driver seat is to the right hand side. Take note of where to actually drill as you can see I was going to drill in the wrong place but caught myself,what looks like a rivit isnt a rivet. Now the switch alone wont make contact with the lid to make it turn off so I used a black screw and drilled it in and adjusted enough where it doenst crush the switch but enough to do the job of hitting the switch.
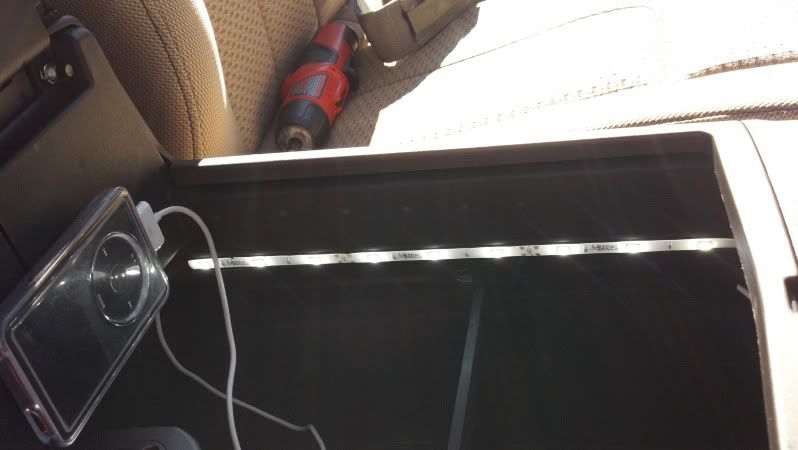
In this pic follow the LED strip from right to left where the white turns black follow that to the wall of the console drill a hole there NOTICE in the upper left hand corner you can see the switch (button) that will work when the lid is open and not work when the lid is closed but notice the location of it
Here is the thread that I started on what I have done so far
11 F150 XLT Center Console Enchancement
BACK TO TOPIC
Youll need:
-Drill
-1/4 drill bit
-electrical wire
-electrical tape
-LED strip
-Single Pole Single Throw switch (button) Operates Normally in the Closed postion (ON postions)
OPTIONAL
-Solerding Iron
-Flux
-Solder
I used the soldering iron to solder the cables to the switch and one end to the 12V lead of the LED strip
Pop the rear end of the console off just pull straight out not too hard where you will pull and break the wires out. The 12v cigarette outlet has two wires comign from it. The 12v source and the ground. I forgot what colors make the factory set up so use a multimeter and find out whatis what. The blue cable in my set up is the +12V going to the switch and the ground from the LED strip is tied to the ground on the 12V cigarette outlet
SIDE NOTE: In retrospect; Instead of running cables to the 12V outlet adapter (GREY PLUG) I would have used the the adpater that is close to the ground(GREY PLUG)
This pic shows the +12V going up to the switch The black part is the bottom of the rear cup holder
Here is the pic of the switch on the upper right hand coner of the console when lookin at the pic the driver seat is to the right hand side. Take note of where to actually drill as you can see I was going to drill in the wrong place but caught myself,what looks like a rivit isnt a rivet. Now the switch alone wont make contact with the lid to make it turn off so I used a black screw and drilled it in and adjusted enough where it doenst crush the switch but enough to do the job of hitting the switch.
In this pic follow the LED strip from right to left where the white turns black follow that to the wall of the console drill a hole there NOTICE in the upper left hand corner you can see the switch (button) that will work when the lid is open and not work when the lid is closed but notice the location of it
01-02-2012, 12:29 AM
#14
Senior Member
Thats what I did. But I installed a mercury switch inside the top portion of the console. So when you open it the lights come on and close it, they go off.. I have been meaning to post a 'How To" on it. But as of yet I haven't had the time to disassemble my console and take pics of what I did. But I assure you, it works great. Everything is hidden. The LED strips had a sticky back, so I mounted then up in the outer lip on each side on the console and ran the wires through the back and down to the 12v lighter. Very clean and the LED's are very bright. Good for looking into that huge storage space in the Flowthrough console.....