
Aftermarket heated seat inserts
 12-30-2012, 08:52 PM
#101
Meaner than ymeski56

I placed mine vertically and just trimmed the sides a bit so I could tuck the excess in where the velcro is. Worked for me very well.
Also, not sure how you did it but you can cut a window in the pads. I had to do that for the seat bottom and it heats the part beyond the window very well.
Also, not sure how you did it but you can cut a window in the pads. I had to do that for the seat bottom and it heats the part beyond the window very well.
 12-30-2012, 10:20 PM
#102
Senior Member

The lowers were easy. I had no problem cutting holes for the hog ring area.
The uppers are what's holding me up. On my pads, the power strips along the sides are completely covering the velcro even when tucked in the grooves.
I started to cut the foam with a razor knife, but it just kind of pulled chunks off. Didn't quite work as expected. So I just folded the one side over onto itself along the adhesive line and added a strip of double sided tape where the adhesive should be. Takes about an inch and a half off the width. The material still goes down to the velcro, but doesn't block it now. Hopefully everything works properly and it stays in place for a long time.
12-30-2012, 11:14 PM
#103
Senior Member


Take a look at your directions. I think they are trying to make sure you don't do that.
12-31-2012, 12:55 PM
#104
Girthy Member
Did you have to wrap the edges of the sides after you cut them? The directions for mine say DO NOT CUT the sides. Any issues doing it that way?
I'm doing the passenger side right now and am going to do it how FordEver did his. When I get to the driver side, I want to do it full length. Just not so sure about it yet.
I'm doing the passenger side right now and am going to do it how FordEver did his. When I get to the driver side, I want to do it full length. Just not so sure about it yet.
Mine have been in the truck for about a year now and work flawlessly. I use the heaters daily in winter.
 12-31-2012, 10:15 PM
#106
Meaner than ymeski56
Hard to tell with my Carhartts on lately haha. But I can feel them eventually. I would say they take 3-5 minutes to warm up. I'll have to time it one of these mornings
01-01-2013, 04:49 PM
#107
2013 Ruby Red FX4 SCrew
Thread Starter
I installed mine back in the spring, so I really didn't use them until a couple of months back. But they are functioning incredibly well
01-01-2013, 08:48 PM
#108
Senior Member
Mine work about the same and I'm pretty happy with them.
Not as fast or as hot as the ones in my wife's G8. Those get hot in about a minute and have to be turned to low after 2 minutes.
Not as fast or as hot as the ones in my wife's G8. Those get hot in about a minute and have to be turned to low after 2 minutes.
01-01-2013, 09:05 PM
#109
Senior Member
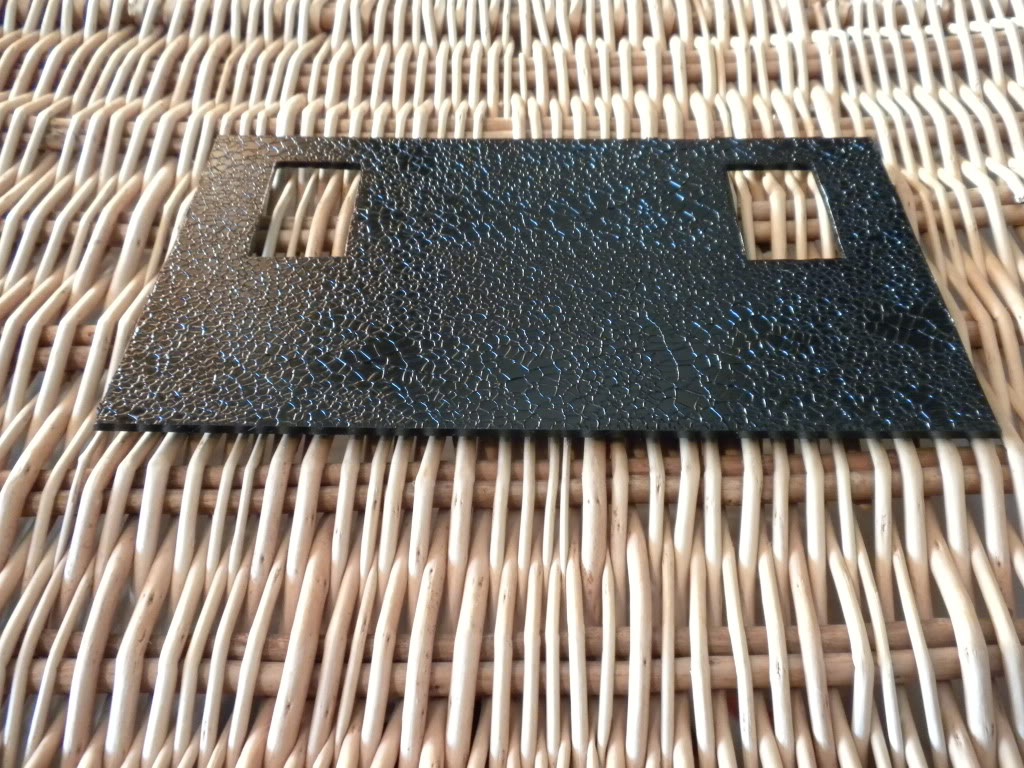
I made a plate to mount my switches. I used lexan and tried to paint it flat black. The first coat went on nicely, but the second coat made the first coat shrivel up. Tried it on the other side and it did the same thing. Had to sand it off and use vinyl wrap instead.
-
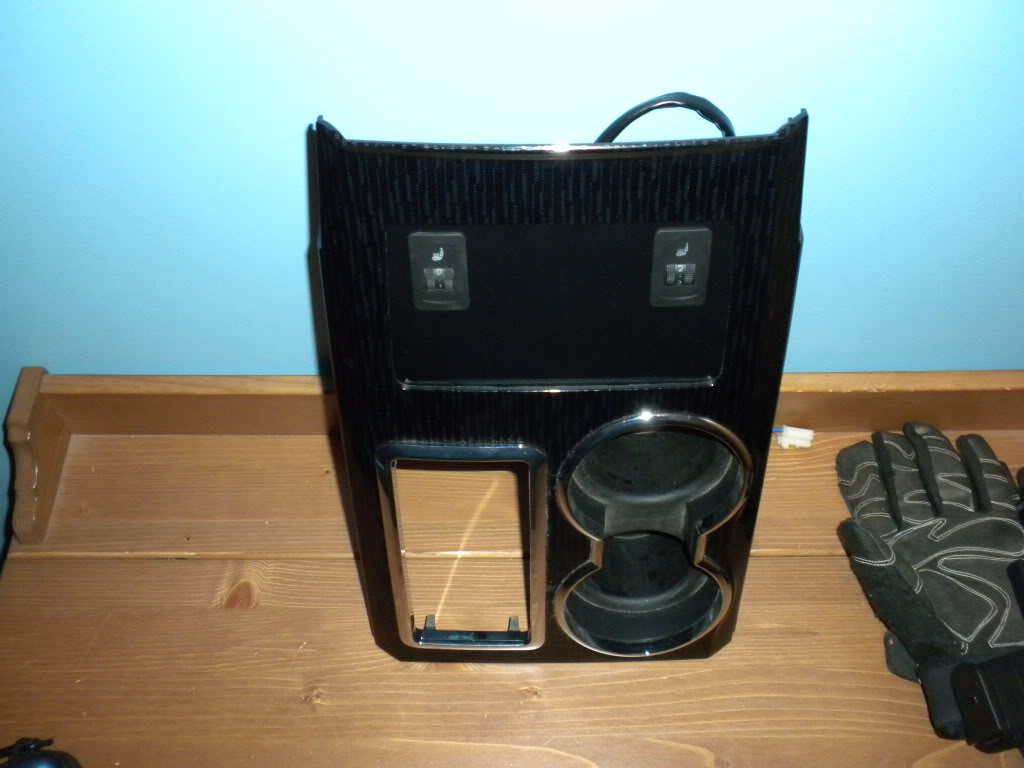
Here's the plate in the console trim piece. Plenty of room to add more switches when needed.
-
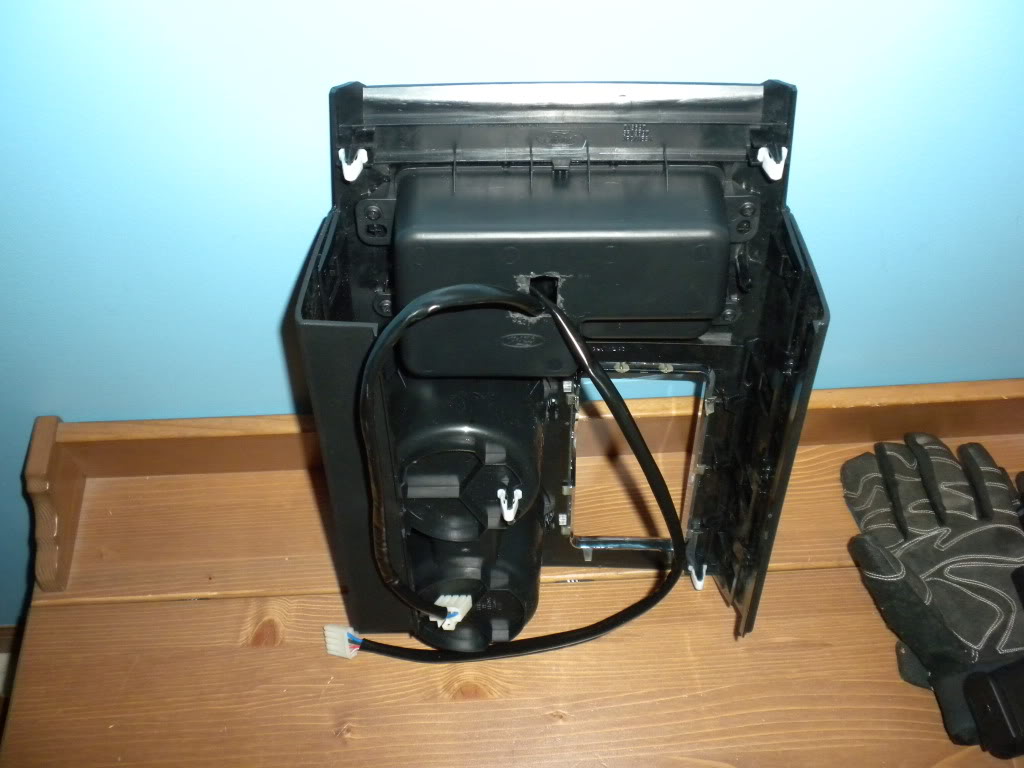
The original pocket is still there and is used to clamp the plate in place to force the contour to match. If I change my mind about the switch locations, it can all easily be put back to stock. The rubber mat can drop in and cover the little hole I cut in the pocket.
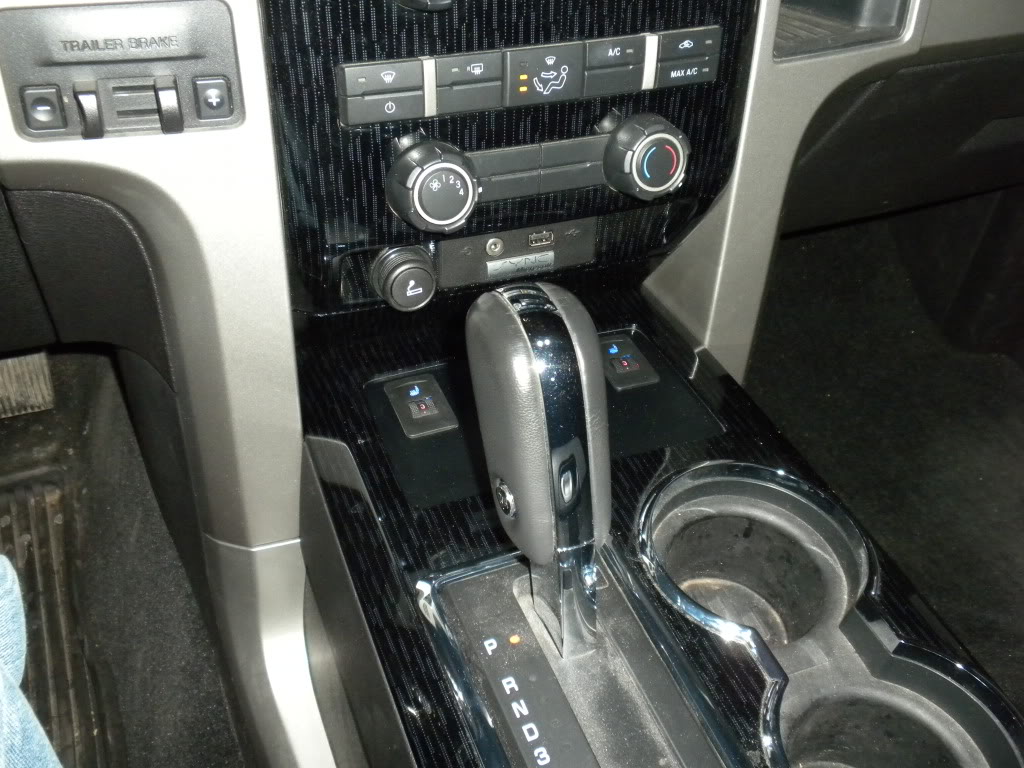
Finished product:
-
Here's the plate in the console trim piece. Plenty of room to add more switches when needed.
-
The original pocket is still there and is used to clamp the plate in place to force the contour to match. If I change my mind about the switch locations, it can all easily be put back to stock. The rubber mat can drop in and cover the little hole I cut in the pocket.
Finished product:
Last edited by Mike FX4; 01-01-2013 at 09:39 PM.
01-02-2013, 08:14 AM
#110
Senior Member
I made a plate to mount my switches. I used lexan and tried to paint it flat black. The first coat went on nicely, but the second coat made the first coat shrivel up. Tried it on the other side and it did the same thing. Had to sand it off and use vinyl wrap instead.

-
Here's the plate in the console trim piece. Plenty of room to add more switches when needed.

-
The original pocket is still there and is used to clamp the plate in place to force the contour to match. If I change my mind about the switch locations, it can all easily be put back to stock. The rubber mat can drop in and cover the little hole I cut in the pocket.

Finished product:

-
Here's the plate in the console trim piece. Plenty of room to add more switches when needed.
-
The original pocket is still there and is used to clamp the plate in place to force the contour to match. If I change my mind about the switch locations, it can all easily be put back to stock. The rubber mat can drop in and cover the little hole I cut in the pocket.
Finished product: