
My current audio install 2010 Screw - rev 4 - pic heavy


 09-22-2011, 09:27 AM
#22
I hate to say this but I think I also have a pop. I didn't hear it when I running the front stage just off the Clarion. Now that I have the mids off the Sundown 125.2 I can hear it.
The reason I can now hear it is I blew the passenger mid the other day. I hated hearing just tweeters on the left side so I disconnected both of them.
Right now all I have is passenger mid with no tweets up front. I turned the deck off yesterday and guess what I heard a pop. I was able to repeat it over and over.
It is the always on fusing that is messing us up. If the stock HU had the 12volt accessory then the amp would turn off when the deck did.
I am looking forward to your impression of the MS-8. I am so close to pulling the trigger on a dedicated DSP.
Dang man. you should grab an MS8 on sonic electronics.com while they are on sale. just do the "make an offer" and offer like 460 and you will get a BADASS PRICE on it. thats how i got mine.
10-01-2011, 07:37 PM
#23
Junior Member
Thread Starter
Join Date: Aug 2011
Location: Austin, Tx
Posts: 23
Likes: 0
Received 0 Likes
on
0 Posts

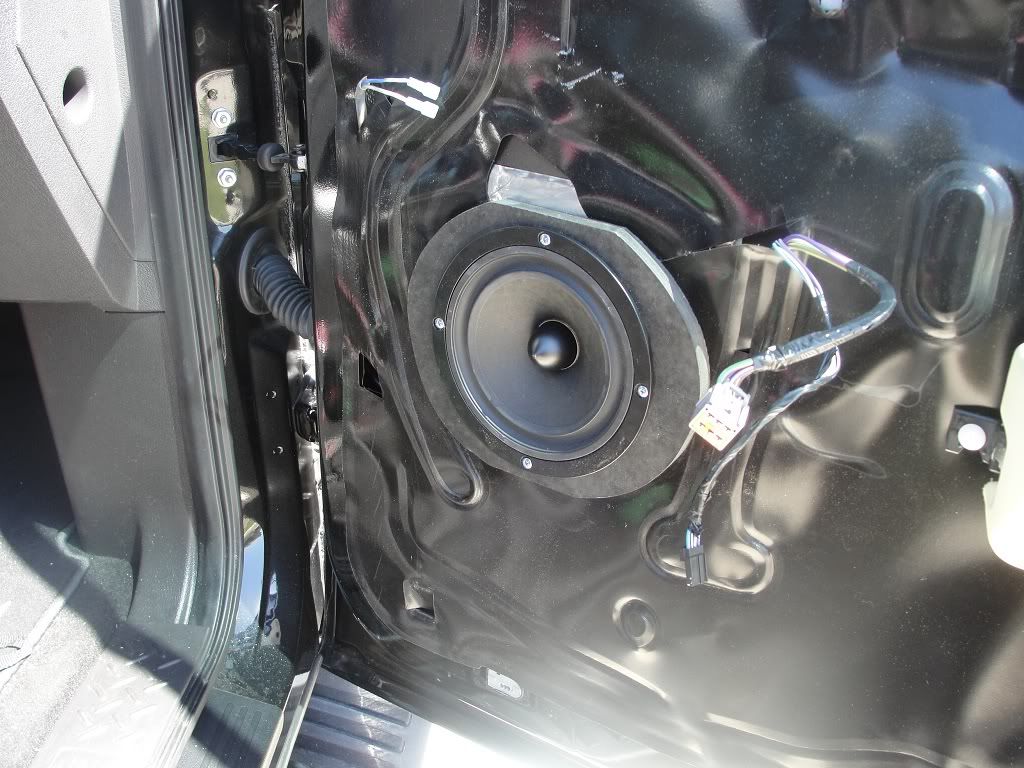
Had a little mishap a week and a half ago. I was messing around and ended up damaging the passenger side Massive Ck6 mid. When playing it was making a really bad buzzing sound. I am in the process of getting a factory replacement but I couldn't wait and had the opportunity to get something I have been wanting to try.
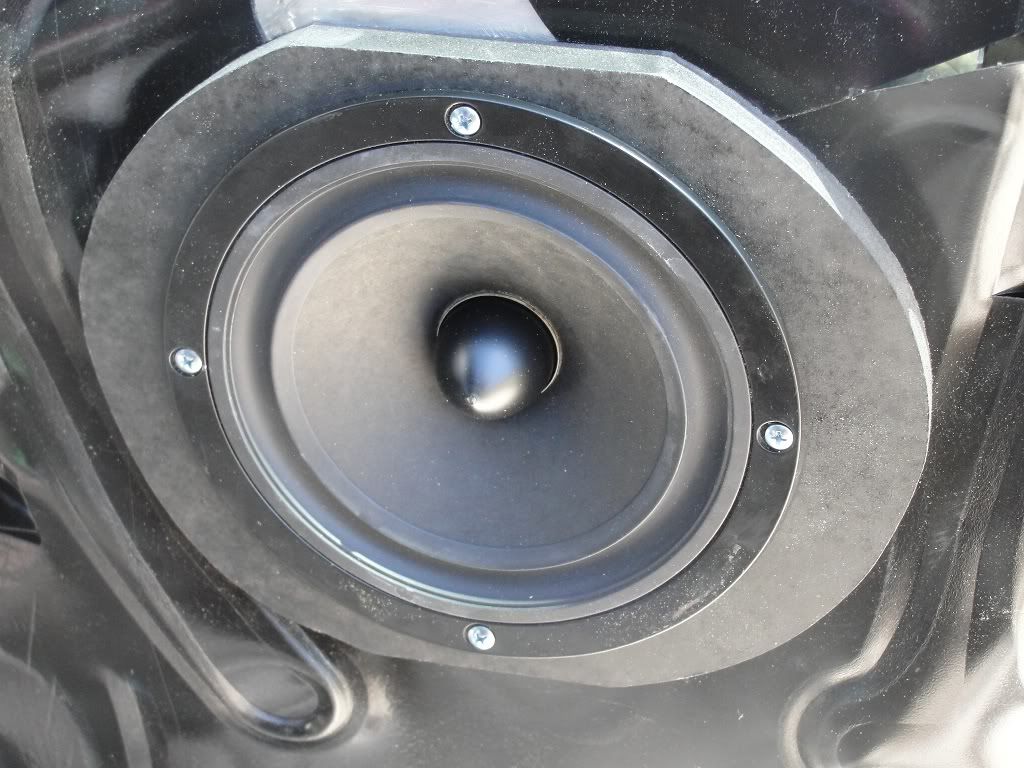
Bought a set of Hybrid Audio Legatia L6 mids. Just installed them and I like them a lot. The Massives are really good and play deep. However the HAT L6 have a better extension above 3khz.
Made new baffles out of 5/8 MDF and painted them with rattle can flat black to keep any water out. Will be sealing the doors in the near future now that it isn't 105 degrees during the day.
After listening to a car, a few days ago, with a HAT front stage I am serious thinking about replacing the Focal TNB tweeters with HAT L1 R2 Pros.
I have a feeler in the TK5 to make some plastic tweeter baffles that will get the Focals point up towards the rear view mirror instead of down towards the head unit. We will see how that changes how they sound and I might not want to replacement them quite so soon.
I still really need a Digital Signal Processor. I was holding out for the Fosgate 3sixty.3 but I am tempted to try the miniDSP. They are now offering a 12v power filter that should cut out the electrical noise they are notorious for.
Anyway the next steps will be documented as always. Just depends on what the budget allows and what comes up for sale next.
02-19-2012, 09:51 PM
#24


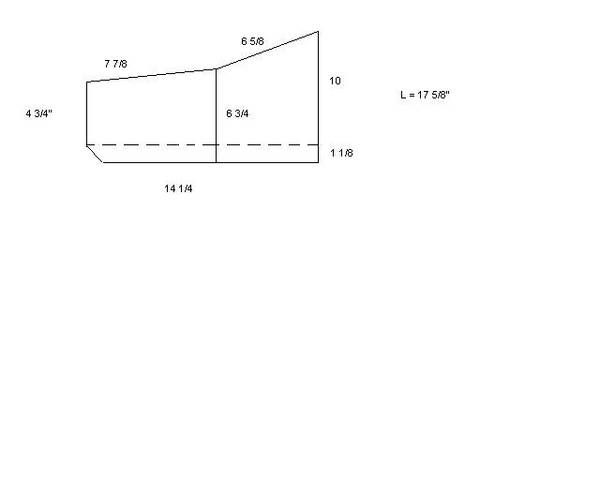
For the sub box dimensions, I'm looking for a bit of clarification on a couple of them.
I'm looking the left and right measurements, 4-3/4" and 10". Does this include the 1-1/8 on the bottom, or is that in addition to, ie overall is 11-1/8 on the right.
Also, I'm fairly new at this, but wondering how you achieved the bevel on the lower left. Did you take a skill saw and miter the edge all along?
I used the dimensions from someone else who has a single MKIII. Here is a quick pick of the measurements he gave me. I changed it up just a bit. I have 1.5 inches of excursion space and my entire box is 36.5 inches long. I have a two sealed chambers and it came out to .55 per side.
I can get both sides about 85% up before they start rubbing. I could get them to go up with a little more engineering. However, I have two car seat in back, and will have for a few more years so I am not worried about it.
I can get both sides about 85% up before they start rubbing. I could get them to go up with a little more engineering. However, I have two car seat in back, and will have for a few more years so I am not worried about it.
02-29-2012, 07:09 PM
#26

That's awesome, hey of u don't mind me asking what type of screws/bolts did you use to mount the amp rack to the truck? I would love to have my amp rack that big but with the sliding rear window the motor sits dead center and makes it so hard to build around.


I did mine using hushmat and after having used not dynamat and now this, it's way more flexible an much easier to use in my opinion. Your looks great. Did you dynamat just the back panel though?
I did mine using hushmat and after having used not dynamat and now this, it's way more flexible an much easier to use in my opinion. Your looks great. Did you dynamat just the back panel though?
03-01-2012, 01:38 AM
#27
Senior Member
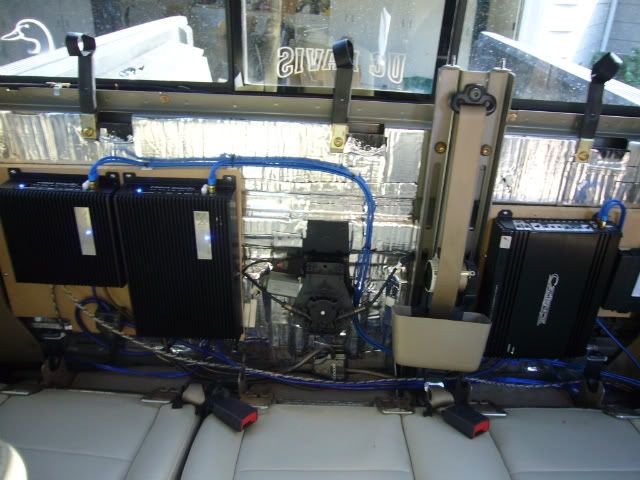
I have the window motor too. I just built two separate boards around it. Here was a test fit and test-fire of everything before carpeting and wire-organization (please excuse the wires everywhere):
 03-01-2012, 09:17 AM
#28
Some people use self taping screws, some use liquid nails...just make sure you only drill through the first layer and NOT all the way through the cab.
I have the window motor too. I just built two separate boards around it. Here was a test fit and test-fire of everything before carpeting and wire-organization (please excuse the wires everywhere):
I have the window motor too. I just built two separate boards around it. Here was a test fit and test-fire of everything before carpeting and wire-organization (please excuse the wires everywhere):
03-01-2012, 12:24 PM
#30
Senior Member