
A little upgrade
 02-06-2010, 05:01 AM
#1
I had been trying to figure out what I could possibly want to do this semester. Honestly I love how the truck looks on the outside. The only things worth replacing are the flat and faded trim pieces (flares and b-pillars). So I started looking inside. Besides figuring out a way to keep the dog hair off the carpet (impossible  ) the only thing I could do inside is redo my sound system. When I installed it about a year ago I had limited time so I was looking more for convenience.
This is what I put in place of the stock system:
Head Unit
Kenwood DDX-512

Speakers
Alpine Type R Components

Subwoofer
MTX Thunderform (pre-amped)

Amplifier
Kenwood KAC 7204

Sound Deadener
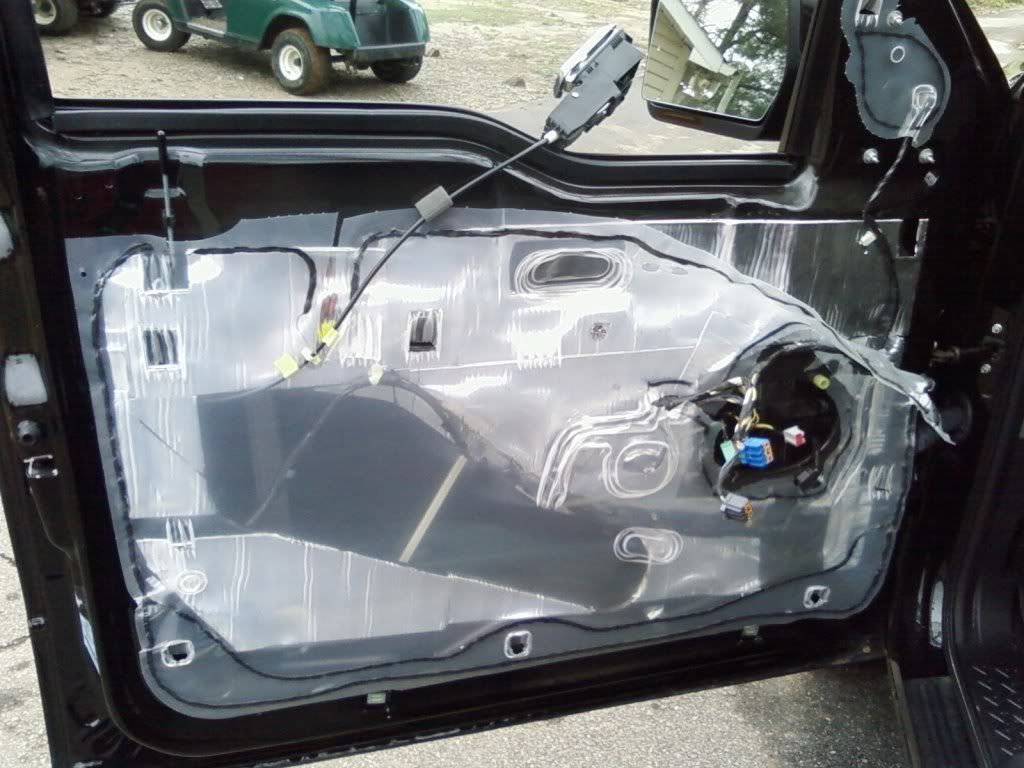
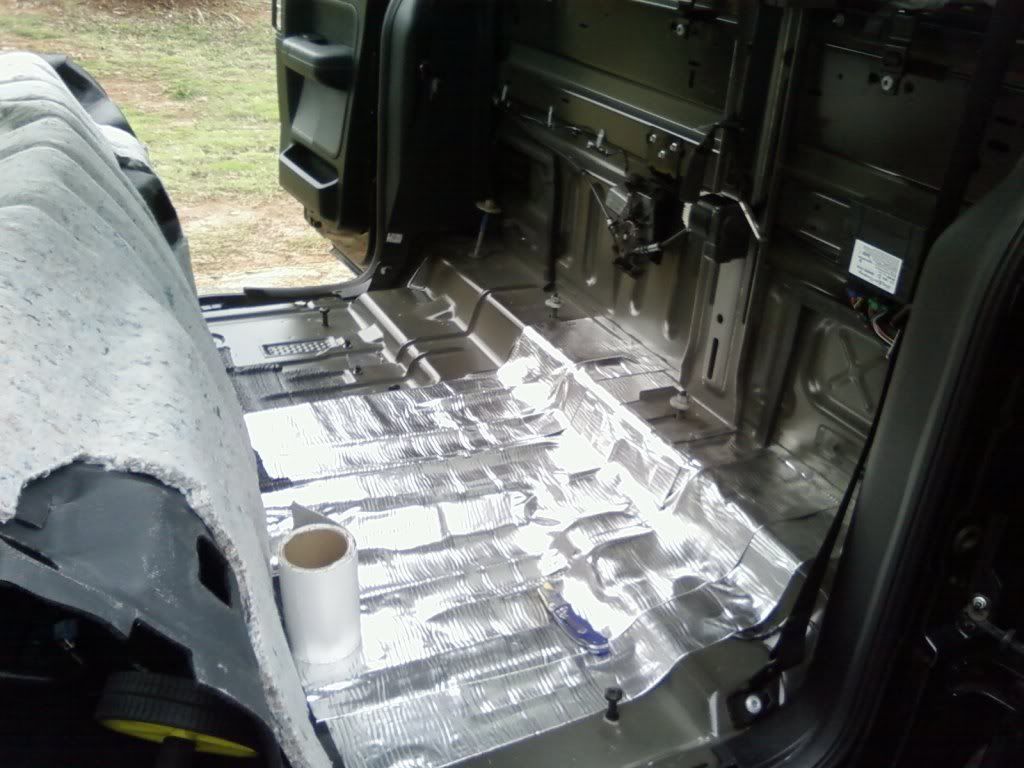
Entire back wall, every door panel, entire floorboard. Only thing missing is the roof. Some pics taken during the old install:


) the only thing I could do inside is redo my sound system. When I installed it about a year ago I had limited time so I was looking more for convenience.This is what I put in place of the stock system:
Head Unit
Kenwood DDX-512
Speakers
Alpine Type R Components
Subwoofer
MTX Thunderform (pre-amped)
Amplifier
Kenwood KAC 7204
Sound Deadener
Entire back wall, every door panel, entire floorboard. Only thing missing is the roof. Some pics taken during the old install:
 02-06-2010, 05:02 AM
#2
I debated going to an active setup, but decided against it. I don't have the time nor knowledge to deal with it at the moment.
So here's what I switched in (keeping original comps/amp for now):
Head Unit: Pioneer AVIC-Z110BT

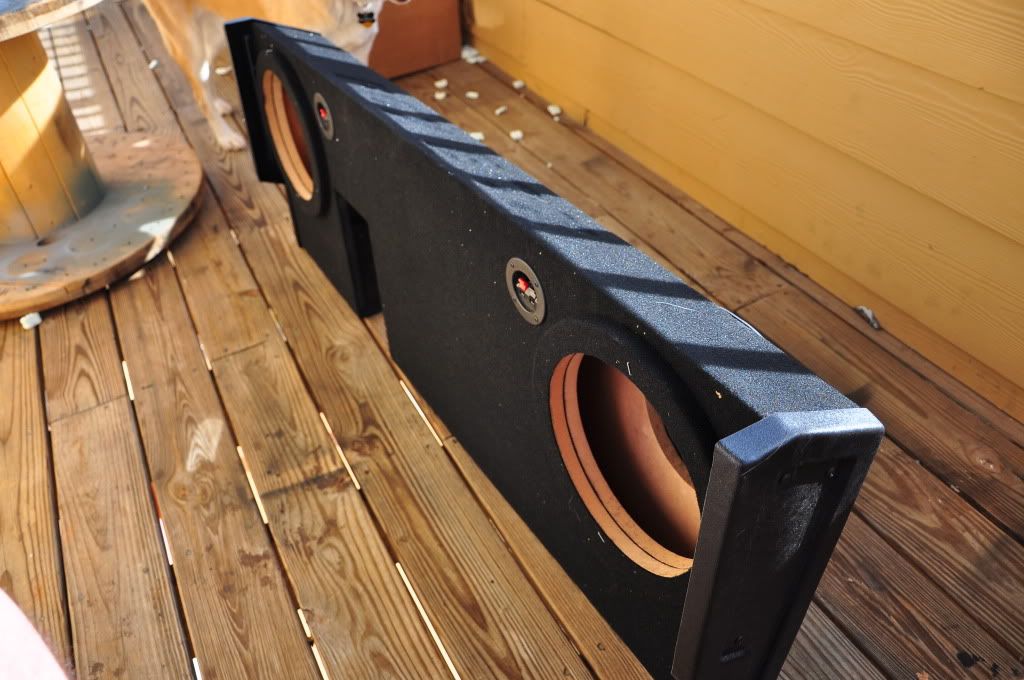
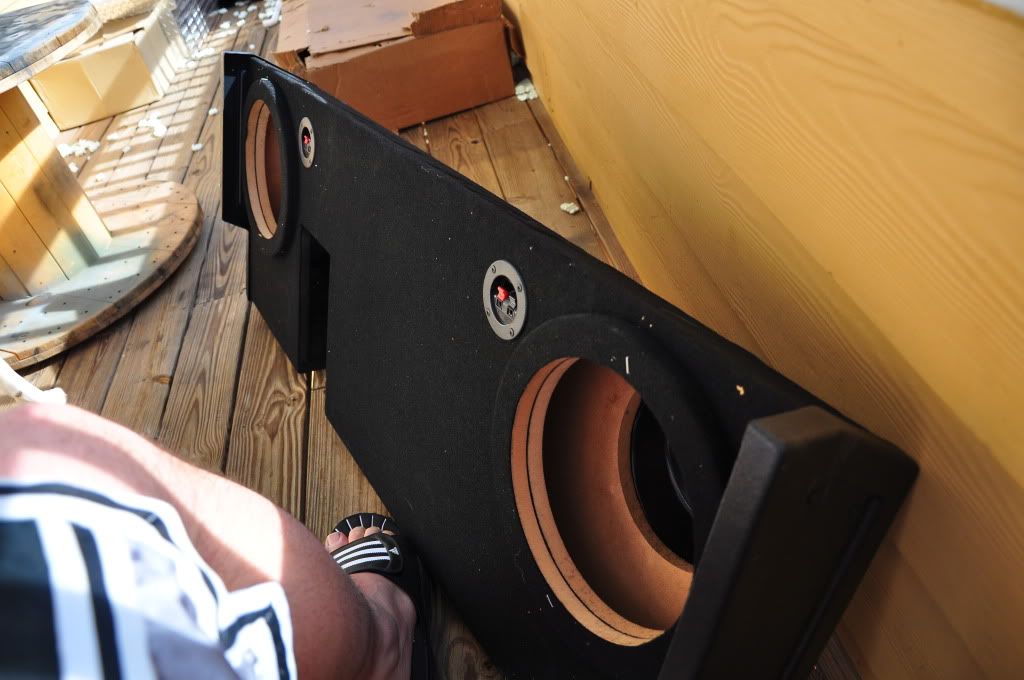
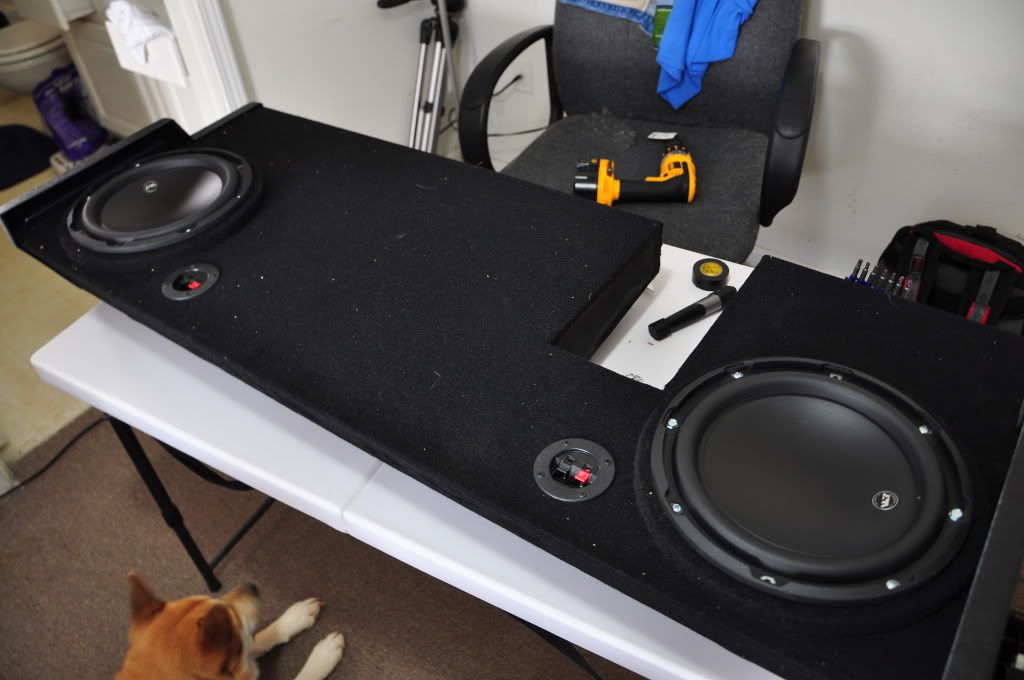
Subwoofers:
2x10" JL Audio 10W3v3

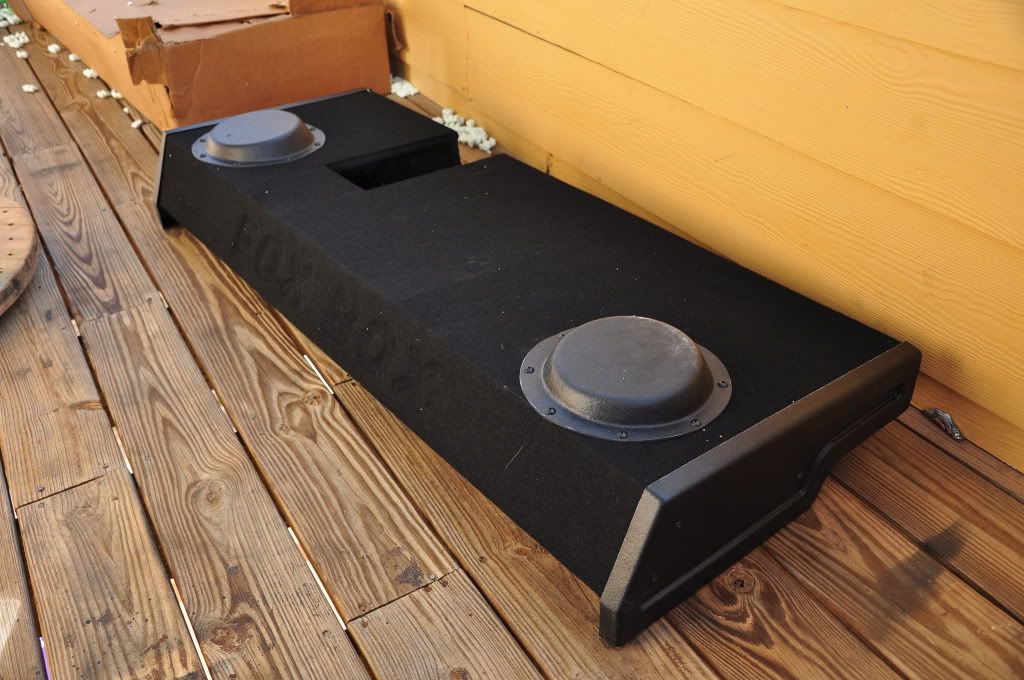
Sub Box:
Fox Acoustic Custom-Built


Kenwood eXcelon XR-1S

One of my biggest goals for this was to relocate my amp to the back wall and redo all the speaker wire.

Got everything in.


So here's what I switched in (keeping original comps/amp for now):
Head Unit: Pioneer AVIC-Z110BT
Subwoofers:
2x10" JL Audio 10W3v3
Sub Box:
Fox Acoustic Custom-Built
Kenwood eXcelon XR-1S
One of my biggest goals for this was to relocate my amp to the back wall and redo all the speaker wire.
Got everything in.
Last edited by mblouir; 02-06-2010 at 05:07 AM.
02-06-2010, 05:03 AM
#3


Oh it's about time for an update. Despite some more pain in the shoulder I just spent the last six hours working on the system.
Here's a list of what I did. I didn't take pics as I was doing it--would have taken too long. I'll take some shots tomorrow of what I have so far.
- Bought a 4x2 sheet of wood for amps
- Spliced and prepared amp kit for installation
- Measured allowed space in truck for amp board
- Made sure amps would fit and cut board to size
- Installed amp board
- Wired truck, leaving all wires loose at amp ends
- Hooked up amps
- Put amps on board
- Gobbling elf cookies and milk and rubbing my lower back a lot
This is the list I made for myself on what order I was going to do everything. Made it much easier:
-Pull off all trim
-Disconnect negative battery terminal
-Pull out all old wire
Both power wires
- Connect to battery
- Run down between wheel well and engine bay
- Run through framing underneath truck
- Pull through grommett at rear passenger door
- Leave unconnected
- Splice both wires at battery and install fuses
Both ground wires
- Wire cup brush on frame
- Self-tapping screws to put ground to frame
- Leave unconnected
New speaker wires (RT side)
- Run from door panel into truck through rubber wire cover (whatever that thing is called)---THIS WAS A BITCH
- Run under door sill trim to rear
- Leave unconnected
New speaker wires (LF side)
- Same process as RT side, except this was much harder
- Cuss a lot
- Get it into truck
- Run down door sill trim
- Run over to right side
- Leave unconnected
RCA Cables (Spkr and Sub)
- Connect at back of head unit and run underneath driver's carpet
- Run down door sill trim
- Run to right side
- Leave unconnected
Remote turn-on for amps
- Same as RCA cables
Connect amps
- Connect power for each
- Connect ground for each
- Connect Remote turn-on
- Connect RCA cables
- Connect speaker wires for 7204 (spkrs)
- No speaker wires yet for subs
Mount amps on board
- Drill pilot holes for each amp
- Screw into amp board
- Fix wires tomorrow
Pics after install:
Amp Power Wires from Battery

Easiest way to run it is over wheel well to a grommet on rear passenger side

Still need to run cable protector

View from front to rear--running through frame

Crossover fits in here nicely. Ran all new speaker wire. Old speaker wire was pinched in door panel at arrow.

Last edited by mblouir; 02-06-2010 at 05:08 AM.
02-06-2010, 05:03 AM
#4
Took a poor shortcut last time and ran the wire from arrow to arrow. Got slightly pinched in weather stripping. No shortcuts this time. It was a B**** but I got it through here this time.

Door sill trim removed---passenger speaker wire down passenger side.

Remove circled panel to get speaker wire from door into cab. Had to loosen fuse box to get room. Line shows path of speaker wire.

Grommet on rear passenger side. Dashed shows power cables and solid shows passenger speaker wire.

Ground connections after using wire cup brush.

Line shows path of RCA cables and remote turn-on lead for amp.

Remove circled panels and door sill trim for driver's side speaker wire. Arrow shows where I ran it the first time. This side was harder than the passenger side, but it's worth it not having pinched speaker wire.

Another pic showing route of RCAs and remote turn-on

Path of RCAs, remote turn-on, and driver's speaker wires over to amps.

Pic of amps all hooked up and mounted--wires not fixed yet.

Door sill trim removed---passenger speaker wire down passenger side.
Remove circled panel to get speaker wire from door into cab. Had to loosen fuse box to get room. Line shows path of speaker wire.
Grommet on rear passenger side. Dashed shows power cables and solid shows passenger speaker wire.
Ground connections after using wire cup brush.
Line shows path of RCA cables and remote turn-on lead for amp.
Remove circled panels and door sill trim for driver's side speaker wire. Arrow shows where I ran it the first time. This side was harder than the passenger side, but it's worth it not having pinched speaker wire.
Another pic showing route of RCAs and remote turn-on
Path of RCAs, remote turn-on, and driver's speaker wires over to amps.
Pic of amps all hooked up and mounted--wires not fixed yet.
02-06-2010, 05:04 AM
#5
Closer shot

Tied up wires--still a little more to do but mostly done

Closer shot

Rear carpet added back on with hole cut for amps

Closer

One more looking back

I managed to get out 95% of the dog hair with this powerful little hand-vac I picked up. I just need to put on the rubber gloves again to get in the nooks and crannies. Sorry for camera phone--it's all I had.
Before:
After

Main home screen

Customizable secondary home screen--drag and drop up to 15 icons

Tied up wires--still a little more to do but mostly done
Closer shot
Rear carpet added back on with hole cut for amps
Closer
One more looking back
I managed to get out 95% of the dog hair with this powerful little hand-vac I picked up. I just need to put on the rubber gloves again to get in the nooks and crannies. Sorry for camera phone--it's all I had.
Before:
After
Main home screen
Customizable secondary home screen--drag and drop up to 15 icons
02-06-2010, 05:04 AM
#6
NAV

AV Source Selection

FM Radio

Amazing iPod interface

Settings menu

Voice-activated controls

My view--Gryphon looks washed out but it's just really bright

Box came in! This thing is excellent quality--need to give it a good vacuum from the peanuts but other than that it's ready to go.

AV Source Selection
FM Radio
Amazing iPod interface
Settings menu
Voice-activated controls
My view--Gryphon looks washed out but it's just really bright
Box came in! This thing is excellent quality--need to give it a good vacuum from the peanuts but other than that it's ready to go.
02-06-2010, 05:05 AM
#7
On to some more pics. I went ahead and put wire loom on the power wires running under the truck. Better safe than sorry. Also had to relocate the amp for my components because it was in the way of reinstalling the seats. A small metal bracket couldn't get into place. So I pretty much switched up the amp locations.
Also reinstalled the rear seats. Zip-tied a little clip so it's not so hard to take them off next time. Should only have to pop off the back section and install the subwoofer amp when it gets in.
Anyways, on to the pics...
Wire loom on power wires:


Starting to install seats. Clip on left (zip-tied) couldn't go in place because of amp:

Torx bolt locations (I think T50--not 100%). For relative locations look at first pic of seats:


Clips that are a B**** to release when trying to get off upper half of back seats. Zip-tied for easy removal next time:

Last edited by mblouir; 02-06-2010 at 05:13 AM.
Trending Topics
02-06-2010, 05:05 AM
#8


For metal bar with brackets and lower rear seats, four bolts are used to hold in place. Far left one is a long bolt---other three are nuts that go on built-in bolts coming out of floorboard. Here's the left bolt. It's also a B**** the first time you take it out due to the loc tite:

Amp relocated, seats back in place, sub box almost pushed back all the way. Managed to get it back a little bit more:


Upper rear seat. Be careful with metal spokes in 2nd pic. Clips in 3rd pic go in top three holes on back wall. 4th pic shows the little hole you have to hit when you poke a screwdriver in there. I'll take more pics when I pull it back off:


 02-06-2010, 05:06 AM
#9
Almost finished:

Scooted back all the way--would like more but nothing I can do:

The sub box doesn't go back as far as I would like it to, but that's my fault. When I put my deadening in I also put in 1/4" carpeting from Lowe's (to help with road noise). That adds quite a bit of thickness to the contours of my floorboard, so when I try to push it back all the way it just won't go. It's not too bad, though. Plenty of foot space---even I crawled back there and I'm 6'5".
Can say one thing that I learned today:
The dog loves having "her" seats back.
New amp came in. Finally something goes right---hooked it up where the defective amp was and it worked perfectly. Finished up the wiring, cleaned it all up, and reinstalled the seats....
The low end difference is amazing. It hits harder, louder, and is more crisp. Such a more natural sound than the preloaded MTX.
Just to get an idea of the difference (sounds like crap on camera):
Rock: P.O.D. - Youth of the Nation
Rap: Young Jeezy - Welcome Back
That's as far as I've gotten in the last three weeks. I'll try to update with some better (daytime) photos and vids.
Scooted back all the way--would like more but nothing I can do:
The sub box doesn't go back as far as I would like it to, but that's my fault. When I put my deadening in I also put in 1/4" carpeting from Lowe's (to help with road noise). That adds quite a bit of thickness to the contours of my floorboard, so when I try to push it back all the way it just won't go. It's not too bad, though. Plenty of foot space---even I crawled back there and I'm 6'5".
Can say one thing that I learned today:
The dog loves having "her" seats back.
New amp came in. Finally something goes right---hooked it up where the defective amp was and it worked perfectly. Finished up the wiring, cleaned it all up, and reinstalled the seats....
The low end difference is amazing. It hits harder, louder, and is more crisp. Such a more natural sound than the preloaded MTX.
Just to get an idea of the difference (sounds like crap on camera):
Rock: P.O.D. - Youth of the Nation
Rap: Young Jeezy - Welcome Back
That's as far as I've gotten in the last three weeks. I'll try to update with some better (daytime) photos and vids.
Last edited by mblouir; 02-06-2010 at 05:13 AM.
03-26-2010, 11:00 AM
#10

if you dont mind me asking how much did that whole set up cost you. and approx how much would an install run. theres no way i would be able to do that haha.
nice work tho
nice work tho