When you click on links to various merchants on this site and make a purchase, this can result in this site earning a commission. Affiliate programs and affiliations include, but are not limited to, the eBay Partner Network.
no, he means the control **** that controls the DSP, not the wire harness.
Ha, that makes more sense... It must have been somehow sensored as a bad word when I read it the first time because it only showed 4 asterisks not the actual word "****.� I obviously had assumed a different word.
To answer the actual question then, that control is used for some of the upfront setup and can then be used normally as a kind of bass control. I don't normally need to use it much, so it wouldnt be that bad to just hide in the glovebox or somewhere less accessible.
Last edited by 1Chad; 12-10-2016 at 11:26 AM.
Reason: Clarify post
I have the same amp in my '04 hooked up to a Pioneer AVIC-8200NEX.
Will play with the amp settings for a bit before I go the EQ route. Just looking for a cleaner sound than the factory crap they install. Shame I have to spend all this money and time fixing the stereo in a $70K vehicle.
I recently purchased this 2016 F150 XLT Sport. I did not get the Nav option and it does not have the Sony System.
As many of us know, the sound on these is super basic. It sucks. So i decided to upgrade the system.
Just to let you guys know, i am not any type of professional in any way shape or form, i am a huge fan of DIY projects but i am limited to doing things in the living room of my apartment. I live in a complex, so i try to do as much as i can inside my apartment and i try to take the things alredy assembled to the vehicle. This is because i dont want strangers to know what i am installing in my truck. So, i know that my drilling isnt straight, and i dont have any fancy tools. Just a drill, some bits, a knife, and a basic socket set from sears.
I am a huge fan of the Alpine components. Their S-Type are budget friendly and sound really good. So, i sprung on a mission to upgrade my stereo system on a low budget. So, this is what i came up with...
MRV-F300 V-Power 4 Channel AMP
MRV-M500 V-Power Mono Amp
Rux-**** Bass Control Remote
SPS-110TW 1" Component Tweeter
SPS-610 6.5" 2-Way Coax Speakers
SPS-619 6x9 3 Way Coax Speakers
LC7i AudioControl 6 Channel Line Out Converter
72-5602 Metra Speaker Wiring Adapters
82-5605 Metra 6.5" Speaker Mounting Adapter Rear Door
82-5606 Metra 6x9 Speaker Mounting Adapter Front Door
Stinger 9 Conductor SpeedWire
1/0 Power & Ground Cable
4 Guage Power Cable
SPD5204 Stinger Fuse Holder
SHD20 Distribution Block 1/0 to Dual 4 guage
40TCWS104 10" Truck Enclosed Box With Subwoofer
This is what I consider a Super Sweet Budget Build. My budget was Laid out at 700 dollars. And i think i am still under budget by 20 or 40 dollars. Amazon helped out alot and also best buy has a great price match guarantee. This helped out alot with cost.
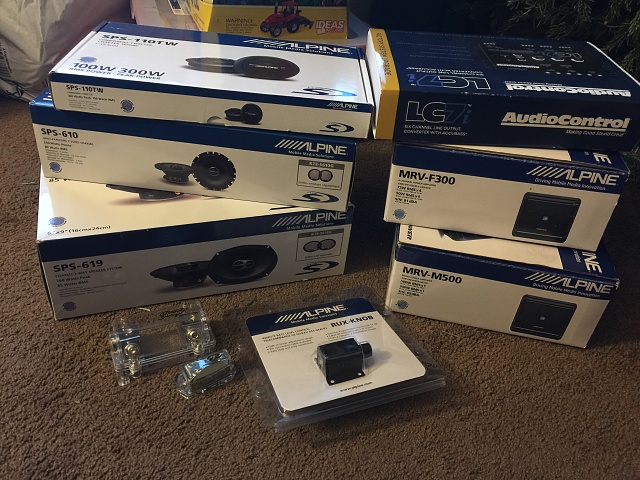
Here are some if the things in gathered in the last couple of months.
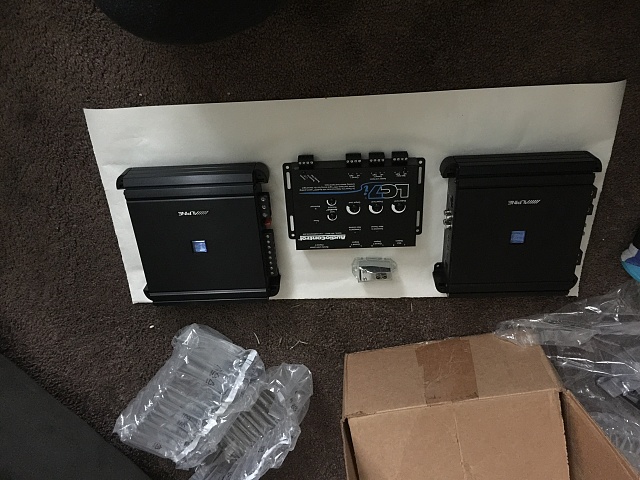
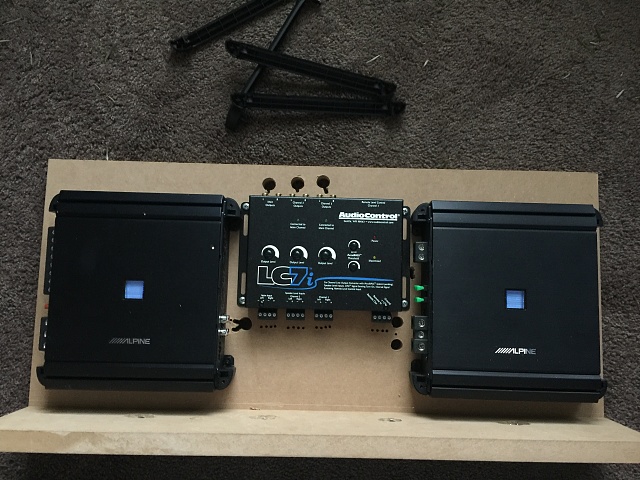
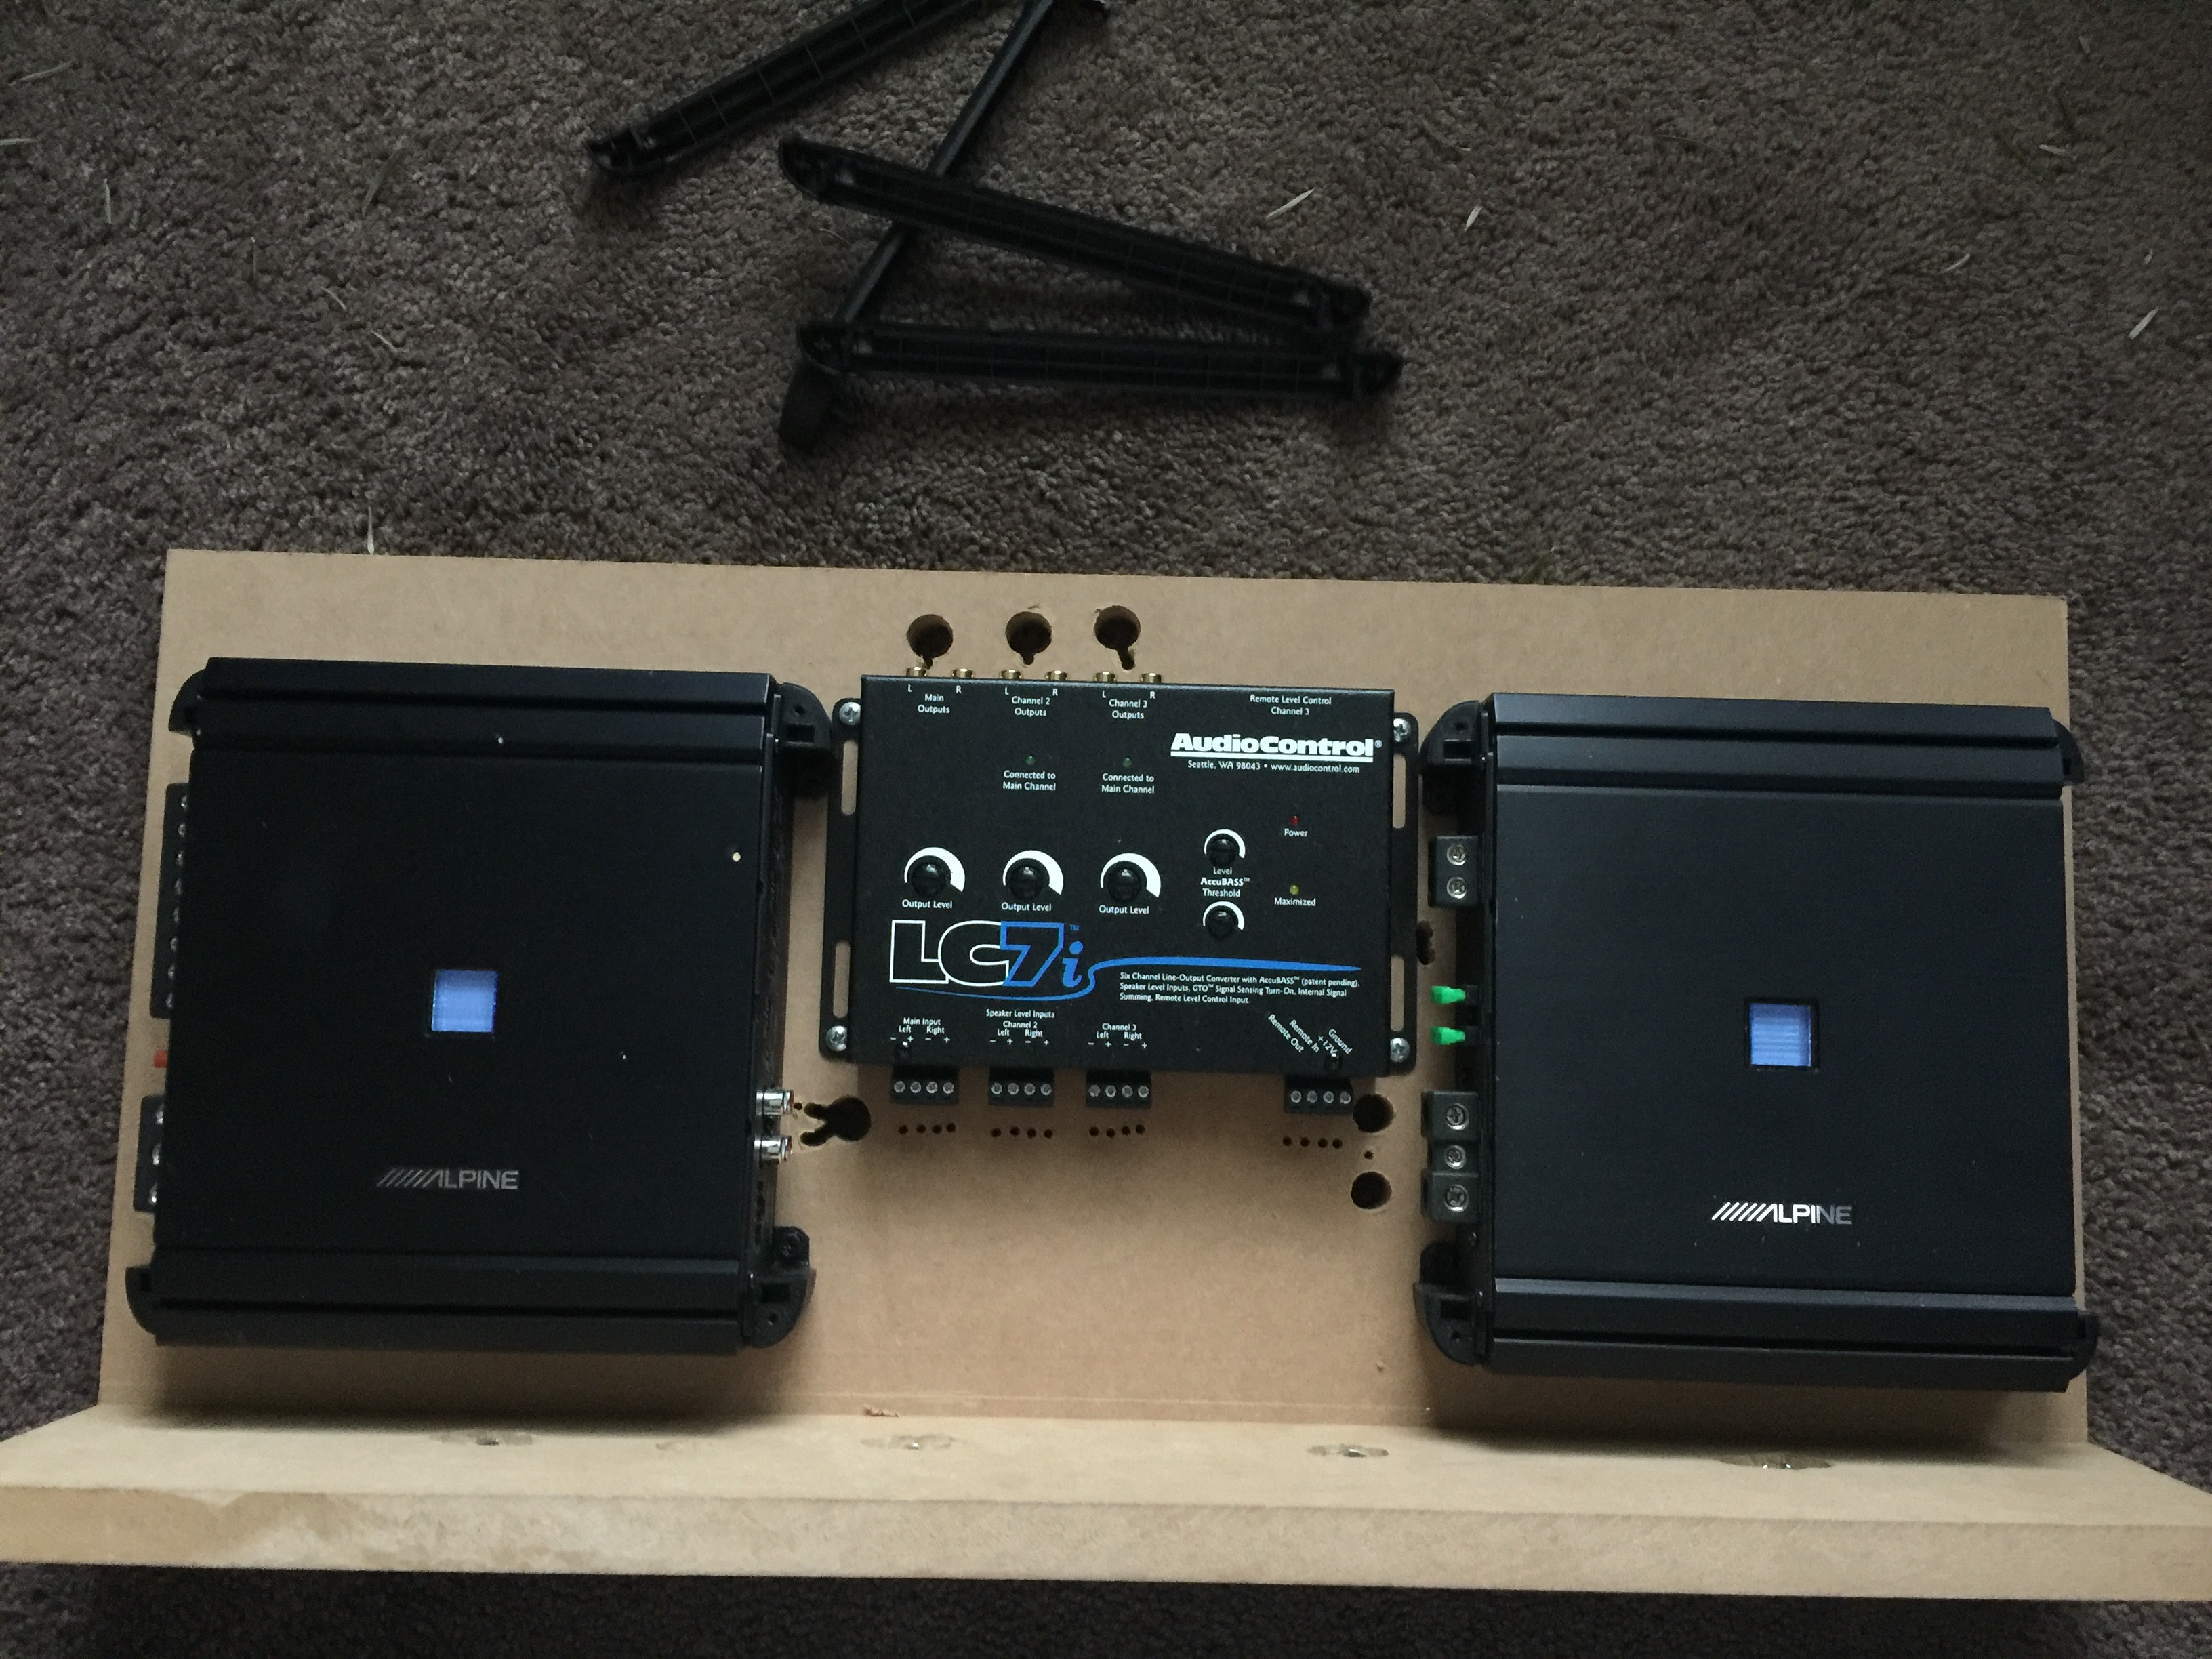
So, first i cut out a piece of paper and placed it in the back of the cab. Folded it and trimmed it to the size i imagined the amps would fit. Then i went inside and placed the amps and LOC on it.
AMP RACK
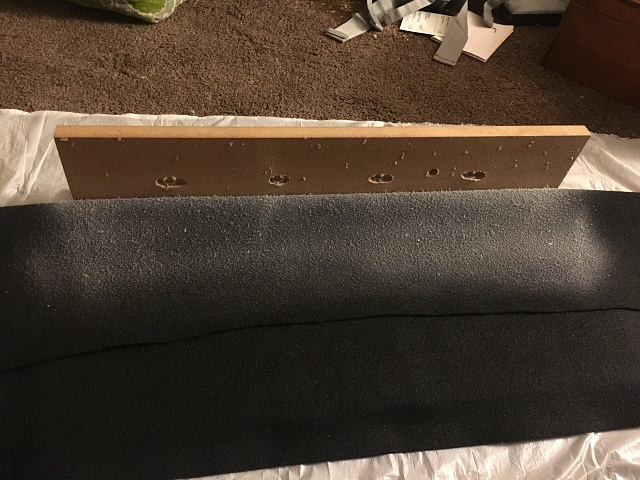
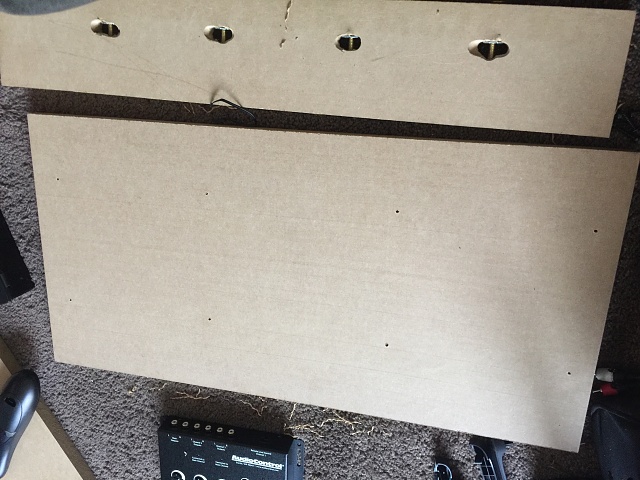
I went to the local Home Depot and looked for a piece of MDF Board. I was Able to find a small piece which was about 2-3 inches short from my measured piece of paper. I had the guy trim it at the store and then i bought some T-Nuts and 1/4-20 3" long screws.
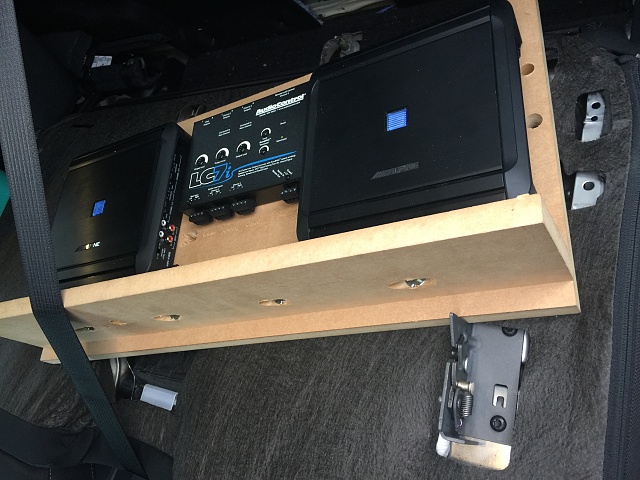
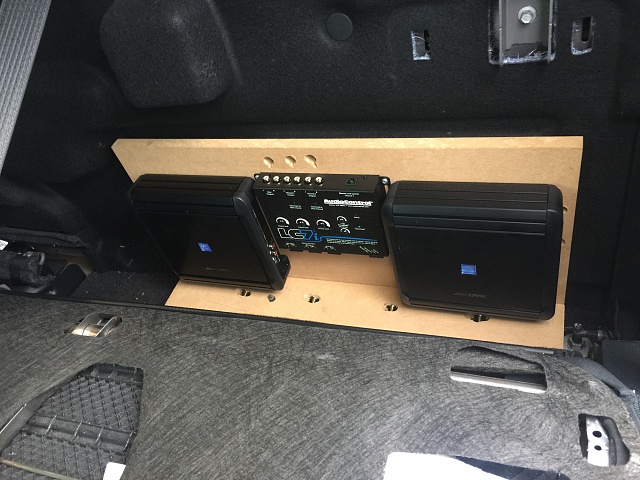
There was a piece that i had cut separate which i want to use to stabilize the Amp Rack by using the seat mounting bolt to press it hard on to the wall to keep it still.
I drilled some holes on to the board and installed the T-Nuts. Then went to the truck and got a rought estimate of where i would drill the hole for the seat mounting bolt to go into.
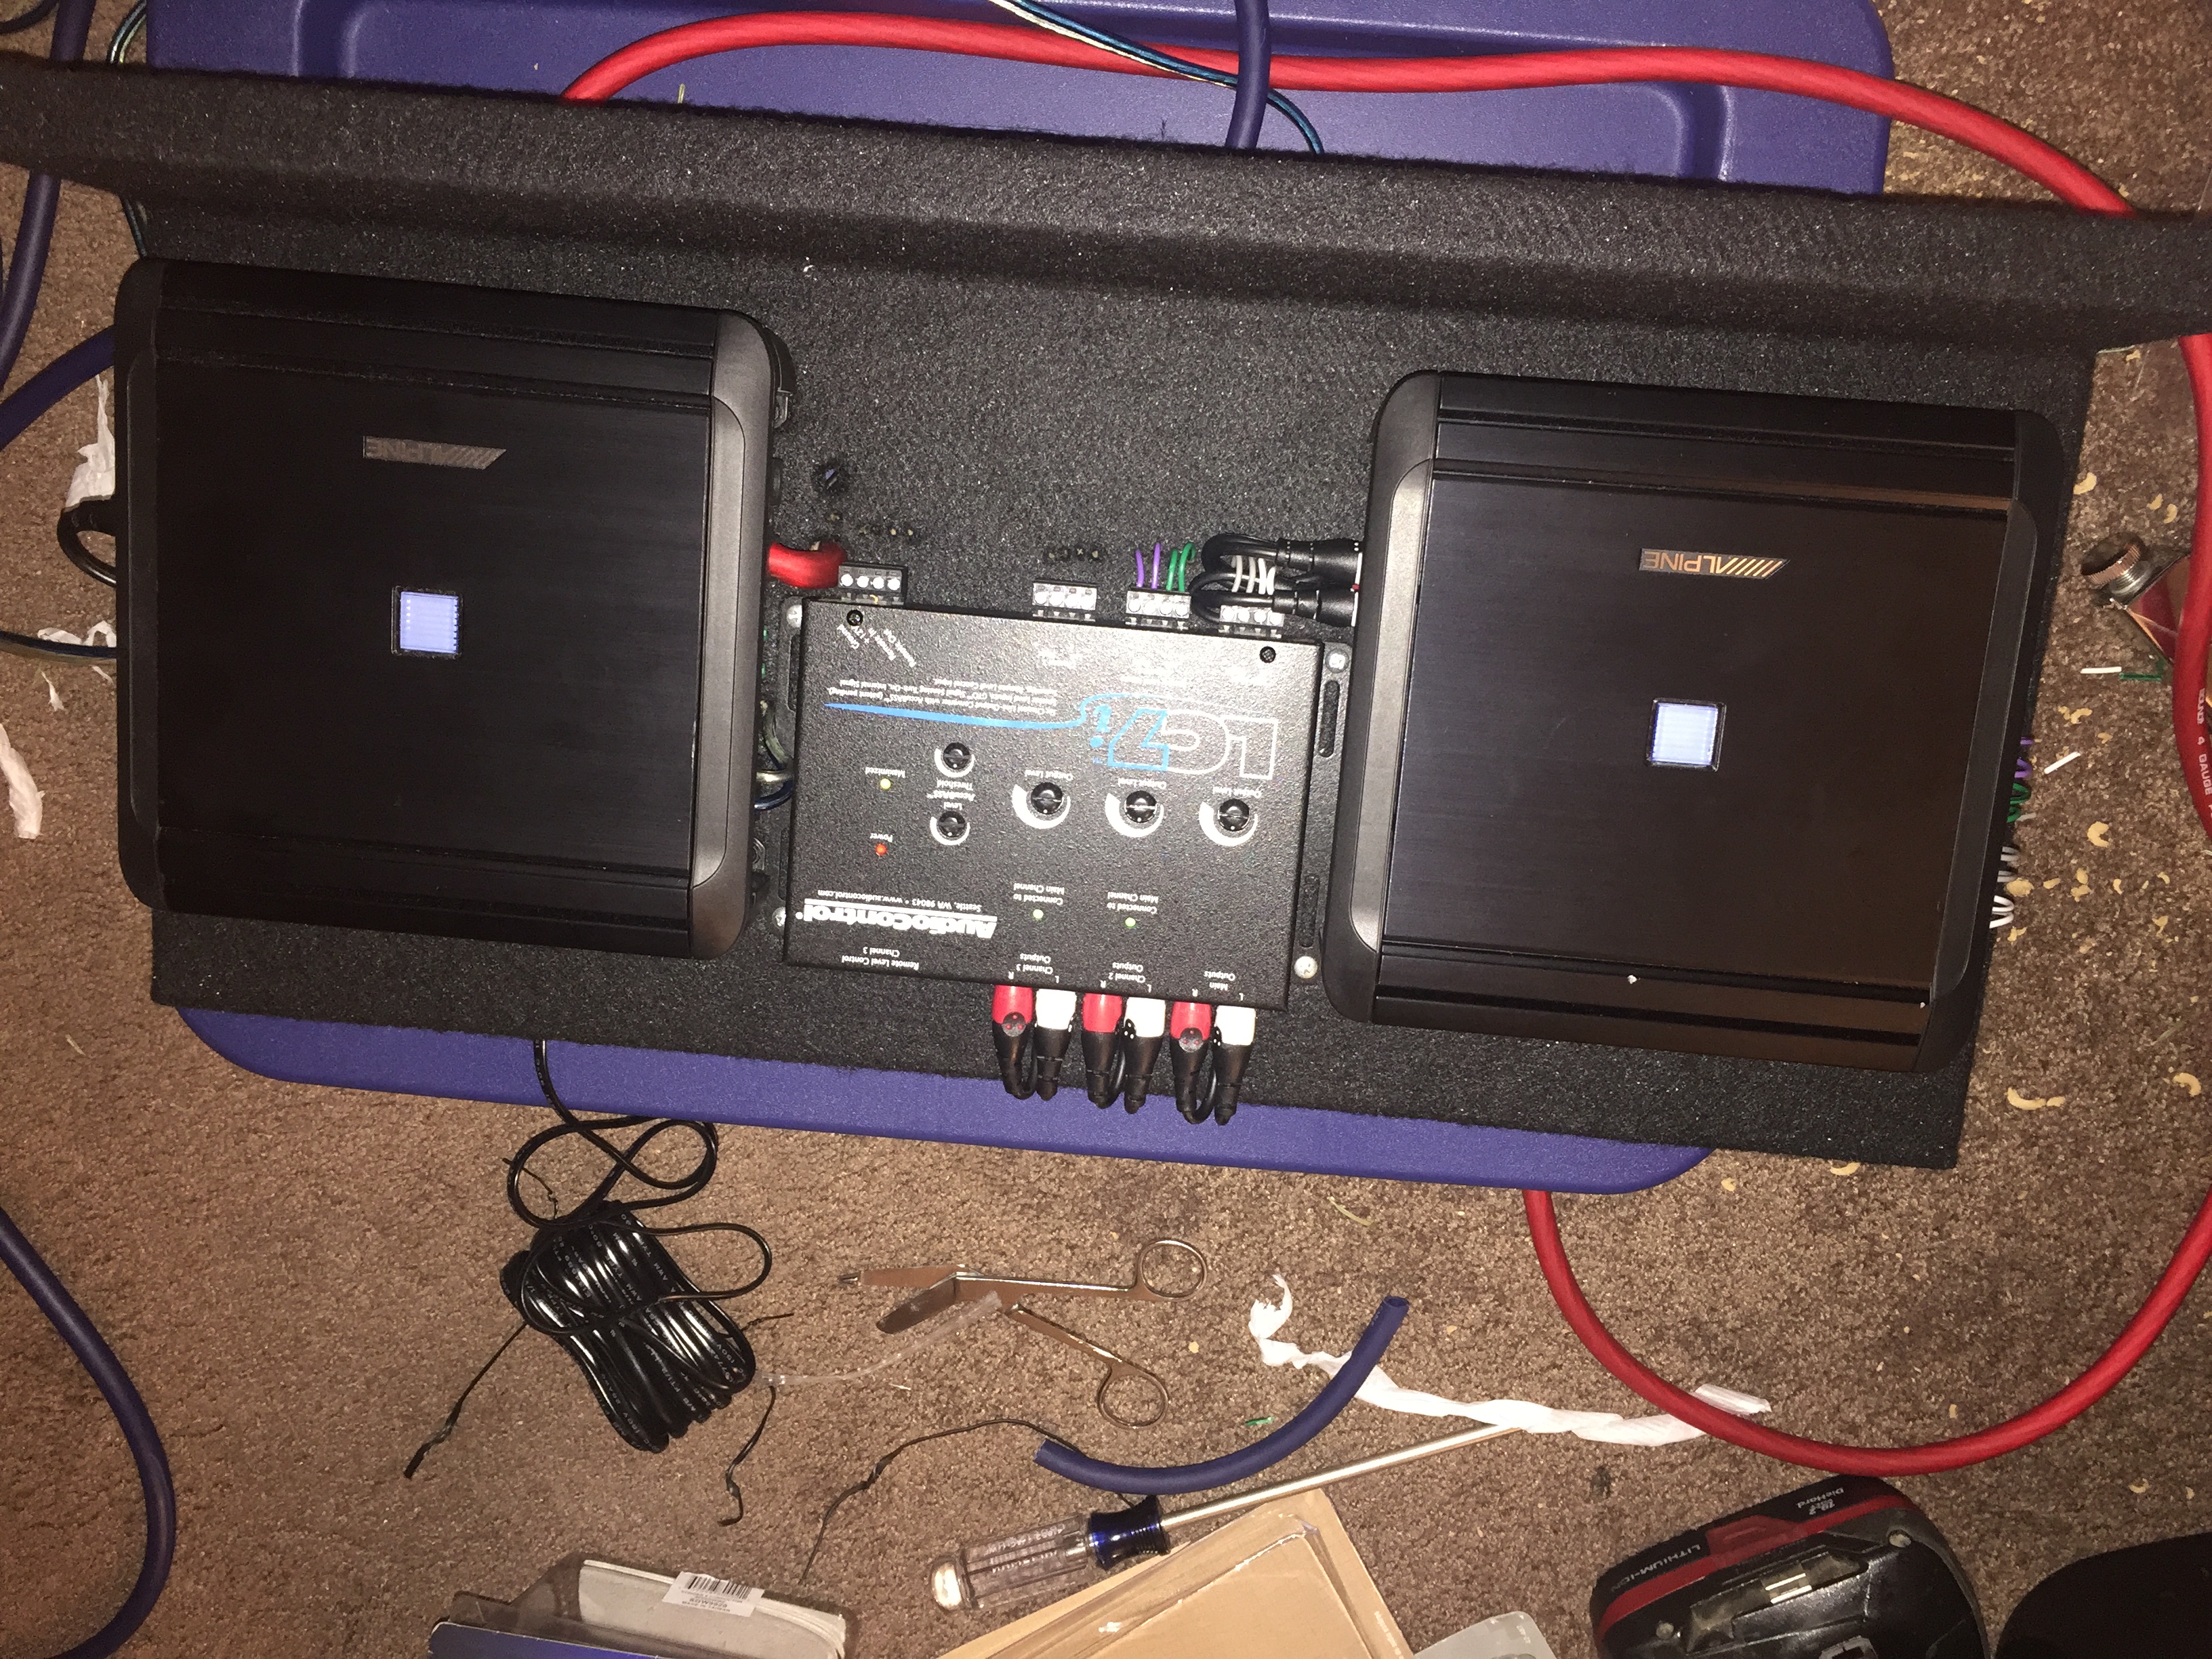
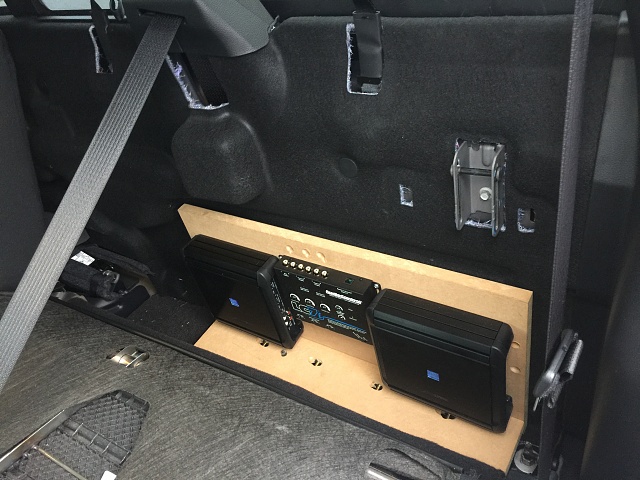
On the picture where the rack is installed on the wall, u can see a hole where the bolt goes through right under the Left side amp. I drilled it to where the hole has some pressure on it and pushes the whole amp rack on to the wall to keep it from wobbling. It holds it up really sturdy and i dont think it will heed any drilling or anything like that.
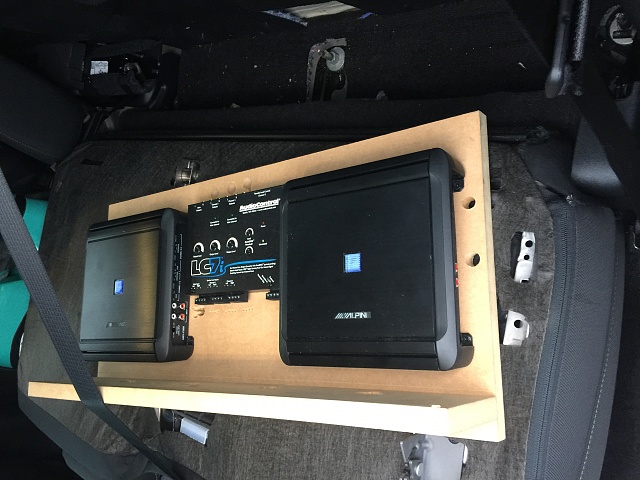
The seats have complete movement, when the seat is pulled up all the way, it barely touches the amps and pushes them back like 1/8 of an inch. Which is nothing. I just thought i would let you guys know. Im sure someone is wanting task me that.
After i had the amps placed on the amp rack the way i liked it, i started to drill a bunch of holes to run the wiring through the amp rack for a clean setup.
This is where i finished up today. If u guys like this, i can keep updating this project. I only work on it for a bit like once or twice a week so, it is probably gonna take me a while to complete.
Anyways, thanks for viewing. Hope u guys like this preview.
I recently purchased this 2016 F150 XLT Sport. I did not get the Nav option and it does not have the Sony System.
As many of us know, the sound on these is super basic. It sucks. So i decided to upgrade the system.
Just to let you guys know, i am not any type of professional in any way shape or form, i am a huge fan of DIY projects but i am limited to doing things in the living room of my apartment. I live in a complex, so i try to do as much as i can inside my apartment and i try to take the things alredy assembled to the vehicle. This is because i dont want strangers to know what i am installing in my truck. So, i know that my drilling isnt straight, and i dont have any fancy tools. Just a drill, some bits, a knife, and a basic socket set from sears.
I am a huge fan of the Alpine components. Their S-Type are budget friendly and sound really good. So, i sprung on a mission to upgrade my stereo system on a low budget. So, this is what i came up with...
MRV-F300 V-Power 4 Channel AMP
MRV-M500 V-Power Mono Amp
Rux-**** Bass Control Remote
SPS-110TW 1" Component Tweeter
SPS-610 6.5" 2-Way Coax Speakers
SPS-619 6x9 3 Way Coax Speakers
LC7i AudioControl 6 Channel Line Out Converter
72-5602 Metra Speaker Wiring Adapters
82-5605 Metra 6.5" Speaker Mounting Adapter Rear Door
82-5606 Metra 6x9 Speaker Mounting Adapter Front Door
Stinger 9 Conductor SpeedWire
1/0 Power & Ground Cable
4 Guage Power Cable
SPD5204 Stinger Fuse Holder
SHD20 Distribution Block 1/0 to Dual 4 guage
40TCWS104 10" Truck Enclosed Box With Subwoofer
This is what I consider a Super Sweet Budget Build. My budget was Laid out at 700 dollars. And i think i am still under budget by 20 or 40 dollars. Amazon helped out alot and also best buy has a great price match guarantee. This helped out alot with cost.
So, first i cut out a piece of paper and placed it in the back of the cab. Folded it and trimmed it to the size i imagined the amps would fit. Then i went inside and placed the amps and LOC on it.
AMP RACK
I went to the local Home Depot and looked for a piece of MDF Board. I was Able to find a small piece which was about 2-3 inches short from my measured piece of paper. I had the guy trim it at the store and then i bought some T-Nuts and 1/4-20 3" long screws.
There was a piece that i had cut separate which i want to use to stabilize the Amp Rack by using the seat mounting bolt to press it hard on to the wall to keep it still.
I drilled some holes on to the board and installed the T-Nuts. Then went to the truck and got a rought estimate of where i would drill the hole for the seat mounting bolt to go into.
On the picture where the rack is installed on the wall, u can see a hole where the bolt goes through right under the Left side amp. I drilled it to where the hole has some pressure on it and pushes the whole amp rack on to the wall to keep it from wobbling. It holds it up really sturdy and i dont think it will heed any drilling or anything like that.
The seats have complete movement, when the seat is pulled up all the way, it barely touches the amps and pushes them back like 1/8 of an inch. Which is nothing. I just thought i would let you guys know. Im sure someone is wanting task me that.
After i had the amps placed on the amp rack the way i liked it, i started to drill a bunch of holes to run the wiring through the amp rack for a clean setup.
This is where i finished up today. If u guys like this, i can keep updating this project. I only work on it for a bit like once or twice a week so, it is probably gonna take me a while to complete.
Anyways, thanks for viewing. Hope u guys like this preview.
Please keep it going. I and I'm sure others enjoy watching builds.
I'm still trying to figure out how you got all that for under $700? Nice job. PLease keep the pictures coming. I'm planning a build for my 2016 Screw and want to do something very similar.
This was one of the more difficult portions of the install because I wanted everything to run down the passenger side to keep it away from the audio signal wires as well as connect to the battery which is on that side. There is very little room to work so it took several hours to get this run through the firewall in this manner. I'm very happy with how well it came together, but it wasn't much fun. Also, I used the full amount of the 4Ga wire running it this way, so there isn't a lot of extra in that kit.
Thanks for taking the lead on this 1Chad. Since you warned us how difficult it would be I devised a modified wire pulling method. Once I pulled off the grommet, I poked an ice pick tool through the hole and into the mouse fuzz felt stuff. I felt around on the inside (got a bloody finger from the ice pick) and then I poked a skinny longer screwdriver through the hole, taped a small pull wire to it with gorilla duct tape, and pulled it back. Then I poked a larger screwdriver through the hole to make it even bigger. I had to pull my 8 AWG wire through from the outside but it worked with relative ease (20 min total).
I like the passenger side power wire run for the same reasons as you. Cleaner installation and less possible interference. I pulled an additional wire through for future additions.
Update on my Amp Rack on my 2016 F150 Non-Nav, Non-Sony
I just wanted to post up todays progress on my amp rack for those interested.
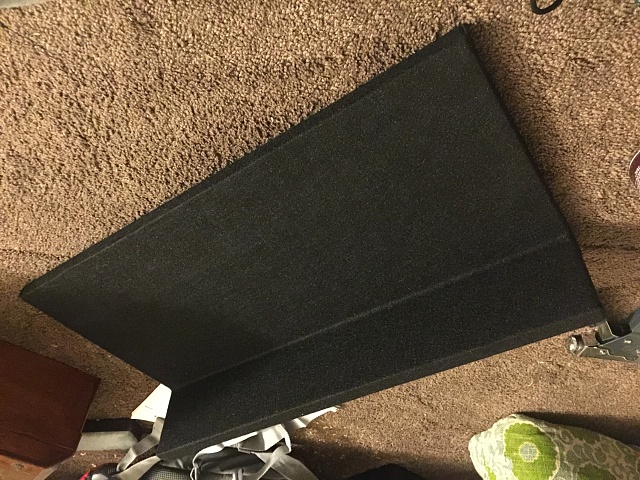
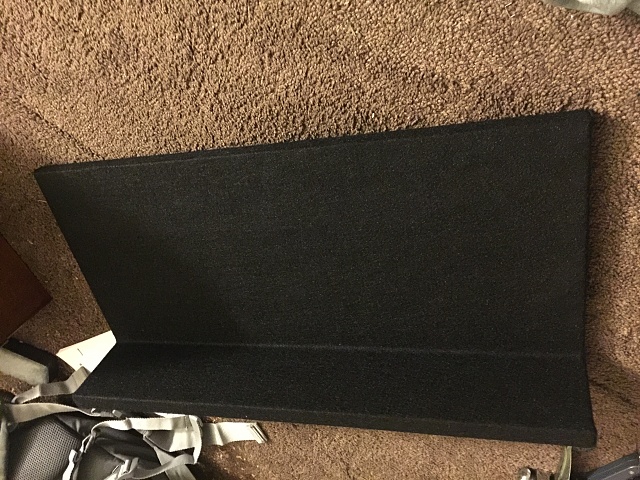
I went to the local stereo store and wanted to biy a small piece of speaker box carpet. But, they dis not have it in stock. I asked if they had any lefrover pieces laying around and the man found a small piece behind his work table. He let me have it.
I got home and unmounted the amps from the rack. I the. Glued the carpet to the box using 3M spray adhesive. I think it came out decent.
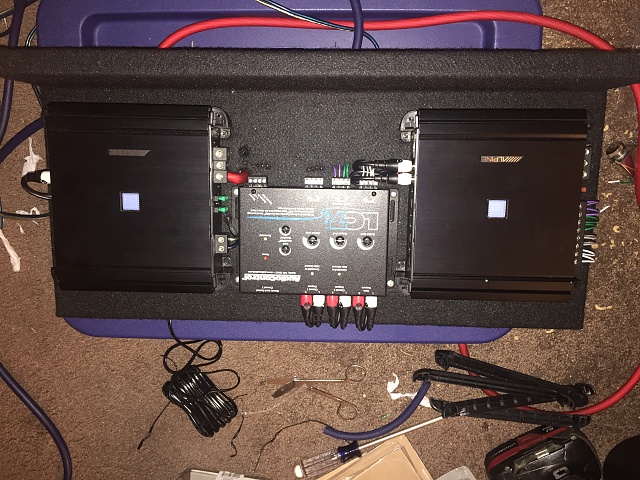
I went to mount the amps to the rack and i think it looks great. I also started to pre-wire the amp rack. I havent finished but i took some pictures of where i finished off for the day.
Great great write up. My head is spinning from all this info
I am also looking to install a similar setup, trying to keep the 4" screen in my '15 XLT & upgrade the speakers & possibly an amp. Question is, do I really need a signal processor ? Will I get by just fine w/ new speakers & an amp ? I wasn't originally gonna do an amp but after reading numerous posts it seems like any aftermarket speaker would be severely degraded w/o one.

 12-10-2016, 11:23 AM


 Since you warned us how difficult it would be I devised a modified wire pulling method. Once I pulled off the grommet, I poked an ice pick tool through the hole and into the mouse fuzz felt stuff. I felt around on the inside (got a bloody finger from the ice pick) and then I poked a skinny longer screwdriver through the hole, taped a small pull wire to it with gorilla duct tape, and pulled it back. Then I poked a larger screwdriver through the hole to make it even bigger. I had to pull my 8 AWG wire through from the outside but it worked with relative ease (20 min total).