
2015 CrewCab Sub box for behind seat (with dimensions!!!)
 02-09-2017, 08:29 AM
#1
Senior Member
Thread Starter

Hello.
I picked up a 2015 f150 crewcab at the end of October and have begun the process of making it my own. Like many others in this section, I felt that the stereo system was rather lacking. I've always had a sub in my vehicles, so why not add the truck to the list! I am 39 years old, so blowing out my eardrums isn't on my list like it was back in my 20s. I just want to fill out the sound, and have it sound better than the kicker sub from the factory. The only other requirement was, I didn't want to loose any space. I have 2 kids under 3 and have car seats/toys, tools....you name it, it will be in my truck, so I wanted to have full access under the seats, as well as still be able to flip them up to the original locking position. Many of the threads on here have been helpful, so I figured I would share my progress. and hopefully it will help someone else if they are interested in building a similar box!
After taking a bunch of measurements and then researching different subs, I came to the decision to go with a 8" Kicker Comp RT. It is a shallow mount sub and I think will do the job. Part of me wanted to go with a 10" JL shallow mount, but I honestly think it would have been too much for my liking in this cab. The box measurements could possible still fit a 10' jl, but I never confirmed it. I will be powering the sub with a Punch P300x1.
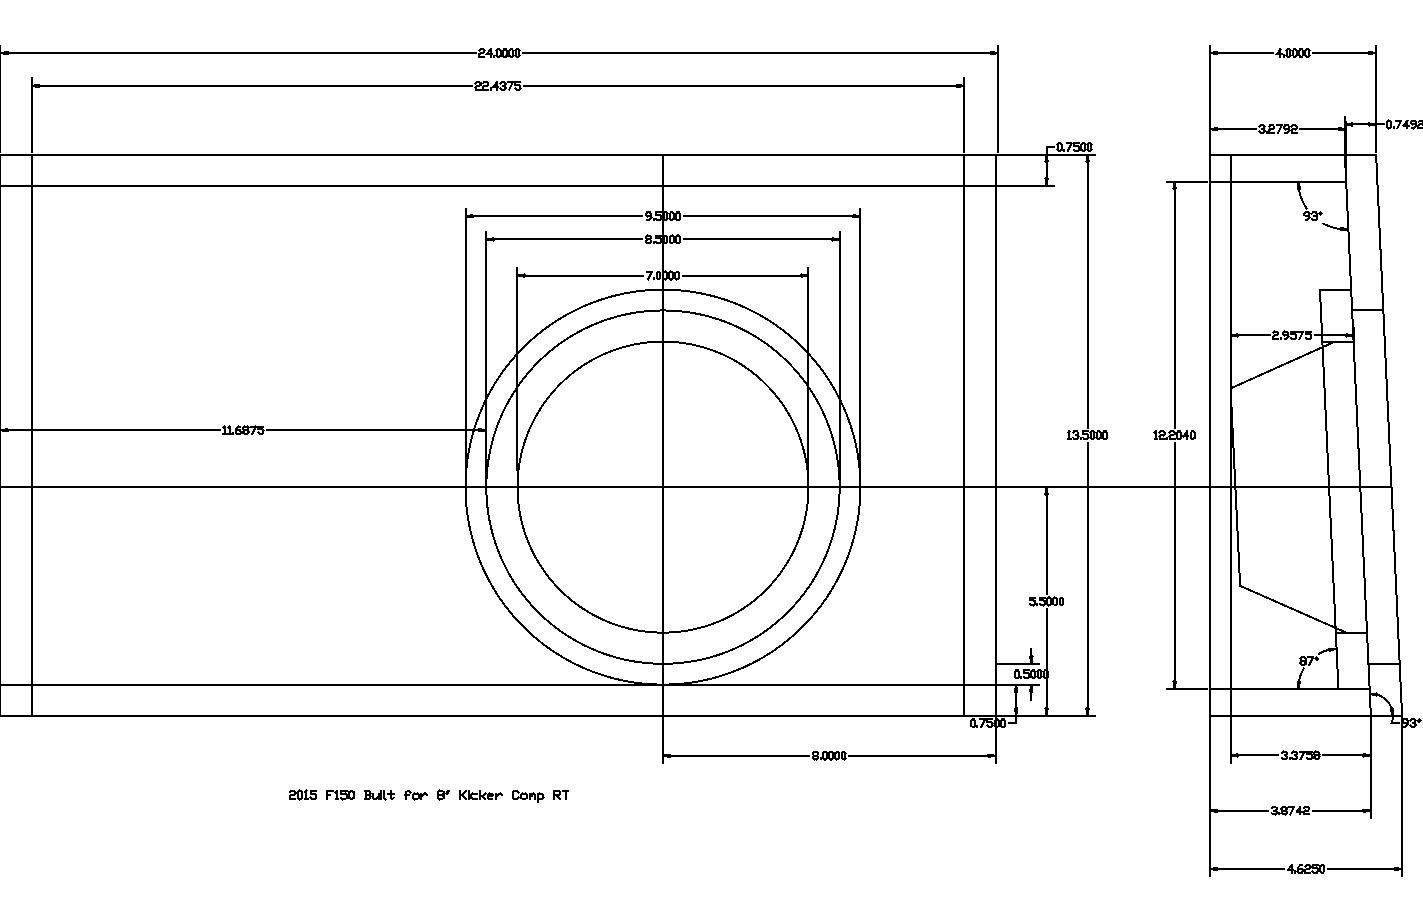
I did a rough drawing in autocad to confirm I had enough clearance for the magnet. If my math was correct the internal volume of the box ended up being .49 cubic feet.
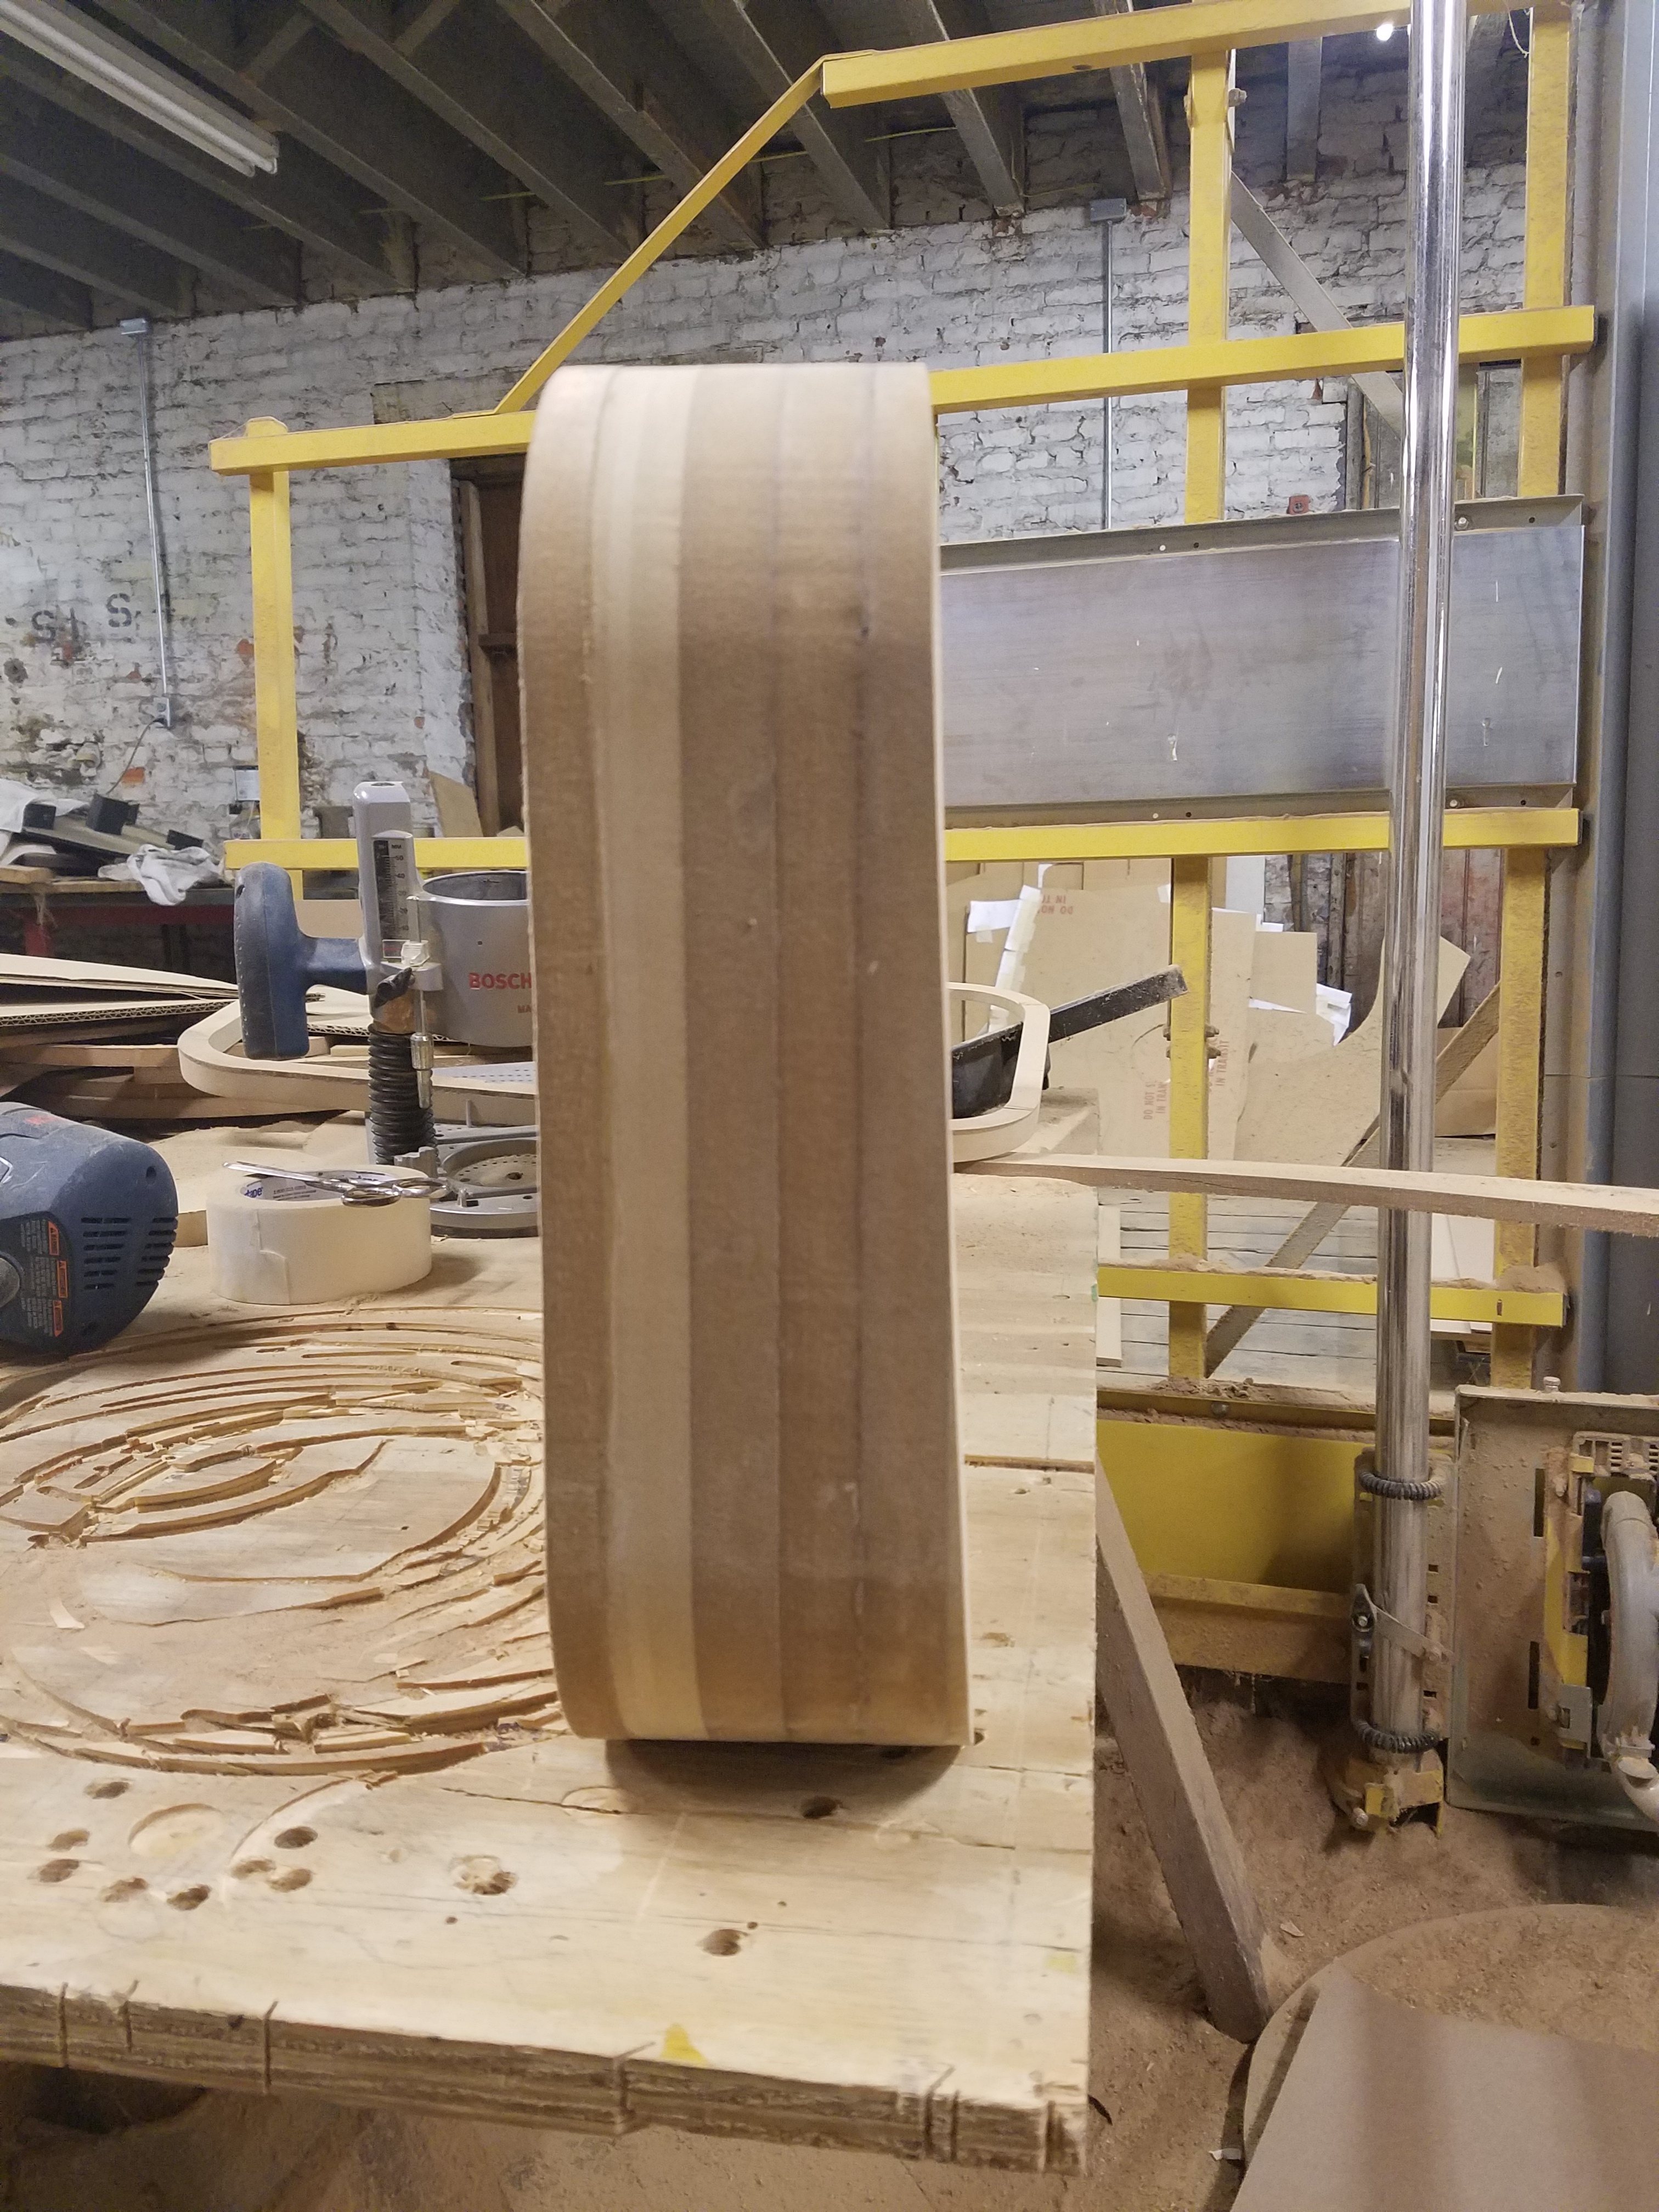
Once I knew I was good on the fit, I began the process of building. I decided to build the box using a stacked method, just because I wanted to try something different, and liked the rounded corners.
The start of the layer cake

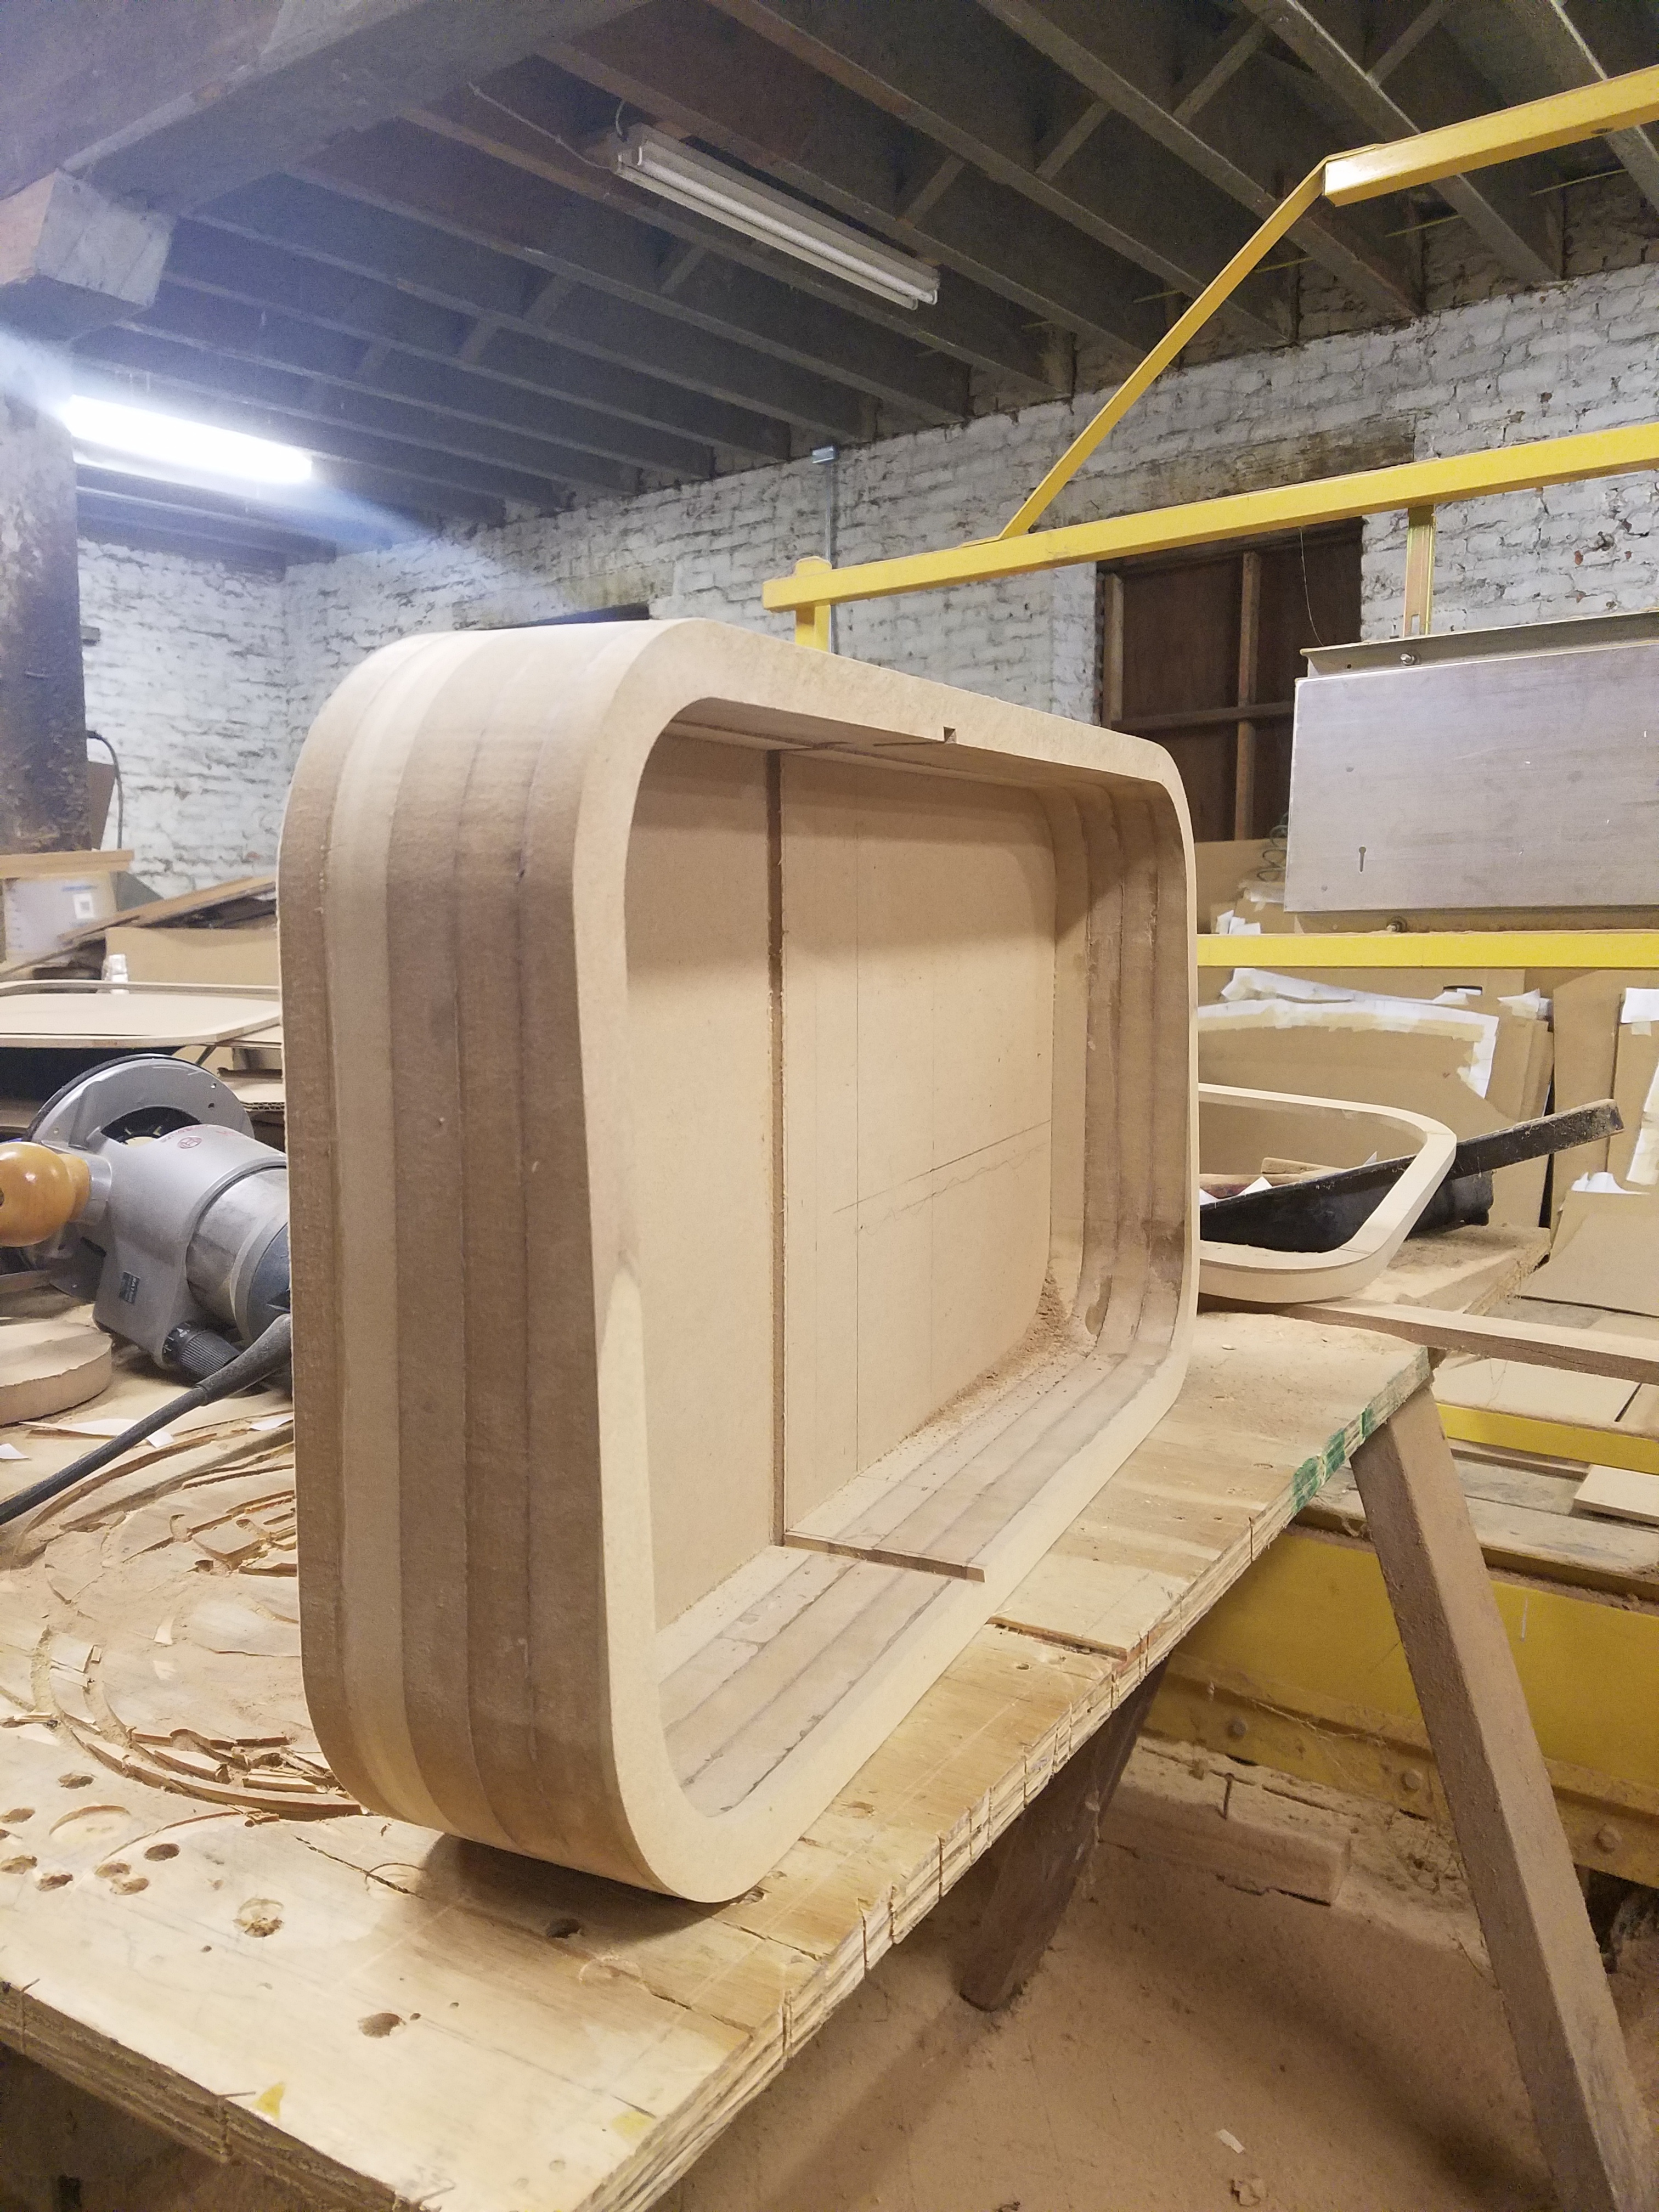
Stacked and all glued up.

This shows the slight taper to the enclosure.
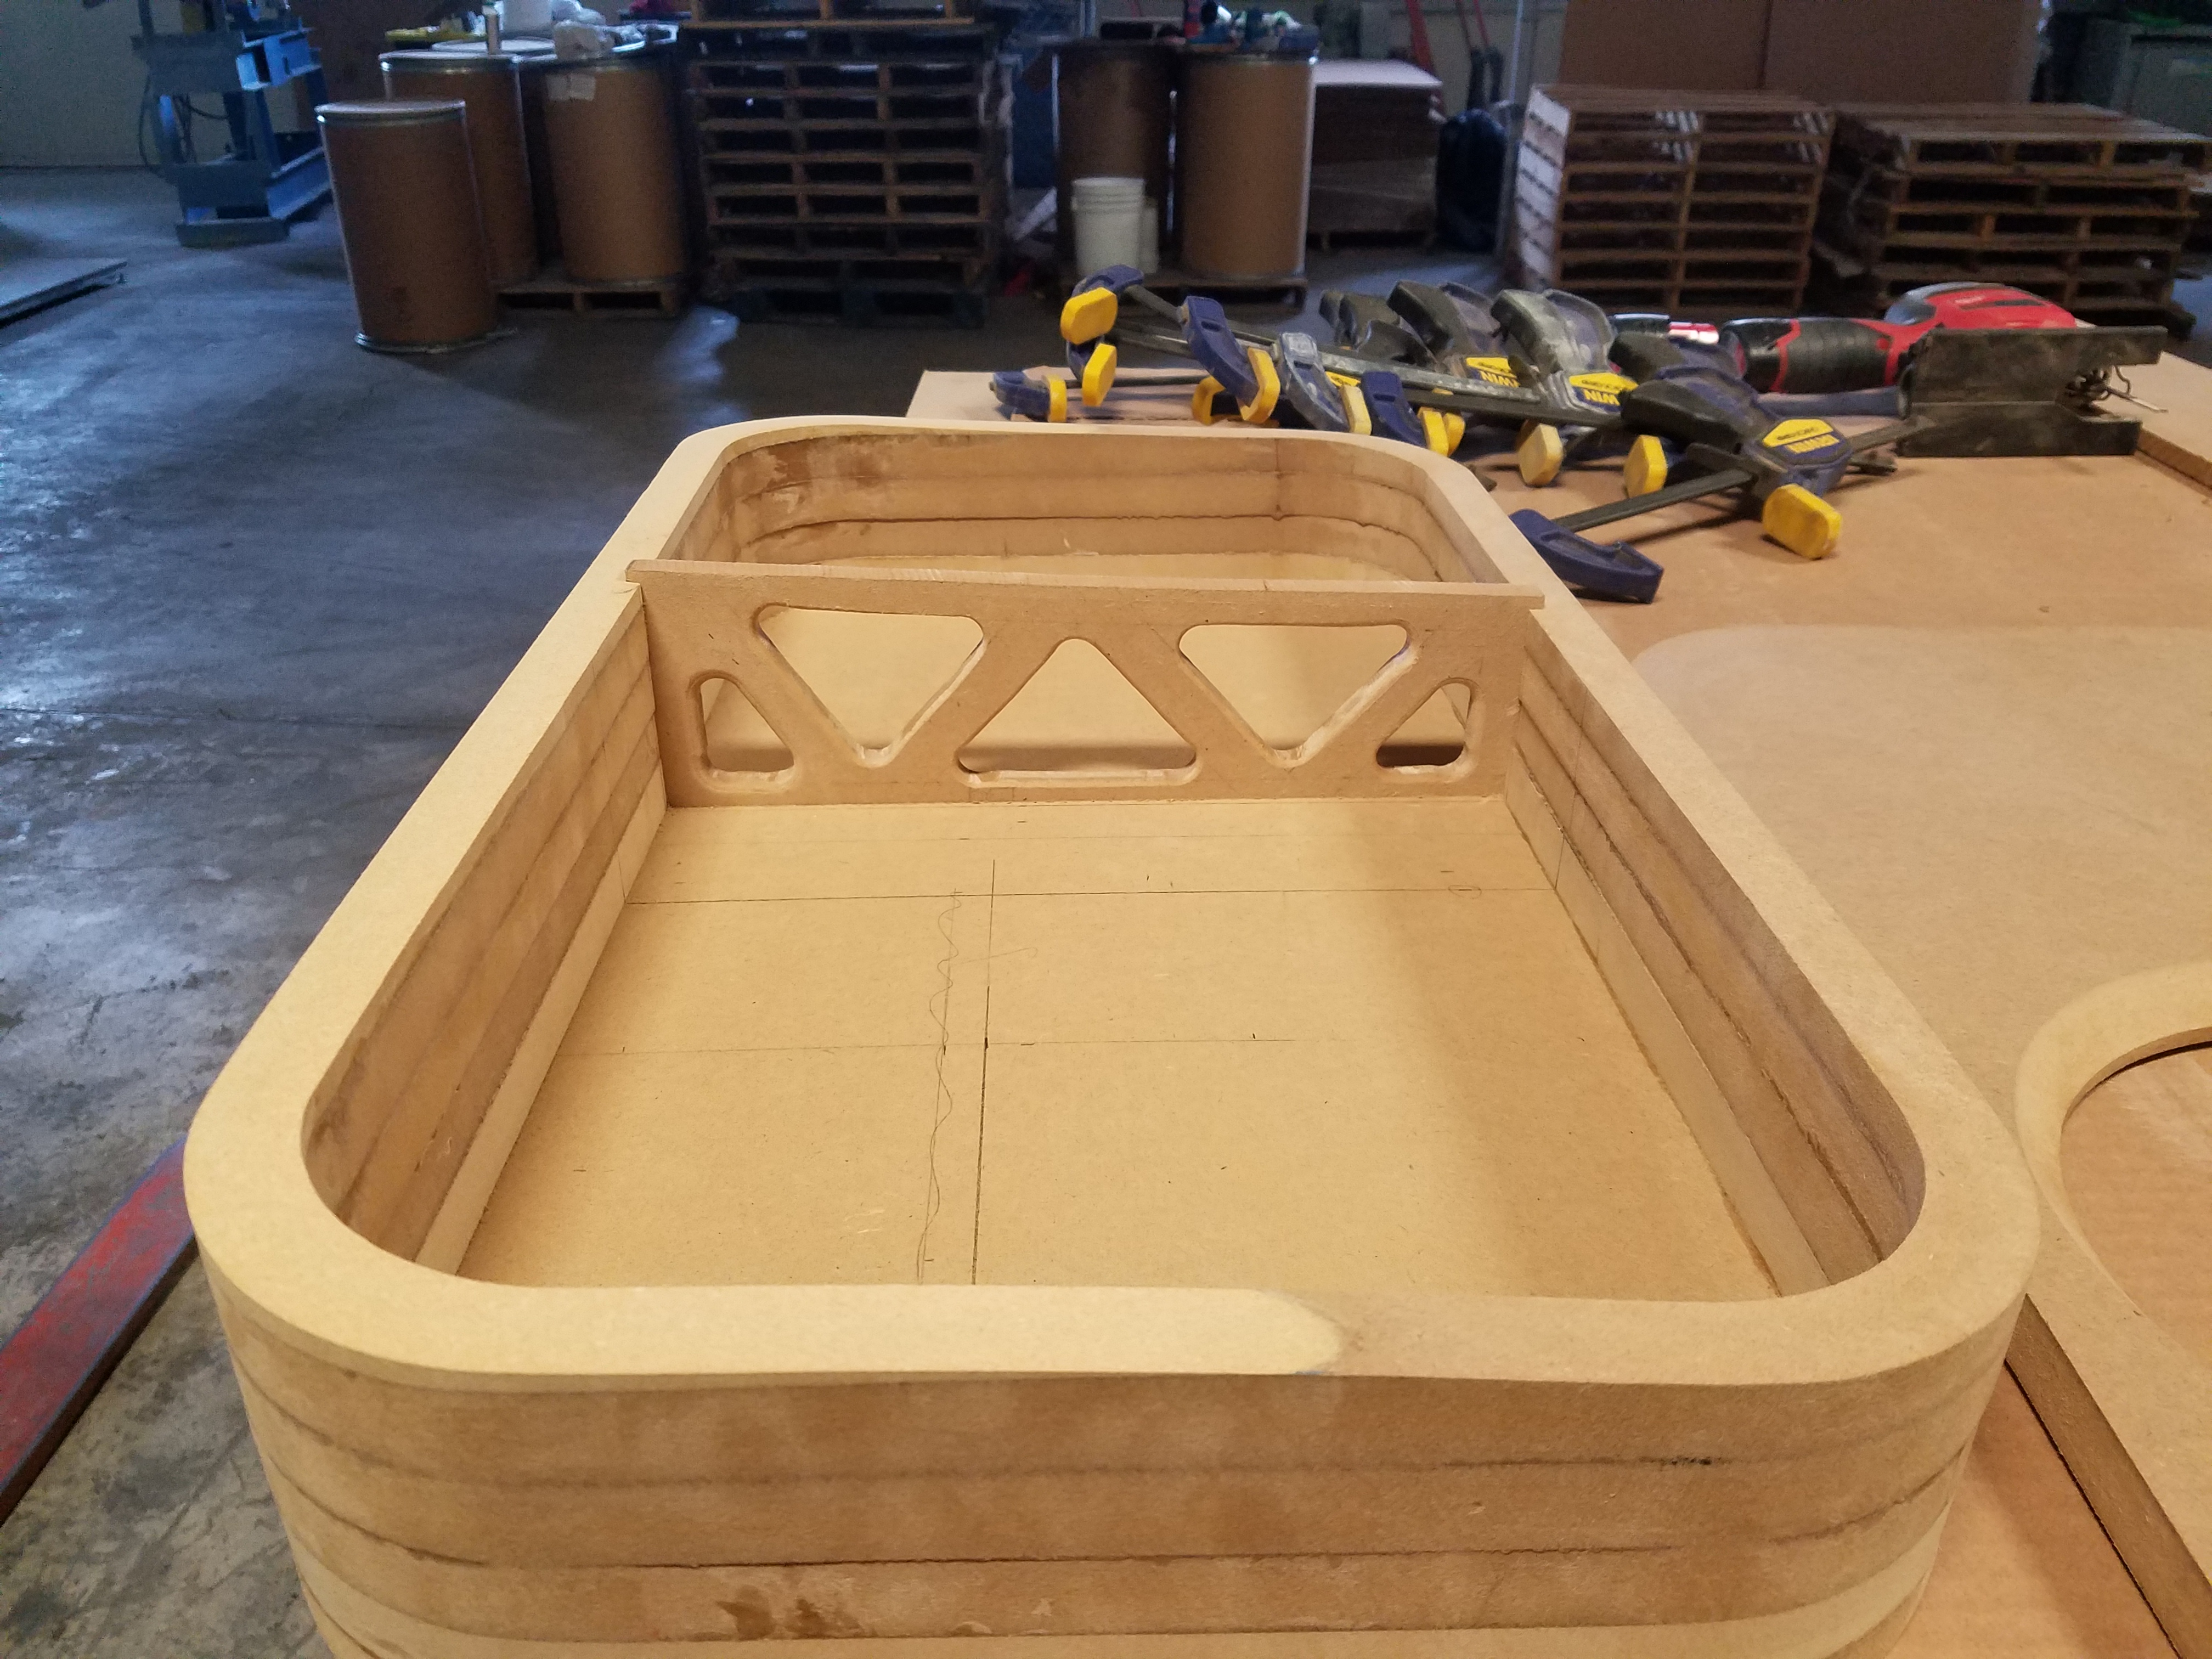
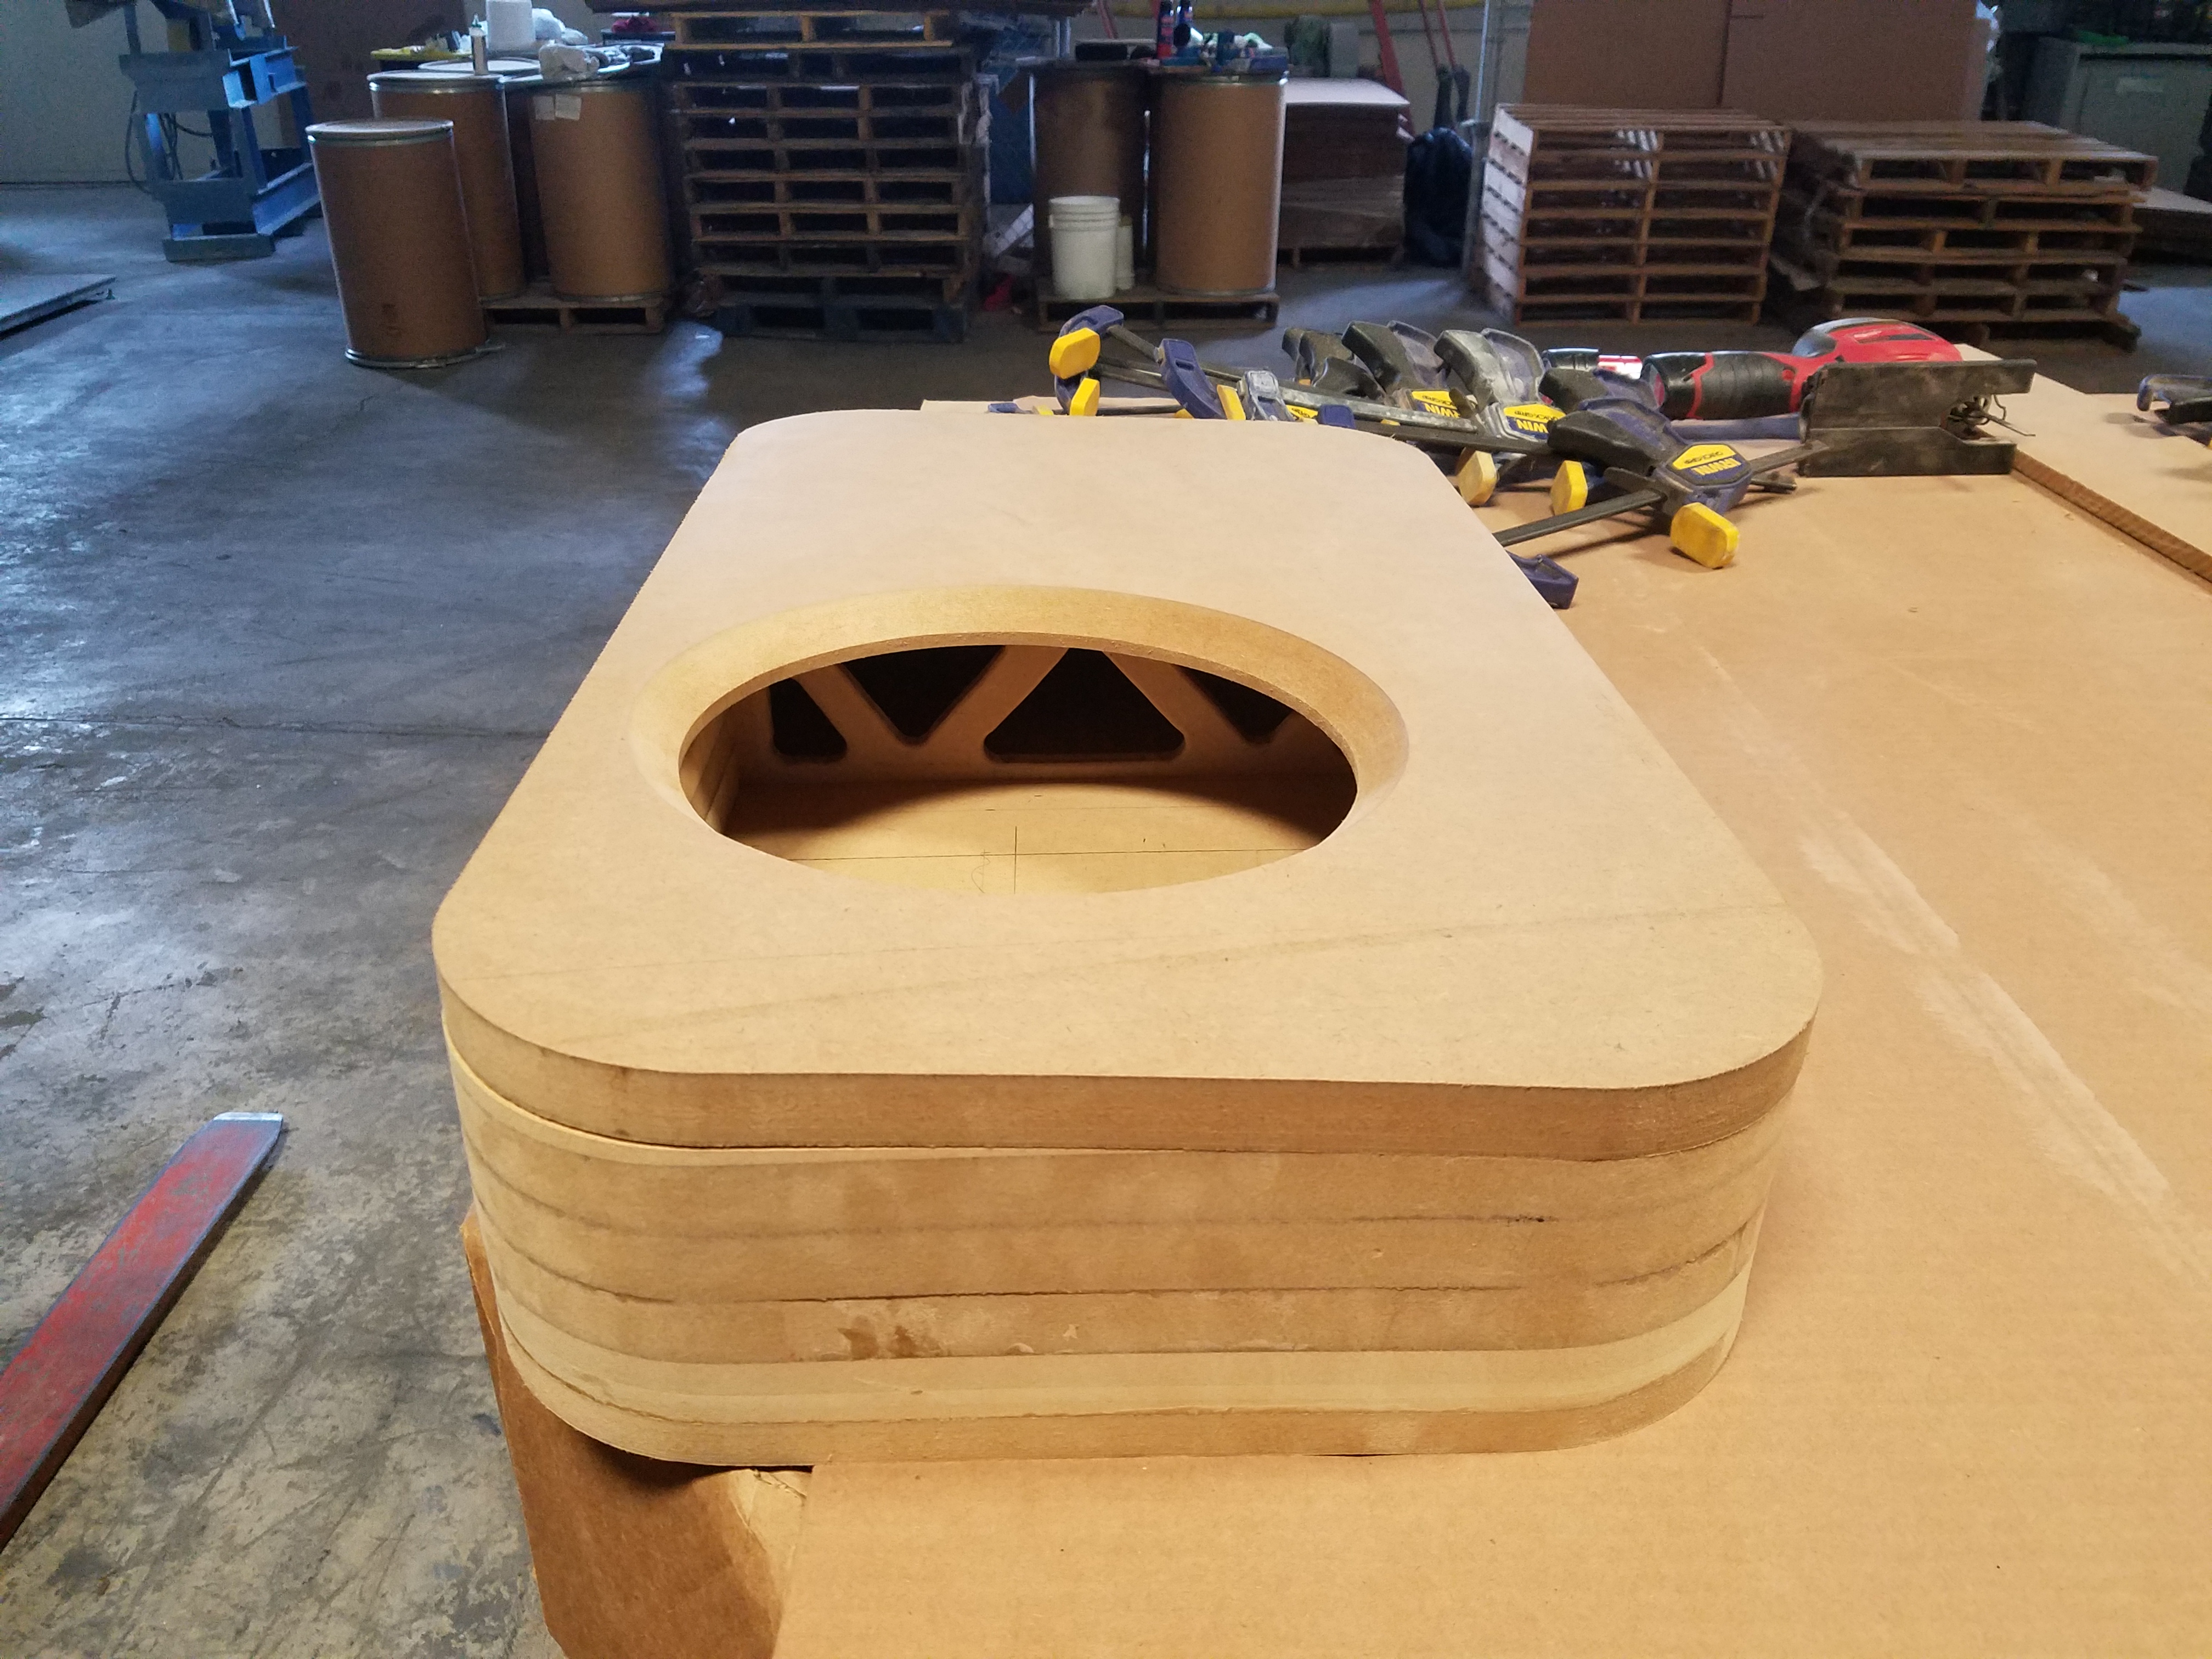
Because I chose to use 1/2" mdf on the back, I decided to add an internal brace to help strengthen the box. you can see the routed groove for the brace.
Brace installed and glued in
And the cover just sitting on top. haven't decided on the final look of the top, so I am holding of on gluing in on. Plus I plan to put a layer or 2 of fiberglass on the inside of the box to help strengthen it.
I will update as I progress, be patient, I work two jobs and time is limited, but I'm excited to finish this and get it installed!!
I picked up a 2015 f150 crewcab at the end of October and have begun the process of making it my own. Like many others in this section, I felt that the stereo system was rather lacking. I've always had a sub in my vehicles, so why not add the truck to the list! I am 39 years old, so blowing out my eardrums isn't on my list like it was back in my 20s. I just want to fill out the sound, and have it sound better than the kicker sub from the factory. The only other requirement was, I didn't want to loose any space. I have 2 kids under 3 and have car seats/toys, tools....you name it, it will be in my truck, so I wanted to have full access under the seats, as well as still be able to flip them up to the original locking position. Many of the threads on here have been helpful, so I figured I would share my progress. and hopefully it will help someone else if they are interested in building a similar box!
After taking a bunch of measurements and then researching different subs, I came to the decision to go with a 8" Kicker Comp RT. It is a shallow mount sub and I think will do the job. Part of me wanted to go with a 10" JL shallow mount, but I honestly think it would have been too much for my liking in this cab. The box measurements could possible still fit a 10' jl, but I never confirmed it. I will be powering the sub with a Punch P300x1.
I did a rough drawing in autocad to confirm I had enough clearance for the magnet. If my math was correct the internal volume of the box ended up being .49 cubic feet.

Once I knew I was good on the fit, I began the process of building. I decided to build the box using a stacked method, just because I wanted to try something different, and liked the rounded corners.
The start of the layer cake

Stacked and all glued up.

This shows the slight taper to the enclosure.

Because I chose to use 1/2" mdf on the back, I decided to add an internal brace to help strengthen the box. you can see the routed groove for the brace.

Brace installed and glued in

And the cover just sitting on top. haven't decided on the final look of the top, so I am holding of on gluing in on. Plus I plan to put a layer or 2 of fiberglass on the inside of the box to help strengthen it.

I will update as I progress, be patient, I work two jobs and time is limited, but I'm excited to finish this and get it installed!!
Last edited by gintyfab; 02-09-2017 at 08:34 AM.

The following users liked this post:
jjbff45 (04-04-2017)

 02-09-2017, 05:47 PM
#5
 02-10-2017, 09:03 AM
#6
Official HTT Greeter
I ended up just modifying a Pioneer 12" box to fit. Probably wound up being as much work as starting from scratch....But it fit, and it kept me occupied during the sub-freezing nights of December rather than buying Harley parts.
02-10-2017, 10:58 AM
#7
Senior Member
Thread Starter
Trending Topics
02-11-2017, 03:58 AM
#8
Mass Effect
 02-11-2017, 05:19 PM
#9
Senior Member
Please keep us posted on this. Very good quality work. Plus i would be interested in buying the same box from you if everything turns out good and you are up too making a few more since I am sure i am not the only one interested in one.