
X-mas in November woohoo
 02-27-2015, 11:05 PM
#21
Senior Member
Nice indeed. Finally broke down and bought a pair but not for me. They are for my brother and his wife's birthdays. They are a week apart and they will both be 75 in July. He currently has one of my factory nerfs on the passenger side and nothing on the driver side do to being short two brackets because of my steps. I hope to put them on this weekend, if he'll let me. Have you noticed any ill effects of not cutting the boards and would you recommend not cutting them? What are pros and cons of motor in front or back and which would you recommend? Thanks in advance, Denny
No ill effects to not cutting. I actually think it looks cleaner as it runs the whole length of the rocker.
I don't think it's optional motor wise. On the scab you have to put it up front because of frame mount being in the way on passenger side. The drivers side goes to the rear.
 02-27-2015, 11:15 PM
#22
Member

Thread Starter


Nice indeed.
Finally broke down and bought a pair but not for me. They are for my brother and his wife's birthdays. They are a week apart and they will both be 75 in July. He currently has one of my factory nerfs on the passenger side and nothing on the driver side do to being short two brackets because of my steps. I hope to put them on this weekend, if he'll let me.
Have you noticed any ill effects of not cutting the boards and would you recommend not cutting them?
What are pros and cons of motor in front or back and which would you recommend?
Thanks in advance,
Denny
The boards come crew cab length but are the exact same length as the super cab nerfs I took off, motor position is universal unless going on a super cab, this is due to the body mount on the passenger side, it is in the way of putting that motor in the rear. Don't really matter otherwise because the wiring harness comes long enough to mount the motors to the rear.
Only way I would cut them is if going on a regular cab truck. Otherwise leave them alone.
03-01-2015, 11:14 AM
#23
Senior Member

Thanks guys. They're on but I wish I had cut them. They are 80" long and don't fit quite right when retracted. The original nerfbars are 76" and the AMPs would fit better at that length. I'll let my brother decide as it's his truck. He may just make me take them off no matter the length.
The install wasn't bad (OBD version) but there is definitely room for improvement in their design.
Thanks again guys.
The install wasn't bad (OBD version) but there is definitely room for improvement in their design.
Thanks again guys.

 03-01-2015, 11:18 AM
#24
Senior Member
Thanks guys. They're on but I wish I had cut them. They are 80" long and don't fit quite right when retracted. The original nerfbars are 76" and the AMPs would fit better at that length. I'll let my brother decide as it's his truck. He may just make me take them off no matter the length. The install wasn't bad (OBD version) but there is definitely room for improvement in their design. Thanks again guys.
Hmmm, very weird! Mine tuck right up with no problems and I didn't cut them at all. I wonder if there is something in the way.
What would you improve? I thought the kit was easy and straight forward. The OBd2 system was nice and easy compared to the tap into harness ones.
03-01-2015, 11:43 AM
#25
Member
Thread Starter
Very odd indeed, my nerfs were the chrome design and 76" long, the amp boards I received are exactly the same length, you can still cut them, just take off one of the end caps, cut and then replace the end cap.
03-01-2015, 12:29 PM
#26
Senior Member
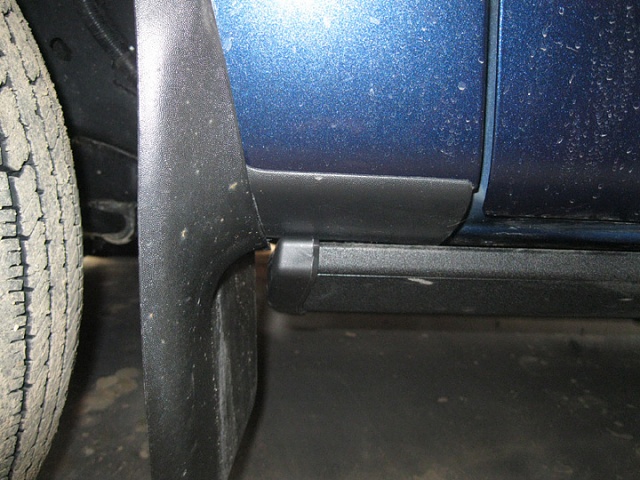
They hit the plastic piece behind the front wheels. I could move them back to clear that piece but then they would extend beyond the cab and under the box which is not proper. AMP suggests 72� but 76� would be perfect. For the price you pay and the fact that you have to indicate cab style, they should come in the proper length. But, I realize it�s about economics of inventory.
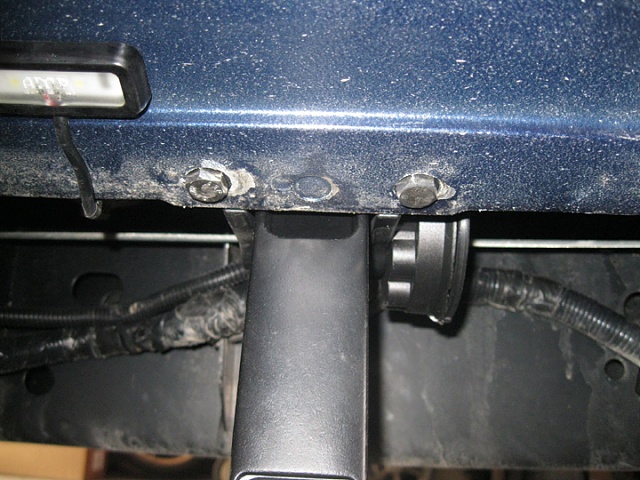
Some of the washers supplied are too small. They fit through the outer holes and are only holding on one thickness of sheet metal. They should be fender washers.
The light wires should exit closer to the face to better clear the step in the sheet metal. The light wires could be a couple inches longer as could the driver side motor wires. The instructions didn�t even mention to shrink the light wire butt splices. I bet there are many �professional� installers that don�t even know those are heat shrink connectors.
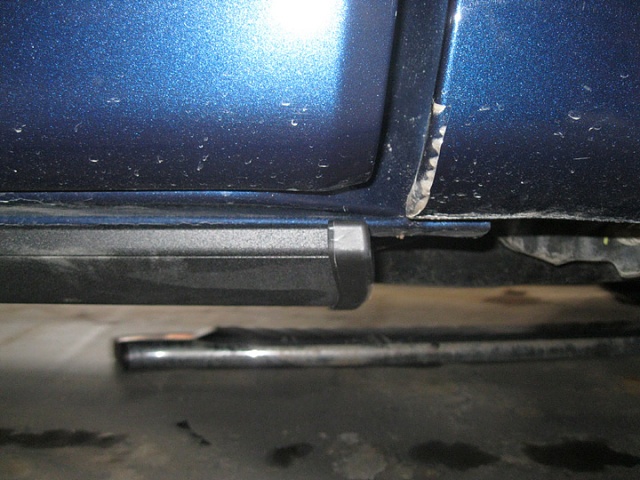
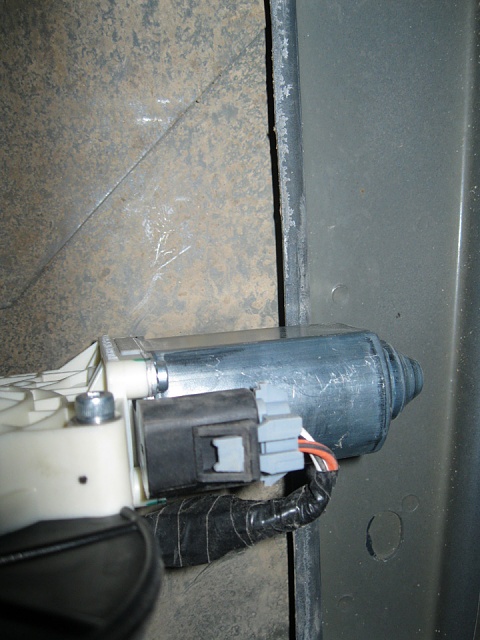
The passenger side motor hits a floor support/stiffener. Hopefully there isn�t enough undue pressure to cause failure of some sort. Also, having that motor in the front (Super Cab) is unacceptable in my mind. It is going to be constantly assaulted by front tire spray and will likely fail due to salt damage. If the motor arms were left and right they could both be mounted in the rear and these issues wouldn�t exist.
Even though the instructions leave much to be desired, installation wasn�t too bad and it looks to be a quality product. Only time will tell how well they hold up to Minnesota winters and by brothers� abusive neglect.
My observations are a bit **** and shouldn't deter anyone from choosing this product.
Thanks again,
Denny
P.S. This was a Super Cab installation. Super Crew and Regular Cab will be different.


Some of the washers supplied are too small. They fit through the outer holes and are only holding on one thickness of sheet metal. They should be fender washers.
The light wires should exit closer to the face to better clear the step in the sheet metal. The light wires could be a couple inches longer as could the driver side motor wires. The instructions didn�t even mention to shrink the light wire butt splices. I bet there are many �professional� installers that don�t even know those are heat shrink connectors.

The passenger side motor hits a floor support/stiffener. Hopefully there isn�t enough undue pressure to cause failure of some sort. Also, having that motor in the front (Super Cab) is unacceptable in my mind. It is going to be constantly assaulted by front tire spray and will likely fail due to salt damage. If the motor arms were left and right they could both be mounted in the rear and these issues wouldn�t exist.

Even though the instructions leave much to be desired, installation wasn�t too bad and it looks to be a quality product. Only time will tell how well they hold up to Minnesota winters and by brothers� abusive neglect.
My observations are a bit **** and shouldn't deter anyone from choosing this product.
Thanks again,
Denny
P.S. This was a Super Cab installation. Super Crew and Regular Cab will be different.
03-01-2015, 12:43 PM
#27
Member
Thread Starter
I reused the bolts from my original nerfs because I had them and they have the washers you say should be included, none of the issues with wiring you say, and I don't have mud flaps, had to take them off to install flares, also I have my boards a little farther back they are dead even with the front edge of the bed. You have to be looking for it to be seen and they are always up when driving so that's a non issue.
You're being **** about it was dead on lol but like I said you can take an end cap off and trim to what ever desired look the owner wishes. 2 screws I believe and a sawzall and done. Hard to believe you would be so nit picky about it when you cut and glued a plastic measuring spoon over the auto light sensor on your dash
I measured mine and you are correct they are 80".
03-01-2015, 01:15 PM
#28
Senior Member
They hit the plastic piece behind the front wheels. I could move them back to clear that piece but then they would extend beyond the cab and under the box which is not proper. AMP suggests 72” but 76” would be perfect. For the price you pay and the fact that you have to indicate cab style, they should come in the proper length. But, I realize it’s about economics of inventory. Some of the washers supplied are too small. They fit through the outer holes and are only holding on one thickness of sheet metal. They should be fender washers. The light wires should exit closer to the face to better clear the step in the sheet metal. The light wires could be a couple inches longer as could the driver side motor wires. The instructions didn’t even mention to shrink the light wire butt splices. I bet there are many “professional” installers that don’t even know those are heat shrink connectors. The passenger side motor hits a floor support/stiffener. Hopefully there isn’t enough undue pressure to cause failure of some sort. Also, having that motor in the front (Super Cab) is unacceptable in my mind. It is going to be constantly assaulted by front tire spray and will likely fail due to salt damage. If the motor arms were left and right they could both be mounted in the rear and these issues wouldn’t exist. Even though the instructions leave much to be desired, installation wasn’t too bad and it looks to be a quality product. Only time will tell how well they hold up to Minnesota winters and by brothers’ abusive neglect. My observations are a bit **** and shouldn't deter anyone from choosing this product. Thanks again, Denny P.S. This was a Super Cab installation. Super Crew and Regular Cab will be different.
Mine do slightly touch that little plastic piece at the front but that won't deter them from working properly. This isn't Amps fault as they say to lop off 7" and line the front of the board up with the front door seam.
Other than that I have none of the other issues. My motor is clocked properly and doesn't touch anything. Harness length was fine if you followed the routing indicated. As for the lights, I agree with a little more to work with but was easy enough. Butt connectors were fine and most will/should either solder or crimp and shrink wrap the connection vs shrinking the butt connector.
As mentioned, it would take 10 mins to trim them down.
03-01-2015, 01:28 PM
#29
Member
Thread Starter
He's talking about the passenger side motor up front, mine is the same way, I used a hammer to flatten that little rib just a hair so the motor wouldn't touch it. Really don't matter as there is no movement between the parts but there could be some marking on the motor case after what little bit of body flex could possibly have over a period of several years, again a non issue.
03-01-2015, 03:30 PM
#30
Senior Member
He's talking about the passenger side motor up front, mine is the same way, I used a hammer to flatten that little rib just a hair so the motor wouldn't touch it. Really don't matter as there is no movement between the parts but there could be some marking on the motor case after what little bit of body flex could possibly have over a period of several years, again a non issue.