
Clazzio (Front) Seat Cover Install (pics)
 02-27-2016, 02:48 PM
#1

First off, I used Lockelamora and namrogd's tips for install found here: https://www.f150forum.com/f118/clazz...mments-316413/. Thank you guys. I decided to make my own thread due to complexity and also noted differences with my install. This install only covers the front seats because the rear seats are quite simple once you release the backs as shown by others and videos on youtube.
My truck: 2016 F150 2.7 EB Supercrew Sport w/ console and black cloth interior. I have 302A that has both powered front seats (heated).
Order: I ordered directly from Clazzio.com Part # 7229 "with storage in center". However, this may not be correct to order because I received covers for a center jump seat where as I have center console (Sport). Obviously I don't need the center jump seat cover but it still works.
I ordered all black: black outer, black inserts, black stitching
Tools needed:
- plastic tool provided by clazzio
- T-20 torx bit
- scissors
- freshly trimmed fingernails and tough cuticles DO NOT SKIP THIS PART
Time needed: 4 hours if you are a perfectionist, which you should be for this. It actually doesn't seem to take that long but it does. The good thing is that unlike other installs, you can do this one seat at a time, even one half a seat at a time so you can take breaks or install over several days. Like Lockelamora said, once you do it once you can do it again in half the time.
Notes: I received different instruction booklet than Lockelamora. Mine is in color and clear. There is only one major deviation I have than the instructions. They say to velcro bottoms before putting the headrest protrustions through the top of the covers. I had to do reverse because I needed more material to grab on to to work with. I slipped back of seats on, put headrest holes over headrest protrusions, then velcro the bottom. Also, the T-20 screws can be removed loosening the power controls for front seats as mentioned in Lockelamora's thread via namrogd's advice.
Disclaimer: My pictures do NOT do these covers justice. I was concerned with "PVC" and "ONLY LEATHER INSERTS" on the website, but these are absolutely great quality. I will do a cut test later using my spare jump seat cover and post the results.
I installed the driver side and then documented the passenger side install. The installs for both sides are identical.
Step 1: Raise the seats all the way up. It makes install much easier. You will need to move the seat forward and backwards several times to get best access during various parts of install.
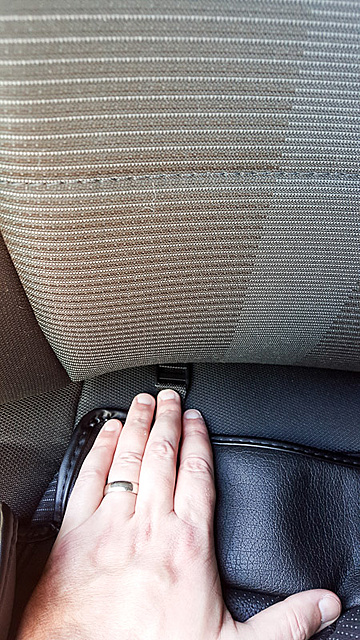
Step 2: The factory cloth seats have bungee straps/ribbon to pull the cloth tight. There are two �loops� of bungee located under the rear of the seat that keeps a flap down covering the opening between seat back and seat bottom. My issue was that the bungees were hooked in place before some electrical connections were made at the factory. I was left with two options, either disconnect various electrical connections under the seat to free up the bungee loops or cut the bungees and retie them later. It has been my experience in the past that disconnecting factory airbag connections, even if only temporarily, can permanently trigger fault codes to prevent tampering with safety systems. A few years ago, I made a $500 mistake by disconnecting an electrical connection under the seat of a VW. I chose to cut the bungee loops.
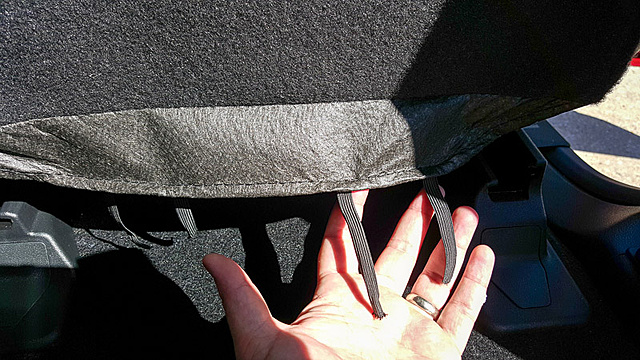
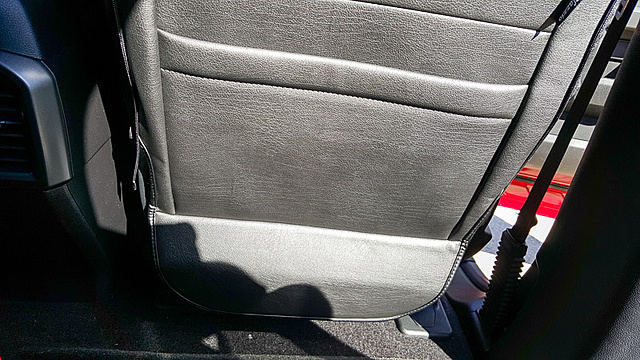
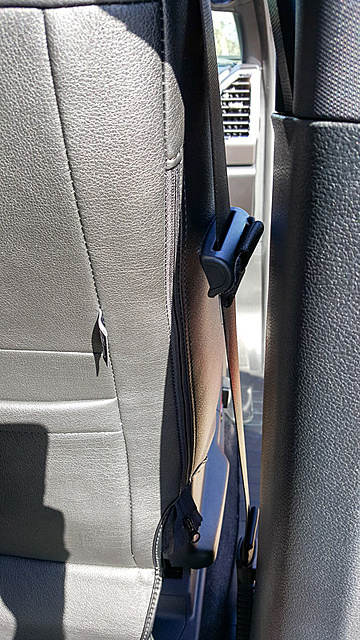
The instructions don�t really say what to do with this flap, I�ll describe it later but this is the photo of flap after cutting bungee loops
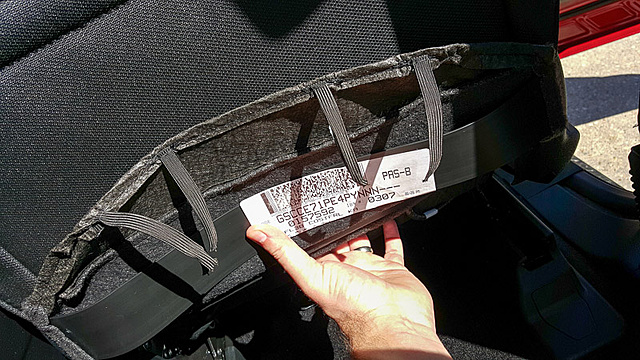
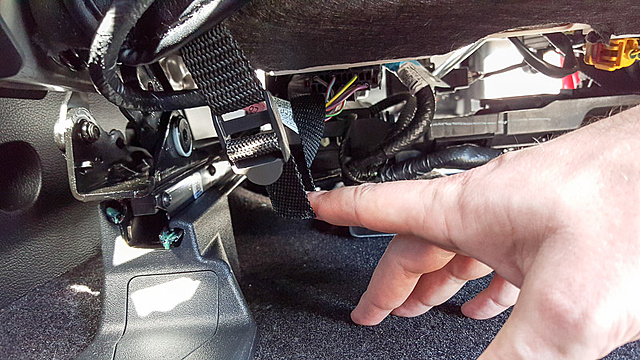
Step 3: Remove factory bungee from seat belt. This is actually very, very tight and I had to play with seat height to get this off without feeling like I was going to tear factory seat.

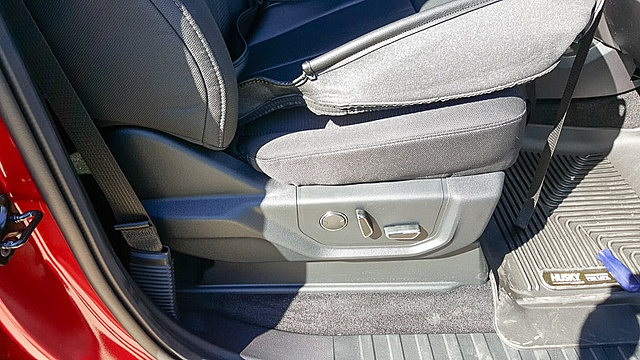
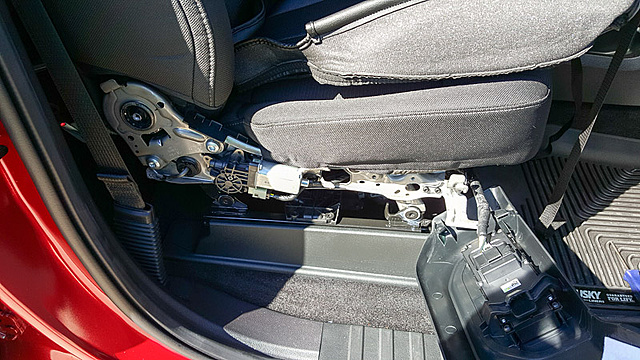
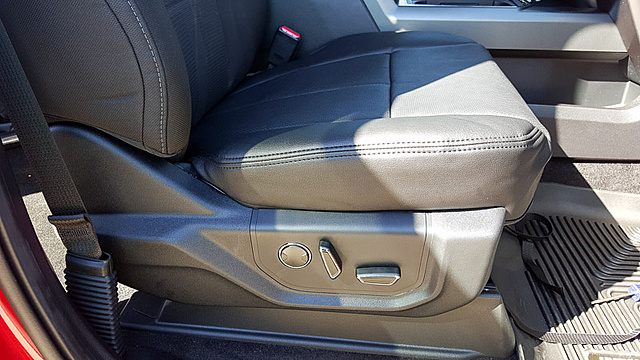
Step 4: Loosen the factory plastic panel on the side of seat where controls are. This is done via (2) T-20 torx head screws. One in the front, one in the back. Connecting the panel to seat, there are various plastic clips that slide onto, around, in, etc to the metal pieces on the seat frame. If you completely remove the side panel, it is a pain in the *** to get back on. If you remove the panel, practice getting it back on. It takes various positioning, twisting, turning, etc. It�s a real head scratcher because there is no reason for Ford to make this piece so complicated. Anyway, be patient when trying to get this back on.
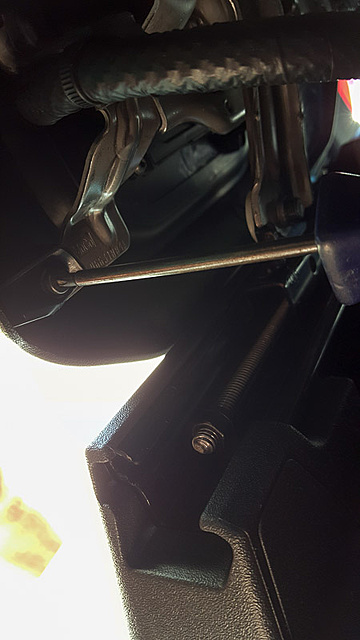
Rear T-20 torx screw
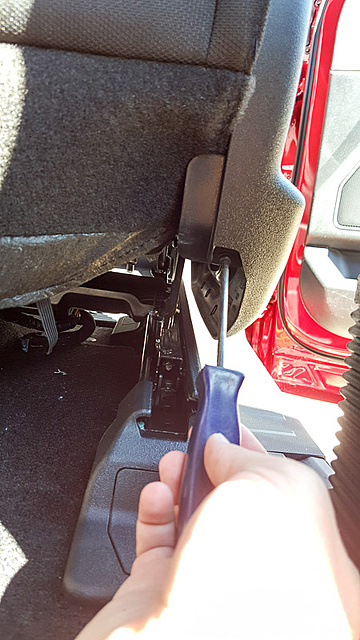
Front T-20 torx screw
Panel on
Panel off
Step 5: Push strap tops between back and bottom of seat
My truck: 2016 F150 2.7 EB Supercrew Sport w/ console and black cloth interior. I have 302A that has both powered front seats (heated).
Order: I ordered directly from Clazzio.com Part # 7229 "with storage in center". However, this may not be correct to order because I received covers for a center jump seat where as I have center console (Sport). Obviously I don't need the center jump seat cover but it still works.
I ordered all black: black outer, black inserts, black stitching
Tools needed:
- plastic tool provided by clazzio
- T-20 torx bit
- scissors
- freshly trimmed fingernails and tough cuticles DO NOT SKIP THIS PART
Time needed: 4 hours if you are a perfectionist, which you should be for this. It actually doesn't seem to take that long but it does. The good thing is that unlike other installs, you can do this one seat at a time, even one half a seat at a time so you can take breaks or install over several days. Like Lockelamora said, once you do it once you can do it again in half the time.
Notes: I received different instruction booklet than Lockelamora. Mine is in color and clear. There is only one major deviation I have than the instructions. They say to velcro bottoms before putting the headrest protrustions through the top of the covers. I had to do reverse because I needed more material to grab on to to work with. I slipped back of seats on, put headrest holes over headrest protrusions, then velcro the bottom. Also, the T-20 screws can be removed loosening the power controls for front seats as mentioned in Lockelamora's thread via namrogd's advice.
Disclaimer: My pictures do NOT do these covers justice. I was concerned with "PVC" and "ONLY LEATHER INSERTS" on the website, but these are absolutely great quality. I will do a cut test later using my spare jump seat cover and post the results.
I installed the driver side and then documented the passenger side install. The installs for both sides are identical.
Step 1: Raise the seats all the way up. It makes install much easier. You will need to move the seat forward and backwards several times to get best access during various parts of install.
Step 2: The factory cloth seats have bungee straps/ribbon to pull the cloth tight. There are two �loops� of bungee located under the rear of the seat that keeps a flap down covering the opening between seat back and seat bottom. My issue was that the bungees were hooked in place before some electrical connections were made at the factory. I was left with two options, either disconnect various electrical connections under the seat to free up the bungee loops or cut the bungees and retie them later. It has been my experience in the past that disconnecting factory airbag connections, even if only temporarily, can permanently trigger fault codes to prevent tampering with safety systems. A few years ago, I made a $500 mistake by disconnecting an electrical connection under the seat of a VW. I chose to cut the bungee loops.

The instructions don�t really say what to do with this flap, I�ll describe it later but this is the photo of flap after cutting bungee loops

Step 3: Remove factory bungee from seat belt. This is actually very, very tight and I had to play with seat height to get this off without feeling like I was going to tear factory seat.

Step 4: Loosen the factory plastic panel on the side of seat where controls are. This is done via (2) T-20 torx head screws. One in the front, one in the back. Connecting the panel to seat, there are various plastic clips that slide onto, around, in, etc to the metal pieces on the seat frame. If you completely remove the side panel, it is a pain in the *** to get back on. If you remove the panel, practice getting it back on. It takes various positioning, twisting, turning, etc. It�s a real head scratcher because there is no reason for Ford to make this piece so complicated. Anyway, be patient when trying to get this back on.
Rear T-20 torx screw

Front T-20 torx screw

Panel on

Panel off

Step 5: Push strap tops between back and bottom of seat

 02-27-2016, 02:49 PM
#2
Step 6: Put cover over seat bottom. You don�t really have to fold the cover inside out but it may help positioning. This is combined with the panel from Step 4. Hopefully I have enough pics to help.
Folding the cover over matched edges
Cover folder over seat, notice how its tucked behind metal tab towards the front
Panel on, working the edge in
To get the back corner in, you must push down on cushioning
The back pivot point is the last piece of panel to align
You will celebrate this moment.
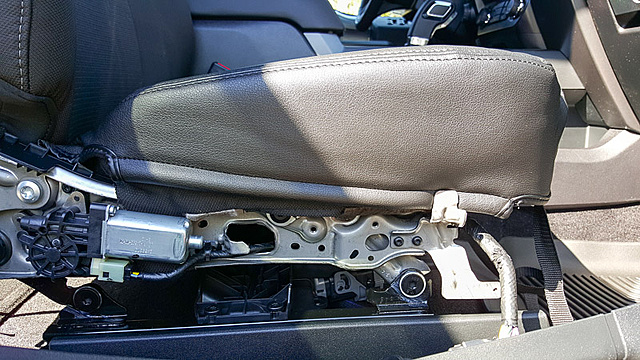
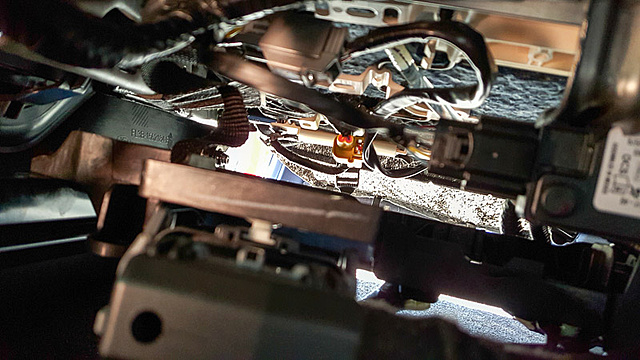
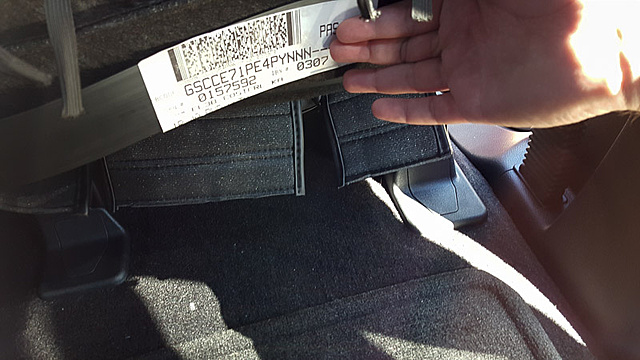
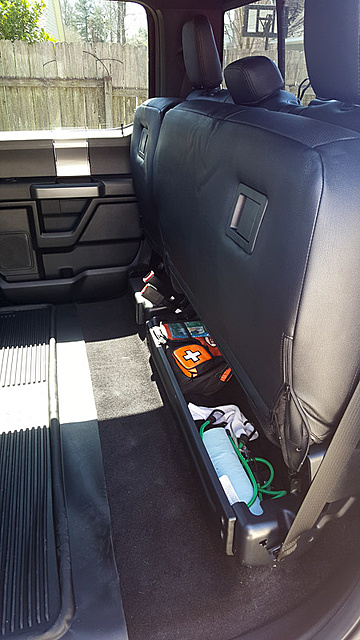
Step 7: Route straps under the seat and connect. Here you can see how busy it is under the seat. You are now done with the seat bottom!
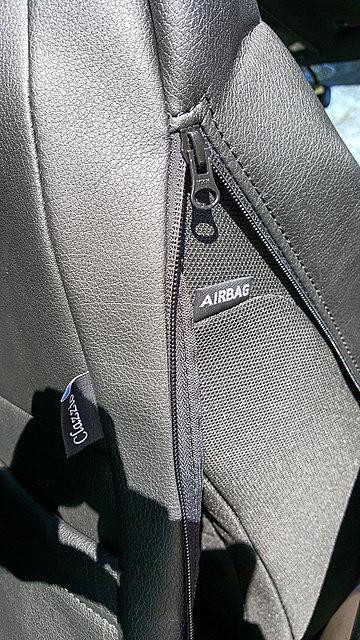
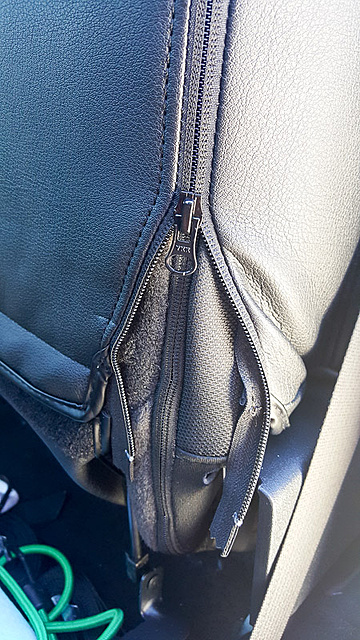
Step 8: Slip seat back on. No need to turn inside out. One note is that the instructions state that zippers are meant to split during airbag deployment.
Folding the cover over matched edges

Cover folder over seat, notice how its tucked behind metal tab towards the front

Panel on, working the edge in

To get the back corner in, you must push down on cushioning

The back pivot point is the last piece of panel to align

You will celebrate this moment.

Step 7: Route straps under the seat and connect. Here you can see how busy it is under the seat. You are now done with the seat bottom!


Step 8: Slip seat back on. No need to turn inside out. One note is that the instructions state that zippers are meant to split during airbag deployment.

The following users liked this post:
Erollin150 (03-04-2016)
02-27-2016, 02:50 PM
#3
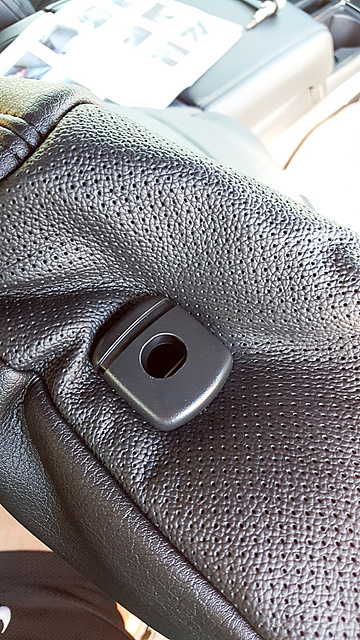
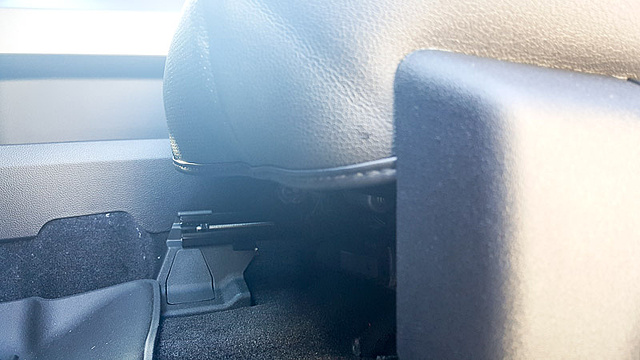
Step 9: Headrest protrusions through holes. This is not in order according to provided instructions. I needed to do this before stuffing the bottom and veclroing. This can be tricky and scary. Start with the protrusion with the larger press/button. Use the tool to pry. You might split and tear the leather but most of it should still remain under the protrusion. Out of the 5 head rests (10 holes), I tore two about 1/8th inch.

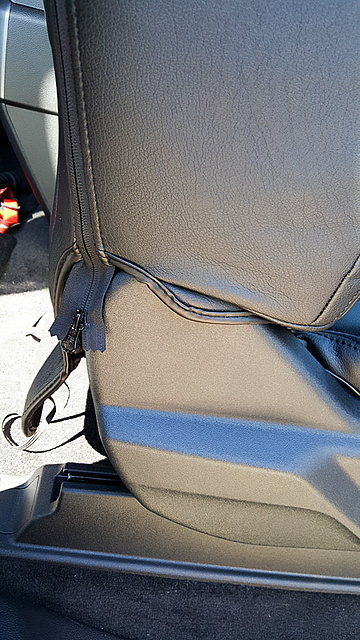
Step 10: Stuff tail/Velcro between seat back and bottom and pull tight from back
Here you can see the factory flap from Step 2 folded up
Here you can see the clazzio flap (same purpose as factory flap)
Step 11: Position the back and zip.
From the back seat, pull the cushion and zip.
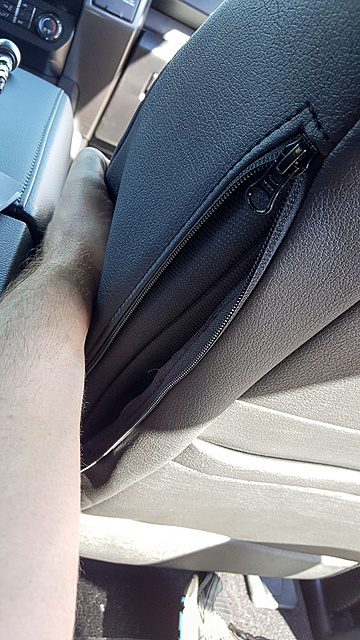
Other side
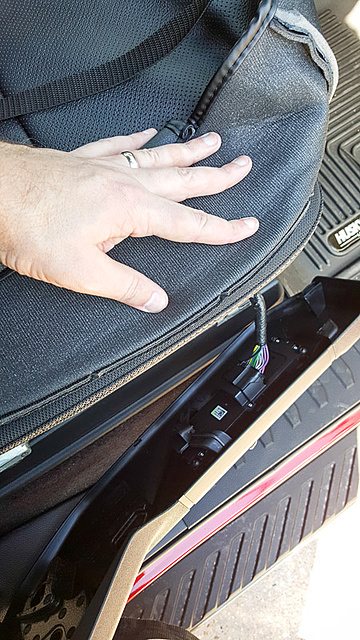
Step 12: Tuck in the sides into pivot part of the side panel. You are now done with the seat part.
Step 13: I left out this step previously. Sorry! The final step is to strap the clazzio flap under the seat just like the factory strap is. The thing that is not spelled out is what to do with the facrtory flap. I folded the flap UP against the back of the seat. I then connected the clazzio strap as instructed. This will become obvious when working on it and requires about 6 hands to do this LOL. This is the only part of the install that requires a helper.


Step 10: Stuff tail/Velcro between seat back and bottom and pull tight from back

Here you can see the factory flap from Step 2 folded up

Here you can see the clazzio flap (same purpose as factory flap)

Step 11: Position the back and zip.
From the back seat, pull the cushion and zip.

Other side

Step 12: Tuck in the sides into pivot part of the side panel. You are now done with the seat part.


Step 13: I left out this step previously. Sorry! The final step is to strap the clazzio flap under the seat just like the factory strap is. The thing that is not spelled out is what to do with the facrtory flap. I folded the flap UP against the back of the seat. I then connected the clazzio strap as instructed. This will become obvious when working on it and requires about 6 hands to do this LOL. This is the only part of the install that requires a helper.
Last edited by krautfed; 02-27-2016 at 03:48 PM.
The following 5 users liked this post by krautfed:
asdaven (08-06-2019),
Erollin150 (03-04-2016),
njoyn69 (02-27-2016),
TB15XLT (02-27-2016),
TooManyVehicles (02-27-2016)
02-27-2016, 02:51 PM
#4
(note: Pics picked up glare from windows, again these do the material not justice. They look great)
Issues/Concerns:
The install went much easier than I anticipated. Its time consuming but not difficult. I did tear two of the holes at the headrest but you can not tell because the tears are under the headrest protrusions. I only had 2 issues after the install, one with the install itself and one with the product itself.
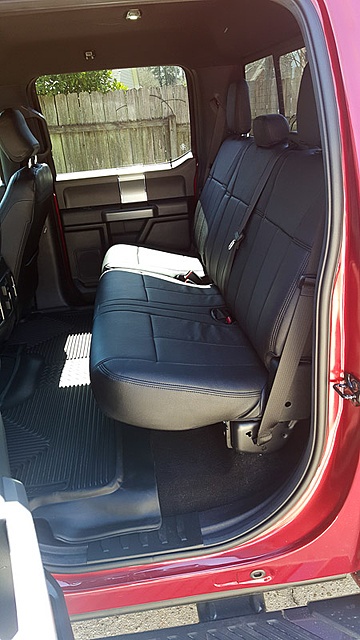
Install issue that I expect to be able to address after getting some butts to massage the seat covers around a bit. The rear's I could not zip completely. There is velcro that makes it difficult to zip and velcro at same time.
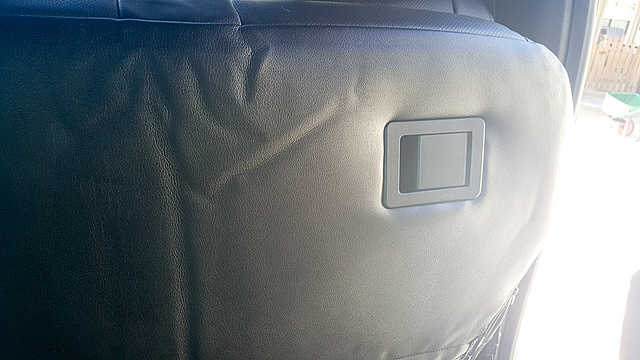
I believe the wrinkles under the seat will go away when fully zipped.
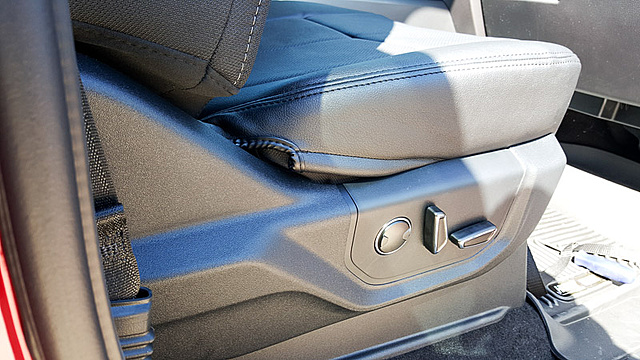
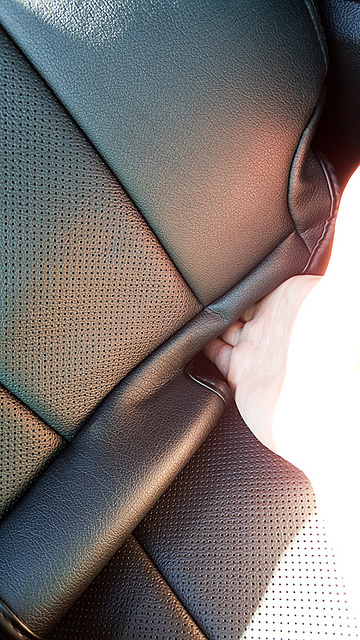
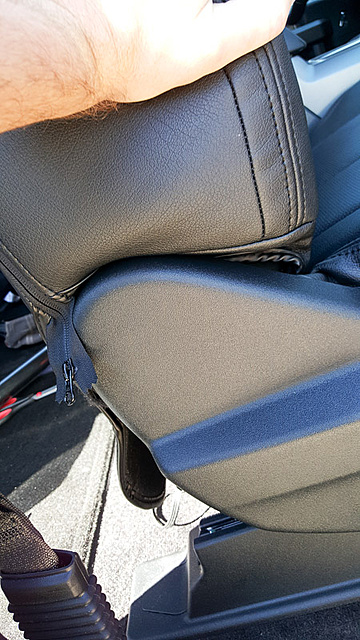
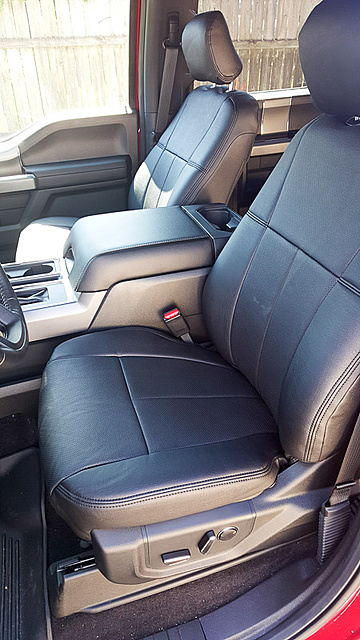
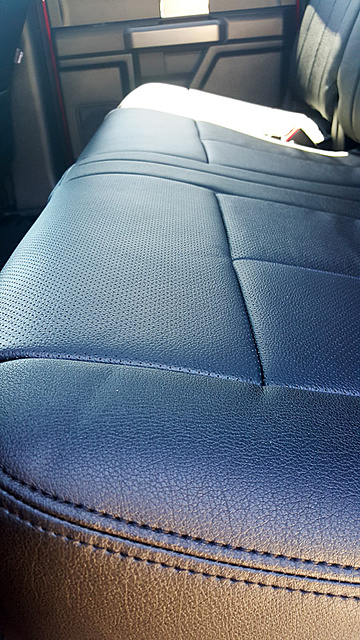
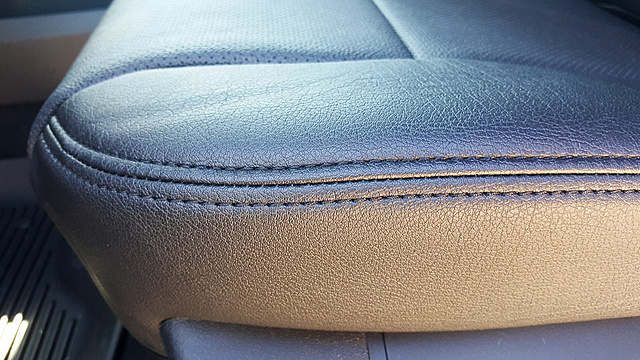
The only negative I can find with this product is that the front seats do not wrap around the front very far and only have two straps. I think coming down a little further or having a 3rd would be the perfect product. You can only tell when looking at eye level or from beneath.
Pic of the front of the front seat
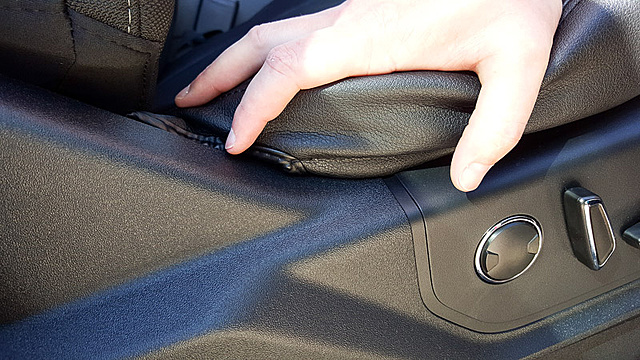
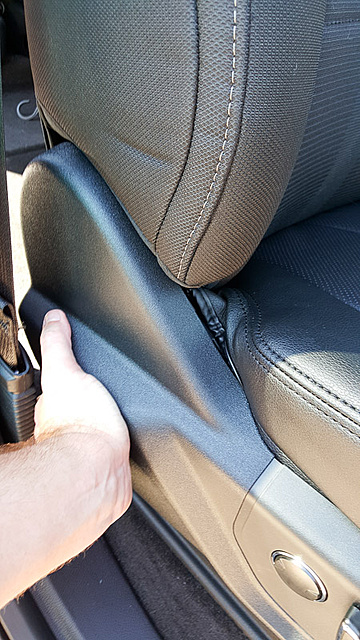
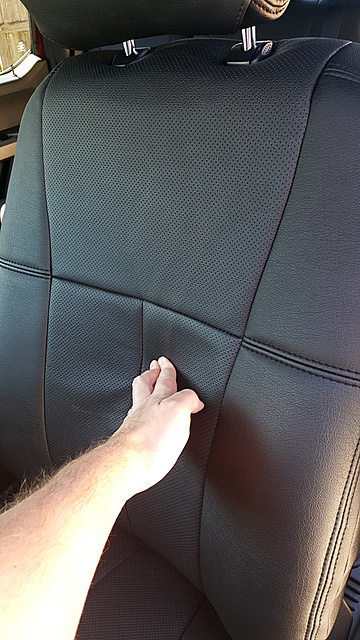
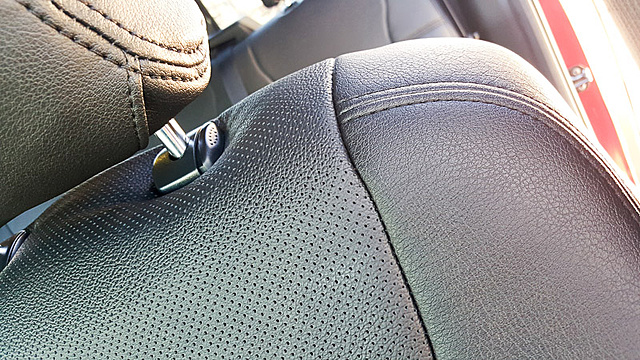
The only other thing worth mentioning is that in order to get a tight fit, clazzio had to make the material span between the bolsters on the front seat. This means there is about 2" from the cover to the actual seat at the back. I don't see this being an issue and only effects the look as you dont get that deep bolster look. Obviously when you sit in the seat you are against the seat and can not tell this.
spanning the bolsters
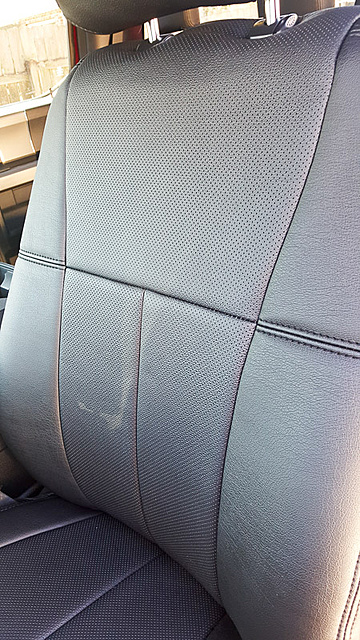
pushing the covers against the seat
Issues/Concerns:
The install went much easier than I anticipated. Its time consuming but not difficult. I did tear two of the holes at the headrest but you can not tell because the tears are under the headrest protrusions. I only had 2 issues after the install, one with the install itself and one with the product itself.
Install issue that I expect to be able to address after getting some butts to massage the seat covers around a bit. The rear's I could not zip completely. There is velcro that makes it difficult to zip and velcro at same time.

I believe the wrinkles under the seat will go away when fully zipped.


The only negative I can find with this product is that the front seats do not wrap around the front very far and only have two straps. I think coming down a little further or having a 3rd would be the perfect product. You can only tell when looking at eye level or from beneath.
Pic of the front of the front seat

The only other thing worth mentioning is that in order to get a tight fit, clazzio had to make the material span between the bolsters on the front seat. This means there is about 2" from the cover to the actual seat at the back. I don't see this being an issue and only effects the look as you dont get that deep bolster look. Obviously when you sit in the seat you are against the seat and can not tell this.
spanning the bolsters

pushing the covers against the seat

Last edited by krautfed; 02-27-2016 at 03:42 PM.
02-27-2016, 02:52 PM
#5
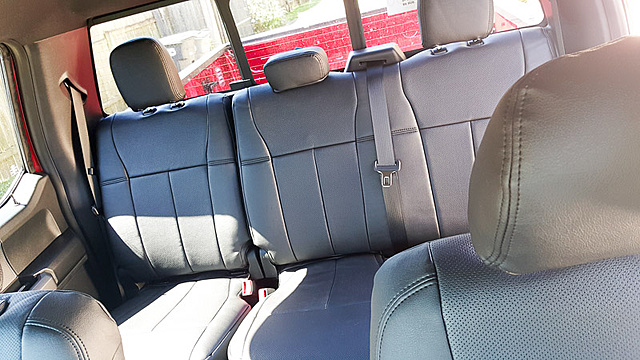
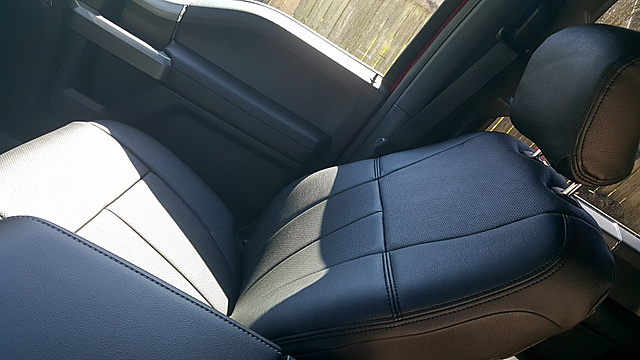
What you are all looking for, the post install pics. Again, my camera started picking up glare inside my truck. These pictures do not do
you can see the glare here
Attachment 569464


you can see the glare here
Attachment 569464


Last edited by krautfed; 02-27-2016 at 03:41 PM.
The following users liked this post:
Sod (01-12-2019)
02-27-2016, 03:03 PM
#7
Senior Member


nice good write up I need to buy and do mine I was hesitant of doing it because it might be hard but from the looks it might be easier than I thought! thanks again
what do you think of the quality of them? How does the leather feel?
what do you think of the quality of them? How does the leather feel?
Last edited by 2slow05; 02-27-2016 at 03:12 PM.
Trending Topics
02-27-2016, 03:53 PM
#8
Quality is great. I want to note that the Clazzios are PVC and leather. I was concerned at first but now I realize that this is exactly what other vehicles with leather feel like outside of the leather of the King Ranches. They feel identical to my wife's 2012 Hyundai's leather.
Like I said above, I have some extra cover for the center front seat that I'm going to put to the test with abrasion/tearing.
02-27-2016, 04:18 PM
#9
Senior Member
Very nice! Thanks for doing such a nice and detailed overview/instruction!

