1990 F-150 Build, and Electric Fan Swap
 03-15-2015, 10:30 AM
#11
1994 F150 XLT 5.8L 2wd
I'm not sure why anybody is paying anywhere close to those amounts when a couple relays from the junk yard and this (http://www.autozone.com/autozone/par...=267187_9581_0) $20 temp sensor/controller will control any E-fan out there. I'm also not sure why people buy aftermarket fans when factory fans are quieter, more reliable, push just as much if not more CF/M of air, and are $25-50 at most yards.
I did my entire set up plus new 130amp 3g alternator and wiring upgrade for less than some people spend for just a fan and controller.
EDIT: I also agree that the controller the OP is using for the Mark VIII won't hold up, the M-VIII uses up to 70 amps to kick high on which will eventually fry the single 40 that's used to control the high speed function-if it doesn't just blow the 30 amp fuse wired into the control board.
Last edited by fltdriver; 03-15-2015 at 10:50 AM.

The following users liked this post:
Cokyodi (11-28-2017)
03-15-2015, 12:00 PM
#12
Thanks man! You did the exact same thing as I'm going to do! I like how you mounted it. I had to buy a new radiator, and I went with a dual core... 2 rows or whatever haha. So an electric fan was a must.
The Ron Francis controller makes wiring incredibly easy for people that don't understand wiring such as myself. It has two 40A relays in parallel to assist in startup. As for the 30A blade fuses, I can easily throw 40A in if I'm having problems with it blowing. I also am putting a 40A in-line fuse to the main power cable.
All reviews and people I have talked to rave about the controller. I believe this fan to be better for me, because I don't necessarily like smaller dual fans that will only cool half the radiator unless both fans are on. Not saying there is anything wrong with it, as I have no experience, I just like the idea of a single, powerful fan better.
03-15-2015, 12:29 PM
#13


Thanks man! You did the exact same thing as I'm going to do! I like how you mounted it. I had to buy a new radiator, and I went with a dual core... 2 rows or whatever haha. So an electric fan was a must.
The Ron Francis controller makes wiring incredibly easy for people that don't understand wiring such as myself. It has two 40A relays in parallel to assist in startup. As for the 30A blade fuses, I can easily throw 40A in if I'm having problems with it blowing. I also am putting a 40A in-line fuse to the main power cable.
All reviews and people I have talked to rave about the controller. I believe this fan to be better for me, because I don't necessarily like smaller dual fans that will only cool half the radiator unless both fans are on. Not saying there is anything wrong with it, as I have no experience, I just like the idea of a single, powerful fan better.
The Ron Francis controller makes wiring incredibly easy for people that don't understand wiring such as myself. It has two 40A relays in parallel to assist in startup. As for the 30A blade fuses, I can easily throw 40A in if I'm having problems with it blowing. I also am putting a 40A in-line fuse to the main power cable.
All reviews and people I have talked to rave about the controller. I believe this fan to be better for me, because I don't necessarily like smaller dual fans that will only cool half the radiator unless both fans are on. Not saying there is anything wrong with it, as I have no experience, I just like the idea of a single, powerful fan better.
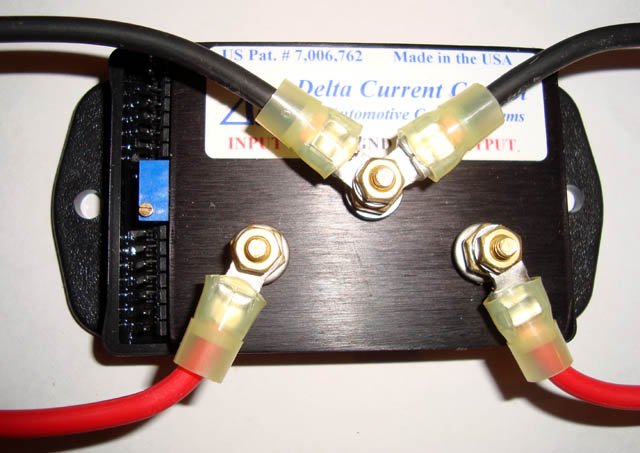
http://www.dccontrol.com/fk45.jpg
Not to belabour the point - but it's aboot the same price, is far more capable and flexible than any relay controller -and has no moving parts save fer the adjustment pot.
Just sayin', aight? . Good luck with yer choice.
MGD
The following users liked this post:
Cokyodi (11-28-2017)
03-15-2015, 02:02 PM
#14
**** my life. Nothing goes right. Get it all back together, startup the engine, and I lose 5 quarts of engine oil in less than 9 seconds. Got to be something with the front oil seal.
I'm too bummed out and tired to jump back in, so I will pick it up tomorrow. I pressed the seal in evenly, and soaked it oil so as not to tear the rubber and assist in seating. No visible damage to the seal or cover so far. Confused and frustrated a bit.
I'm too bummed out and tired to jump back in, so I will pick it up tomorrow. I pressed the seal in evenly, and soaked it oil so as not to tear the rubber and assist in seating. No visible damage to the seal or cover so far. Confused and frustrated a bit.
Last edited by Silent Echo; 03-18-2015 at 01:39 AM.
03-18-2015, 01:37 AM
#16
Alright, for whatever reason my seal was faulty. I also compared the two timing covers, and the original seal from the bad cover. The original seal does not have a large lip to prevent it from seating too deep, also, Jaspers pressed in the seal using RTV Black Silicone go seal around the outside.
There are two different front seals. One that has the lip, and one that does not. I imagine that the newer seal, with the lip, does not allow the seal to set deep enough.
For additional info, I used a micrometer to check the the wear on the harmonic balancer shaft where the seal rides, as opposed to the rest of it. The difference was 0.00005, so five/tenths of a thousandth. So I was able to eliminate the harmonic balanced as a source of the leaking.
Hopefully this should seal everything. If it doesn't... The only thing left I can think of is buying a Speedi-Sleve for my harmonic balanced so that it has a 100% true, new surface to ride on.

This is the "newer" seal with the lip. I was checking it to see how it fit around the harmonic balancer.
03-25-2015, 12:17 AM
#17
I pressed the seal in using the silicone, and I have not had an issue since.
I couldn't find a place under the hood where I wanted to mount the controller for the electric fan, so I removed my dash, drilled through the firewall, and fed all the wires through so I can mount it in my cab.
I couldn't find a place under the hood where I wanted to mount the controller for the electric fan, so I removed my dash, drilled through the firewall, and fed all the wires through so I can mount it in my cab.
Last edited by Silent Echo; 03-25-2015 at 12:19 AM.
03-26-2015, 12:24 AM
#18
Went to the junkyard to grab a fan shroud that didn't have a huge chunk torn out of it. I cut out the inner ring of the electric fan so that I could mount it into the OE shroud.
Couple of aluminum bars bent to fit, and boom. This way I can funnel all the air through the radiator with the shroud, and I don't have to drill any holes or make special brackets. Just attached the fan to the shroud.
Couple of aluminum bars bent to fit, and boom. This way I can funnel all the air through the radiator with the shroud, and I don't have to drill any holes or make special brackets. Just attached the fan to the shroud.
03-26-2015, 12:32 AM
#19
Here's another approach: http://www.f150online.com/forums/art...150-4-2-a.html
Not the same model year, but still highlights the importance of minimizing the gap around the fan to maximize efficiency.
MGD
Not the same model year, but still highlights the importance of minimizing the gap around the fan to maximize efficiency.
MGD
The following 2 users liked this post by MGD:
Cokyodi (11-28-2017),
Silent Echo (03-26-2015)
03-26-2015, 01:06 AM
#20
^ Reading through his thread makes me realize that mine is shoddy in comparison haha
Down the road I'm going to try something like that, making panels to seal off the gaps. Thanks for the link!
Down the road I'm going to try something like that, making panels to seal off the gaps. Thanks for the link!